...
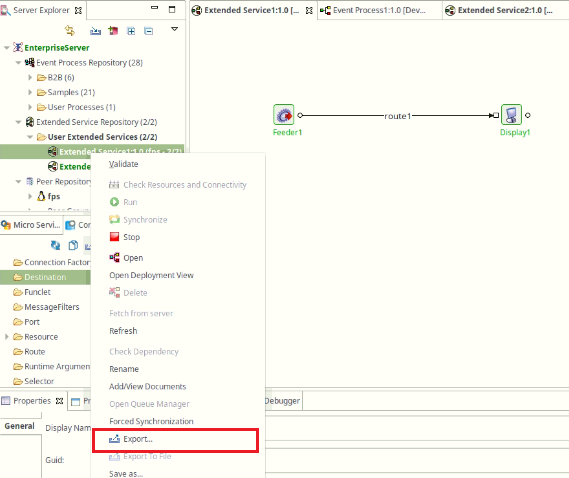
To export an Extended Service to a local disk, perform the steps below:
- Right-click the Extended Service to be exported from the Extended Service Repository view and click Export from the menu.
...
Figure 1: Export Extended Service
...
- The Export Application to Local Disk dialog box provides a list of Extended Services available for exporting along with all the named configurations used in those Extended Services. The entries to be exported can be chosen by selecting the checkboxes next to their names.
...
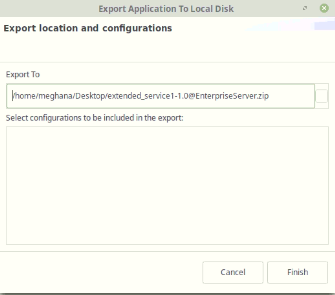
Figure 2: Selecting Configurations for exporting- If the Extended Services are exported along with their configurations in a chain manner into a single folder, the dependency chain is saved in a metadata file.
| Anchor | ||||
|---|---|---|---|---|
|
...
- Right-click the Extended Service Repository node and select the Import Extended Service node from the menu.
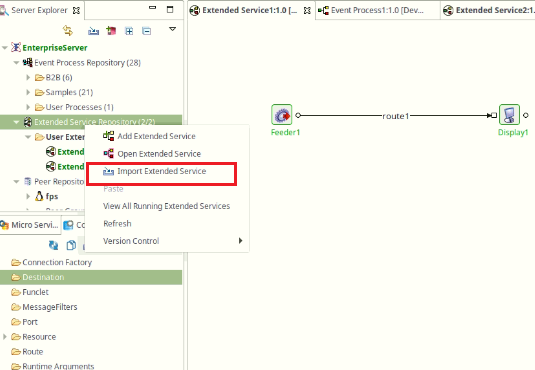
Figure 3: Import Extended Service from the local disk - Browse the location of Extended Services zip file(s) (where the exported Extended Services are saved) and click Open in the browse browsing window or double-click the zip file(s). A list of all Named Configurations used in or referred by the Extended Services are available; select the configurations to be imported along with the Extended Services in the Import Extended Services wizard.

Figure 4: Import Extended Service Wizard - Extended Services or Configurations that are already present in the repository are shown in Red font.
- The configurations used in the Extended Services which are presently missing in the ZIP file are indicated using a Red cross (
 ).
).
| Anchor | ||||
|---|---|---|---|---|
|
...
- Create the document to be saved with the required information and save it in a chosen location.
- Right-click the Extended Services from the Server Explorer panel and click the Add/View Documents option.
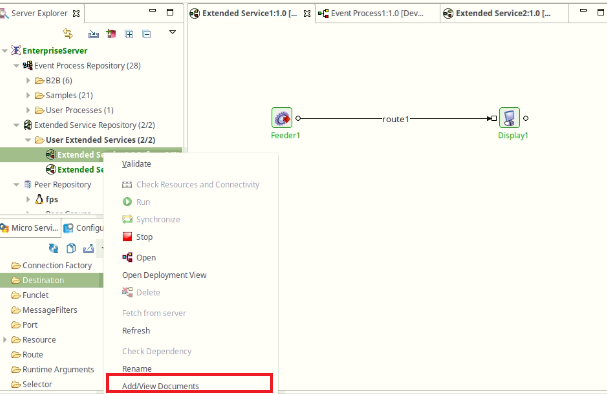
Figure 5: Adding Document to Extended Service - By default, a blank HTML file will be present in the dialog box.

Figure 6: Adding Document to Extended Service Dialogue Box - Click the Add Documents button and browse for the document that is saved.
- To edit the blank document seen in the dialog box, click Download, edit the file and re-add the document. Overwrite it upon prompting.
Options in the dialog box that are intuitive in nature are tabulated below.
...
Overview
Content Tools
ThemeBuilder