The Destination node lists all the destinations created on the server. The destination node allows the administrator to create or delete a destination from the server.
25.4.1 Managing Topics
The Topics node displays the list of topics on the server. The administrator can create or remove a topic, as well as edit the ACL of a topic. By default, all Users on the server possess the required permission. A user can assign Publish, Subscribe, Durable Subscribe and Unsubscribe permission statuses to Users or User Groups.
25.4.2 Adding a New Topic
The Server Explorer pane shows the Destinations node, which, on expanding, shows the Topics sub-node. The Topics sub-node displays the list of all the topics. The administrator can create topics and manage them through the Server Explorer. A User can create new topics using two methods, both of which are described below:
Method 1: From the Destinations node
The Server Explorer pane shows the Destinations node, which enables the administrator to add new topics to the existing topic list. Follow the steps given below to create a new topic:
- From the Server Explorer, select the Destinations node.
- Right-click and select Add > topic from the pop-up menu.
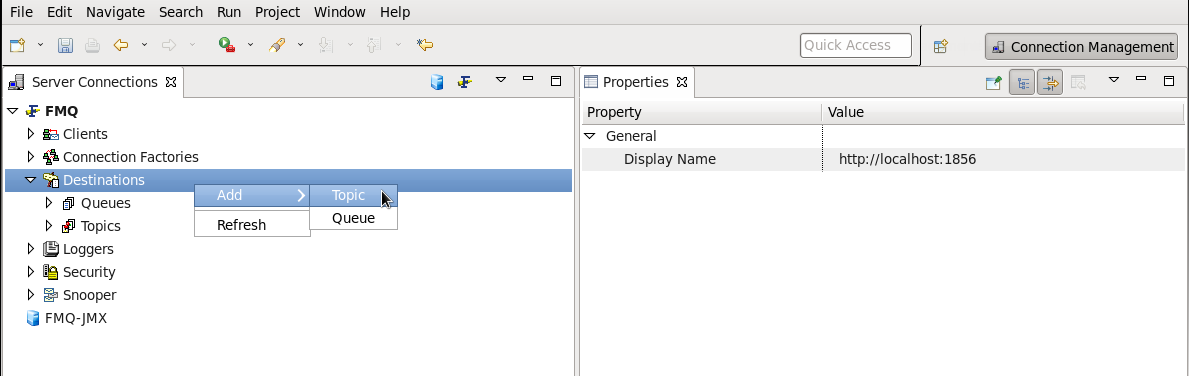
- Configure the properties for the topic as required.
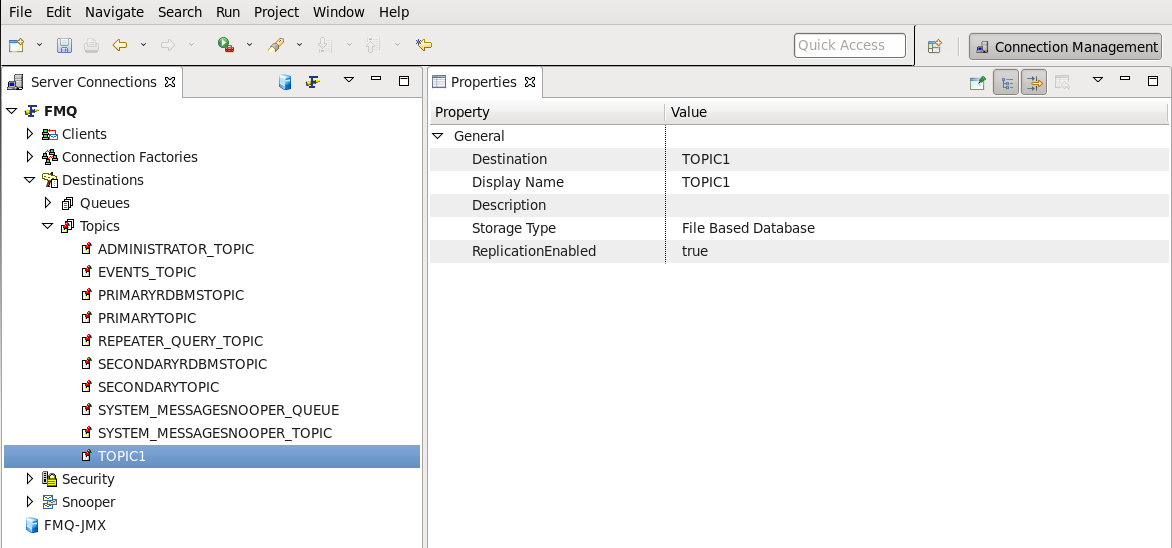
- Save the configuration. The new topic TOPIC1 will be added to the list of topics with the specified properties.
Method 2: From the Topics sub-node
- From the Topics sub-node, right-click and select Add topic from the pop-up menu.
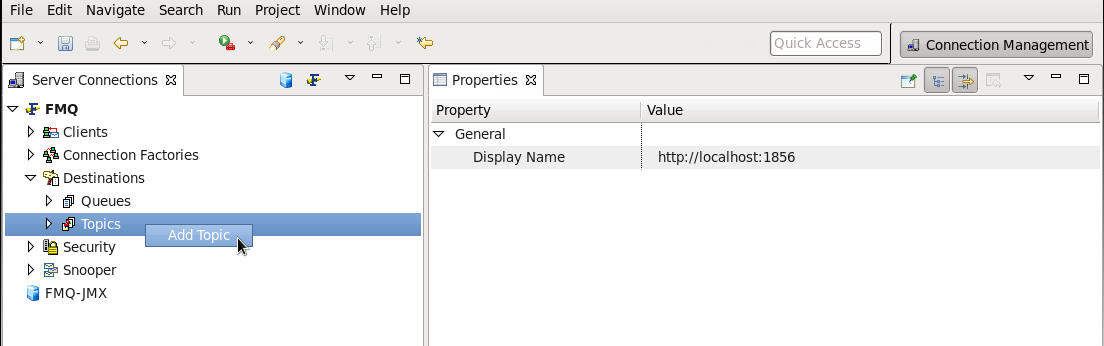
- The New Topic Properties dialog box is displayed (as previously shown). Enter the relevant information.
- Click OK. The new topic will be added to the list of topics with specified properties (as previously shown).
25.4.3 Editing Access Control List (ACL)
Once a topic is created, the Access Control List (ACL) for the topic must be created. To created the ACL, follow the steps below:
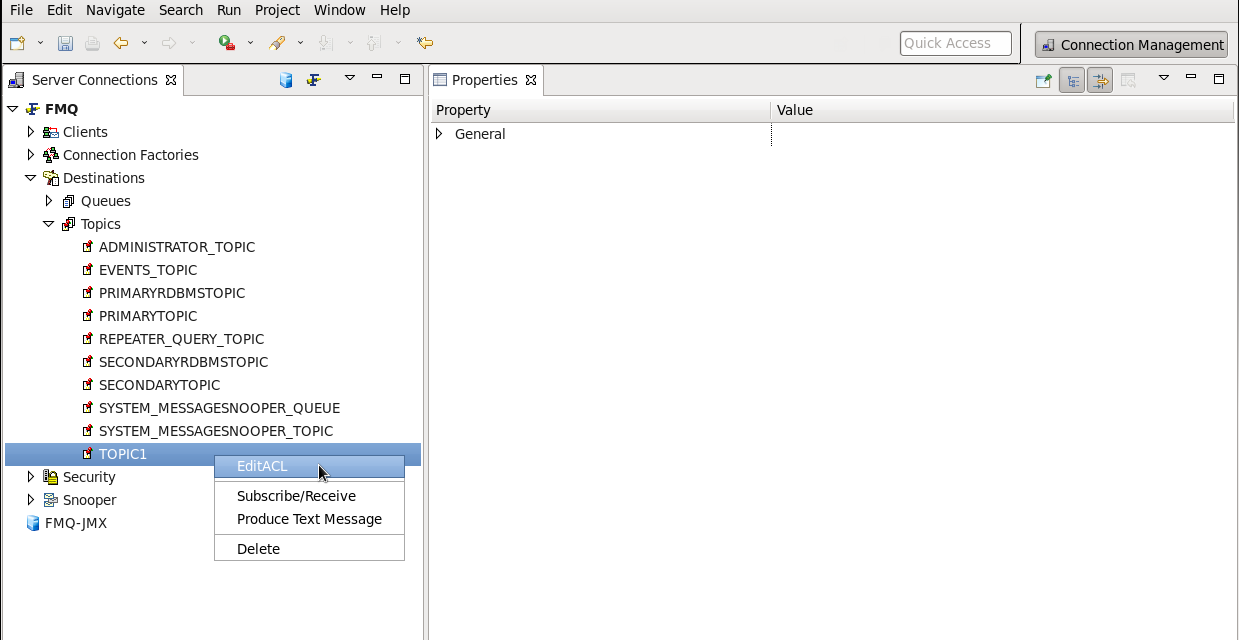
- Select the Topics sub-node. Select the topic name from the list of topics.
- Right-click and select Edit ACL option from the pop-up menu.
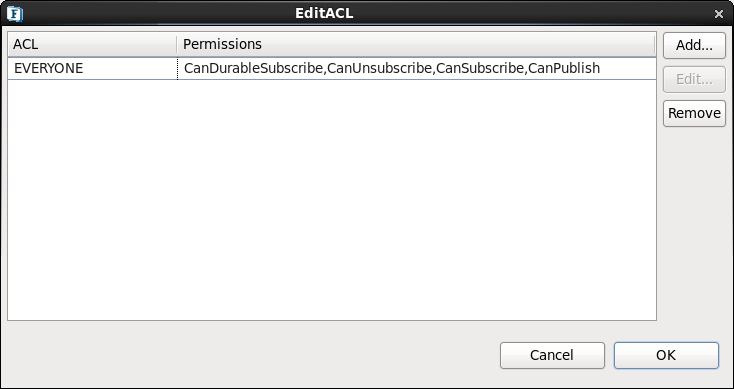
- The Edit ACL dialog box appears and shows various entries in the ACL of the topic. Each entry corresponds to a principal, which can consist of either a User or a Group. Each entry is associated with a set of permissions, which can be either allow, disallow or default. An allow permission implies that the principal is allowed the set of selected permissions. A disallow permission implies that the principal is denied the set of permissions mentioned in the entry. If no permission is manually assigned to the principal, then the permission is set to default. By default, the ACL for a topic has the group 'everyone' in its list with all the permissions set to 'allow'. Since the Group 'everyone' includes all the principals created in the FioranoMQ Server, the topic assigns all permissions to all principals.
The following set of permissions can be assigned to a topic:- Publish
- Subscribe
- Unsubscribe
- Durable Subscribe
- To change the permissions assigned to a member subscribing to a particular topic, select the member and Click the Edit button. The Edit Permissions dialog box appears. Assign the required permissions and click the OK button.
- To add a member to a particular topic, click the Add button on the ACL dialog box. The Add New ACL Entry dialog box appears. Select the member name and click the OK button.
- To remove a member from a particular topic, select the member name from the Edit ACL dialog box and click the Remove button.
- Click the OK button.
25.4.4 Removing a Topic
The administrator can remove the topics that are not required from the topic list. To remove a topic from the topics list, follow the steps below:
- From the Server Explorer, select the Destinations node.
- Select the Topics sub-node. Select the Topic name to be deleted and right-click the mouse. Select Delete from the pop-up menu.
- The Confirm Object Deletion dialog box is displayed. Click the Yes button.
- The selected topic has been deleted and is therefore not visible in the topic list.
Multiple topics can be removed by selecting the required topic (by pressing the Ctrl key), and then pressing the Del key.
25.4.5 Managing Queues
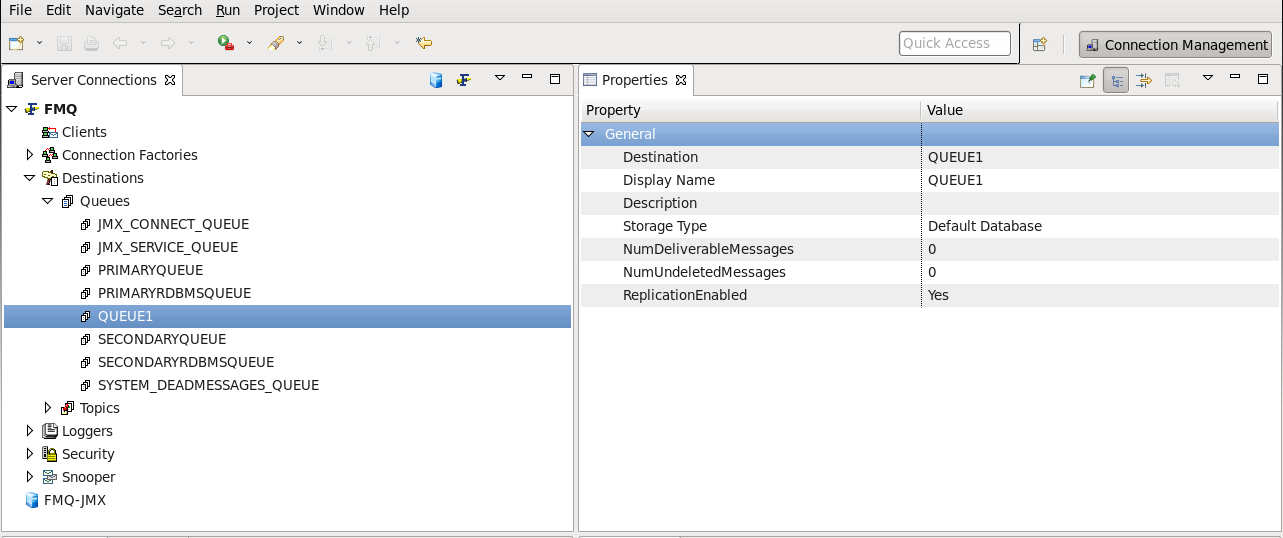
The Queues node displays the list of queues on the server. The Administrator can create and remove the Queues and edit the ACL. By default, all Users on the server have all permissions. The Administrator can assign Send, Receive and Browse permissions to Users and Groups. Browsing the Queue allows the administrator to view the total number of deleted messages, undeleted messages and message properties. Undeleted messages are those messages for which the server has not received acknowledgment from a client.
25.4.6 Adding a New Queue
The Server Explorer pane shows the Destinations node, which, on expanding, shows the Queues sub-node. The Queues sub-node displays the list of all the queues. The administrator can create queues and manage them through the Server Explorer.
The administrator can create new queues by using the two methods described below:
Method 1: From the Destinations node
The Server Explorer pane shows the Destinations node, which enables the administrator to add new queues to the existing queue list. Follow the steps below to create a new queue:
- From the Server Explorer, select the Destinations node.
- Right-click and select Add > queue from the pop-up menu.

- Configure properties as required in the Properties pane on the right side.
- Click the OK button. The new queue will be added to the list of queues with specified properties.
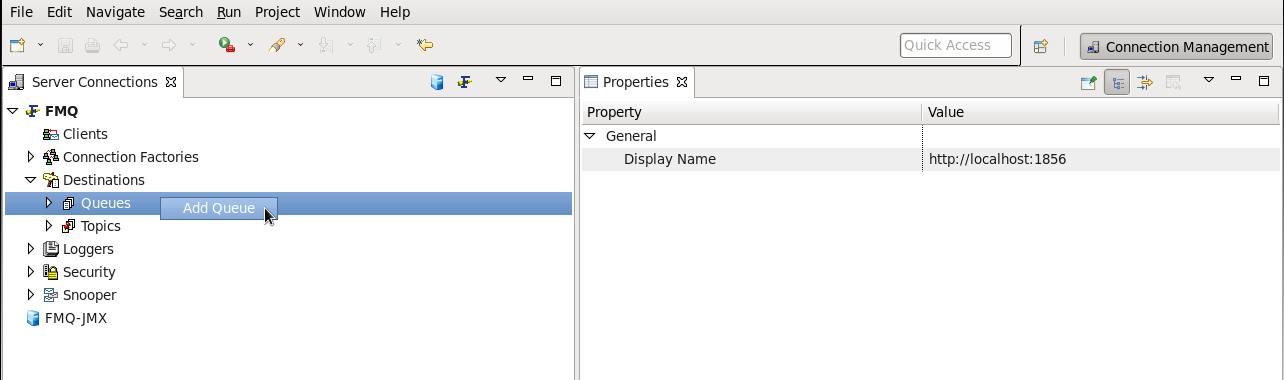
Method 2: From the Queues sub-node
- From the Queues sub-node, right-click and select Add Queue from the pop-up menu.
- The New Queue Properties dialog box is displayed. Enter the relevant information.
- Click the OK button. The new queue will be added to the list of queues with specified properties.
25.4.7 Browsing a Queue
Browsing a queue allows the administrator to view all the messages that are present in the queue. Follow the steps below to browse a queue:
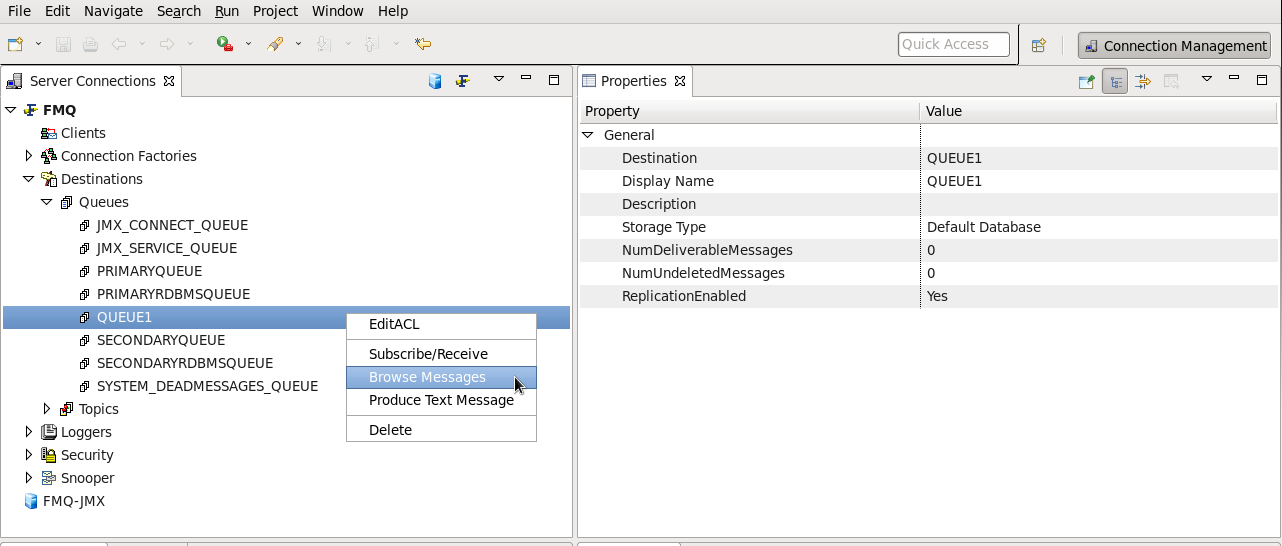
- Select the Queues sub-node. Select the name of the queue to be browsed from the Queues list.
- Right-click and select Browse Messages from the pop-up menu.
- The Browser for Destination dialog box is displayed. Send the messages through PTP samples and open the browser window.
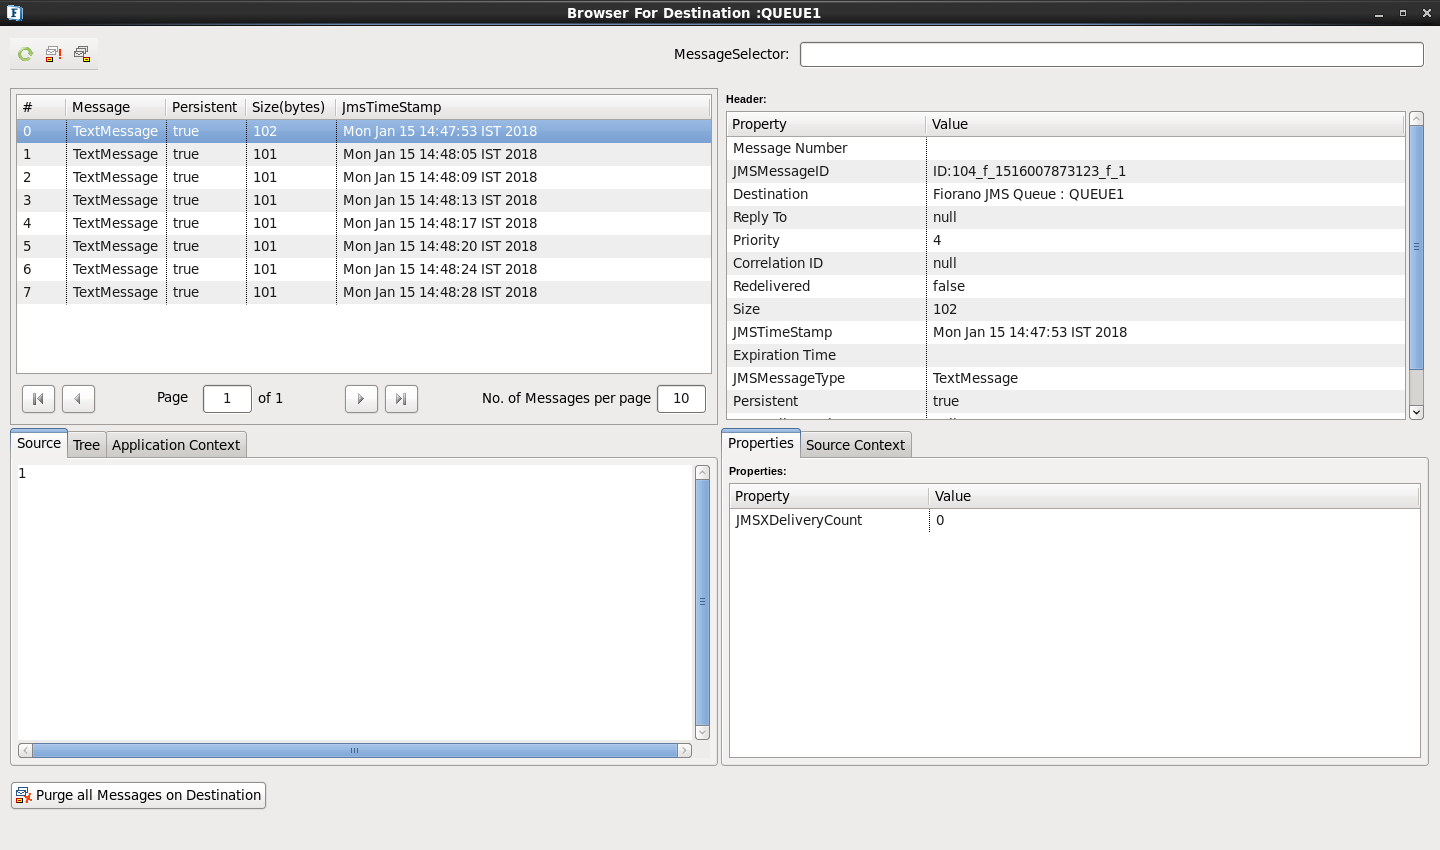
- The Browser also contains a Message Selector. It allows a client to specify, by header field references and property references, the messages it wishes to view/access. Only messages whose header and property values match those of the selector can be browsed. A message selector matches a message if the selector arrives at 'true' when the message header field values and property values are substituted by their corresponding identifiers in the selector. If the value of a message selector is an empty string, the value is treated as null and indicates that there is no message selector for the message consumer.
- The message properties can be viewed from the Properties pane of the Browser.
- Double-click the message to open the message body.
- Close the Browser by clicking on the Close (X) button on the top right of the window.
25.4.8 Editing Access Control List (ACL) and Removing a Queue
The procedure is the same as previously explained with reference to Topics, except that, here, in place of Topics it will now be applied to Queues.
25.4.9 Setting and Configuring OnTheFlyCreationOfDestinations
OnTheFlyCreationOfDestinations property controls the behavior of createTopic and createQueue APIs' in a JMS Session. By enabling this property, when the createTopic/createQueue APIs are called on non-existent Destinations, Destinations will be created for these APIs.
If the OnTheFlyCreationOfDestinations property is disabled, then ADMINISTERED_OBJECT_DOESNOT_EXISTS exception is thrown if a destination does not exist. If a destination is present, then it acts as a lookup method. This feature is controlled by the flag AllowOnTheFlyCreationOfDestinations
The AllowOnTheFlyCreationOfDestinations can be enabled/disabled by following the steps below:
- Open the profile for off-line editing through the Profile Manager as explained in section 4.8 Pinging.
- Go to Fiorano > etc > FMQConfigLoader.
- Turn on AllowOnTheFlyCreationOfDestinations property by changing its value to 'yes'.