Objective
To demonstrate the capability of an application using SMTP (Simple Mail Transfer Protocol) component and POP3 component to send and receive mails to and from Gmail servers respectively.
Prerequisites
- Start Fiorano Enterprise Server (FES) and Fiorano Peer Server (FPS)
- Login to eStudio application
- Understand the basic menus and perspectives (panels) in eStudio application
Scenario
Use SMTP adapter to send mail to the required mail address by sending an XML message containing the details about the mail from Feeder component.
Use POP3 adapter to fetch the mail from the configured mail address by sending an XML message using another Feeder component.
Components used
Setting up the Example
Configuring SMTP component
To configure SMTP component to send mail to Gmail account, perform the following actions:
- Create an Event Process with name 'Gmail_Example'.
- Drag the SMTP adapter from the Bridges category in the Micro Service Palette to the Fiorano Orchestrator.
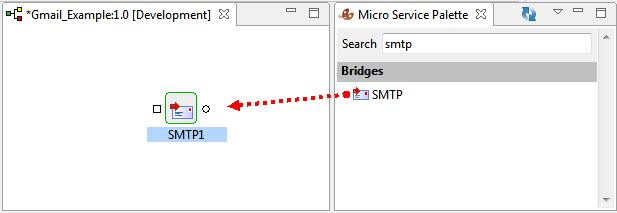
Figure 1: Adding SMTP component to Gmail_Example Orchestrator
- Double-click the SMTP adapter to open its Component Property Sheet (CPS).
- In the Managed Connection Factory dialog box, click the SMTP Server section to expand the options.
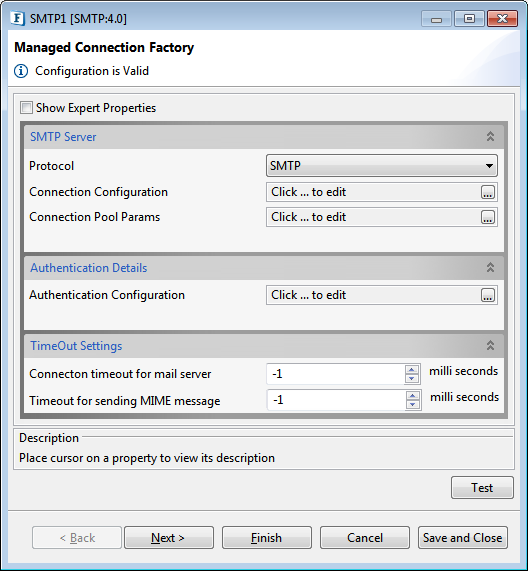
Figure 2: SMTP component CPS
- Under SMTP Server section, retain Protocol value 'SMTP' and click Connection Configuration Ellipsis
 button.
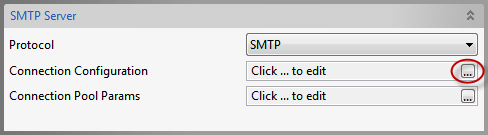
Figure 3: Navigating to SMTP Connection Configuration
- In the SmtpConnectionConfiguration dialog box, provide the following details under Component Configuration section to configure SMTP component to connect to the Gmail server:
- MailServer IP/Name: smtp.gmail.com
- MailServer Port: 465
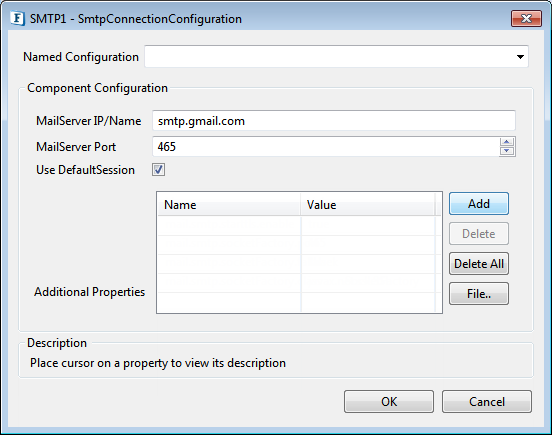
Figure 4: Providing Mail Server details
- In the Additional Properties section, click Add button and provide the following values for Name and Value respectively:
- mail.smtp.starttls.enable – true
- mail.smtp.socketFactory.port – 465
- mail.smtp.socketFactory.fallback – false.
mail.smtp.socketFactory.class - javax.net.ssl.SSLSocketFactory
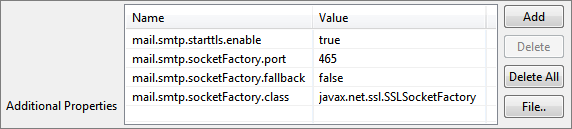
Figure 5: Adding Additional Properties required for Gmail server
- Press OK to close the SmtpConnectionConfiguration dialog box and save the connection configuration.
- Click the Test button present in the bottom-right part of the Managed Connection Factory panel to ensure successful connection. Click Close to close the Test Connection Configuration dialog box displaying successful connection message.
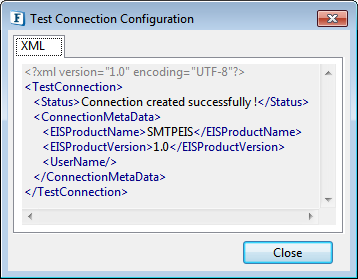
Figure 6: Testing SMTP Connection status
- Under Authentication Details section, click AuthenticationConfiguration Ellipsis button.
- In the AuthenticationConfiguration dialog box, select the AuthenticationRequired check box to enter the credentials. In the Username and Password text fields that appear, enter the user name in the format <Name>@gmail.com and the corresponding password for the account through which mail needs to be sent.
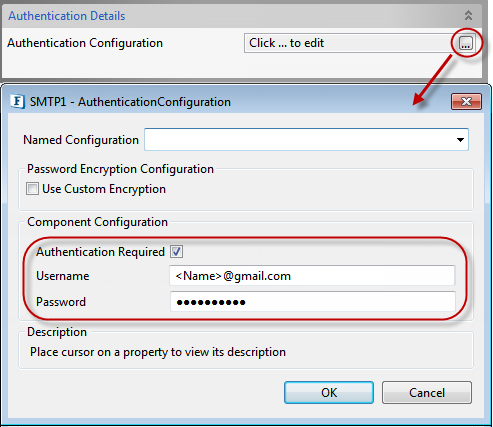
Figure 7: Providing Authentication details
- Click OK to close AuthenticationConfiguration dialog box and click Next in Managed Connection Factory dialog box.
- In the InteractionConfigurations panel, provide the following values under Sender Information section:
- Display Name of the Sender: Name of the sender to be displayed in the mail.
Email ID of the Sender: Valid mail ID with respect to the server details provided in the Managed Connection Factory Panel.
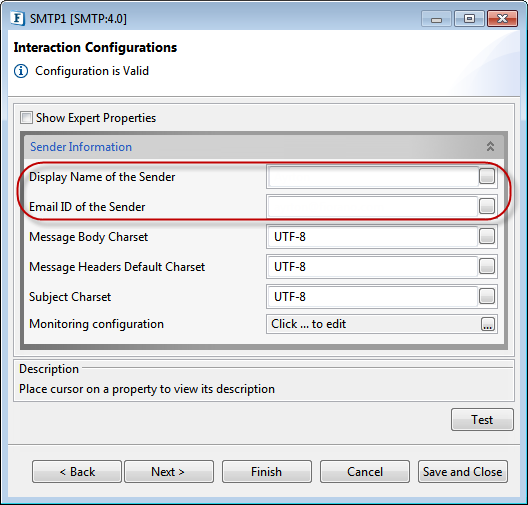
Figure 8: Providing Sender information
- Click Finish to save the configuration and close the CPS
After the configuration, an XSD schema gets set in the input port of the component, which is the schema that any input message should follow to get the desired output.
Configuring the POP3 component
To configure POP3 component to receive mails from an account in Gmail server, perform the following actions in the Gmail_Example event process:
- Drag the POP3 adapter from the Bridges category in the ServicePalette to the Fiorano orchestrator.
- Double-click the POP3 component to open its CPS.
- In the Managed Connection Factory dialog box, retain Protocol value 'POP3' and click Connection Configuration Ellipsis button.
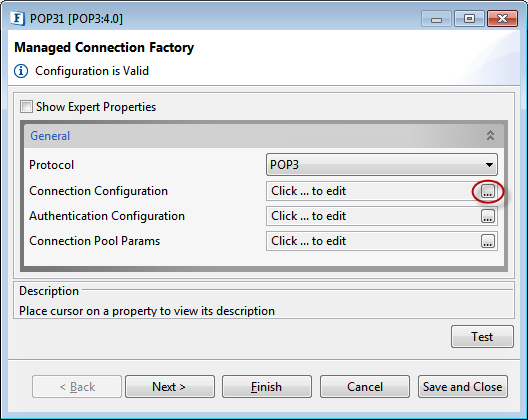
Figure 9: Navigating to POP3 Connection Configuration
- In the Pop3ConnectionConfiguration dialog box, provide the following details under Component Configuration section to configure the POP3component to connect to the Gmail server:
- MailServerURL: pop.gmail.com
- MailServer Port: 99

Figure 10: Providing Mail Server details
- In the Additional Properties section, click Add button and provide the following values for Name and Value respectively:
- mail.pop3.auth - true
- mail.pop3.socketFactory.port – 995
- mail.pop3.socketFactory.fallback - false
- mail.pop3.starttls.enable – true
- mail.pop3.socketFactory.class - javax.net.ssl.SSLSocketFactory
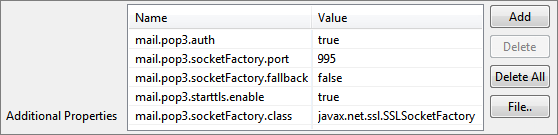
Figure 11: Adding Additional Properties required for Gmail server
- Press OK to close the SmtpConnectionConfiguration dialog box and save the connection configuration.
- Click the Test button present in the bottom-right part of the Managed Connection Factory panel to ensure successful connection. Click Close to close the Test Connection Configuration dialog box displaying successful connection message.
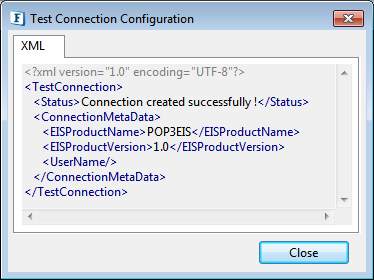
Figure 12: Testing POP3 Connection status
- In the Managed Connection Factory panel, click Authentication Configuration Ellipsis button.
- In the AuthenticationConfiguration dialog box, select the Authentication Required check box to enter the credentials. In the Username and Password text fields that appear, enter the user name in the format <Name>@gmail.com and the corresponding password for the account from which the mail needs to be fetched.
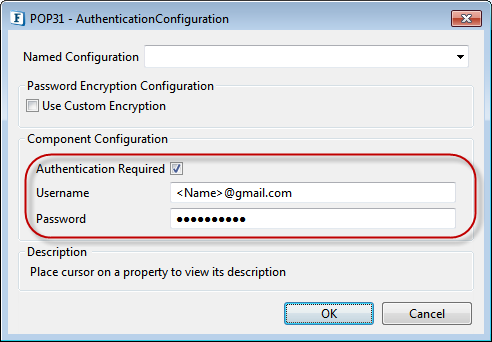
Figure 13: Providing Authentication details
- Click OK to close AuthenticationConfiguration dialog box and click Next in Managed Connection Factory dialog box.
- In the Interaction Configurations panel, select Operation Name 'recvMail' to retrieve the details in the mail and pass to output port, and click Next.
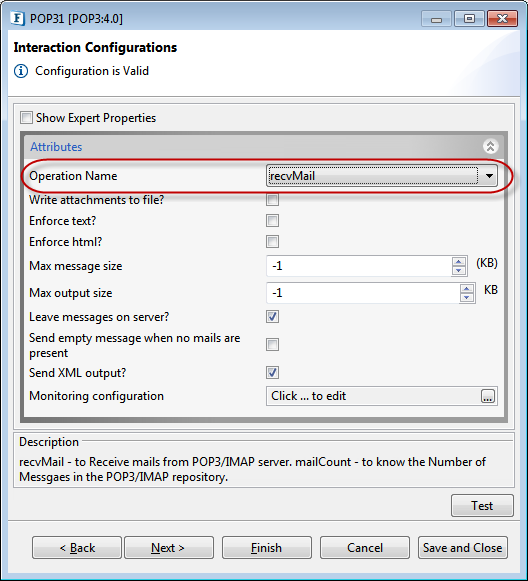
Figure 14: Selecting Operation Name 'recvMail' to retrieve the Mail details
- In the Scheduler Configurations panel. Select Enable Scheduling checkbox to configure scheduling with the default repeat interval of 10 seconds to start checking for mail every 10 seconds after launching the EP.
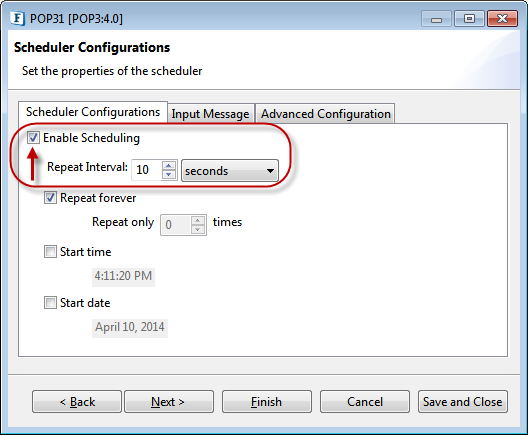
Figure 15: Enabling Scheduling
- Go to Input Message tab, select Use Specified Input checkbox and click the Generate Sample button. In the sample generated, change the MessageCount value to '1' to specify limit the number of mails that needs to be read from the mail server to one.
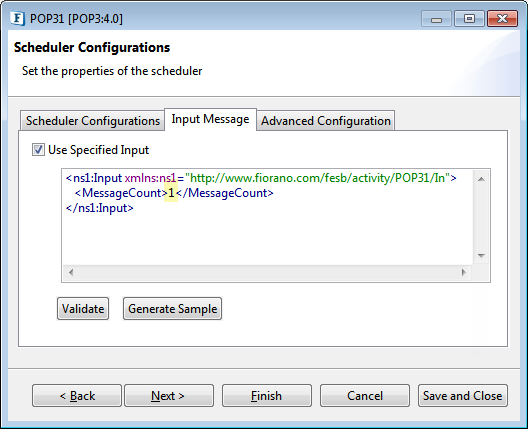
Figure 16: Changing message count to '1' in the sample generated
- Click Finish to save the configuration and close the CPS.
The POP3 component gets configured to receive mails from the Gmail server. After the configuration, an XSD schema gets set in the input port of the adapter, which is the schema that any input message should follow to get the desired output.
Composing the Event Process
To send an input conforming to the XSD Schema set in the input port of the SMTP/POP3 adapter, use the Feeder component and to see the output from the SMTP/POP3 component, use the Display adapter.
Add the above components in the Gmail_Example event process and connect them as mentioned below:
- Add a Feeder component and two Display components from the Util category in the ServicePalette to Fiorano Orchestrator.
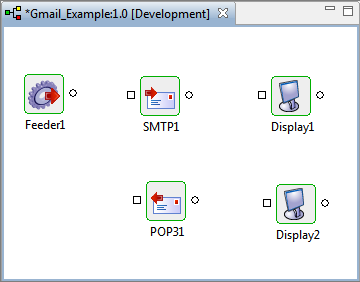
Figure 17: Adding Feeder and Display components to Gmail_Example event process
- Rename the Display components in the following manner to distinguish between the ones connected to SMTP and POP3:
- 'Display1' to 'Display_SMTP'
- 'Display2' to 'Display_POP3'
- Connect the components in the following manner:
- Feeder component output port to SMTP input port
- SMTP component output port to Display_SMTP input port
- POP3 component output port to Display_POP3 input port
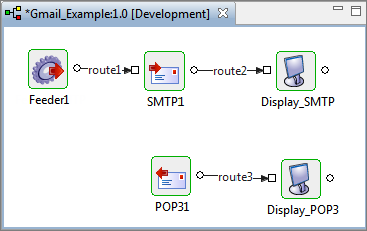
Figure 18: Connecting Feeder and Display with their changed names
Configuring Feeder component
In the Gmail_Example event process, perform the following actions:
- Double-click the Feeder component to open its CPS.
- In the Message Type Configuration page, retain Output Message Format option as 'XML' and click the Connected Port Schemas button.
- In the Connected ports dialog box, select IN_PORT to enable connection between output port of Feeder and input port of SMTP component. Click OK to load that port schema and then click Next.
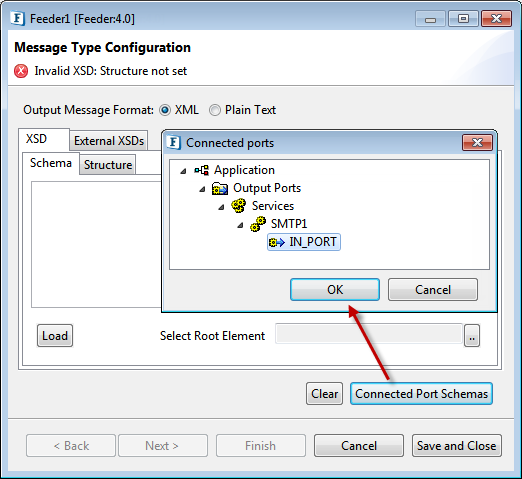
Figure 19: Connecting Feeder input port schema to SMTP output port
- As the Schema appears in the Schema editor, click Next.
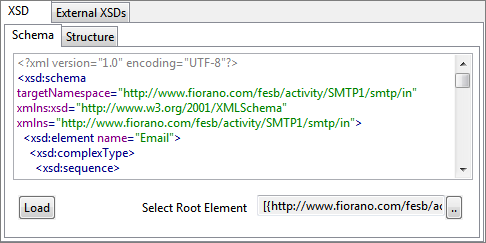
Figure 20: XSD Schema editor with the schema populated
- In the Message Details Configuration page, click the Generate Sample button to load sample input.
- Under No.of Repeatable elements to be generated section in the XSD Sample Generation Dialog window, replace max value '3' with '1' so that only one output is generated, and click OK.
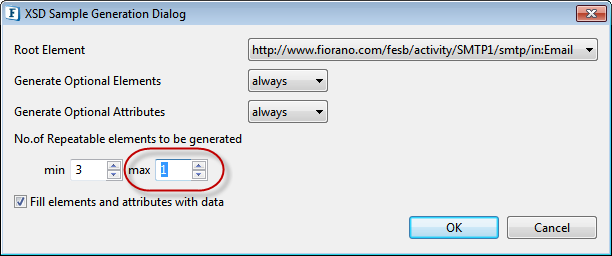
Figure 21: Reducing the number of elements to be generated to '1'
In the sample generated, provide content in Subject element and TextBody element ("TestMail" and "This is a Test Mail" provided respectively in this example).
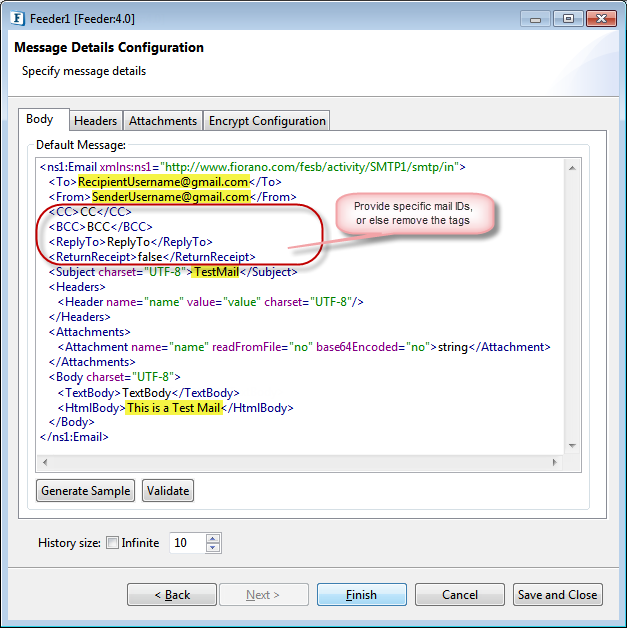
Figure 22: Sample data with the edited contentClick Finish to complete the Feeder configuration.
Running the Example
To run the example, perform the following actions in the Orchestrator:
- Click Check Resource and Connectivity
 icon (or press ALT+SHIFT+C) to check resource and connectivity.
 - Click Run Event Process
 icon (ALT+SHIFT+R) to run the event process. Three windows for Feeder, Display_SMTP, and Display_POP3 components get opened.
 - In the Feeder window, the message configured in its CPS appears. Click Send.
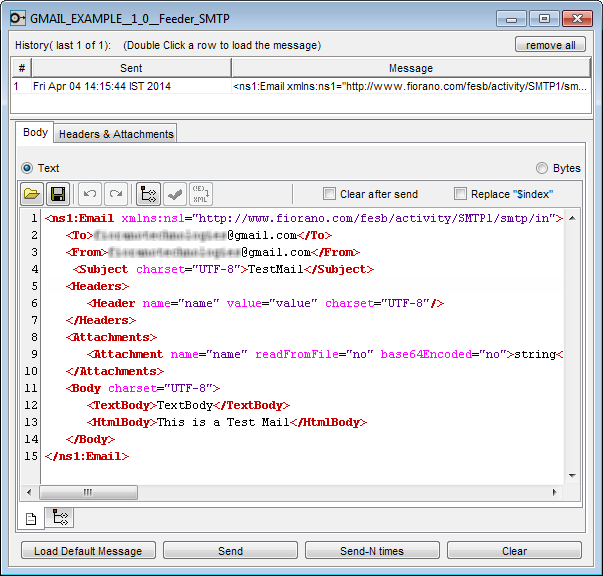
Figure 23: Sending data using Feeder
- Display_SMTP window shows the acknowledgement of the email sent.
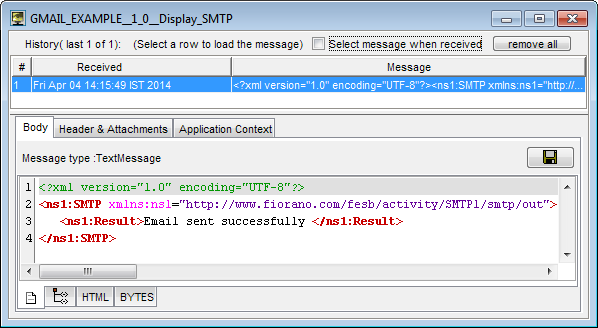
Figure 24: Acknowledgement of the mail sent appearing in Display_SMTP
- Login to the recipient Gmail account and verify the receipt of email.

Figure 23: Mail received in the recipient Inbox displaying the Subject and content
- Display_POP3 shows the entire message details in XML format retrieved from the Gmail server.
Every 10 seconds (as configured in the POP3 Scheduler Configuration) after launching the EP, POP3 component looks for any new message to be retrieved.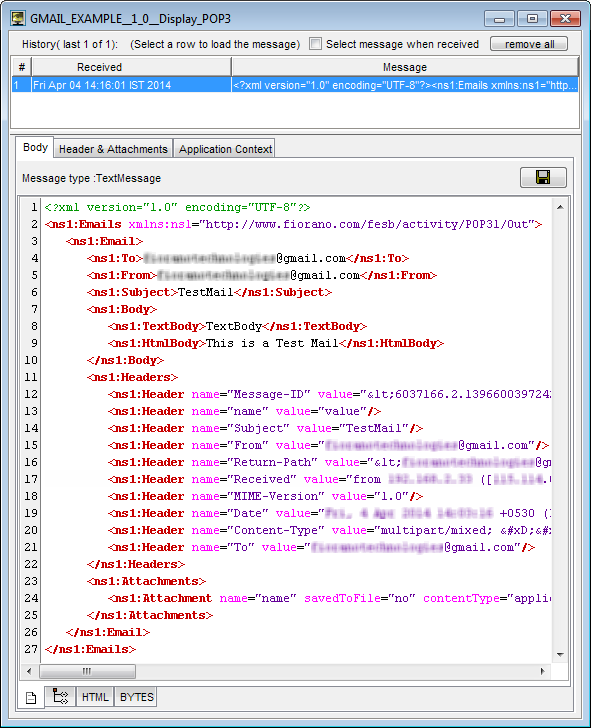
Figure 25: Mail content in XML format displayed in Display_POP3
Reference
- Download gmail_example event process and import it to the Event Process Repository in the Server Explorer in eStudio to understand the configuration used in this example and to execute the working sample.
- Options used in this example are minimum, which helps you to get an overview of the application. To explore the other options present in the SMTP and POP3, Feeder and Display components, refer sections: SMTP, POP3, Feeder and Display respectively.