Objective
Enabling SalesForce component using Apex classes to invoke user-defined operations.
Prerequisites
- Start Fiorano Enterprise Server (FES) and Fiorano Peer Server (FPS)
- Login to eStudio application
- Understand the basic menus and perspectives (panels) in eStudio application
- Create a Salesforce account (use URL: https://login.salesforce.com) and note down the username, password and security token that you receive through e-mail.
Scenario
- Create an apex class with method to create contact and generate WSDL.
- Load the generated WSDL to invoke 'createContact' operation using SalesForce component to create a new Contact with lastname value sent as input from Feeder component.
Components Used
Setting up the Example
Downloading WSDL
- Login to salesforce.com and click the username on upper-right corner of page. Choose Setup in the dropdown.
- In the landing page, under App Setup section, navigate to Develop > Apex Classes, and click New button to open the Apex Class editor.
In the Apex Class editor, provide a valid class and save the Apex Class. Use the below class for the present example:
global class MyWebService {
webService static Id createContact(String lastName) {
Contact c = new Contact(lastName=lastName);
insert c;
return c.id;
}
}
- In the API WSDL page that opens, click Generate WSDL. Save the WSDL opened in web browser to a file.
Configuring SalesForce component
To configure SalesForce component, perform the following action in eStudio:
- Add a new Event Process with name 'SalesForce_Apex_Example'.
- Drag the SalesForce component present under Bridges category in the Micro Service Palette to the Fiorano Orchestrator.

Figure 1: Adding SalesForce component to Fiorano Orchestrator Double-click the SalesForce component in the orchestrator to open Configuration Property Sheet (CPS).
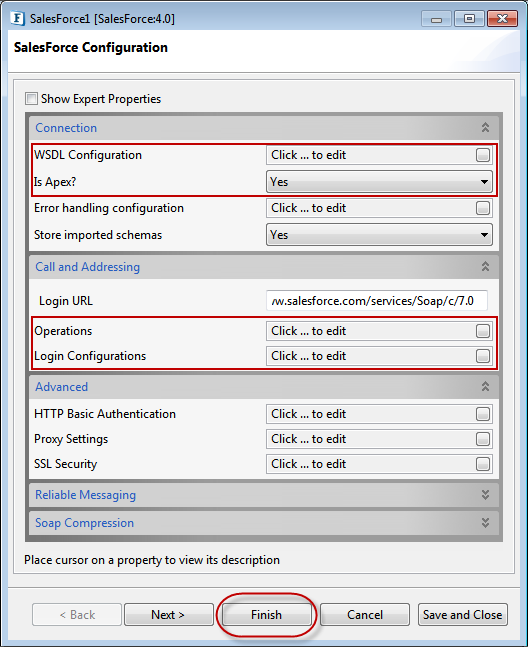
Figure 2: SalesForce Component Property SheetUnderConnection section, click the WSDL Configuration button and perform the following actions in WSDL Configuration dialog box, and click OK:
Retain Load WSDL From value as 'File'.
Click SalesForce WSDL File Ellipsis button to browse for the downloaded WSDL as explained in the Downloading WSDL section.
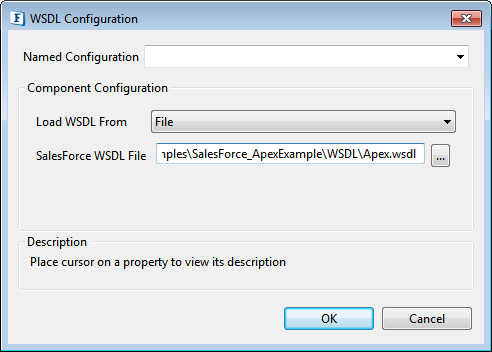
Figure 3: WSDL Configuration
Select 'Yes' from Is Apex? Drop-down.
Under Call and Addressing section, open Operations window and perform the following actions:
Click the Add button in the Operations dialog box. Operation with default name 'Operation1' gets added.
In the Operations dialog box, click Operation button under WSDL Operation Configuration.
In the Configure dialog box that appears, select the Web Service Operation 'createContact' and click OK.
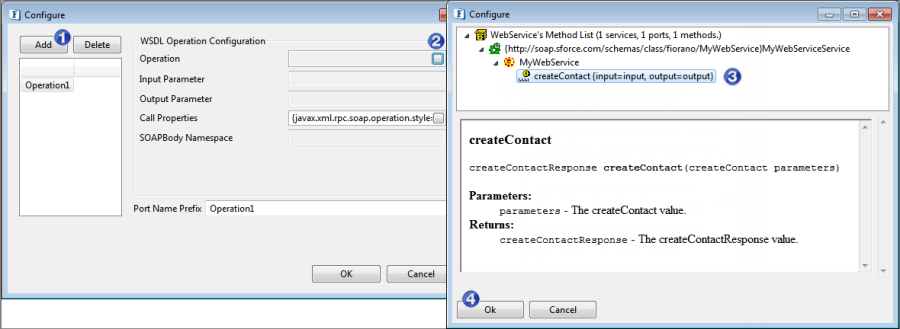
Figure 4: Selecting create operationClickOperation1 and change the name as 'createContact' in Port Name Prefix field (just to provide a logical/meaningful name).
Port name prefix represents the prefix that is appended to names of input and output ports.
Modifying Port Name Prefix value to 'createContact' for createContact Operation generates createContact_REQUEST and createContact_RESPONSE ports.
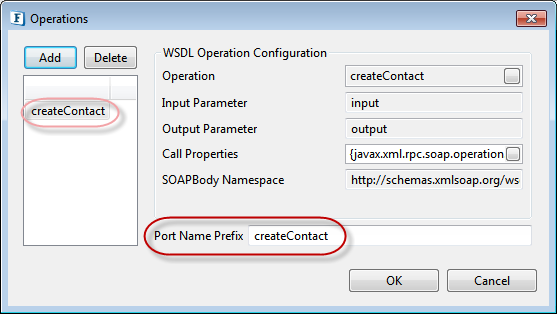
Figure 5: Modifying Port Name Prefix to 'createContact' for query operation
Click Login Configurations button. In Login Parameters dialog box, click Add and provide user name and password for Salesforce account as mentioned in Prerequisites section and click OK.
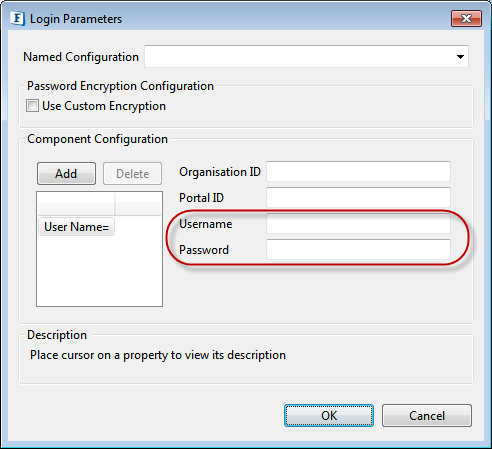
Figure 6: Providing Login ConfigurationsClick Finish to save Salesforce configuration. The input and output ports get generated as below:
Input port for create operation - createContact_REQUEST
Output port for create operation - createContact_RESPONSE
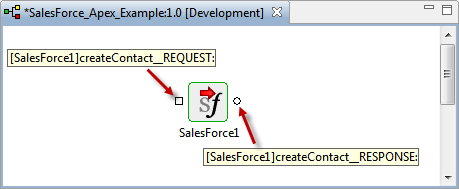
Figure 7: Changed names that reflect in tooltip
Composing the Event Process
To work with the SalesForce component, compose the Event Process by performing the below actions:
- Drag a Feeder component and a Display component from Util category in the Micro Service Palette to the SalesForce_Apex_Example Fiorano Orchestrator.
- Connect the Feeder component output port to SalesForce component input port and connect the SalesForce component output port to Display component input port.
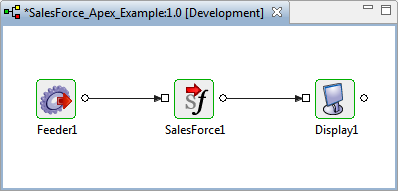
Figure 8: Feeder and Display components connected to SalesForce component - Double-click the Feeder component and perform the following actions in Feeder CPS:
- In the Message Type Configuration page, retain Output Message Format option as 'XML' and click the Connected Port Schemas button.
- In the Connected ports dialog box, select createContact_REQUEST to enable connection between output port of Feeder and input port of salesForce component. Click OK and then click Next.
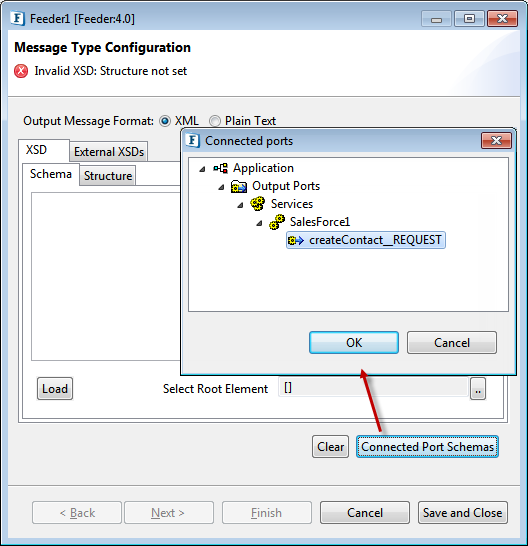
Figure 9: Enabling connecting between the Feeder and SalesForce ports - In the Message Details Configuration page, click the Generate Sample button.
- Under 'No.of Repeatable elements to be generated' section in the XSD Sample Generation Dialog window, replace max value '3' with '1' so that only one output is generated, and click OK.
- In the Body tab, under Default Message editor, remove the soapenv:Header element as it is not required in the present example.
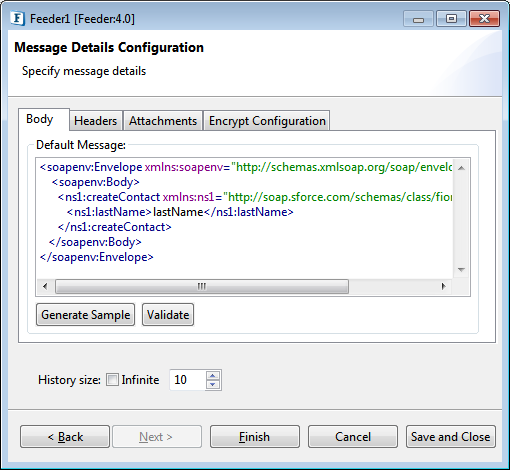
Figure 10: After changing name in message body
- Click Finish to save the Feeder configuration.
Running the Example
To run the SalesForce_Apex_Example, perform the following actions:
- Click Check Resource and Connectivity
 icon (or press ALT+SHIFT+C) to check resource and connectivity.
 - Click Run Event Process
 icon (ALT+SHIFT+R) to run the event process. Two windows get launched for Feeder and Display components.
 In the Feeder, click the Send button to add the new contact "lastName" to the Salesforce account.
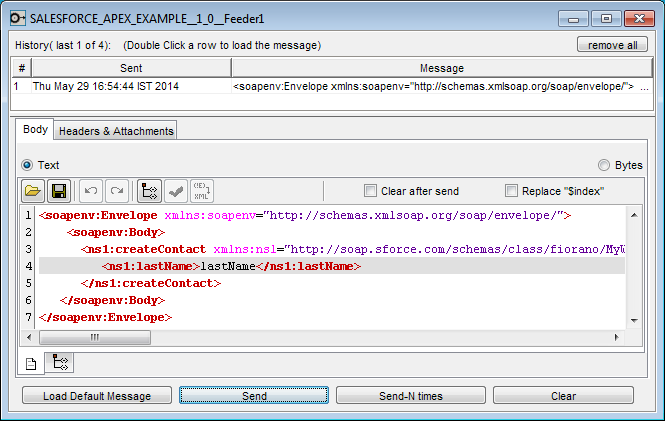
Figure 11: Sending message from the Feeder windowIn the Display window, click the second tab at the bottom of the screen to find the ID created for the new contact.

Figure 12: ID number created for the new contactGo to salesforce account, click the All Tabs
 icon on the main menu and then click Contacts which opens Recent Contacts page. Verify that the new contact is added.
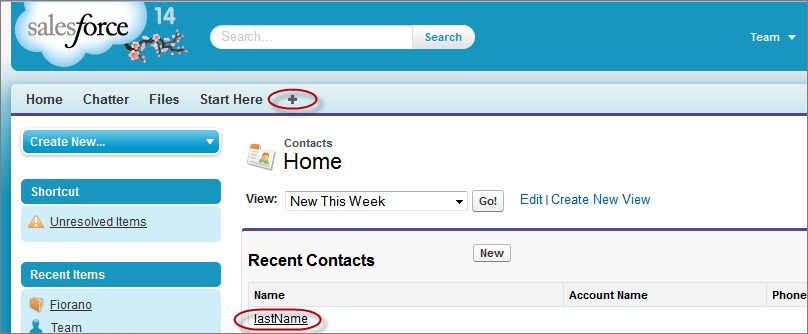
Figure 13: New contact "lastName" added in the salesforce account
References
- Download SalesForce_Apex_Example event process and import it to the Event Process Repository in the Server Explorer in eStudio to understand the configuration used in this example and to execute the working sample.
- Please note that the options used in this example are minimum, which helps you to get an overview of the application. To explore the other options present in the SalesForce, Feeder and Display, refer sections: SalesForce4.0, Feeder and Feeder respectively.