Fiorano Preferences are available under Window > Preferences > Fiorano
The common preferences like security for Enterprise Server connections and JMX connections can be provided here.
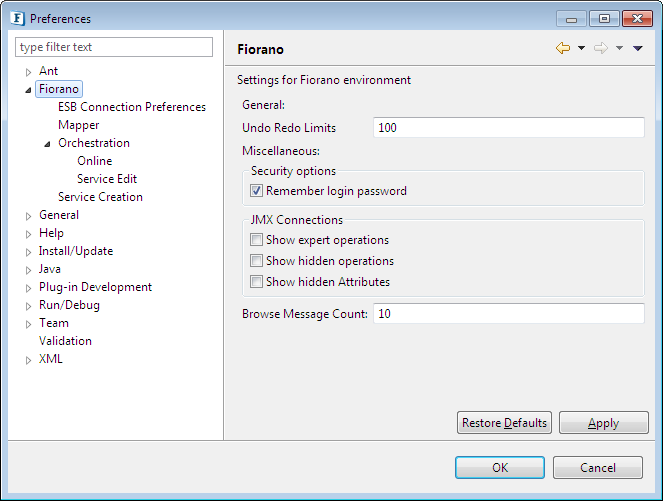
Figure 1: Fiorano preferences
Security Options
Remember login password: If this option is enabled, the password for any user logged out of Enterprise Server (in Online Event Process Development) and any Administrative or JMX Server (in Connection Management) is saved for the future login. The password is also saved in case the connected server goes down or when the studio is restarted.
By default this option is disabled and the password fields are set to blank. Hence, while logging into an Enterprise Server for the first time or in future, whenever the password field is emptied, a dialog box prompts to enter the password wherein this preference can be set as well.
JMX Connections
By enabling the preferences under this section
- Show expert operations
- Show hidden operations
- Show hidden Attributes
As the names suggest, users can view the expert operations, hidden operations and hidden attributes respectively for the JMX connection.
Various sections in Fiorano Preferences are explained in the following sections.
ESB Connection Preferences
Enterprise Server configurations can be defined here. List of Enterprise Servers can be added and the server details such as IP address, port and security credentials can be provided. Configuration of these servers is used in Offline Event Process Development perspective for actions (export Event Process to server, import Event Process from server etc.) that require server connection.
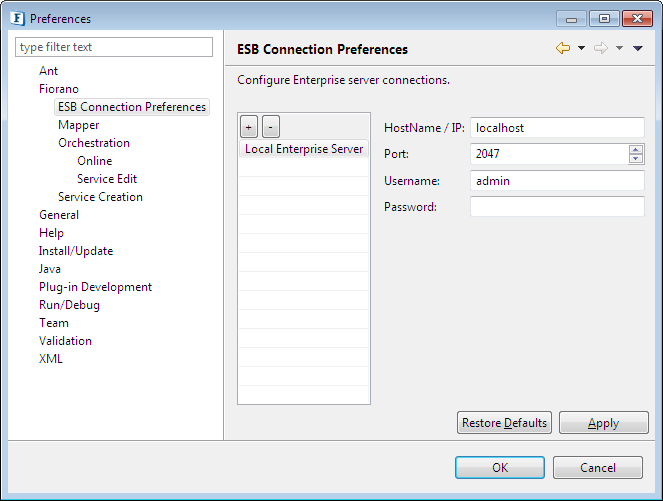
Figure 2: Enterprise Server Configurations
Restore Defaults button is used to restore the preferences to default values.
Mapper
Fiorano Mapper preferences are listed under this section.
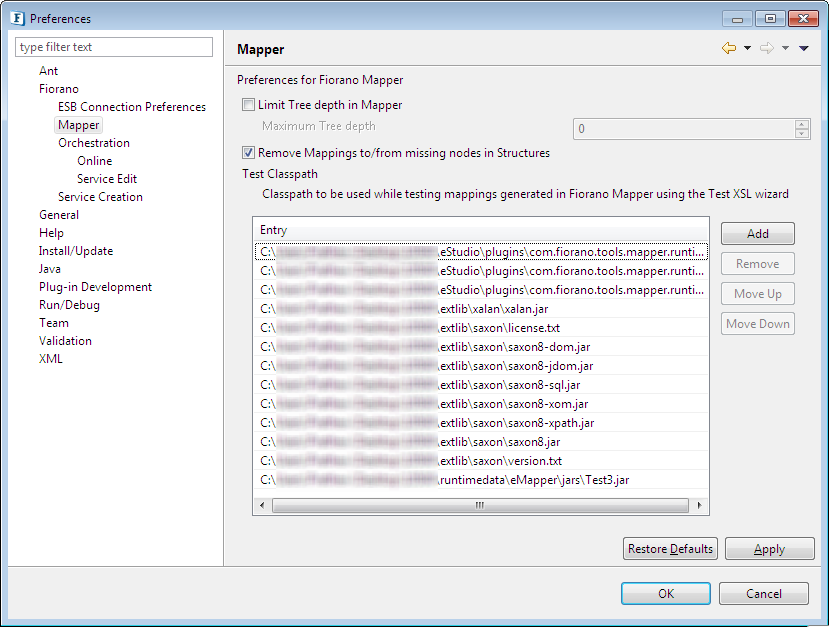
Figure 3: Mapper Preferences
Limit Tree depth
This option is used to hide and hence reduce the size of the input/output tree or schema structure thereby reducing the load to the system.
Limit Tree Depth in Mapper
While loading a structure to the input or output trees in Mapper, the whole structure is parsed in a single go and the tree is loaded with the entire structure. This can cause mapper to load slowly and can also cause memory issues while dealing with large/complicated structures.
Selecting a value from the Maximum Tree Depth option under Limit Tree depth in Mapper configures the depth till which nodes are loaded and displayed automatically.

Figure 4: Option to limit tree depth in Mapper
Limit Output Port Schema Tree Depth
Refer the Limit scheme tree depth on port subsection under the Orchestration section below.
Test Classpath
Mapper allows users to test the mappings defined using the Test option (Refer section Testing the Transformation). If the mappings use Custom java functions, the user has to add them to the classpath before testing the transformation. This table provides the user an option to add/remove entries from the test classpath.
Orchestration
Orchestration preferences are grouped into General options, Workflow options, Service options and CPS options.
General Options
General Options contain preferences for Error Port and Routes Color and Route Shape. The preference chosen here will be applied in orchestration editor.
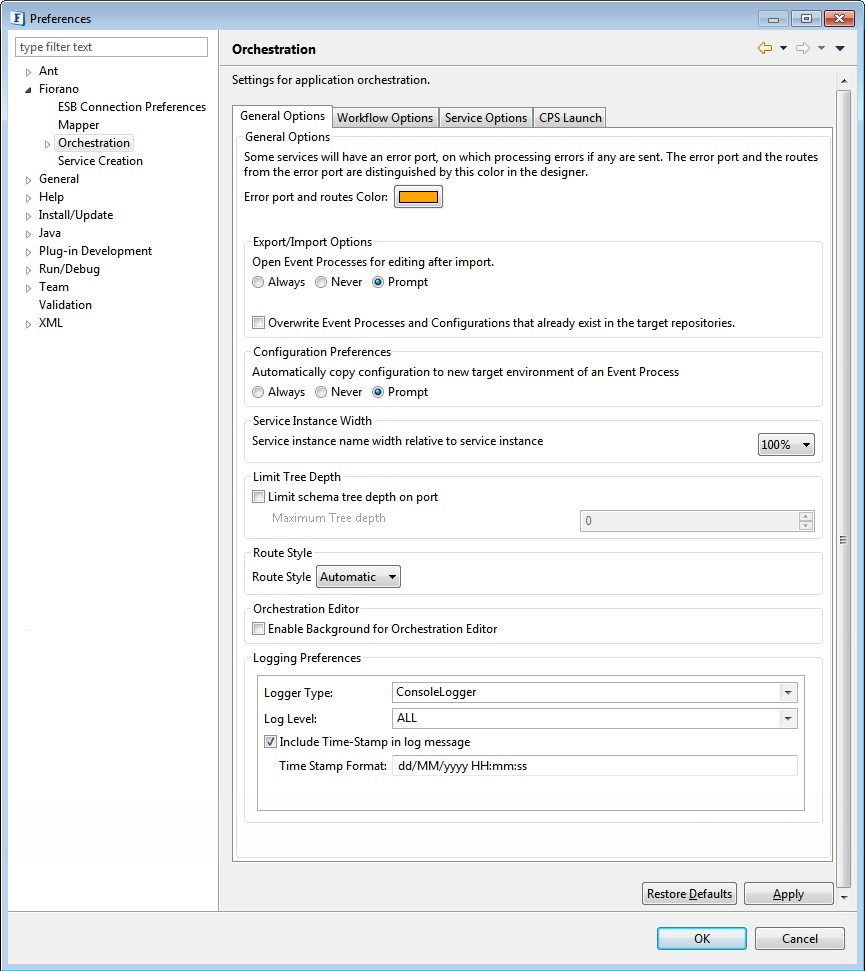
Figure 5: Orchestration Preferences
Limit scheme tree depth on port
While loading a structure of output port schema, the whole structure is parsed in a single go and the tree is loaded with the entire structure. This can slow down the loading of microservice and can also cause memory issues while dealing with large/complicated structures. While dealing with lengthy schemas, the option similar to Limit Tree Depth in Mapper may be used as below.
Maximum Tree Depth option present at Orchestration > General Options > Limit Tree Depth limits the depth of the Output Port schema structure that is loaded and displayed automatically.

Figure 6: Option to limit tree depth in Output Port Schema
Route Style
Changing the route style from Automatic to "Manhattan" gives a more organized look for the routes connecting the microservices. This interface is helpful for applications involving numerous microservices.

Figure 7: Option to choose the Manhattan route style
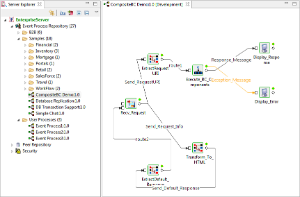
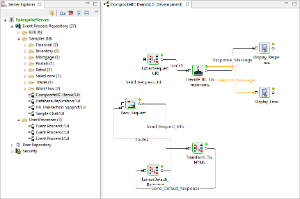
Figure 8: Route style before and after for the ComposieBC Demo EP under Samples
Orchestration Editor
Enable the Background for Orchestration Editor option to turn the default white background of the orchestration editor to one with a grid watermark view.
![]()
Figure 9: Option to enable the Grid Watermark background
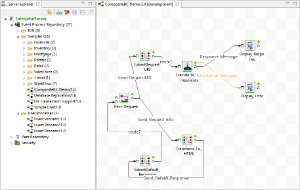
Figure 10: Editor style before and after for the ComposieBC Demo EP under Samples
Logging Preferences
Logs that appear in the Error Log and Console (refer to the respective sections in the Offline Event Process Development views section) panels can be configured to either display in the respective panels or save in a file.
File Logger
Logs will be saved in a file instead of getting displayed in the Error Log / Console panel.
| Property | Description |
| Log Level | Logs can be restricted to either Info, Warning or Error. |
| Directory | The location where the log file gets saved, which is %FioranoHome%\runtimedata\eStudio\workspace\.repositories\logs. |
| File Size | Size of each log file. After reaching the size limit, it gets saved to the next file if more than 1 has been specified in the number of files (next property). |
| # of files | The number of log files to be generated in which lags can be saved. When all the files are exhausted with log data, it starts overwriting from the first log file. |
| Time Stamp Format | Prefixes timestamp to the log message. The default format is dd/MM/yyyy HH:mm:ss |
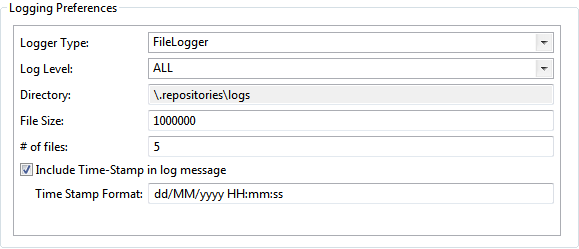
Figure 11: Logger Type configuration properties
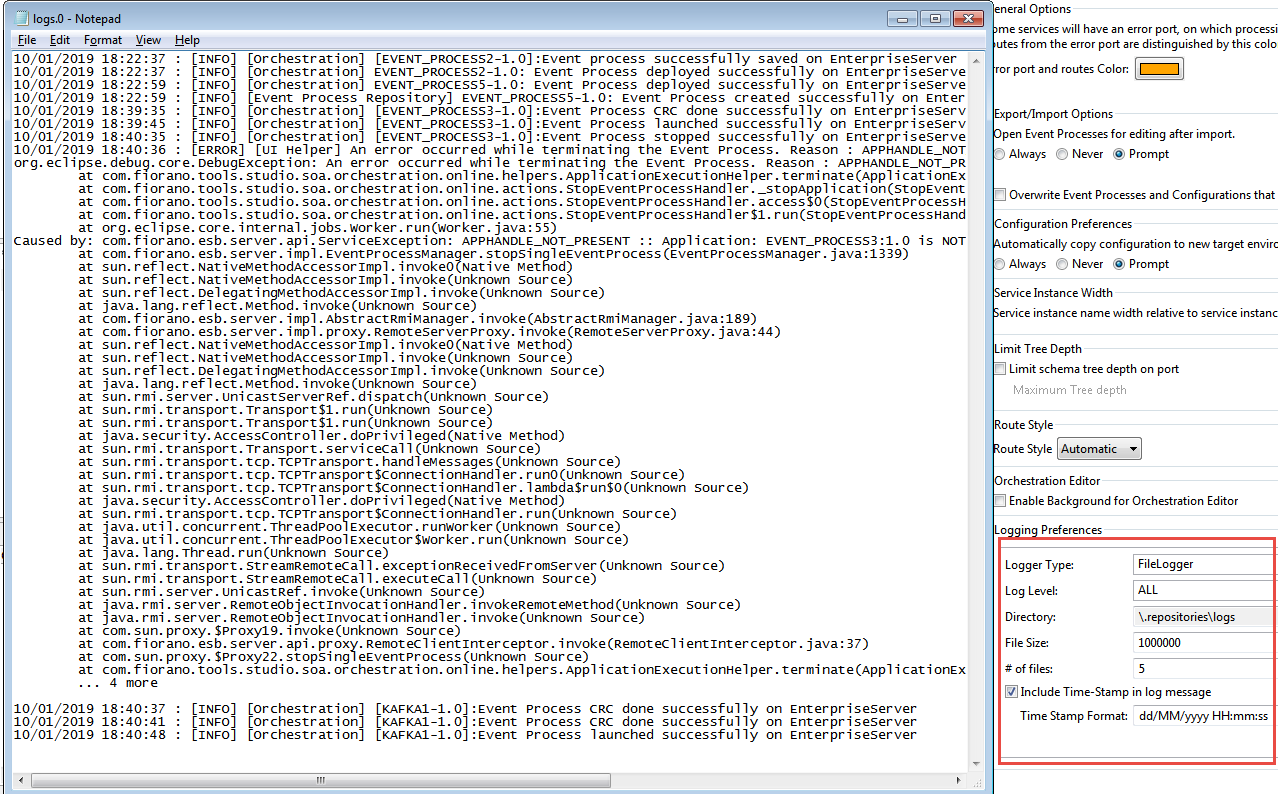
Figure 12: Info and Error logs saved in the log file with the timestamp format as specified
Console Logger
Log level can be restricted to Info, Warning or Error, and a time stamp can be appended to the logs.
If this logger type is selected, logs won't be saved to a file, but will just be displayed in the Error Log and Console panels.

Figure 13: Information logs displayed in the Console panel with the timestamp format as specified
Workflow Options
Workflow options contain Workflow color information. Workflow Item color and Workflow End color used in Document tracking can be configured here.
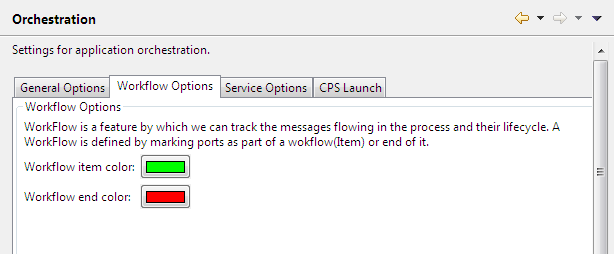
Figure 14: Workflow options
Service Options
Default configurations for Service Instances can be provided here. These default configurations are set on a service instance when a new service instance is created.
Default JVM Configurations
JVM configurations like classpath, System properties, memory options etc. can be defined. These options are used while launching the component in Separate Process launch mode.
These are the default configurations that are applicable to all the newly created service instances. Service Instances can also overwrite the default configurations set on them by making modifications in properties view.
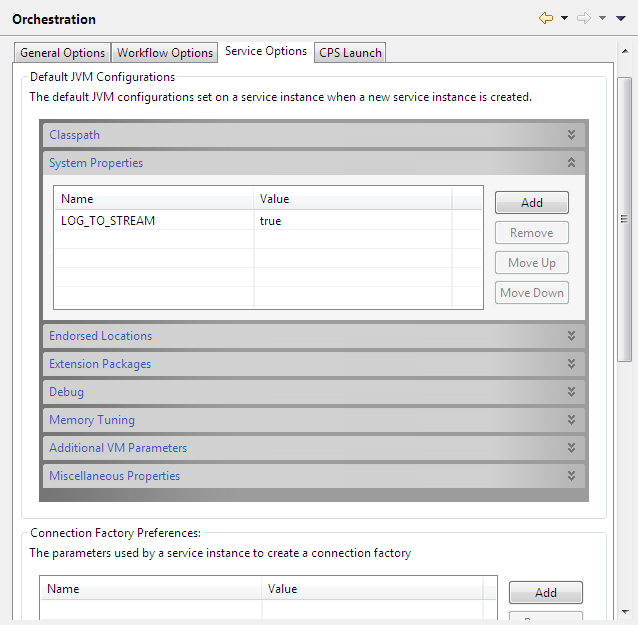
Figure 15: Service options
Configurations defined here are set on the Service Instance in Runtime Arguments section of the properties view. For example if the user wants to change the heap memory settings, he can provide the values for memory tuning properties.
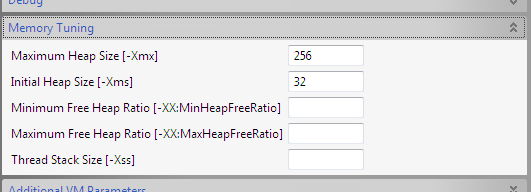
Figure 16: Memory tuning options
After defining these configurations, the default values are set when a service instance is drag-and-dropped in Orchestration editor and can be seen in Runtime Arguments section.
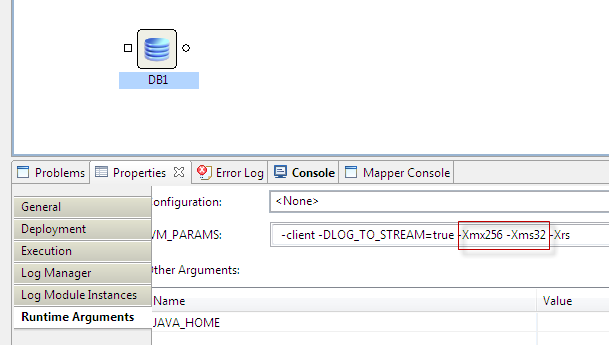
Figure 17: Runtime Arguments
These properties are set on the JVM on which the service instance will be launched.
Connection Factory Preferences
Configurations used by service instances while creating Connection factories can be defined here. The connection factories are created internally by using default configuration. To overwrite the defaults, user can set the properties here.
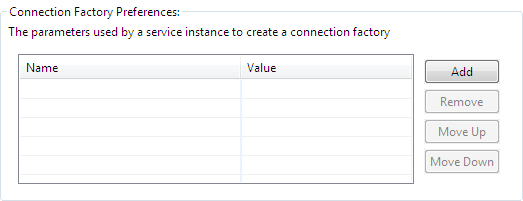
Figure 18: Connection Factory Settings
The properties defined here are available in Execution section in service instances Properties view.
CPS Options
These options are used by external CPS launch components where the CPS is launched as a separate JVM process. The following components CPS is launched in separate process JVM: SapR3, XMLSplitter, SapR3Monitor, Aggregator, CBR, Join, CompositeBC, JMSIn:5.0, JMSOut:5.0 and JMSRequestor:5.0.
Apart from these prebuilt components, custom components CPS will also be launched in a separate process JVM.
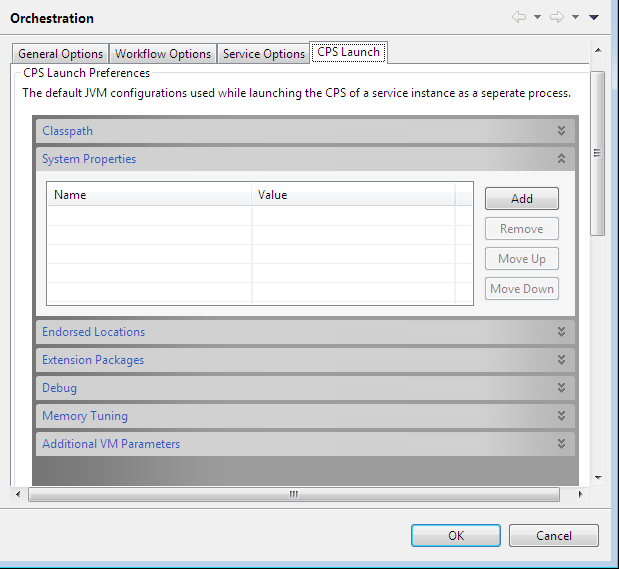
Figure 19: CPS launch options
Orchestration Online
This section contains configurations for online Event Process orchestration.
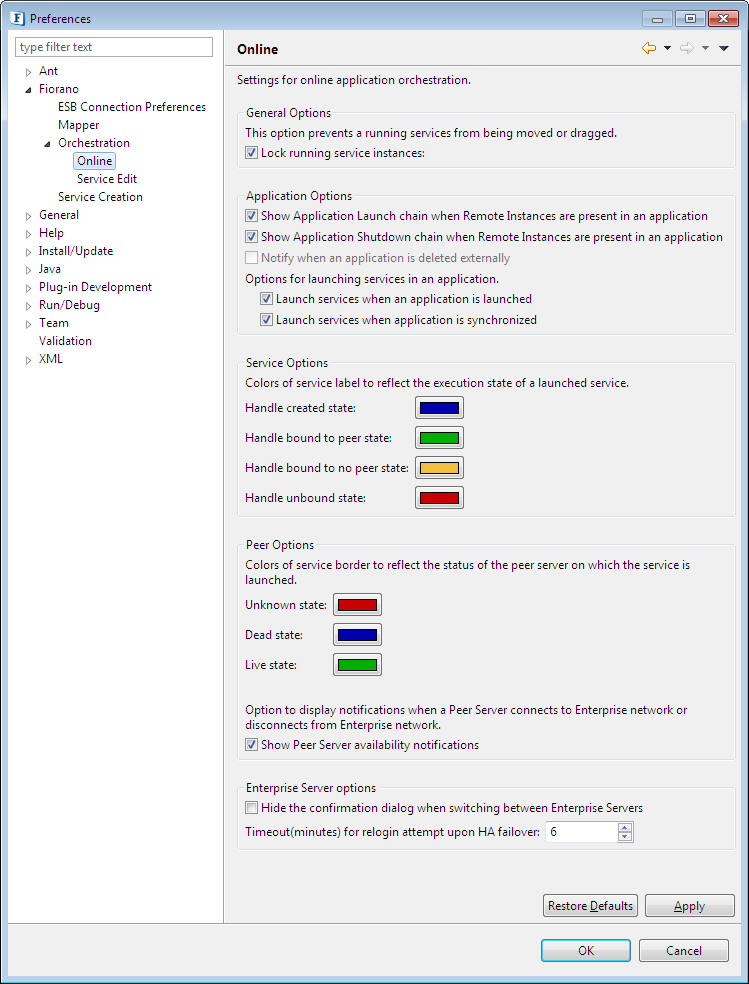
Figure 20: Online Orchestration preferences
General Options
Lock running service instances: This option prevents the service instances from being moved or dragged when an Event Process is running.
Application Options
Launch Services when application is synchronized: If this option is enabled, in a running Event Process, service instances in stopped state will be started if the user clicks the Synchronize button in an Event process.
Service Options
The color of the Service Instance label name at different execution status can be configured from here, that is, when a Service Instance is running, stopped and so on.
By default when a Service Instance is dragged and dropped the instance name color is Black. The states and corresponding Service instance label name colors are explained below.
- Handle Created State: This color is shown when the service instance handle is created. This happens before the component is launched completely.
- Handle Bound to Peer state: This color is when the service instance is running.
- Handle Bound to no peer state: This color is shown when the peer server on which the component is running is stopped.
- Handle unbound state: This color is shown when the component in a running Event Process is stopped.
Peer Options
These are the colors applied to service instance border to reflect the status of the peer server on which the service instance is configured to launch.
- Unknown State: The peer server configured is unknown. i.e. the peer server configured is not running and is not present in peer repository node under Enterprise Server node.
- Dead State: The peer server configured is not running but it is present in peer repository node under Enterprise Server node.
- Live State: The peer server configured is present in Peer repository and is running.
- Show Peer Server availability notifications: Whenever a peer server connects to the Enterprise Server or disconnects from Enterprise network, a notification dialog appears.
Enterprise Server Options
This option is applicable to the Enterprise Server prior to login or relogin into the eStudio.

Figure 21: Enterprise server options
Hide the confirmation dialog when switching between Enterprise Servers: If this option is enabled, when the user is working on multiple servers, the user is no longer prompted with a confirmation dialog to switch the active server and an incative server will be automatically made active whenever the user wants to perform any action (Open Event Process, delete Event Process, CRC, Launch, Import, Export, and so on) on that Enterprise Server.
Time (minutes) for relogin attempt upon HA failover: An Active Server connection failure triggers the enterprise server node connected to that server to reconnect to the backup server or the same server whichever becomes active within the time interval (in minutes) specified here. In case the server(s) takes too long to switch their state(s), a message is logged on the console and the attempt to relogin to studio is failed. It is advisable to increase the time in this case approximately to the time taken by any of the servers to become active.
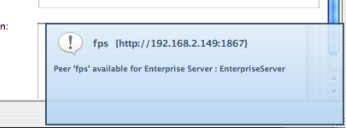
Figure 22: Peer server notification
Key Board Short Cut Preferences
Before using Key Board shortcuts Fiorano scheme has to be set in Preferences (Window > Preferences > General > Keys).
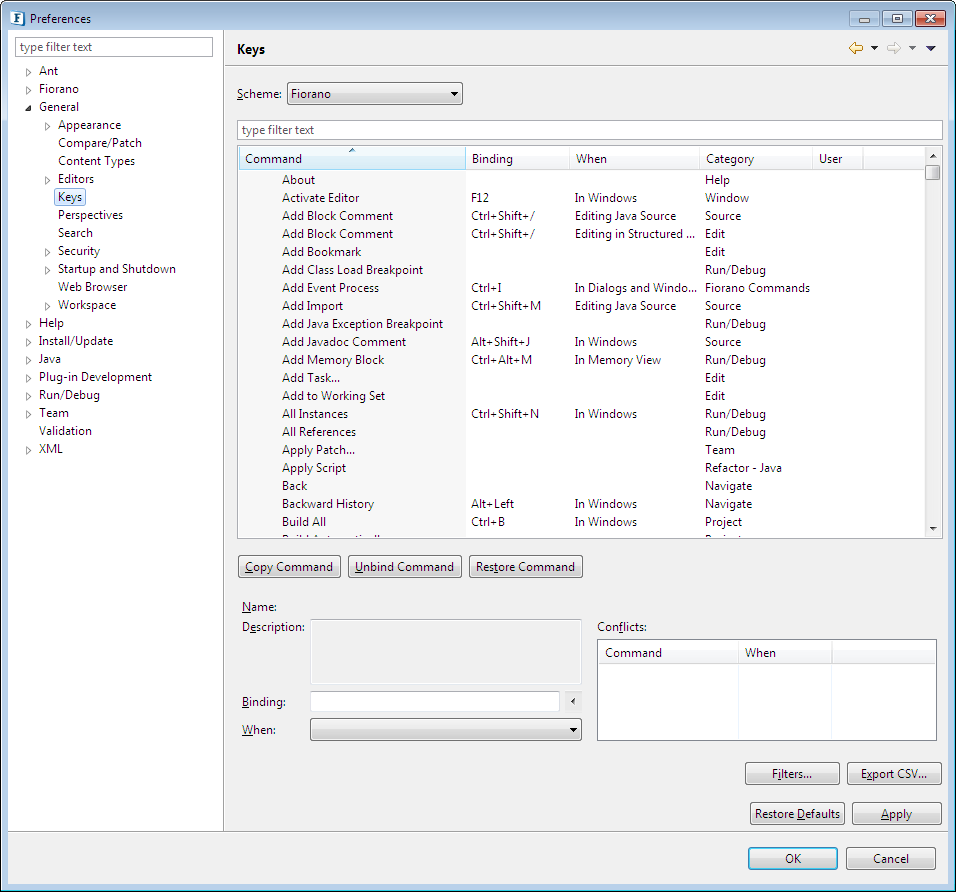
Figure 23: Key-binding preferences
The default Key Board shortcuts for various actions are listed below.
- Help F1
- Rename F2
- Undo Ctrl + Z
- Redo Ctrl + Y
- Add Event Process CTRL + I
- Open Event Process CTRL + O
- Import Event Process CTRL + ALT + I E
- Import Event Process (nStudio) CTRL + ALT + I N
- Import Service (from Local Disk) CTRL + ALT + I L
- Import Service (from Server) CTRL + ALT + I S
- Export Event Process CTRL + ALT + X E
Insert
1. Service Instance CTRL + ALT + A S
2. Event Process CTRL + ALT + A E
3. Remote Service Instance CTRL + ALT + A R
CRC ALT + Shift + C
Run Application ALT + Shift + R
Synchronize ALT + Shift + S
Stop Application ALT + Shift + K
View
1.View Debugger CTRL + ALT + V D
2.View Properties CTRL + ALT + V P
3.Logs CTRL + ALT + V L
4.View Error ports CTRL + ALT + V E
5.View Route Names CTRL + ALT + V R
Clear Logs ALT + C
Export Logs ALT + X
Toggle Lock Mode ALT + Z
Schema repository CTRL+Shift+S
Create Service component CTRL+Shift+N
The option to edit keyboard shortcuts is also available under General > Keys section in the preferences dialog. The list of Fiorano Orchestration commands can be viewed by entering Orchestration in the filter box provided above the available keys. The shortcut for any of the action/command can be changed by editing the Binding text field available below the keys table section.
