How to Launch Profile Manager
- Launch Fiorano eStudio using any one of the following ways:
- Navigate through Start > Programs > Fiorano > FioranoMQ and click Fiorano eStudio.
- Execute the following command based on the operating system:
- Windows: %FIORANO_HOME%\eStudio\bin\eStudio.exe
- UNIX: $FIORANO_HOME/eStudio/bin/eStudio.sh
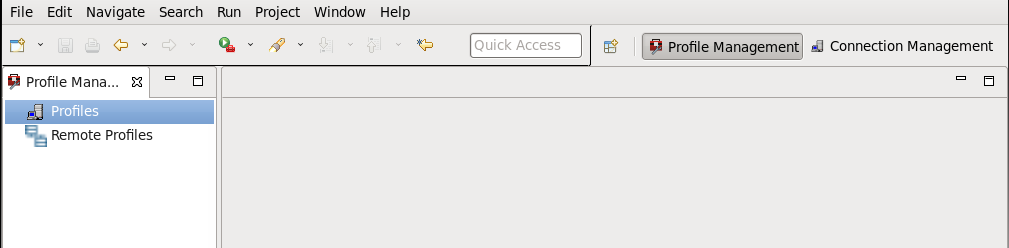
- Select the Profile Manager tab in the Explorer pane.
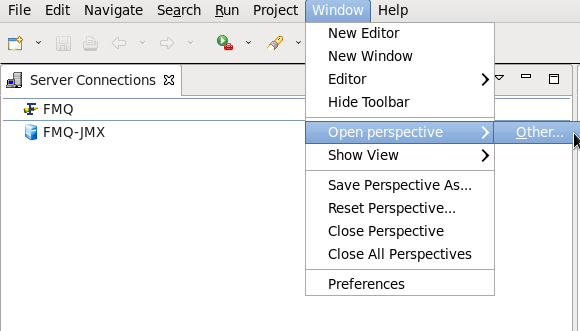
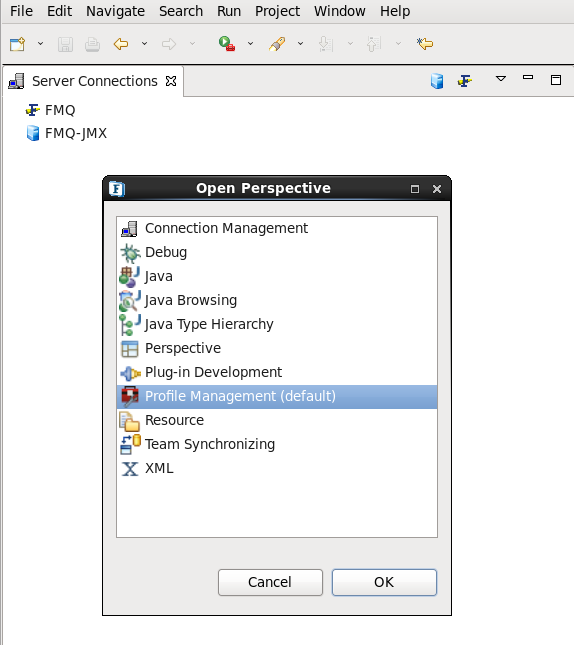
- Alternatively, launch the Profile Manager using Window > Open Perspective > Other > Profile Manager menu-item in the Fiorano eStudio.


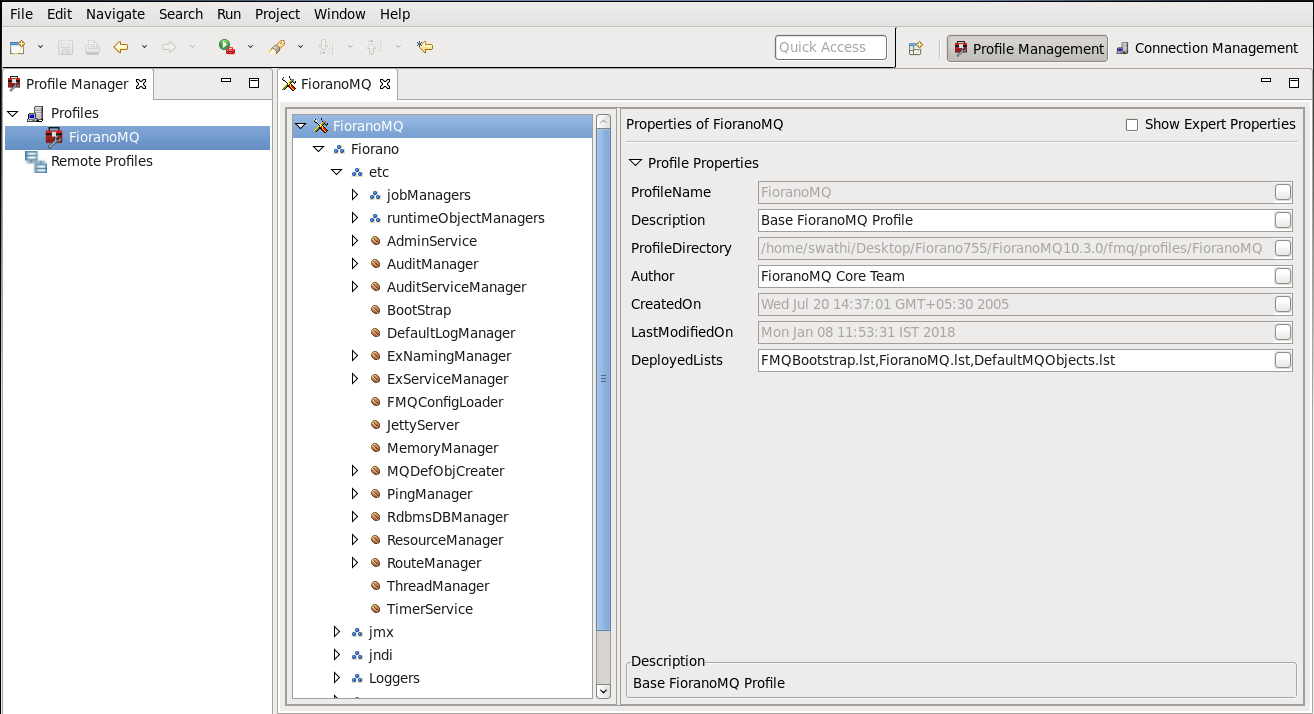
How to Open a Profile for Editing
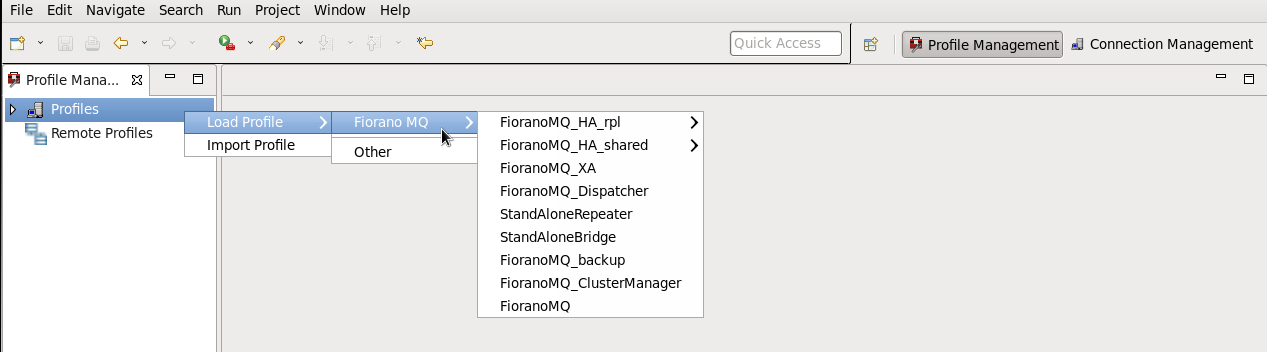
- Right-click the Profiles node in the Profile Manager Explorer and browse to open the profile required.
- A profile appears with a node corresponding to the profile in the Profile Explorer tree. Expand this node in order to view the component instances that are part of the profile. Their properties can be viewed in the Properties pane on the right.
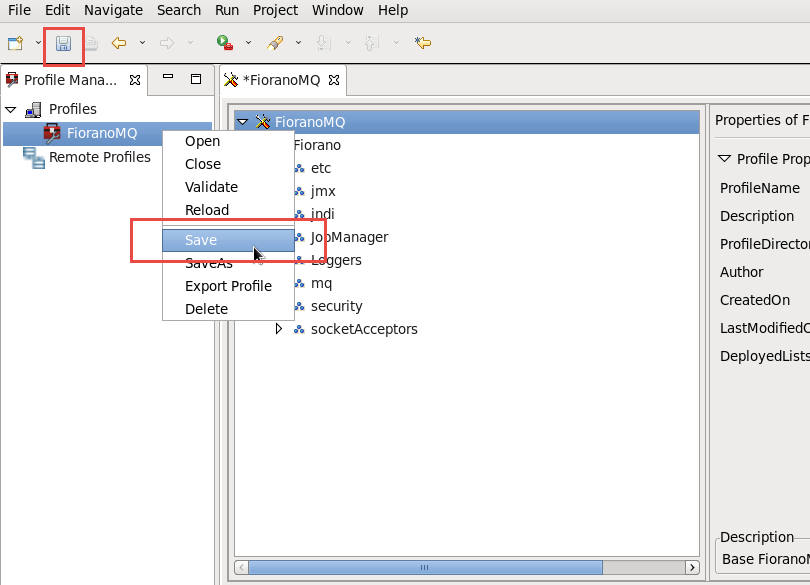
How to Save Changes Made to a Profile
Right-click the profile root node (FioranoMQ) and select the Save option or click the Save icon on the Toolbar.
How to Edit Configuration for a Component Instance
In order to configure the port at which the FioranoMQ Server would run:
- Right-click the Profiles node in the Profile ManagerExplorer, and select the Open Profile option from the pop-up menu displayed.
- In the Select Profile Directory dialog, select the Profile directory you want to edit and click the Open button.
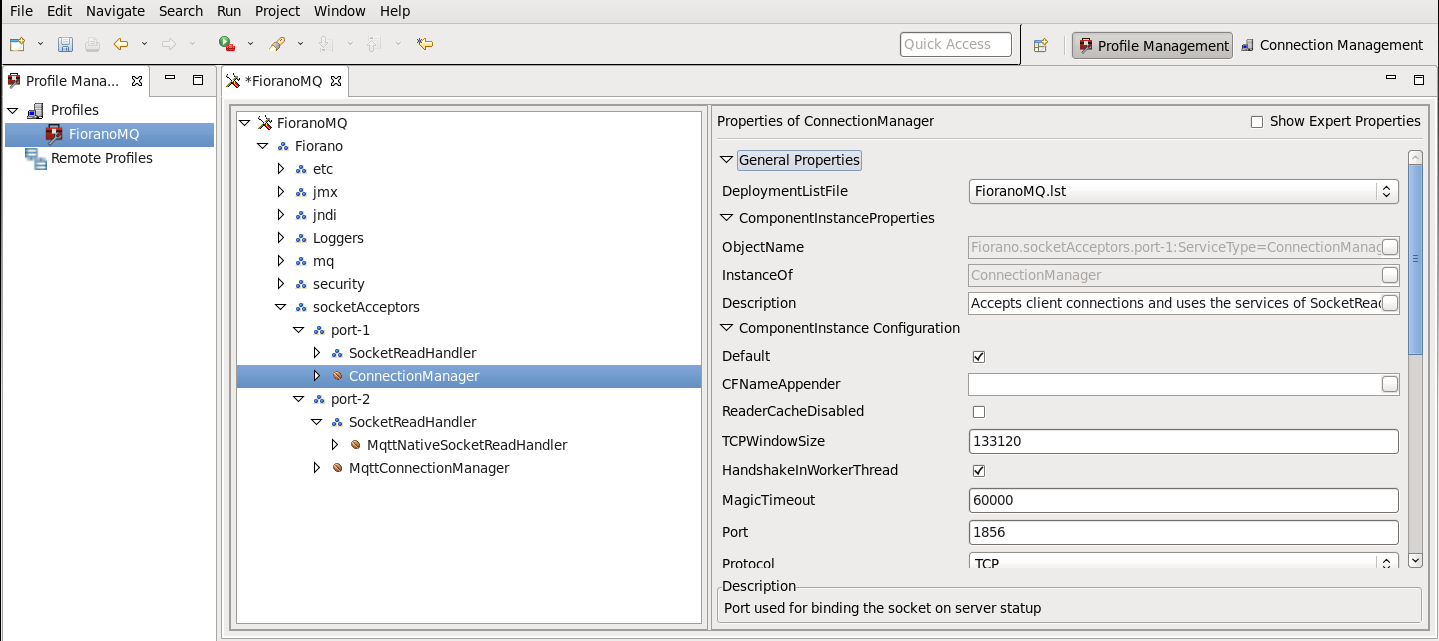
- Navigate to the node corresponding to the ConnectionManager component instance in the Profile Manager Explorer.
- Edit the Port property of the ConnectionManager, which is part of ComponentInstance Configuration using the Properties pane on the right.
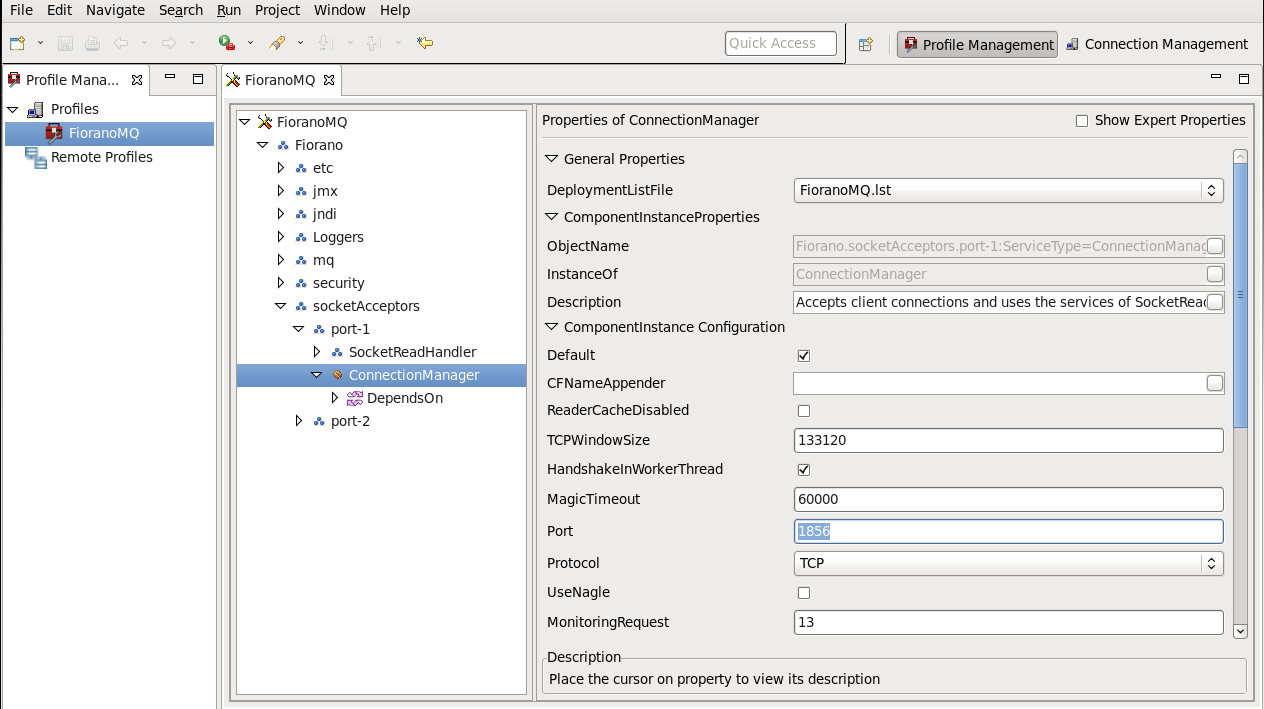
- Click the Save option to save the changes.
How to Edit Attributes for Component Instance
In order to edit the LoggerName attribute for PublishEventManager, which is part of the FioranoMQ Profile, follow the instructions given below:
- Right-click the Profiles node in the Profile ManagerExplorer, and select the Open Profile option from the pop-up menu displayed.
- In the Select Profile Directory dialog, select the Profile directory you want to edit and click the Open button.
- Navigate to the node corresponding to the PublishEventManager component instance in the Profile Manager Explorer.
- Click the PublishEventManager node and edit the LoggerName property present in the properties pane on the right.
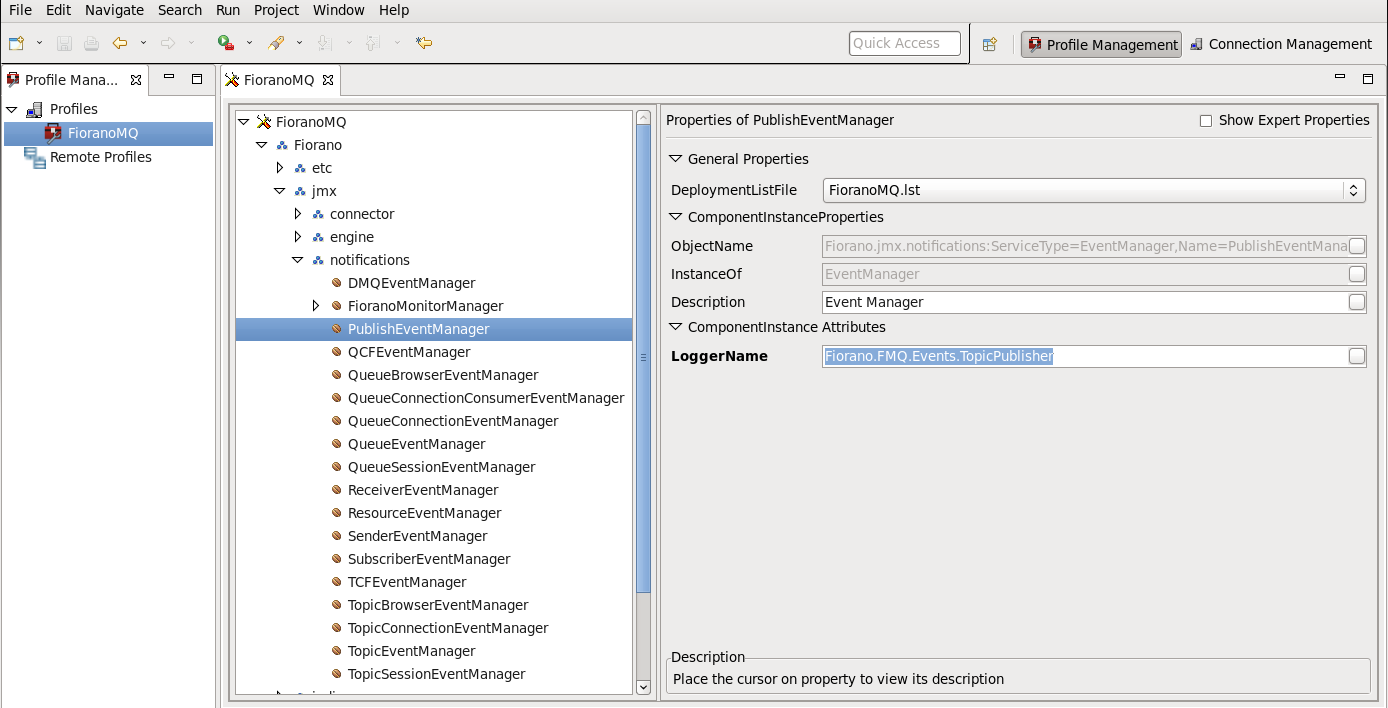
- Click the Save option to save the changes.
How to Add/Remove a Component Instance from the Profile
In order to enable Dispatcher in your FioranoMQ Server, you must add the dispatcher component to the profile as follows:
- Open the FioranoMQ profile using the Profile Manager, as described in Point 2 above.
- Navigate to the domain node to which you wish to add the Dispatcher Component. Right-click the selected domain (say "etc") and select the Add Components option.
In the Add Components to Profile dialog that pops up, navigate to the Dispatcher node, select it and Click the OK button.
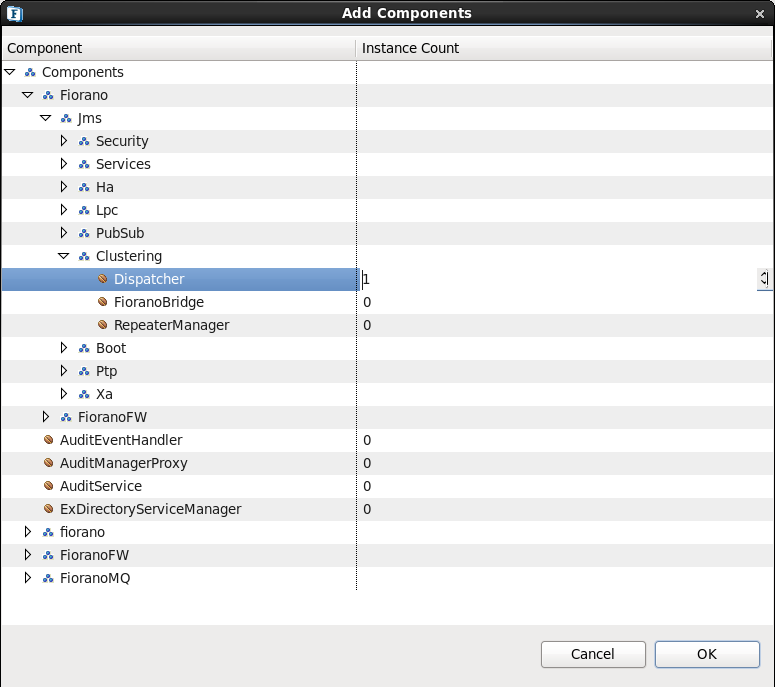
You can see the node corresponding to the Dispatcher component added to the Profile Manager Explorer.
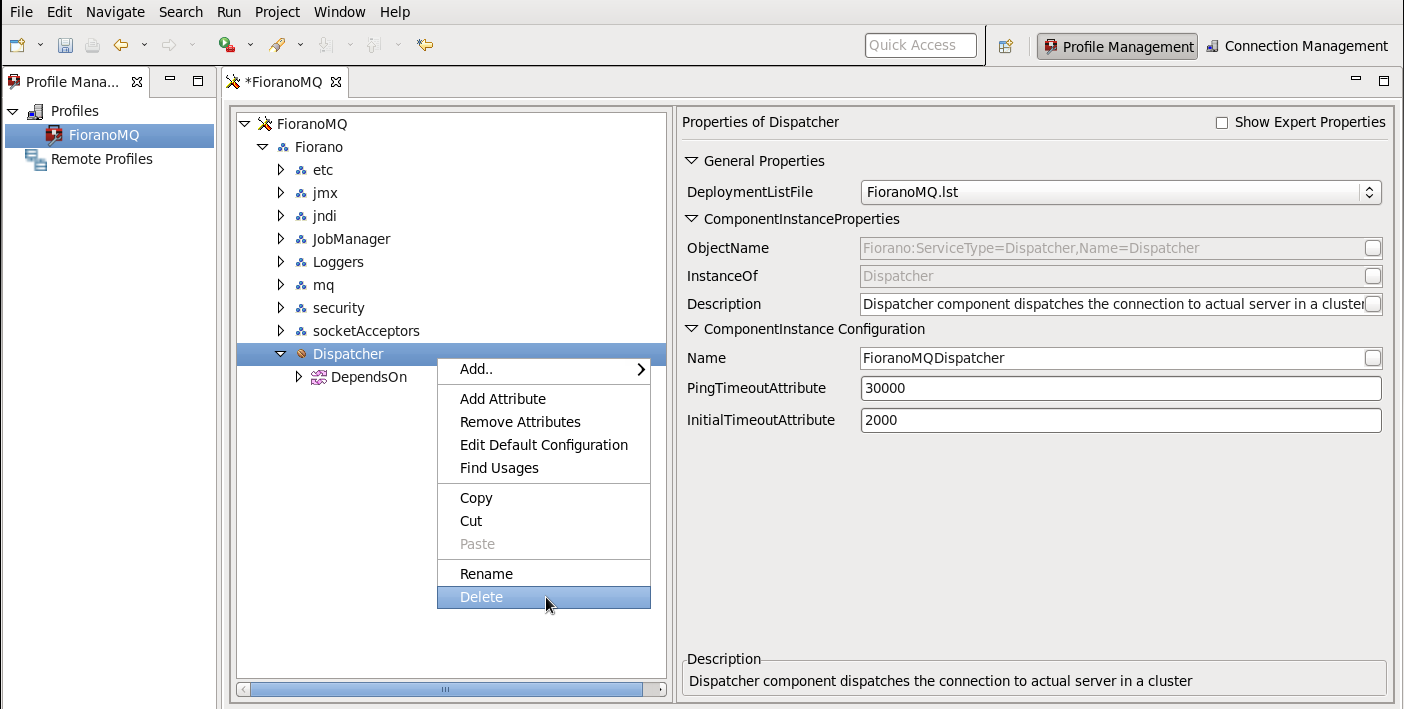
To remove the Dispatcher instance added to the profile, right-click the Dispatcher node in the Profile Manager Explorer and select the Delete option.
How to Resolve Component Dependencies
In order to resolve the dependencies for the Dispatcher component:
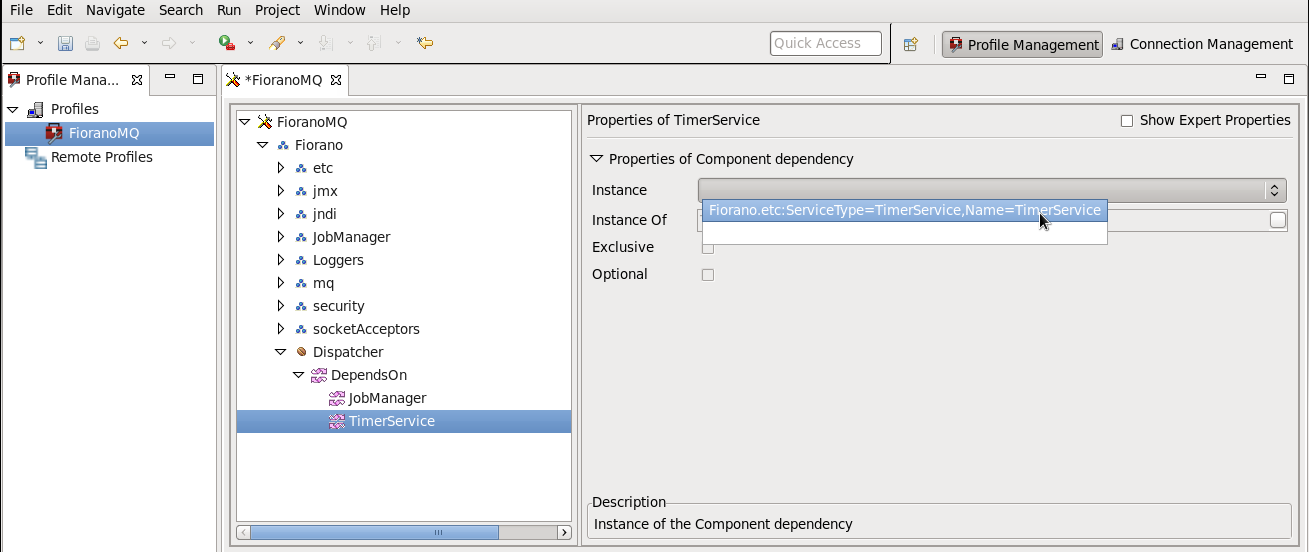
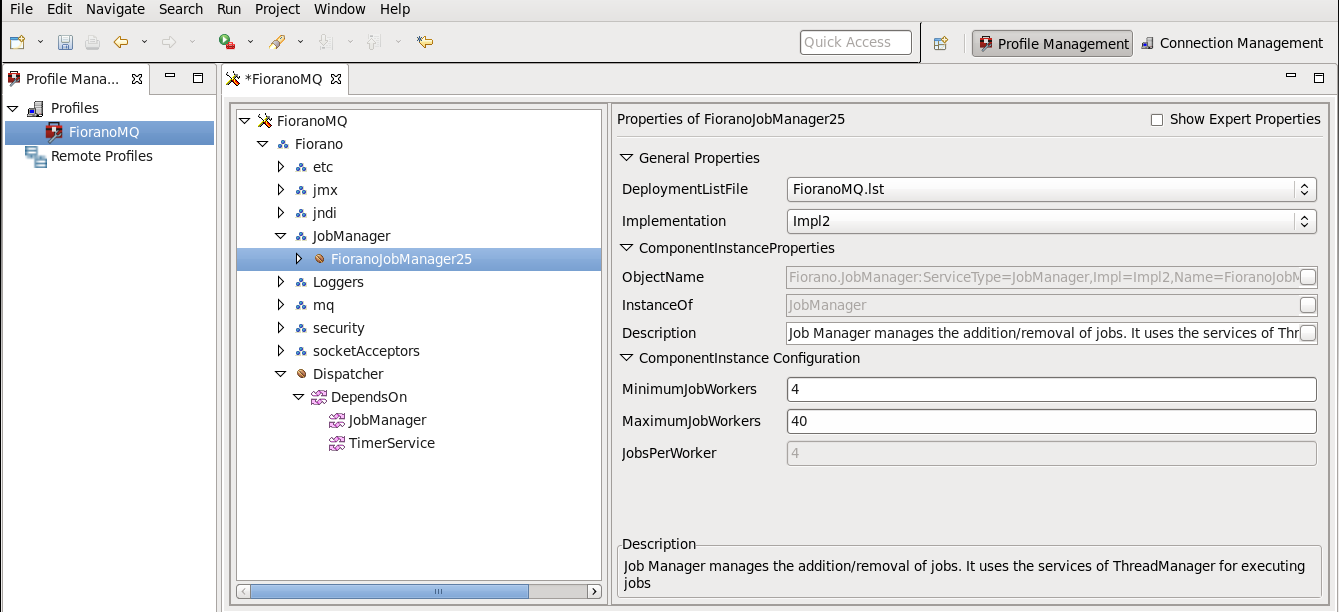
- Expand the Dispatcher node corresponding to the Dispatcher instance added to the profile and navigate to the dependency node that is unresolved (indicated by the red icon). In this case, the TimerService is the dependency.
- Select the Instance property for the TimerService dependency in the Properties pane. From the drop-down menu, select the available instances of TimerService in the profile to be used by the Dispatcher instance.
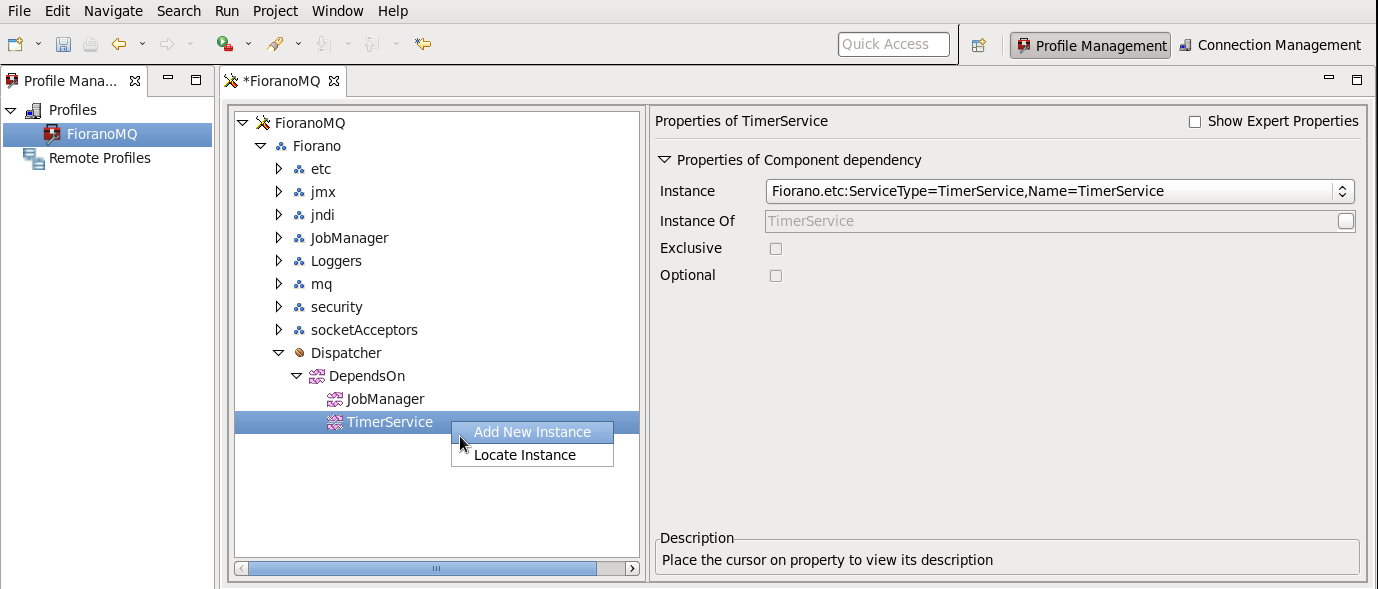
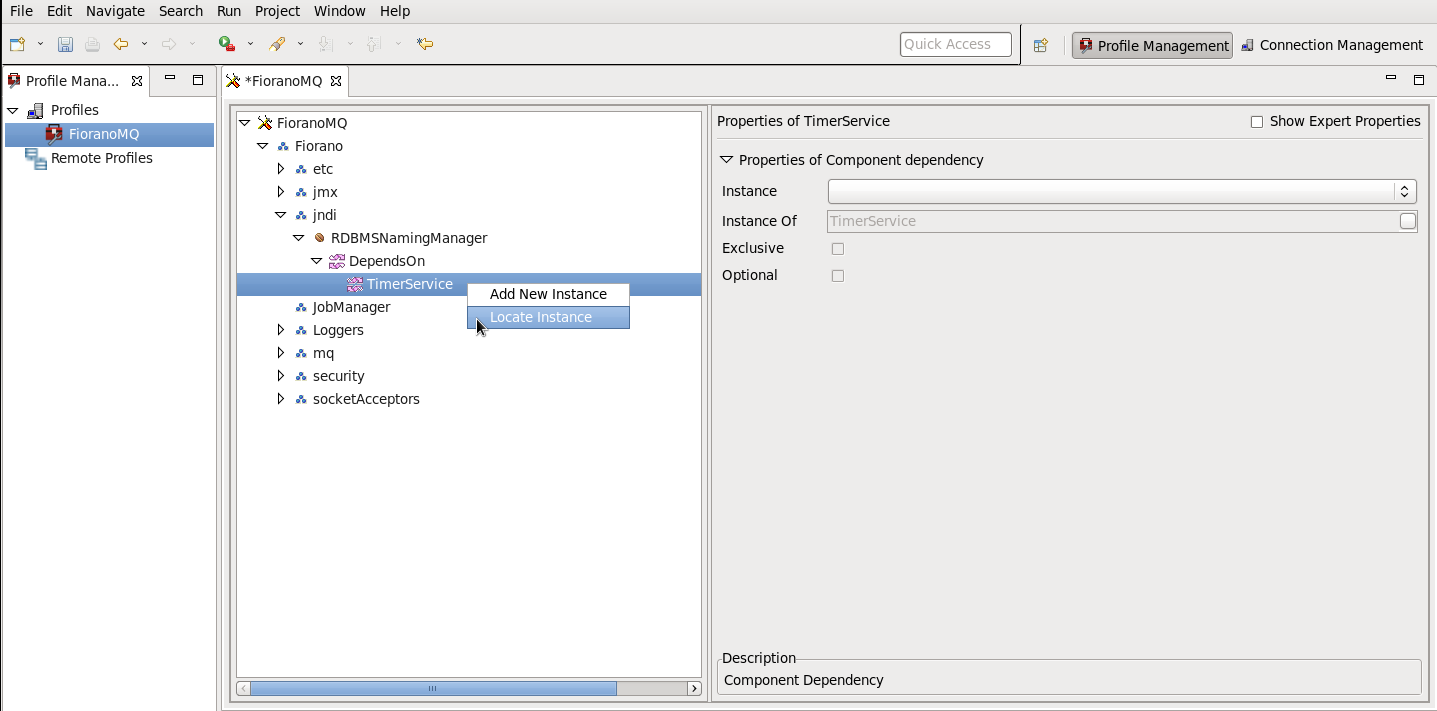
In case no instance of the dependency existed in the profile, you can add a new instance of the component as described above and then resolve the dependency. You may also add a new instance of the dependency as follows:
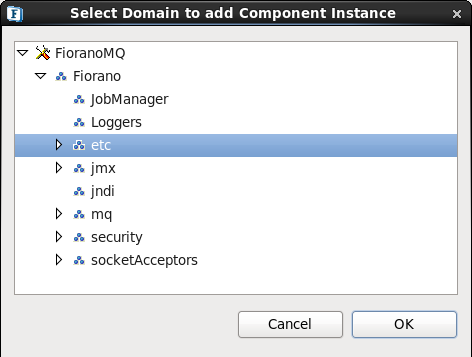
- Right-click the dependency node and select the Add New Instance option. The Select New Component Instance Domain dialog box appears.
- You may use this to specify the domain to which you want to add the new instance of the TimerService. In this case, we select domain etc and click the OK button.
- You can view the new instance of TimerService added to the Profile.
- You can now resolve the TimerService dependency for Dispatcher by selecting the Instance property for the TimerService dependency in the Properties pane. From the drop-down menu, select the available instances of TimerService in the profile to be used by the Dispatcher instance.
How to Change Implementation Type of a Component Instance
Some components provide multiple implementations, such as the NamingManager component. To change the implementation type of the component part of the profile, follow the instructions given below:
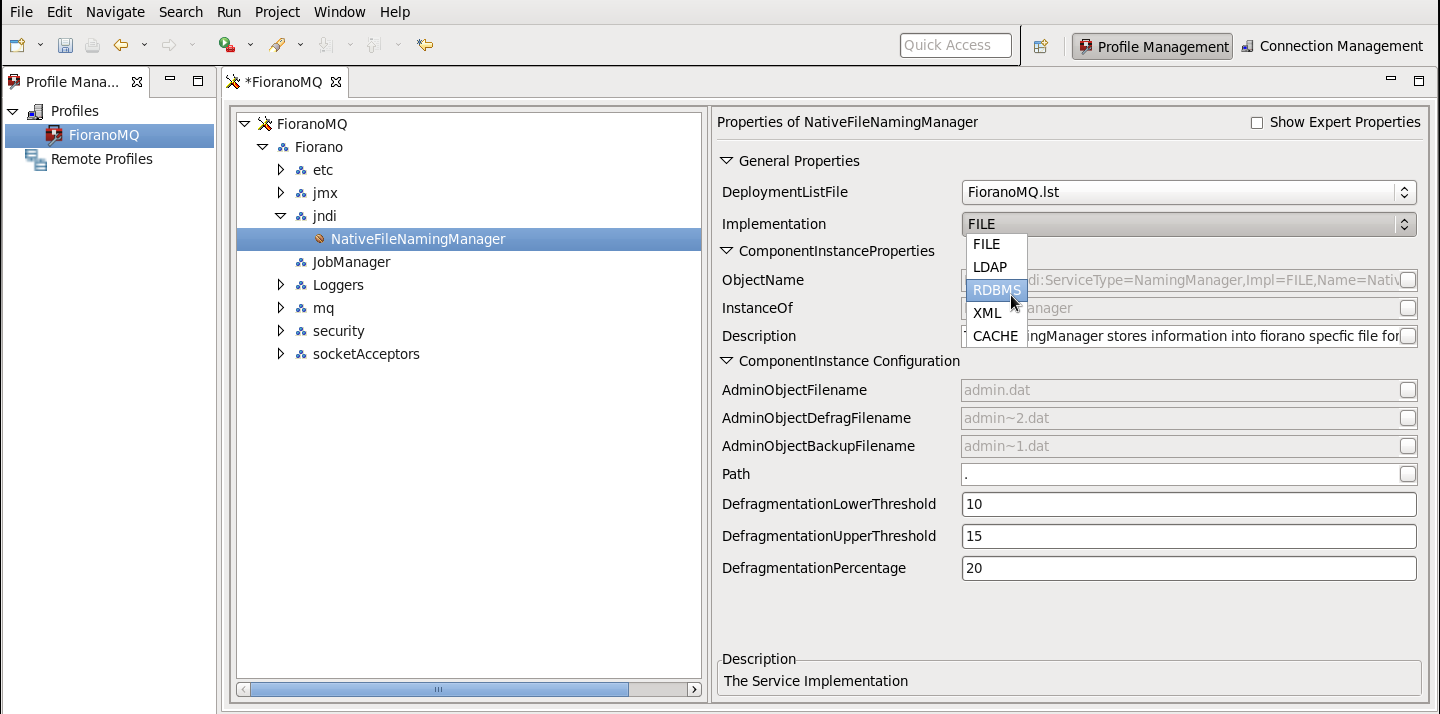
- In the Profile Explorer, navigate to the node corresponding to the component instance for which you wish to change the implementation type: for instance the NativeFileNamingManager instance of NamingManager in the FioranoMQ profile. In the Properties pane, you see a property named Implementation that is set to FILE.
- Click the value for the Implementation property. All available implementations of NamingManager are displayed in a drop-down list. Select the implementation you want to use in your profile: for instance RDBMS.
- On changing the Implementation, the component dependencies and also the ObjectName property for the component are updated accordingly.
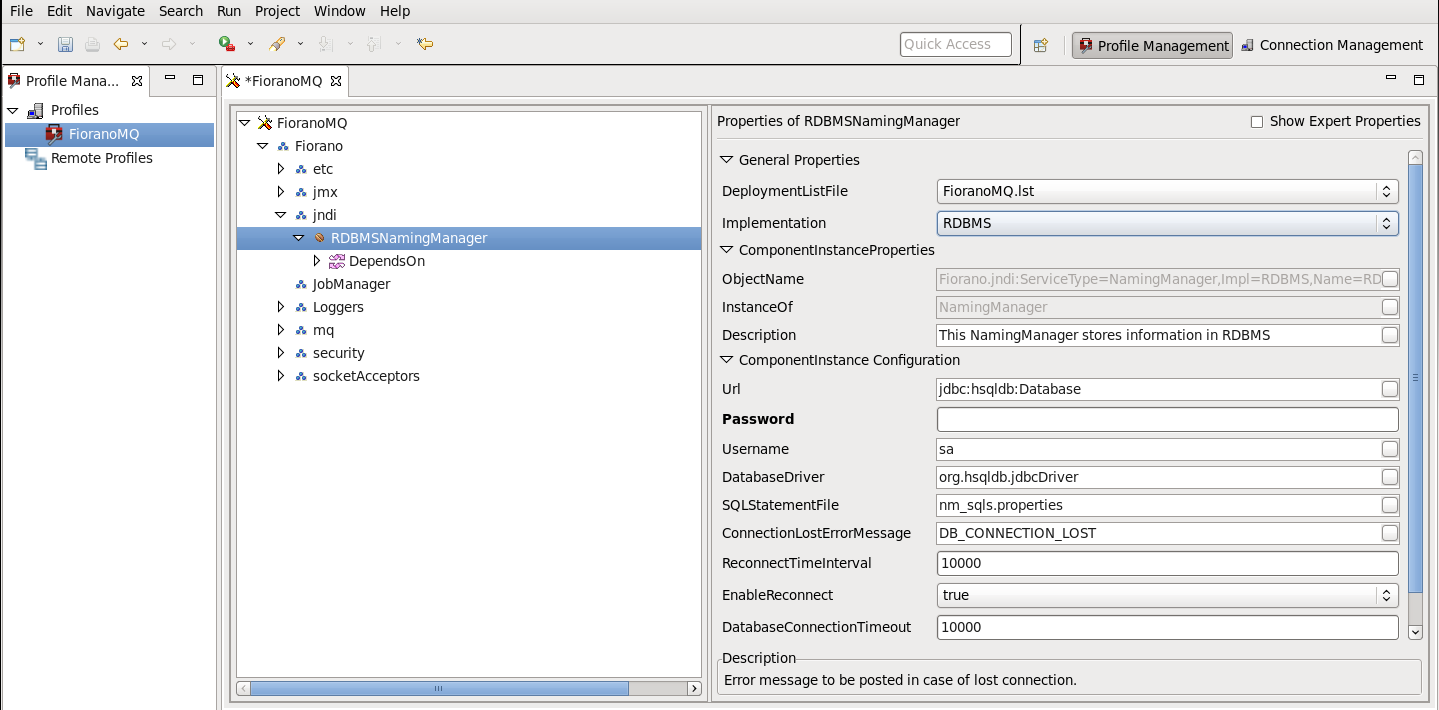
- Resolve all dependencies and save the profile.
How to Locate Component Dependency
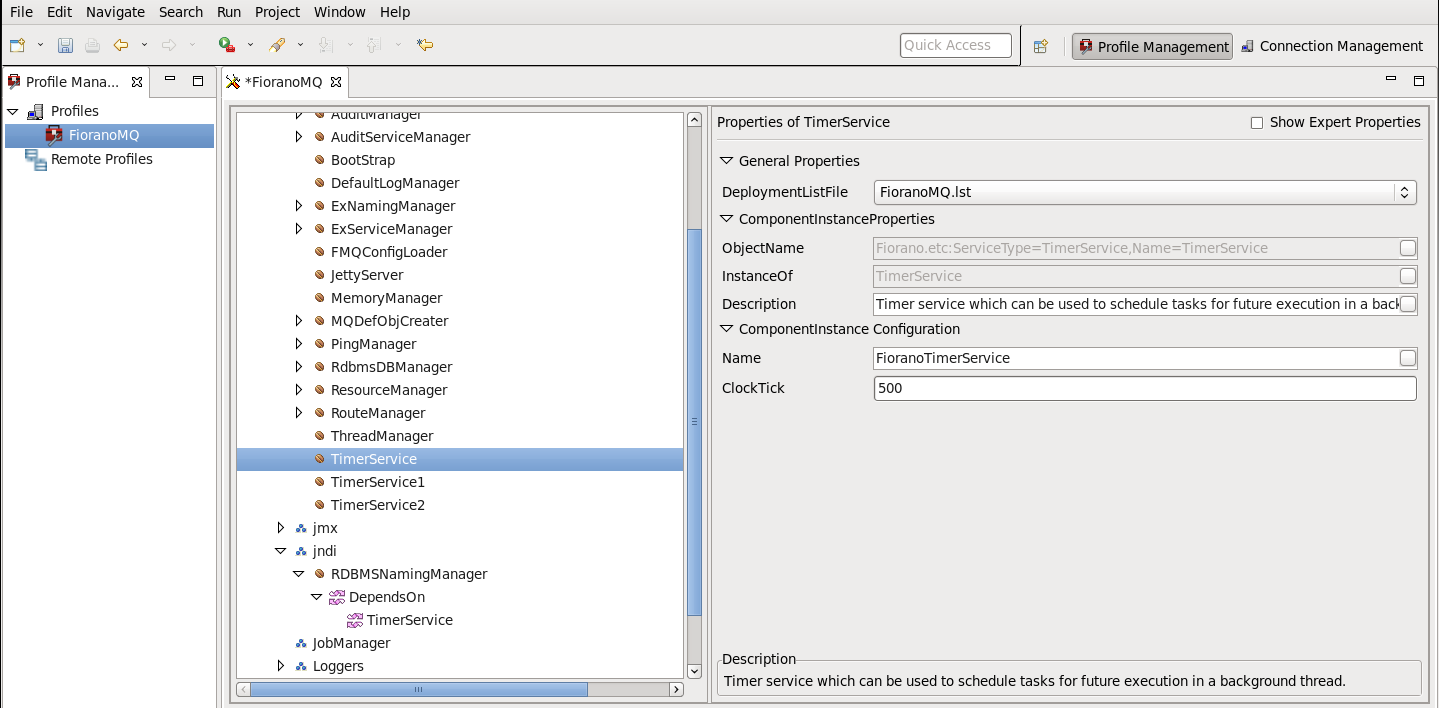
- Right-click a node corresponding to a component dependency and select the Locate in Tree option. For example, let us assume you perform this action on the node corresponding to TimerService dependency for Dispatcher instance.
- This action will select the component instance corresponding to the dependency in the Profile Manager Explorer. For instance, in this case, the selection would change to the TimerService instance that is specified as a dependency for the Dispatcher instance.
How to Find Usages for a Component Instance
- Right-click the node corresponding to the component instance for which to find usages and select the Find Usages option.
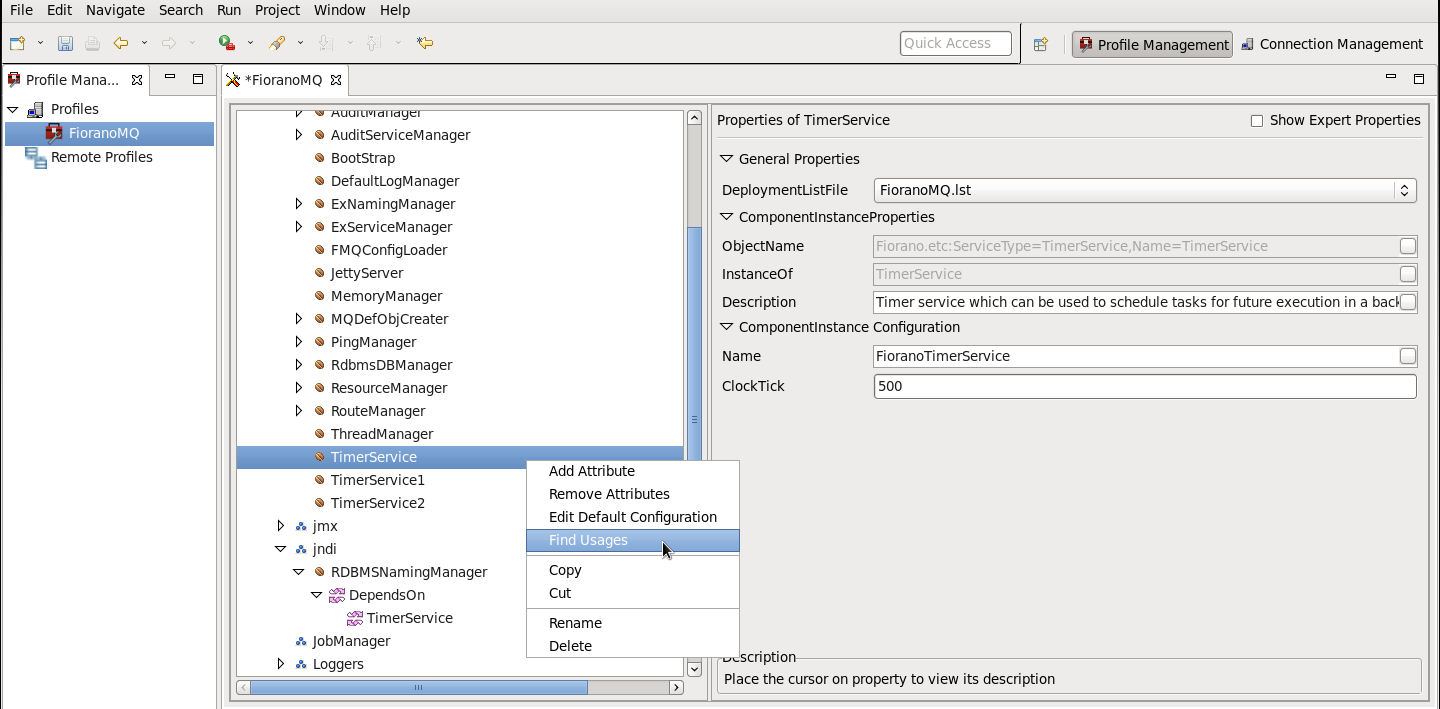
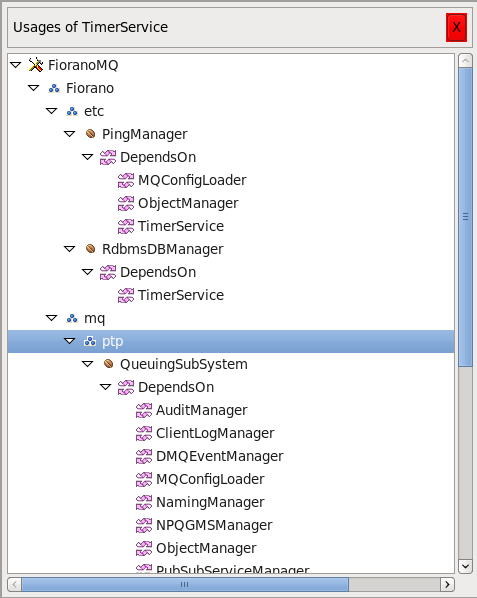
- On performing this action, a dialog box pops up displaying all component instances that use this particular instance in the profile. The instance usages of TimerService appear as shown in the figure below.
How to Validate a Profile
Right-click the profile root node (FioranoMQ) and select the Validate option.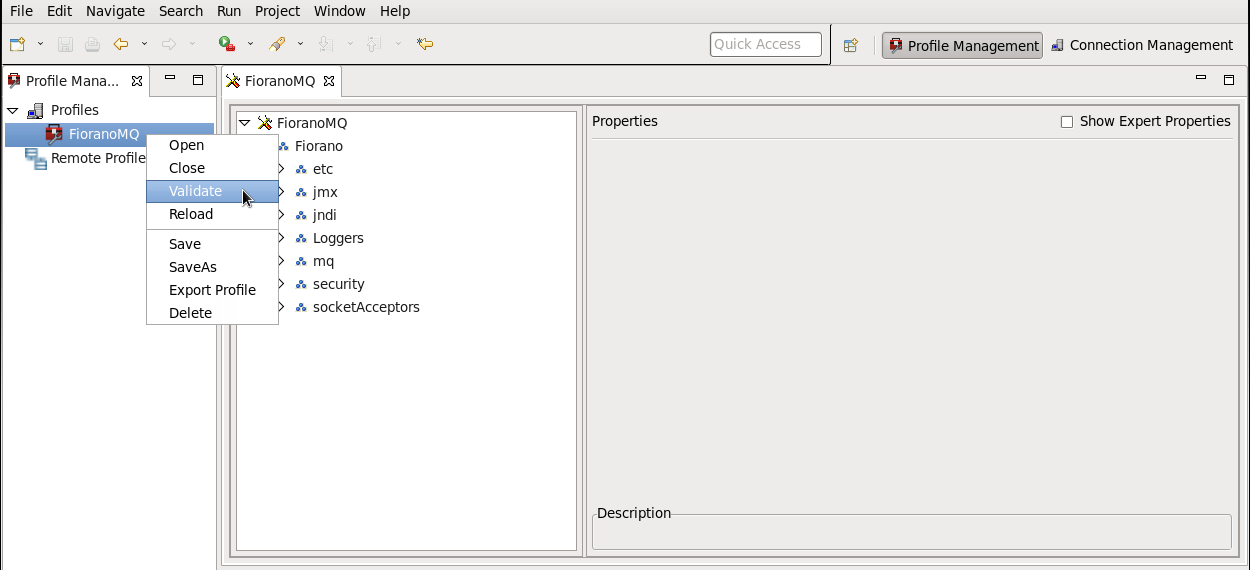
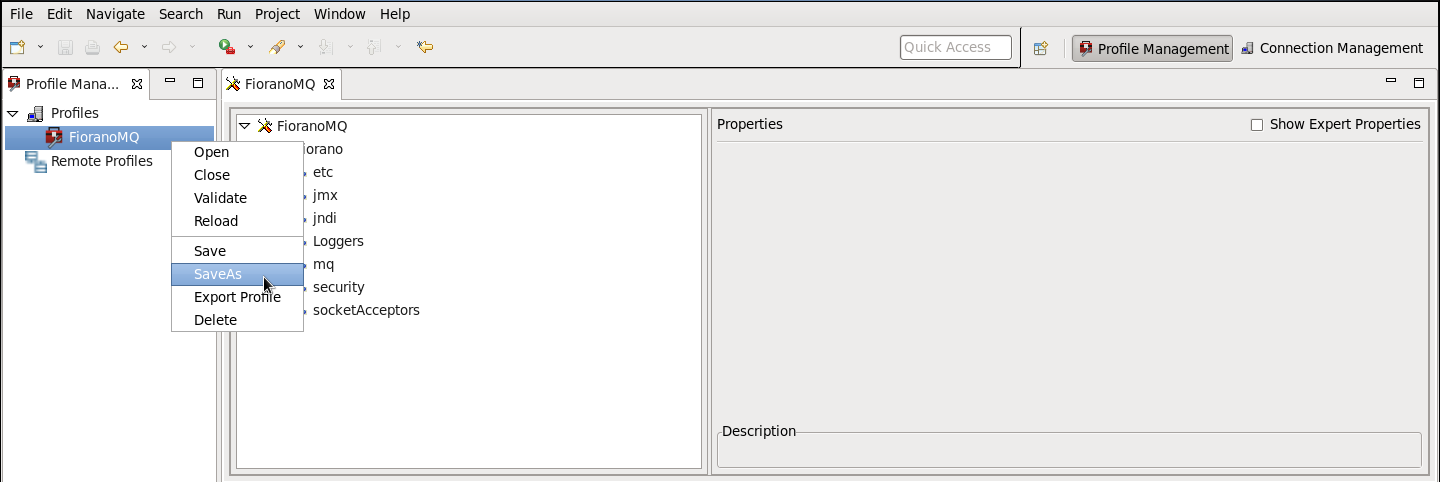
How to Save the Profile in a Different Location
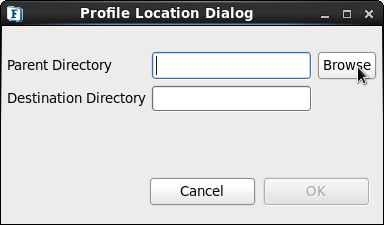
- Right-click the profile root node (FioranoMQ), and select the Save As option.
- In the Profile Location Dialog dialog box, specify the location where the profile needs to be saved. Click the Save button.
- In case a profile already exists in the specified location, a confirmation Confirm Profile Replace dialog box appears. If the user selects the Yes option, the existing profile is replaced, and if No is selected, no further action is performed.
- After the profile is saved to the specified location, a dialog box (Load Profile) appears wherein the user is asked if he wishes to load the new profile created. In case the user selects Yes, the new profile is opened, and if No is selected no further action is performed.
How to Close a Profile
Right-click the profile root node (FioranoMQ), and select the Close option. This will remove the sub-tree corresponding to the profile, from the Profile Explorer.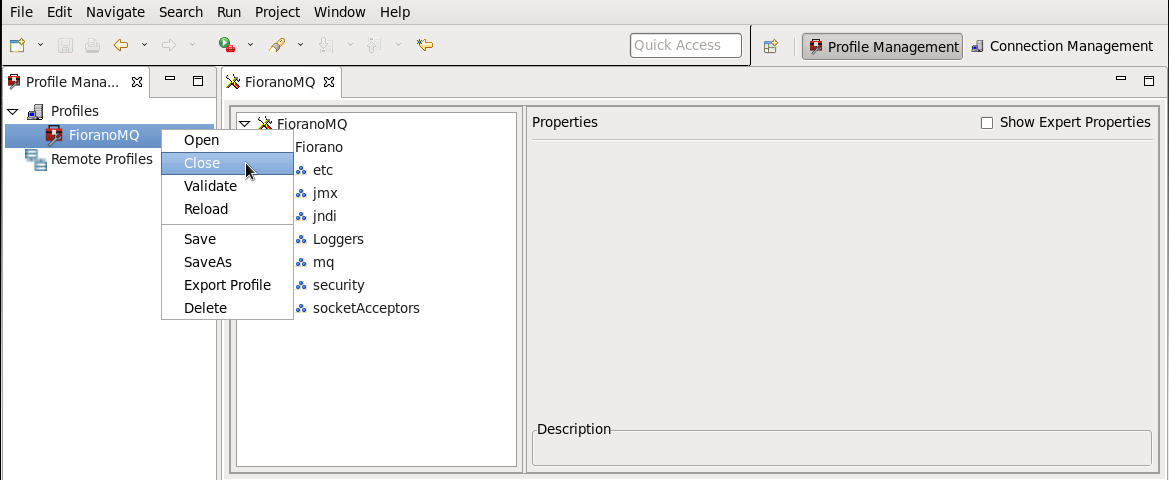
How to Add/Remove New Attributes to a Component Instance
- In the Profile Explorer, navigate to the node corresponding to the component instance to which you want to add an attribute. Right-click the node and select the Add Attribute option.
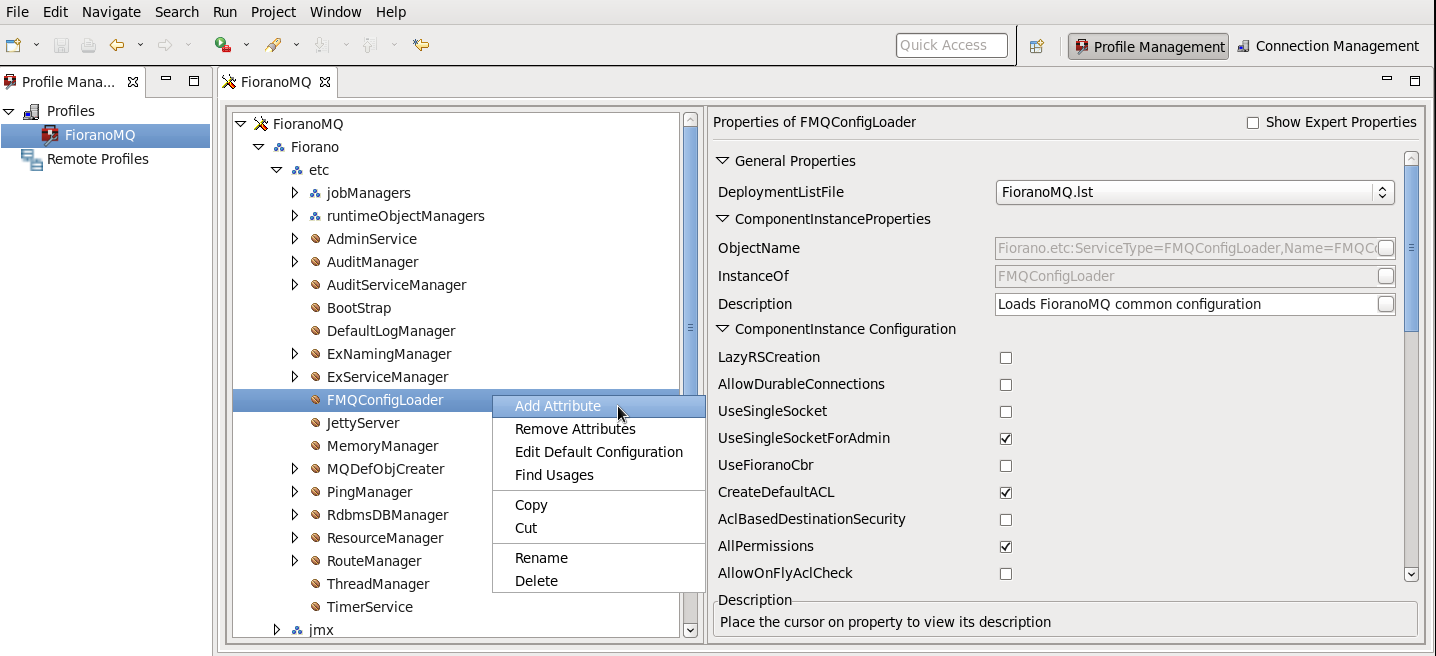
- In the Add Attribute dialog box that appears, specify the Name and Value for the attribute to be added, and Click the OK button.
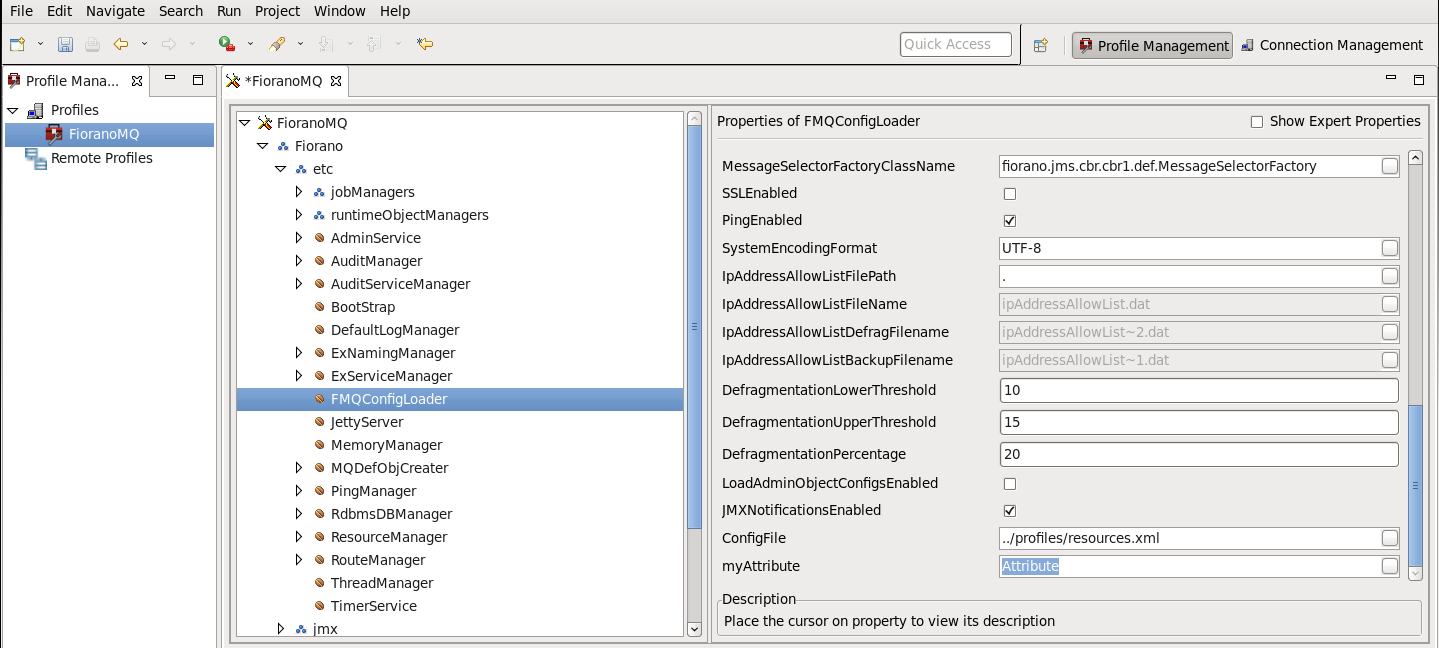
- You can see the new attribute added to the ComponentInstance Configuration parameters in the Properties window on the right.
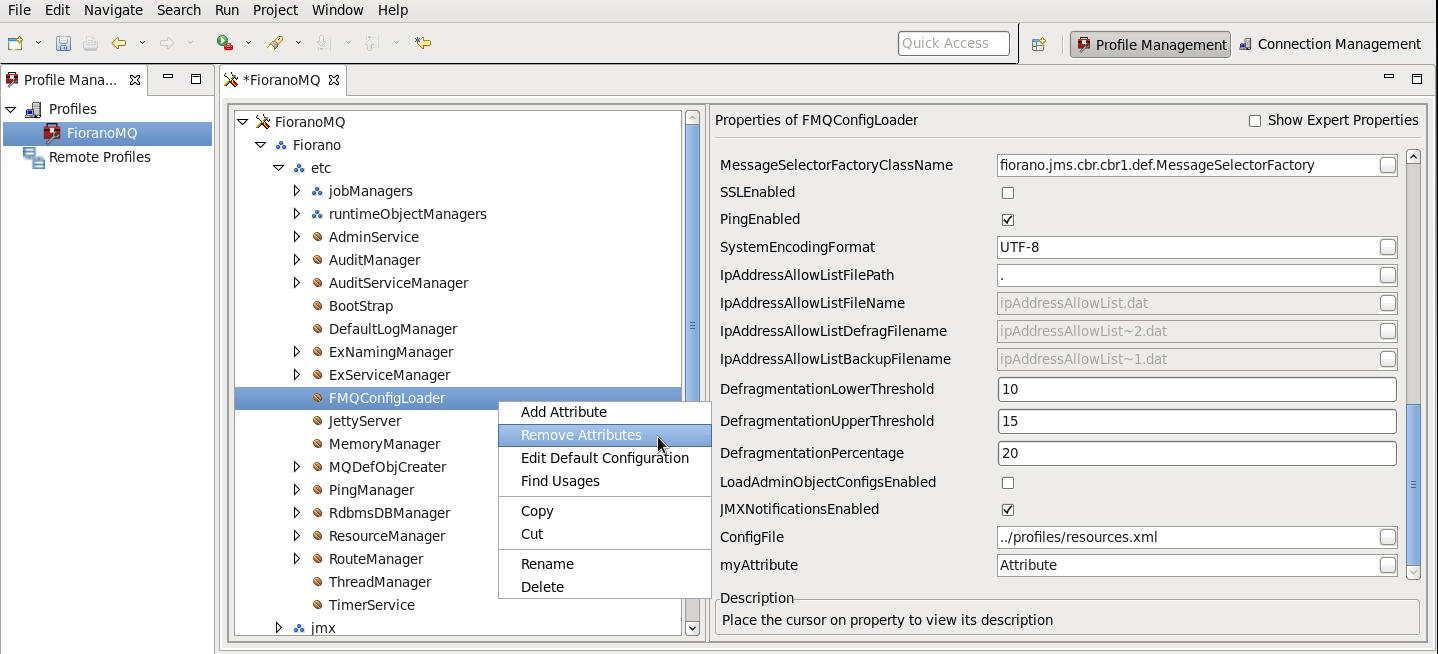
- To remove an added attribute, right-click the component instance node and select the Remove Attributes option.
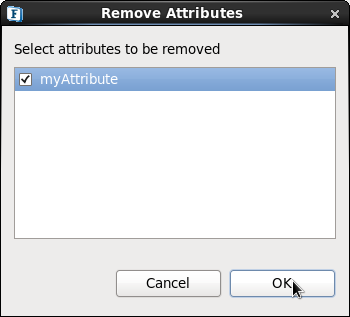
- In the Remove Attributes dialog box, select the attribute(s) to be removed and Click the OK button. The removed attribute(s) are removed from the ComponentInstance Configuration properties in the Properties window.
- After adding/removing attributes to any component instance, save the profile as described earlier.
How to Rename a Component Instance
- In the Profile Explorer, navigate to the node corresponding to the component instance to be renamed. Right-click the node and select the Rename option.
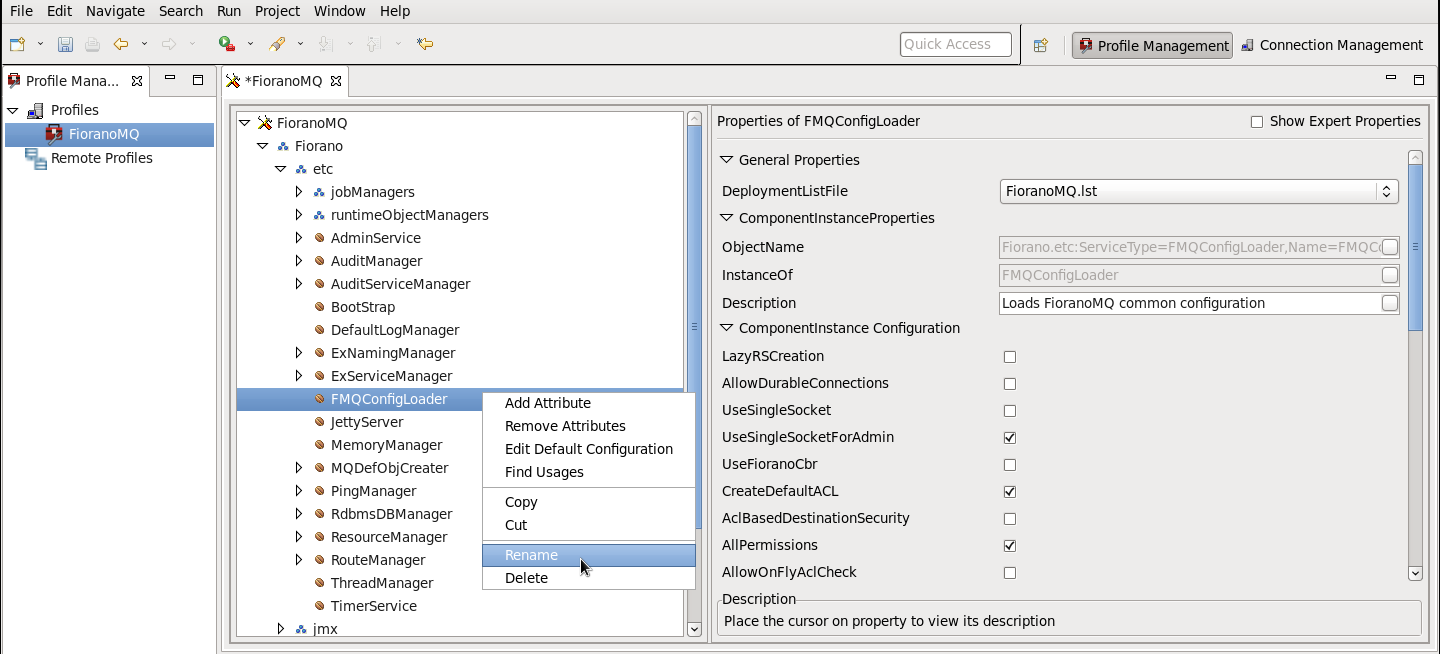
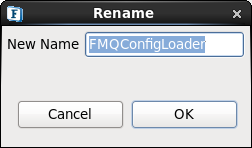
- In the Rename dialog box, specify the new name for the component instance and click the OK button.
You will see the node corresponding to the component instance, and also the ObjectName property for the instance, updated with the new name.
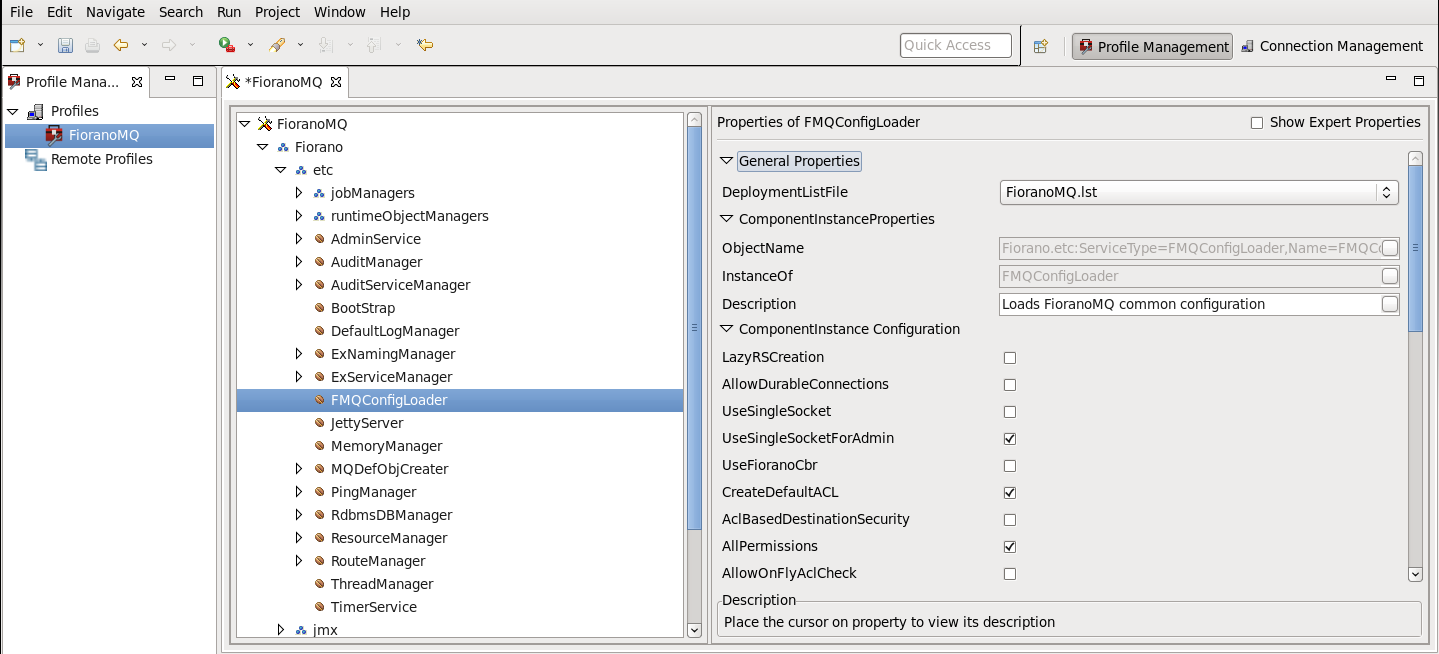
- After renaming the component instance, save the profile as described earlier.
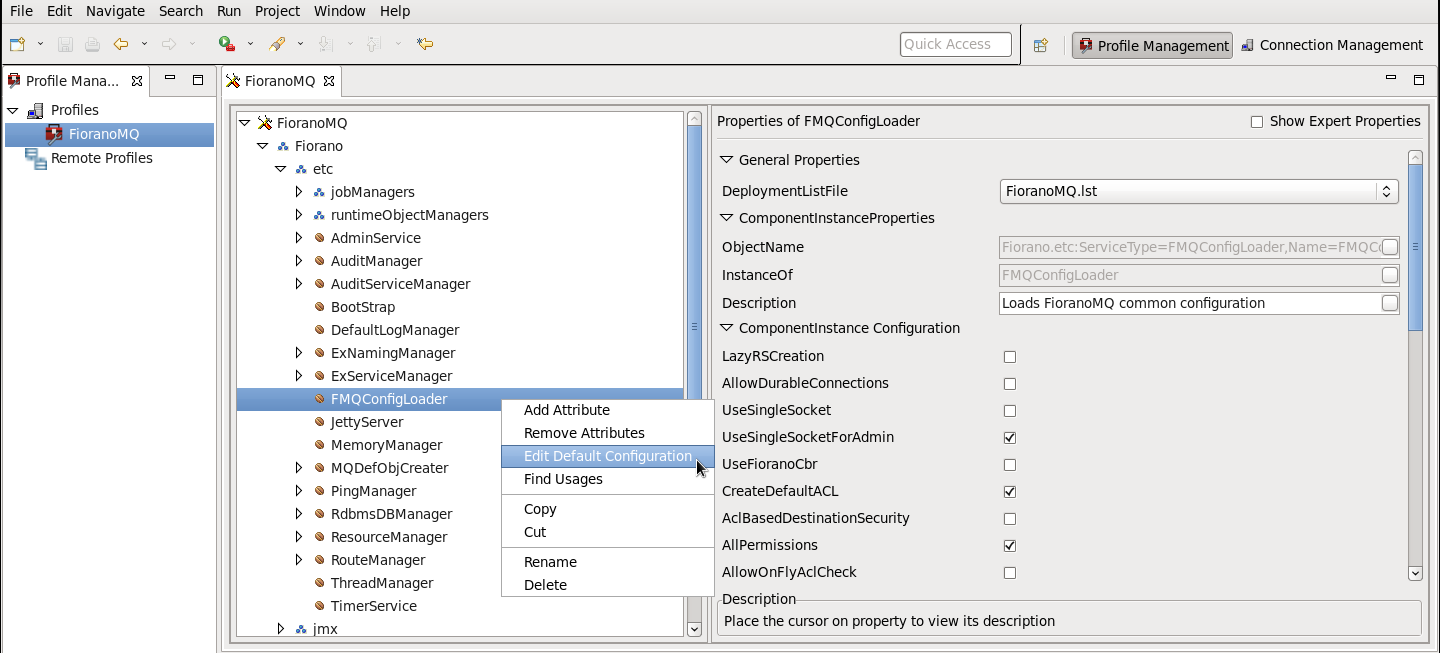
How to Edit Default Configurations for a Component
- In the Profile explorer, navigate to the node corresponding to the component for which you wish to edit the default configurations (for instance FMQConfigLoader component in FioranoMQ profile).
- Right-click the component node and select Edit Default Configuration option.
- In the Edit Default Configuration dialog box that appears, edit the properties and click the OK button.
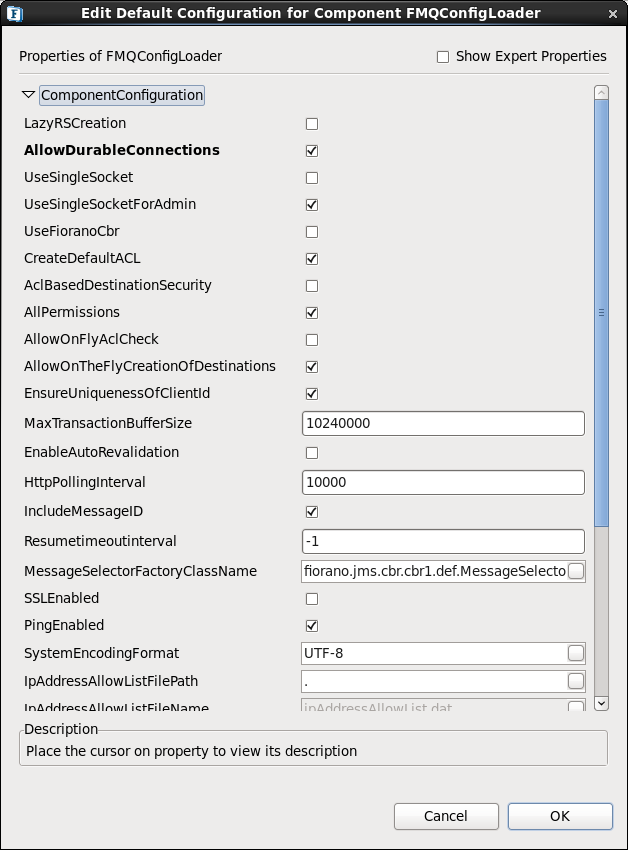
- Save the profile as described earlier.
How to Add/Remove a Domain from the Profile
- Right-click the root profile node or the domain node within which you wish to add the new domain and select the Add Domain option.
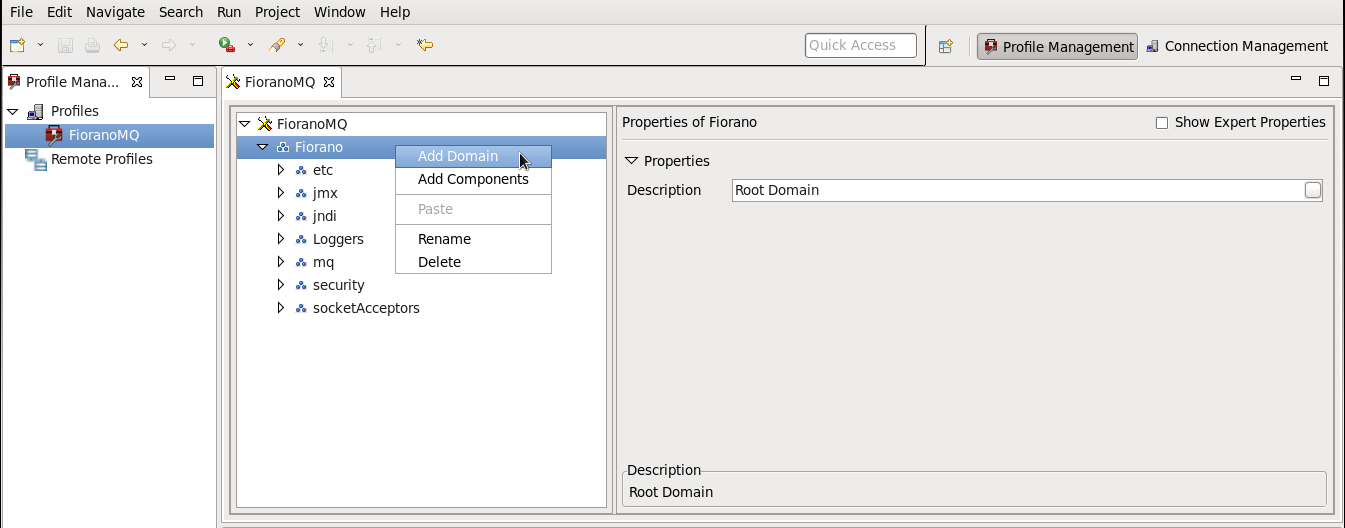
- In the Add Domain dialog box, specify the name of the domain to be added.
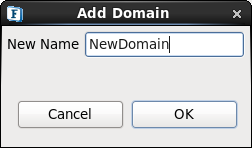
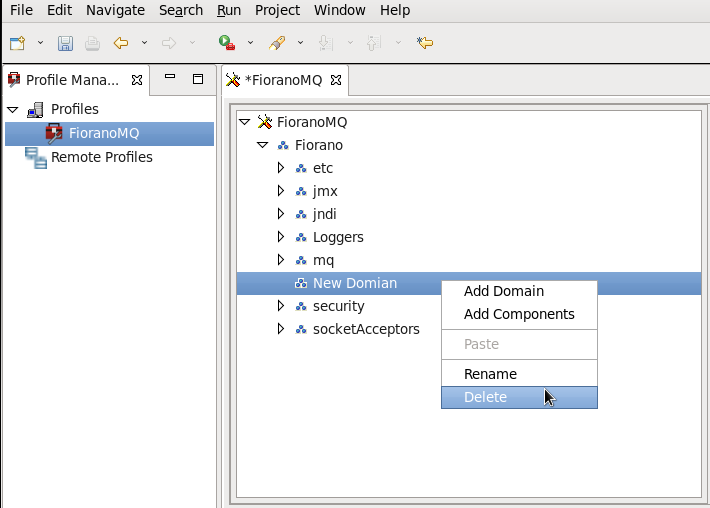
- You can see a node corresponding to the new domain in the Profile Explorer.

- To delete the newly added domain, right-click the domain and select Delete.
How to Rename a Domain
- In the Profile Explorer, navigate to the node corresponding to the domain to be renamed. Right-click the node and select the Rename option.
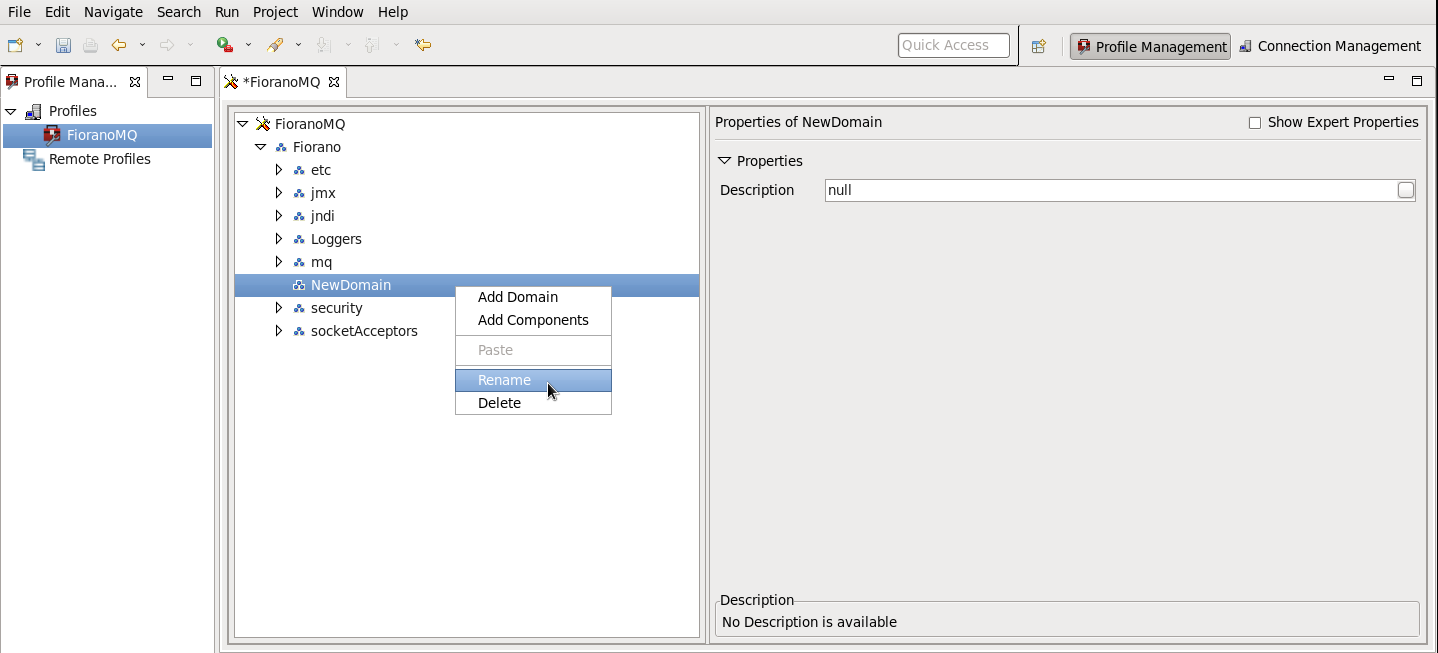
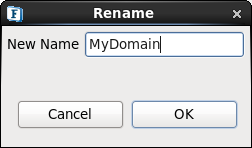
- In the Rename dialog box that appears, specify the new name for the domain and CLICK the OK button.
You will see the node corresponding to the domain updated with the new name.
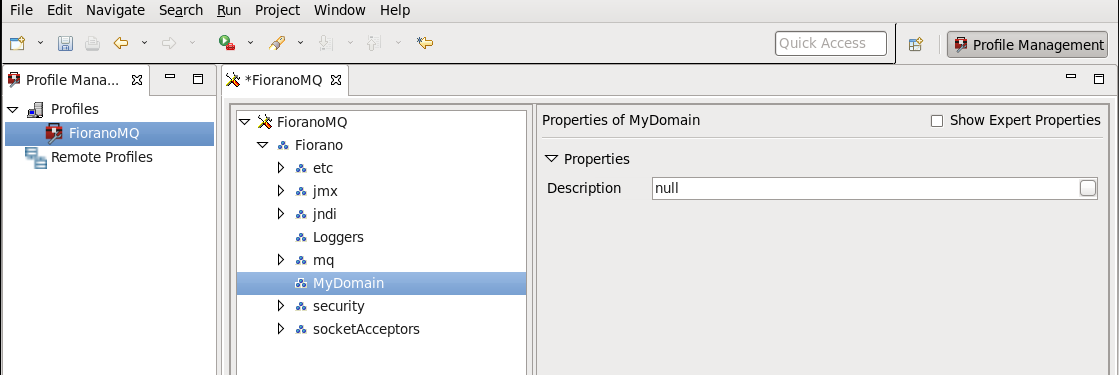
- After renaming the domain, save the profile as described earlier.
How to Edit the Profile Metadata
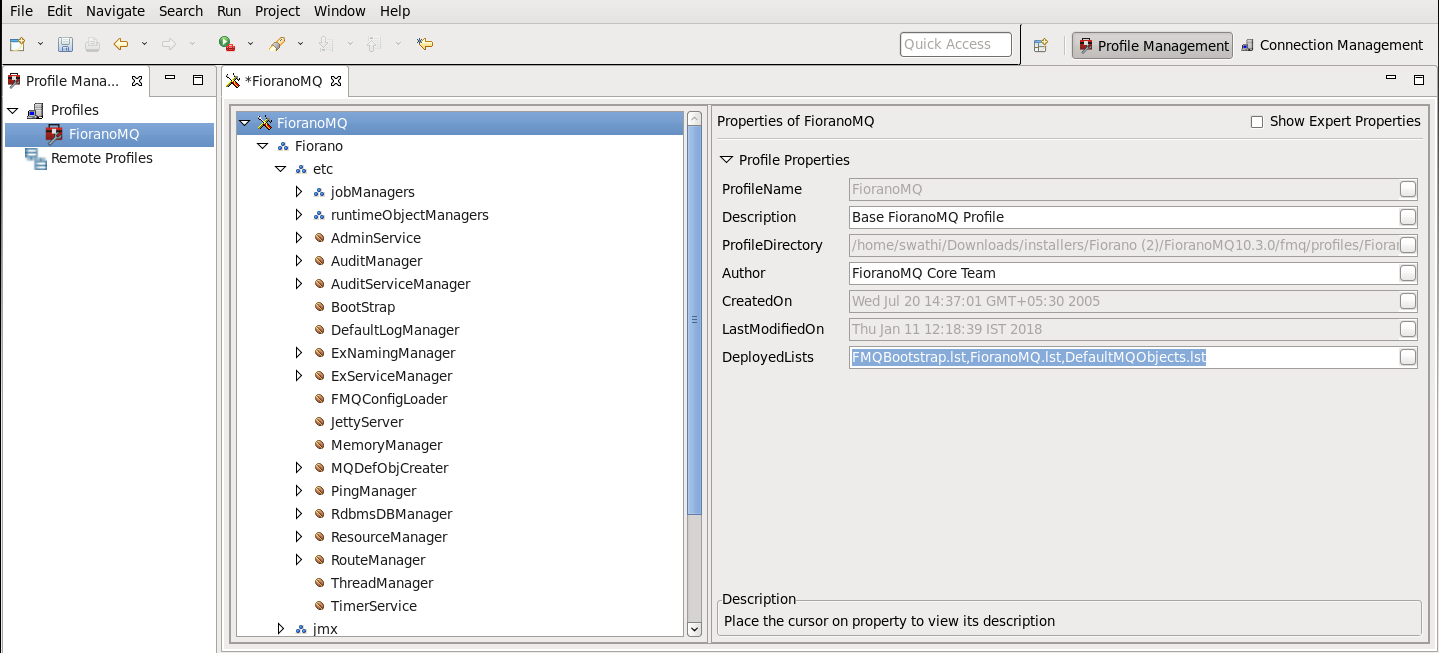
- In the Profile Explorer, select the profile root node. You can view the profile metadata in the Properties pane on the right.
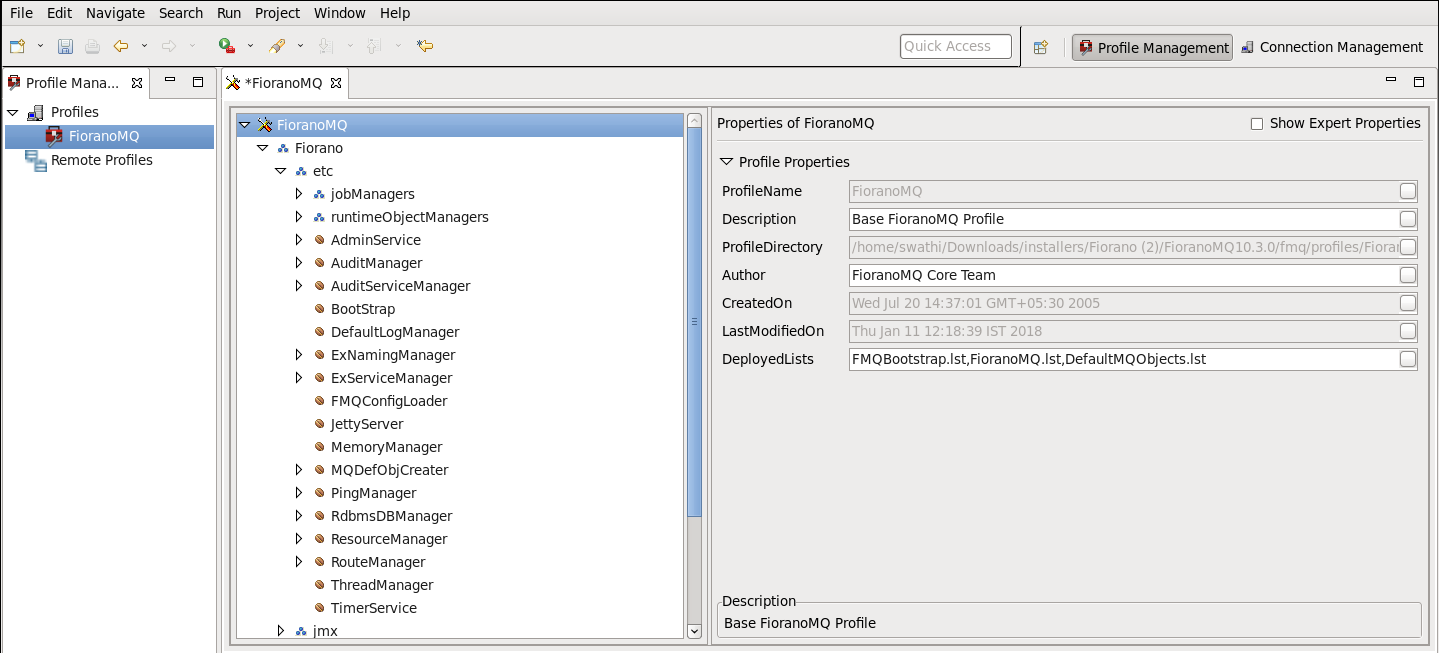
- You can edit the Profile Metadata (including ProfileName, Description, and Author) in the Properties pane.
- After editing the profile metadata, save the profile as described earlier.
How to Edit the Deployment File (deploy.xml) for a Profile
- In the Profile Explorer, select the profile root node. You can view the contents of the deployment file (Deploy.xml) in the Deployment Lists property in the Properties pane on the right.
- Click the Ellipsis button beside the Deployment Lists property value. In the editor window that appears the values may be mentioned separated by commas.

How to Export/Import a Profile
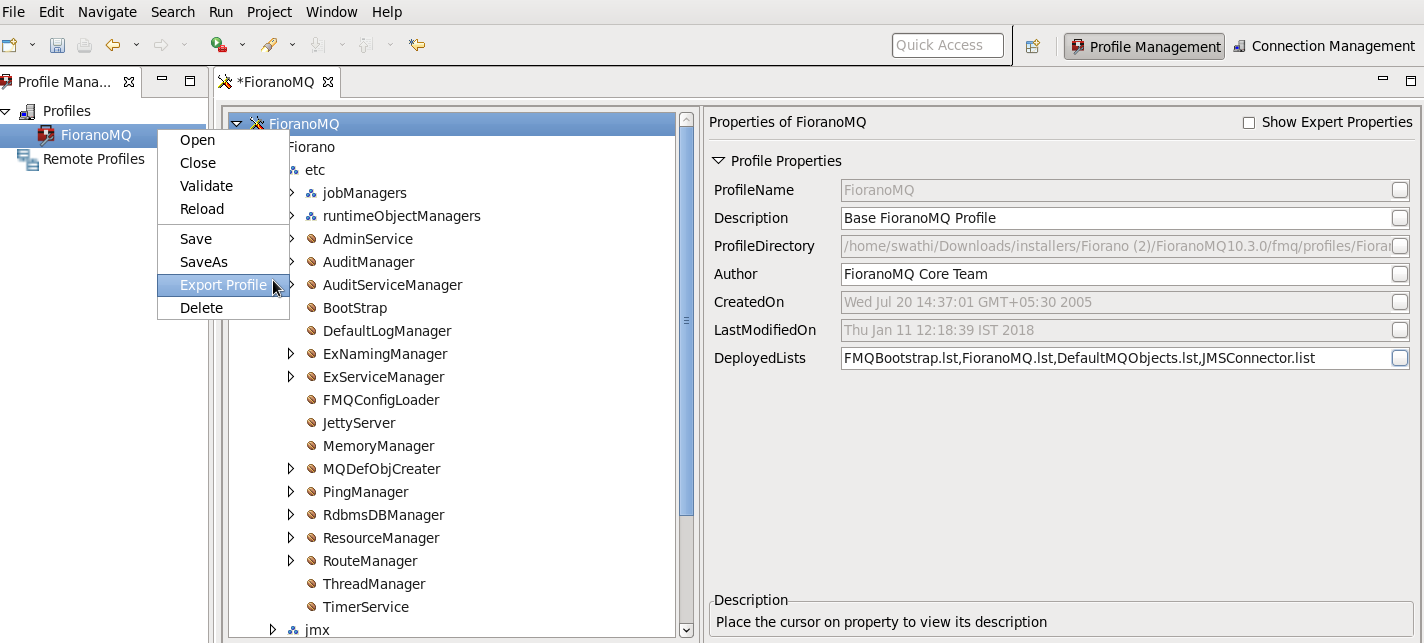
Right-click the profile root node and select the Export Profile option.
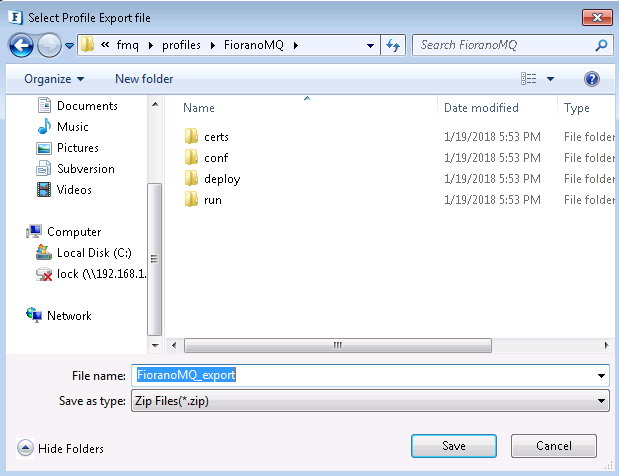
In the Select Profile Directory dialog box that appears, select the directory in which to create the profile export file and Click the Save button.
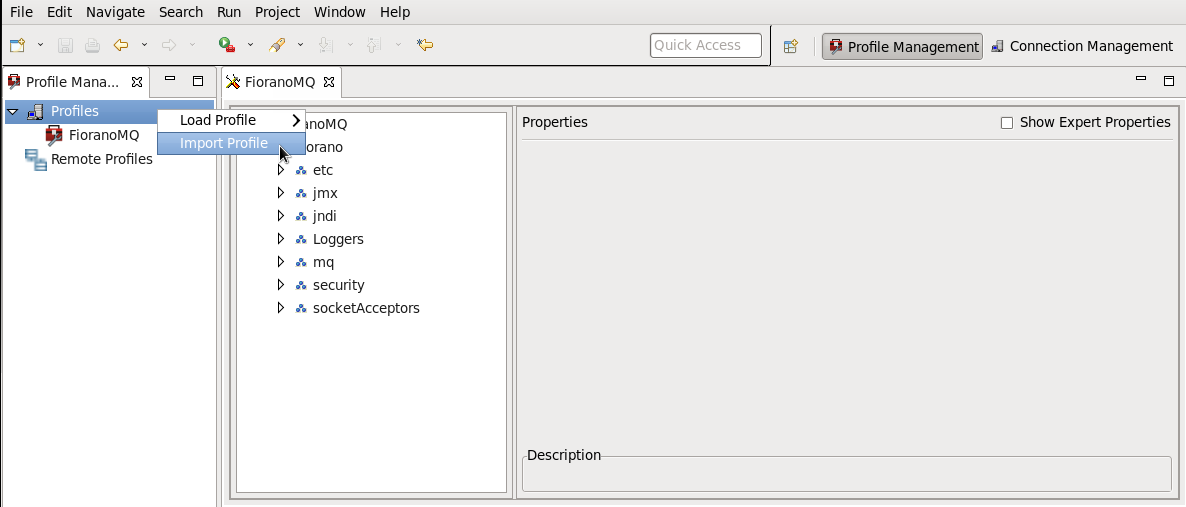
To import a profile, right-click the Profiles node in the Profile Explorer and select the Import Profile option.
In the dialog box that appears, select the profile export file and Click the Open button.
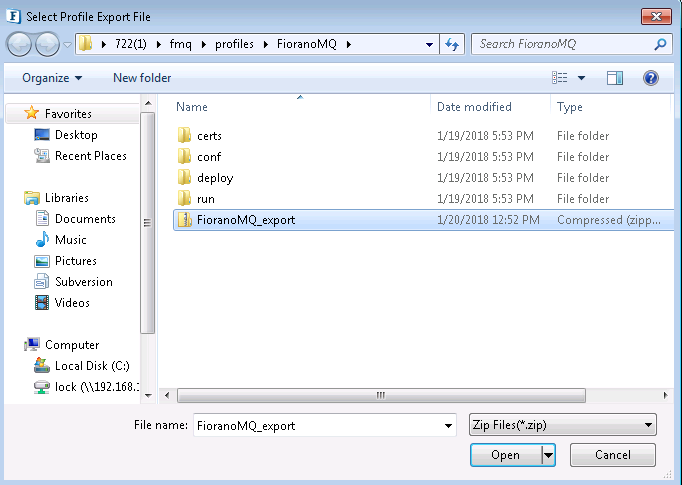
Another dialog box appears asking the user to select the target Profiles directory in which to import the selected profile. Specify the directory and Click the Open button.
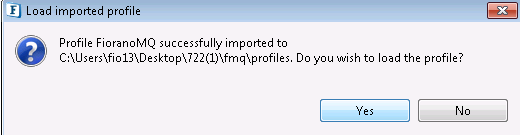
A confirmation dialog box appears asking if the user wishes to load the imported profile. On selecting the Yes option, the imported profile is loaded, and on selecting No, no further action is performed.
How to Delete a Profile
Right-click the Profile root node to be deleted and select the Delete option.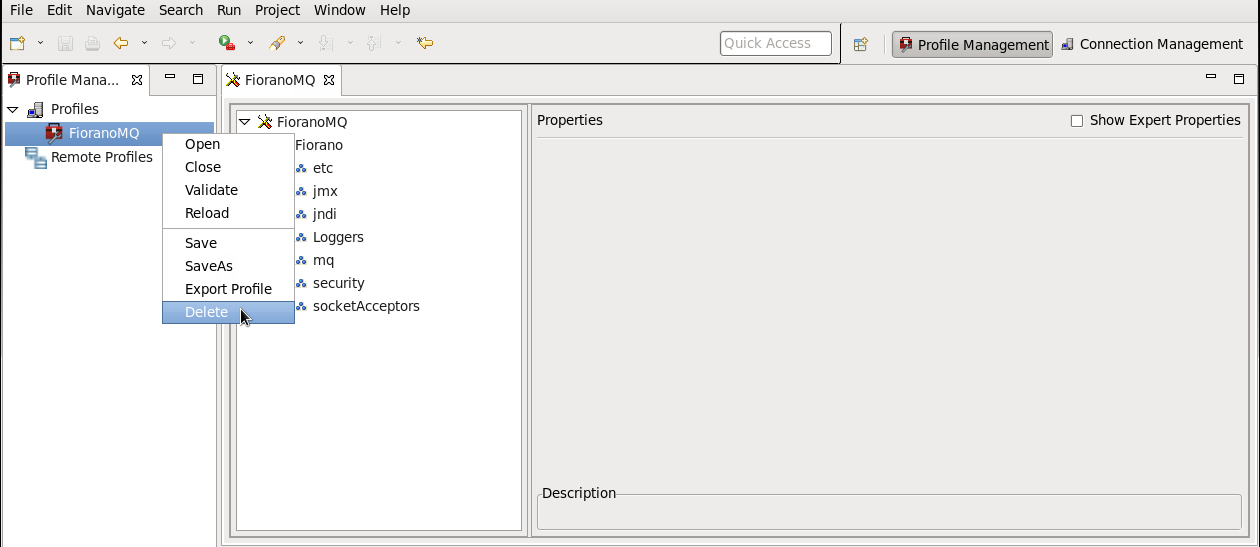
How to Mark a Socket Acceptor as Default
To mark a Socket Acceptor as a default, perform the following steps:
- Select FioranoMQ > Fiorano > socketAcceptors > port1 > ConnectionManager .
In the Properties of ConnectionManager pane, enable/disable the Default property.
How to Set Auto Update Property of All Default Connection Factories
To set the AutoUpdate property for all default Connection Factories, perform the following steps:
- Open the Fiorano eStudio, in the Server Explorer pane, right-click FMQ and click Login from the pop-up menu as shown in the following figure.
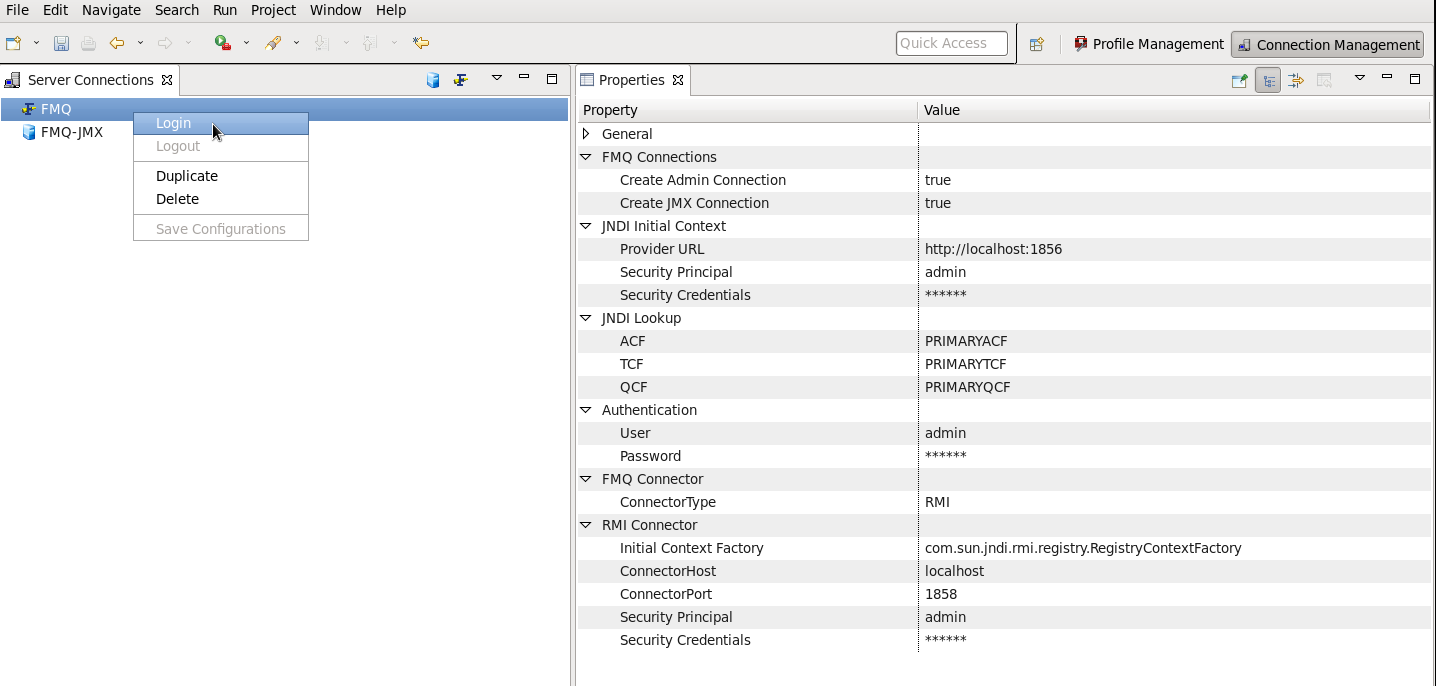
Figure: Fiorano eStudio FMQ Login
- Navigate to FMQ > Connection Factories, right-click the connection factory which you want to change, in this case, we are using PrimaryQCF, and select Edit.
The Configure PrimaryQCF dialog box appears. In the Configure PrimaryQCF dialog box, change the Auto Update property as per your requirement and click the OK button.
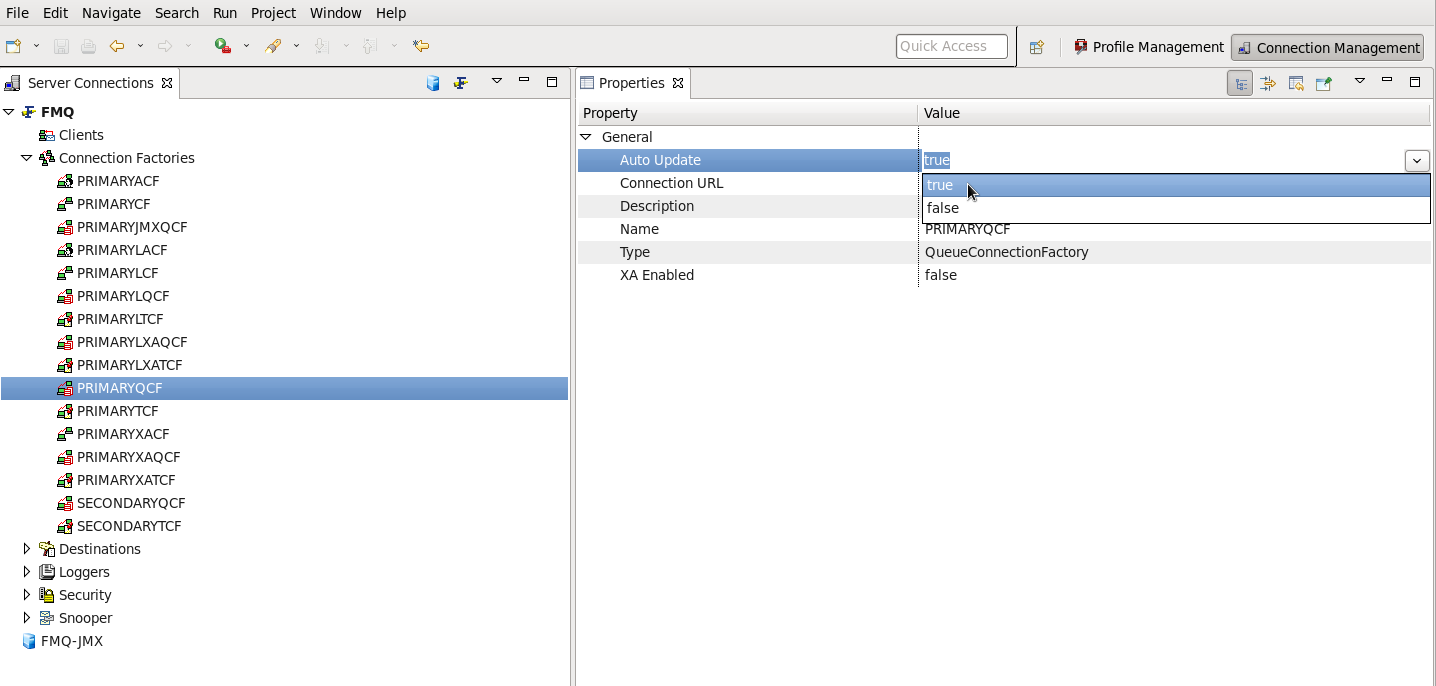
Figure: The Configure PrimaryQCF dialog box
How to Set Auto Update Property for a Connection Factory
To set Auto Update property for a new Connection Factory, perform the following steps.
- Open the Fiorano eStudio, in the Server Explorer pane right-click FMQ and click Login from the pop-up menu as shown in the following figure.

Figure: Fiorano eStudio FMQ Login
- Right-click the Connection Factories on the screen page and select Add Connection Factory.
- The New Connection Factories Properties dialog box appears. Change the Auto Update property, the default set to no.
- Click the OK button and the Auto Update property for a connection factory is set.
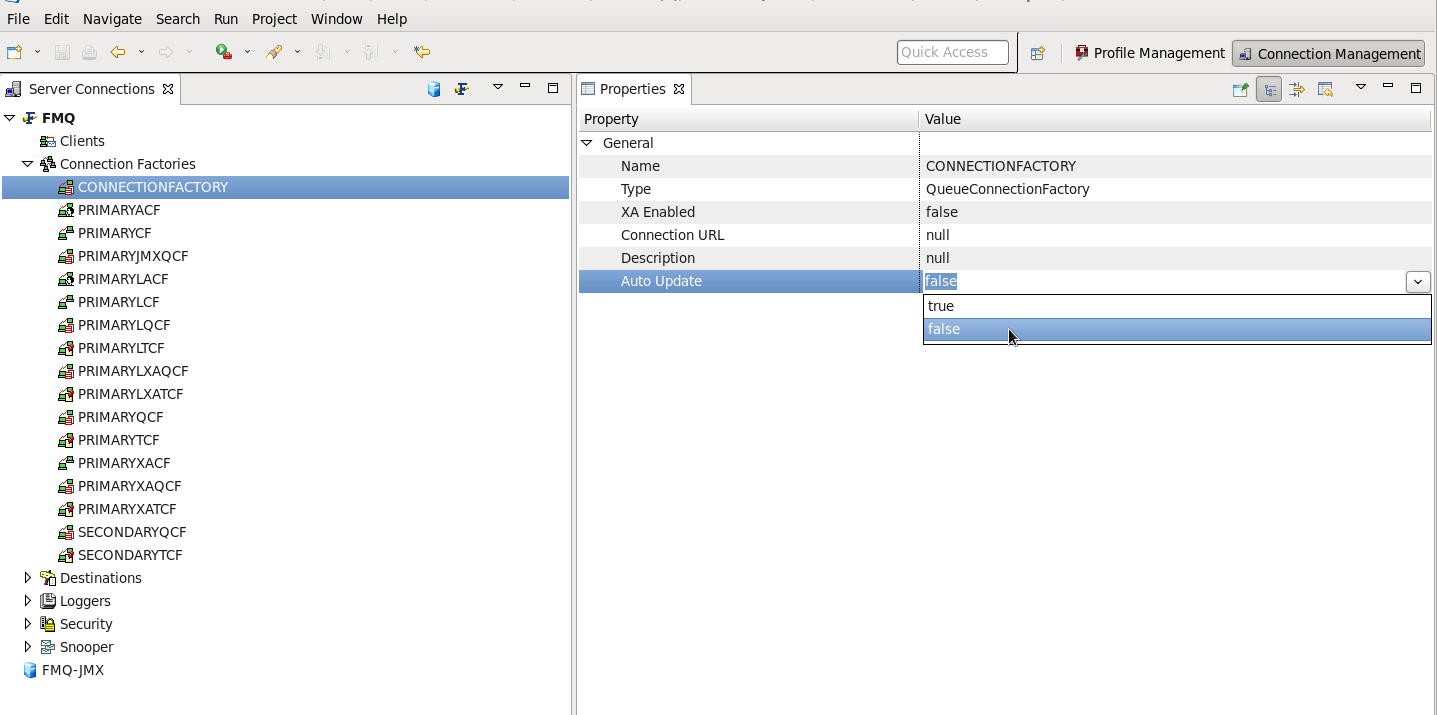
Figure: The New Connection Factories Properties dialog box
How to Start with JMS Application in Java
To start with a JMS application, firstly, you need to know how to write a JMS application. FioranoMQ has samples under <fmq_installation_dir>/fmq/samples; you can go through the samples and write your own samples. For more information, please download Java Message Service.
What are the JAR files required to compile and run the newly created JMS Application?
FioranoMQ provides three libraries, you need to put them in the classpath to run the JMS applications and they are:
- <fmq_installation_dir>/fmq/lib/client/all/fmq-client.jar
- <fmq_installation_dir>/framework/lib/all/fiorano-framework.jar
- <fmq_installation_dir>/extlib/jms/jms-2.0.jar
How to Start with JMS Applications in C
To write C applications which are compatible with FioranoMQ, please refer to the samples under <fmq_installation_dir>/fmq/clients/c/native/samples. FioranoMQ provides a whole lot of samples for C Applications for both Publish-Subscriber and Point-to-Point protocols.
What are the libraries required to compile and run the newly created C JMS Application?
FioranoMQ provides libraries, header files for C applications which should be used to compile and run the applications.
- To compile C Application:
- Header files:
- <fmq_installation_dir>/fmq/clients/c/native/include
- <fmq_installation_dir>/fmq/clients/pthread/include
- Compiler Arguments:
- For Windows:
Arguments required are /w /W0 /nologo /MD/Gd /TC /D "WIN32"
For more information, please refer to build_samples.bat under <fmq_installation_dir>/fmq/clients/c/native/scripts directory. - For Linux/Solaris:
Arguments required are -w -D_SOLARIS_
For more iinformation, please refer to build_samples.sh under <fmq_installation_dir>/fmq/clients/c/native/scripts directory.
- For Windows:
- Header files:
- To link the C Application:
- Libraries required for Windows:
- <fmq_installation_dir>/fmq/clients/c/native/lib/fmq-crtl.lib
<fmq_installation_dir>/fmq/clients/pthread/lib/pthreadVC.lib
- Libraries required for Linux/Solaries:
<fmq_installation_dir>/fmq/clients/c/native/lib/fmq-crtl.a
- Libraries required for Windows:
How to Start with JMS Applications in C++
To write C++ applications which are compatible with FioranoMQ, please refer to the samples under <fmq_installation_dir>/fmq/clients/cpp/native/samples. FioranoMQ provides a whole lot of samples for C++ Applications for both Publish-Subscriber and Point-To-Point protocols.
What are the libraries required in order to compile and run the newly created C++ JMS Application?
FioranoMQ provides libraries, header files for C++ applications which should be used to compile and run the applications.
- To compile C++ Application:
- Header files:
- <fmq_installation_dir>/fmq/clients/c/native/include
- <fmq_installation_dir>/fmq/clients/cpp/native/include
- <fmq_installation_dir>/fmq/clients/pthread/include
- Compiler Arguments:
- For Windows:
Arguments required are /w /W0 /nologo /MD/Gd /TP /D WIN32 /GX
For more information, please refer to build_samples.bat under <fmq_installation_dir>/fmq/clients/cpp/native/scripts directory. - For Linux/Solaris:
Arguments required are -w -D_SOLARIS_
For more information, please refer to build_samples.sh under <fmq_installation_dir>/fmq/clients/cpp/native/scripts directory.
- For Windows:
- Header files:
- To link the Cpp Application:
- Libraries required for Windows:
- <fmq_installation_dir>/fmq/clients/c/native/lib/fmq-crtl.lib
- <fmq_installation_dir>/fmq/clients/cpp/native/lib/fmq-native-cpprtl.lib
<fmq_installation_dir>/fmq/clients/pthread/lib/pthreadVC.lib
- Libraries required for Linux/Solaries:
- <fmq_installation_dir>/fmq/clients/c/native/lib/libfmq-crtl.a
<fmq_installation_dir>/fmq/clients/cpp/native/lib/libfmq-native-cpprtl.a
- Libraries required for Windows:
How to Start with JMS Applications in C#
To write C# applications which are compatible with FioranoMQ, please refer to the samples under <fmq_installation_dir>/fmq/clients/nativecsharp/samples. FioranoMQ provides a lot of samples for C# Applications for both Publish-Subscriber and Point-To-Point protocols.
What are the DLLs required in order to compile and run the new created Csharp JMS Application?
FioranoMQ provides Dynamic Link Library (DLL) file for C# applications which should be used to compile and run the applications.
- To compile and run C# Applications:
DLL file: