Fiorano provides a complete GUI based approach to define, build and deploy components from Fiorano Studio. In this section, the different wizard steps of the configuration wizard are explained. Specific details with respect to language are mentioned in the respective sections.
Creating a new Microservice
To create a new microservice, go to Tools > Create Service Component to open the Micro Service Creation Wizard (Figure 2).

Figure 1: Menu containing Create Service Component action
All the details related to the creation of a new microservice must be specified in this wizard. Various steps in microservice creation are illustrated below.
Microservice Location
This is the location where the component source code and other required files to be generated has to be saved.
- Parent Directory: Provide the absolute path where the folder has to be saved, for example, D:\New\Services
Destination Directory: Provide the name of the folder to be saved under the above location.
A new folder with the name specified for Destination Directory will be created in the Parent Directory specified, which will be the final location for the microservice files generated by the wizard.

Figure 2: Service Location Panel in the Micro Service creation wizard
Basic Details
This panel allows you to specify the type of component to be created and identification details
of the component to be used in the tools.
- Service Guid: Provide a name using which the system uniquely identifies the microservice.
- Name: Display name for the component. It is typically different from the Service Guid and is the name displayed by the Fiorano eStudio for this Component.
- Version: This value will be pre-populated and it can be edited as well.

Figure 3: Basic Details panel
- Category: The components that are registered in the Enterprise Server are categorized under different categories for easier maintenance as seen under the Micro Service Palette. In the Category field, a new Category name can be provided for the component or an existing Category can be selected from the available categories by clicking the button against the property. Existing Categories can be viewed by clicking the ellipsis button that appears against the Category field. On clicking ellipsis, the Category Selection dialog box appears as shown in the figure below. Multiple Categories can also be selected in the dialog box. The components are shown as grouped under the category they belong to in tools; figure below illustrates the organization of categories in Fiorano eStudio

Figure 4: Category Selection dialog box - Generate Source: Used to generate sources for various languages and the option Assemble From Binary is used to create System Libraries.
- Source Language: By default, this option is set to 'JMS'; other options are:
- JCA
- C
- CPP
- CSharp

Figure 5: Source Language options
- is CCP enabled
- If enabled, component listens, understands and responds to control events from Peer Server. It allows components launched as a separate process to cleanup when stopping.
If disabled, the component does not handle control events from the Peer Server. The Peer Server will not send any control event to the component. Component launched in a separate process is issued a destroy command to stop and the component process will be killed instantly without any cleanup.
Ports Information
Data transfer among components is done over JMS. So the components require data channels to receive the request and send the results. These data channels are called ports. Ports are MS destinations; either topics or queues. A component can have any number of input ports and output ports. The port details are configured in this panel.
A new port can be added by clicking the Add button. By default, Port Type is 'Inport'. The Port Type and other port properties can be changed in the Wizard as required.

Figure 6: Ports Information
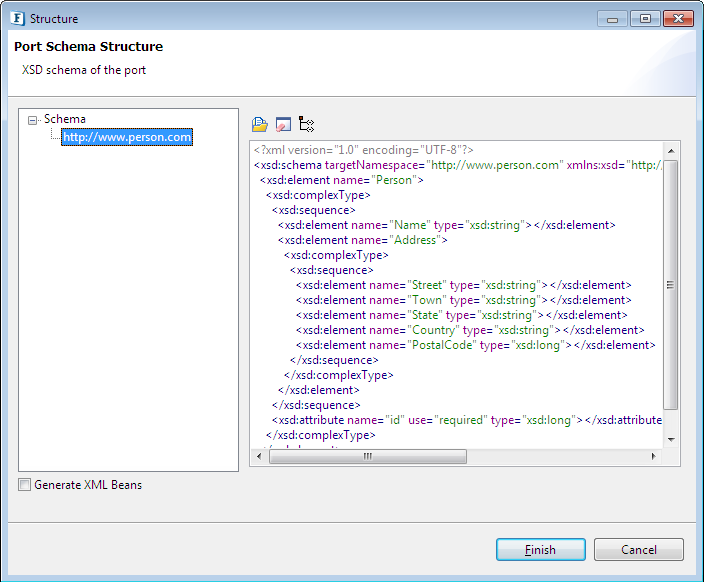
Port Schema Structure
If the component expects or sends out messages in XML format, specify the DTD/XSD the message should be compliant. It can be used as an assertion to make sure that the component receives the message in the format it expects or that it sends out the message in the format it is supposed to be sent. Fiorano eStudio checks for the format mismatches when the components are connected by a route and intimates them.
To provide schemas for the component ports, select the row of the respective port and click the Edit button; Structure window pops-up where the schemas and external schemas (if any) can be provided. Provide a valid schema by loading from a file or copying/typing-in.

Figure 7: Schema Editing Window

 button helps to remove the schema from the text area.
 button helps to beautify the schema added.
Upon adding a valid schema in the text area, root element(s) will get auto populated. Click the Root Element drop-down to select the root element; Finish button gets active.

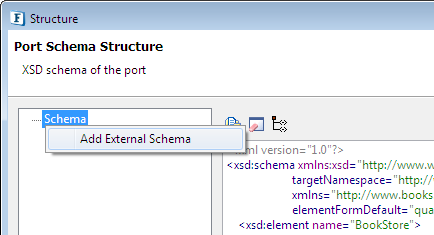
External Schema
To provide external schemas, right-click the Schema node and click Add External Schema option. Follow the same method followed for adding schemas. Upon adding a valid schema, the root element name appears under Schema node replacing the text 'External Schema'.
|

|
|
Figure 9: Adding External Schema
Generate XML Beans
This is an option to generate model objects based on the port schemas, that is, it generates Java classes from the XSDs that are provided for ports. The developer of a custom component can use these to access the input data and generate the output without bothering about input message parsing and output XML generation. The schemas for which this option is selected are stored in schemasForXMLBeans folder in the component directory.
Resources
Any component created in general requires resources –third party libraries, Fiorano libraries or other files – required at the time of component configuration or execution.
The resources required by the microservice (either during configuration time or runtime) can be added in this panel. Resources can be of any file type which is used by the component; there is no restriction on the type of file. Typically, resource files are of types – dll, zip, jar, so, exe.
The server makes a local copy of these files in the component repository (%FIORANO_HOME%\esb\fes\repository\components). So the same file added as a resource to two different components is copied into respective folders of both the components. Also when these components are launched in-memory of same peer server, resources are loaded into the respective class loaders of the components.
Resources can be added or removed using Add and Remove buttons respectively.

Figure 10: Resources panel
Dependencies
Resources and dependencies both serve the same purpose; providing the component with libraries or files required. However, they differ in the way these files or libraries are treated by Fiorano servers.
Dependencies are predefined. Every component or system library registered can be added as a dependency. The dependencies are referenced from the existing location and are not copied locally into the component folder.
- To Add: Select the dependency on the left side of the page and move it to the right side.
- To Remove: Select the dependency on the right side of the page and move to the left side.

Figure 11: Dependencies panel
Log Modules
Logging is a practice of writing out the messages indicating the state of the component, actions performed and any other related data. Logging is used for different purposes including:
- Notifying users of important actions/changes or problems (exceptions/errors) that occur during runtime
- Aiding developers in debugging the application
- Understanding the flow of data among different Method calls
For each of the above purpose, the data and the details that should be logged vary. Log levels help in meeting the needs of different users.

Figure 12: Log Modules Panel
Execution Information
This panel allows the user to specify the execution details of the component. A component, while executing, might require parameters to execute different request or details for handling different requests. There are two ways of passing this information to the component:
- By configuring the details in the Configuration Property Sheet of the panel (discussed in Component Configuration section)
- By defining the command line arguments that can be passed to the component during the launch of the component. These command line arguments are captured as runtime arguments in this panel.

Figure 13: Execution Information panel
Advanced Information Configuration
This panel has the following properties:
| Property | Description |
|---|---|
Supports Error Handling | Enabled - Error port is shown when 'Show Error Ports' is selected |
Supports Failover to another Peer Server | Enabled - When the Peer Server on which component is running goes down, the component keeps running on the next available Peer Server. |
Supports Manual Launch | Enabled - Component can be launched in 'Manual' mode |
Supports Inmemory Launch | Enabled - Component can be launched in 'In Memory' mode |
Generate Fiorano Installation as classpath variable | Enable this to generate Fiorano Home as an eclipse variable instead of a hardcoded path In the eclipse build files generated for the component. You have to define the variable 'FIORANO_HOME' and assign it to specific Fiorano Installation directory. The .classpath file will pick up the required libraries from the specified location. |

Figure 14: Advanced Configuration panel
Finishing Creation
Click the Finish button (see the figure above) to complete the process of creation; an Import Service dialog box appears. Click Yes to import the service files to the workspace and deploy the service right away.

Figure 15: Import Service dialog box to import to workspace
Importing Service on a later stage
Click No (see the image above) if you choose to open the project at a later point of time.
To import the service as a project into the workspace, perform the following actions:
- Open Project Explorer view using any one of the following ways:
- Navigating through Window > Show View > Other > General > Project Explorer
- Click Show View as a Fast View
 icon and navigate through Other > General > Project Explorer
- In the Project Explorer view, right-click and select Import. Import wizard pops up.

Figure 16: Importing Service to workspace from Project Explorer
- Expand General node, select Existing Projects into Workspace option and click Next.

Figure 17: Navigating to existing projects
- In the Import Projects panel, click Browse button to select the location where the service(s) was saved and select the projects added under Projects section. Click Finish.

Figure 17: Browsing the location and selecting the projects to import
When the wizard is finished, sources are generated in src directory which would be placed under the folder specified in the Service Location page. It also creates necessary files to build and deploy the components.