Below sections illustrate how to configure and use GIT version control in eStudio:
Table of Contents
...
Open eStudio and perform the following operations:
...
| Panel | ||
|---|---|---|
| ||
|
Integrating GIT into eStudio
- Close eStudio if it is opened and go to <FioranoInstaller>/eStudio folder.
- Open the eStudio.ini file and take a backup of the value stored in "-Djavax.net.ssl.trustStore" and replace the value with cacerts in java folder.
- Windows: <FioranoInstaller>\jre1.8.0_121_64\lib\security\cacerts
- Linux: <JAVA_HOME>/jre/lib/security/cacerts
- Open terminal in <FioranoInstaller>/eStudio folder and start eStudio using
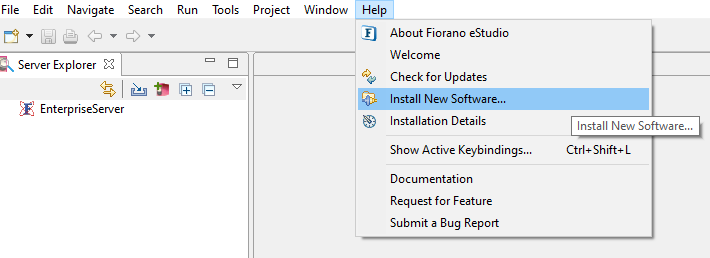
eStudio.exe -cleancommand. - Go to the Help menu and click the Install New Software option to open the Install New Software the Installation wizard.
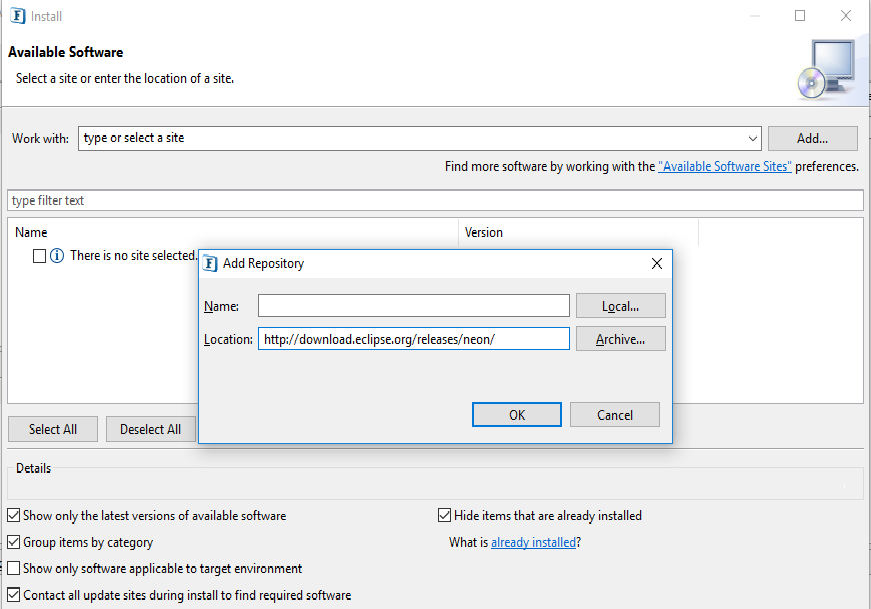
- Click the Add button and provide the URL URL "http://download.eclipse.org/releases/neon/ in " in the Add Repository dialog box and click OK.
Note The Name text box may be left blank.
Select the
- Select the Eclipse Plug-in Development Environment option under the General Purpose Tools name name and click Next twice.
- Accept the Licence agreement License Agreement and click click Finish.
- When the installation is done, restart eStudio as it prompts to do so.
- Open the Install New Software Installation wizard and , add "http://download.eclipse.org/egit/updates-2.3/. Select all features except EGit Plug-in Import Support and click Finish.
/" and select all fields.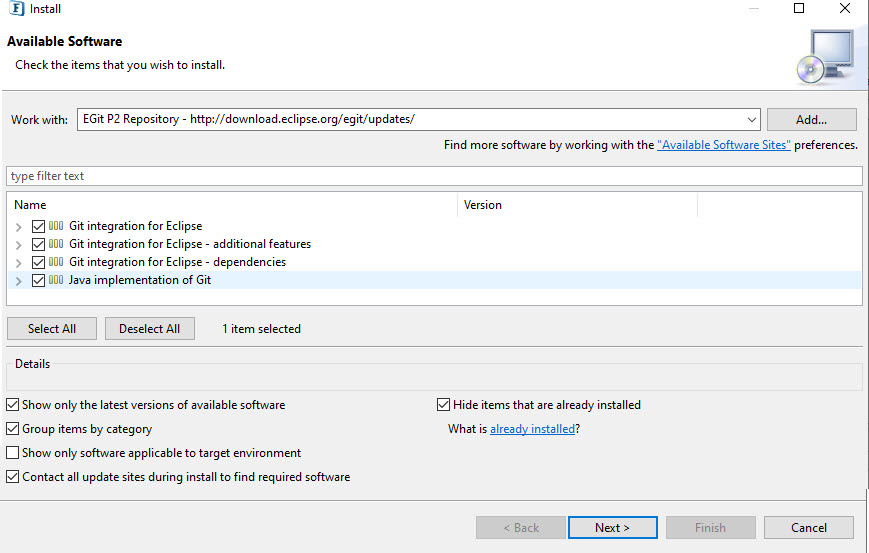
- Click Next twice, agree to agree to the License Agreement, click Finish, and restart .
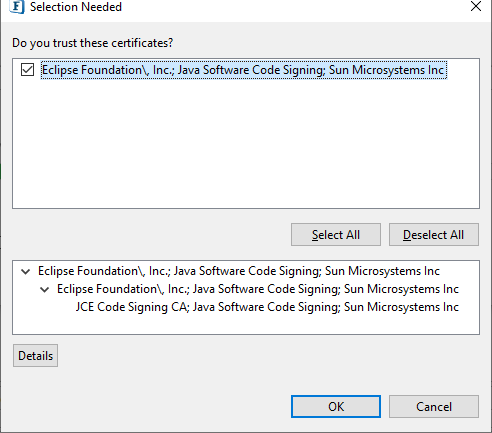
- A pop-up appears asking whether you trust the certificates. Select all and click OK.
- Restart eStudio upon prompting.
...
Prerequisites
Adding a property "http.sslVerify" and setting it to "false"
- Close eStudio and replace the -Djavax.net.ssl.trustStore value with the default value "../fmq/profiles/FioranoMQ/certs/jssecacerts".
- Open terminal in <FioranoInstaller>/eStudio folder and start eStudio using
eStudio.exe -cleancommand.
Clone GIT Repository
Prerequisite
Before Proceeding, make sure you added a property set the http.sslVerify property to "false". To do so, perform the operations below:
- Start eStudio.
- Open Window > > Preferences.
- Go to Team > Git > > Configuration.
- Click the Add Entry button and provide the values as below:
- Key: httphttp.sslVerify
- Value: false
- Click Apply and click OK.
Fetching the FES Unique ID
...
Login to FES-JMX with valid credentials.
| Note |
|---|
Replace the value "localhost" in the Provider URL property with the respective IP address while connecting to a remote server. |
...
Sharing applications to GIT
...
In the Clone GIT Repository window, provide the URI in the following format and click Next twice:
| Info | ||
|---|---|---|
| ||
https://github.com/<pathtorepo> |
| Note |
|---|
|
...
In the Local Destination panel, enter the local destination path as follows:
%FioranoHome%\runtimedata\eStudio\workspace\.repositories\Online\<FESUniqueID>\Applications, and click Finish.
| Tip |
|---|
Use the Unique ID generated as illustrated in the Fetching the FES Unique ID section for FESUniqueID in the above path. |
...
Login into the Enterprise server.
| Note |
|---|
If the event processes from the Git Repository are not reflecting, refresh the Event Process Repository. |
...
Event processes created in eStudio can be committed (exported) to the Git Repository by performing the following actions:
...
...
Cloning and Pushing/Fetching GIT Repository
- Open 'Online Event Process Development Perspective' and Login to EnterpriseServer.
- Open Git Repositories view from Window > Show View > Other > Git > Git Repositories.
Open File Directory and navigate to %FIORANO_HOME%/runtimedata/eStudio/workspace/.repositories/Online/<uniqueID>/Applications, open terminal and perform the following operations:
Info icon false Case1: Cloning and pushing Event Processes to git repository.
Note: Before performing the below git operations, make sure that 'Event Processes' present in git repository are not present in your Applications.- git init
- git remote add origin <repoURL>
- git add .
- git commit -m "<commitmessage>"
- git branch -M main
- git push -u origin main
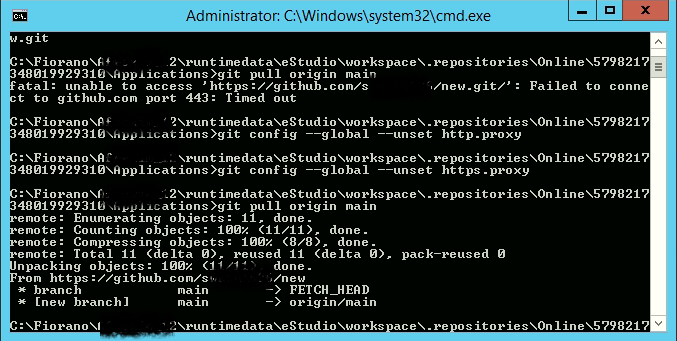
Case2: Cloning and fetching Event Processes from git repository.
- git init
- git remote add origin <repoURL>
- git pull origin main
Note: While performing above operations, if you are unable to access the github, perform the following operations and continue above steps:
- git config --global --unset http.proxy
- git config --global --unset https.proxy
For github credentials, provide Personal Token generated in github account in place of password since github no longer accepts account passwords when authenticating Git operations on GitHub.com. Generate personal access-token on Github as follows:
- In the upper-right corner of any page, click your profile photo, then click Settings.
- In the left side bar, click Developer Settings.
- In the left side bar, click Personal access tokens.
- Select all the scopes and click 'Generate Token'
- Open eStudio, login to Enterprise Server, right-click the Event Process Repository node and click Refresh.
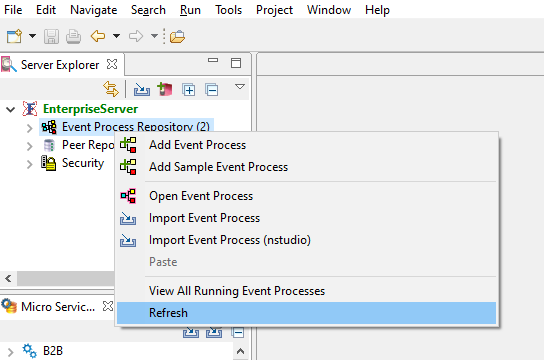
- Event Process Repository and Git Repositories views will be updated.

Configure Push and Fetch
Perform the following operations in the Properties panel:
- Right-click the property under Remotes > origin and select select the Configure Push option.

- In the Configure Push dialog box, click the Add Button and press spacebar in space-bar in Remote branch textbox text-box to select the branch from the options that appear. Click the the Save and Push button.
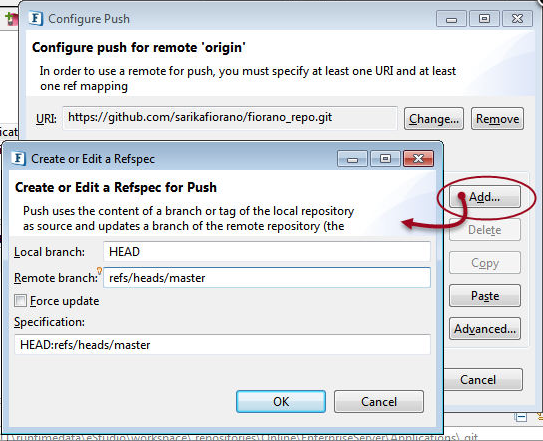
- Configure Fetch also in the same manner as above.
Checking Out/Updating the Projects from GIT Repository
- Right-click the shared Event Process in the Server Explorer and click Refresh to notice the change in the file name and the icon with the dirty flag.
...
To check out a project from GIT repository, follow the steps in the Sharing Applications to Git section and then perform the following actions:
...
- repository and click the Fetch option.

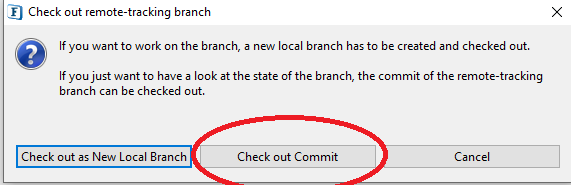
- Go to Branches > Remote Tracking, right-click the sub node, and click the Checkout option.
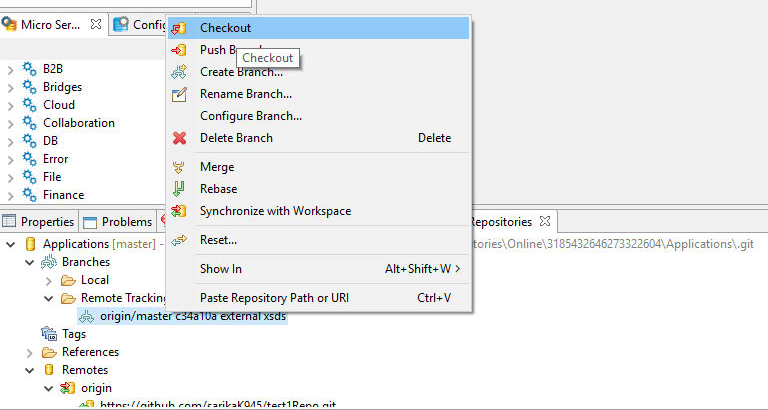
- Click the Check out Commit button in the pop-up.
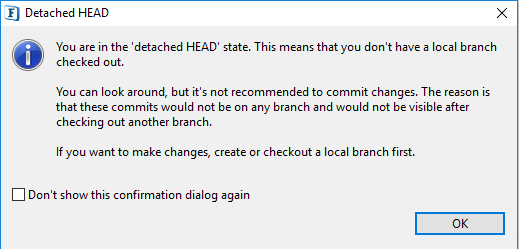
- A Pop-up will be displayed; click OK.
- If new event processes are added from git repo to eStudio, refreshing the Event Process Repsoitory node will update the new event processes to the workspace.
Adding an Event Process to GIT
| Note |
|---|
Before Adding or committing your changes to GIT Repository, make sure to update the local Repository. To do so, follow the steps in the Checking Out/Updating the Projects from GIT Repository section. |
Event processes created in eStudio can be committed (exported) to the Git Repository by performing the following actions:
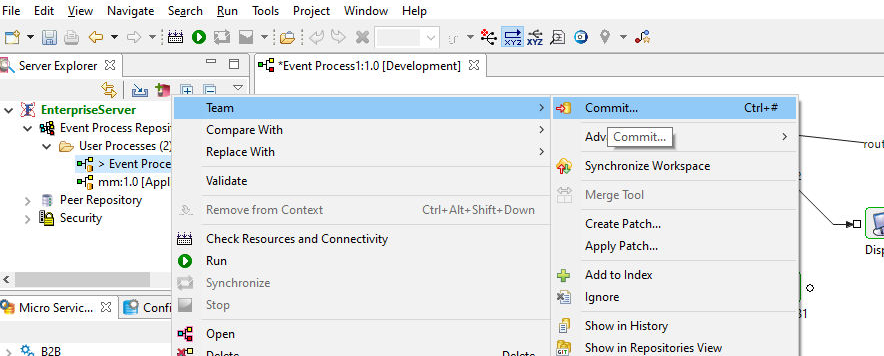
- Select Team > Commit.
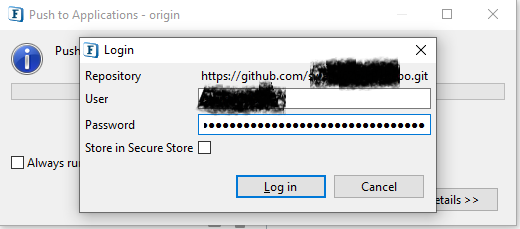
- In the Git Staging view, select all the related files of the corresponding event process and move from the Unstaged Changes panel to the Staged Changes panel. Provide a description in the Commit Message section and click the Commit and Push button.
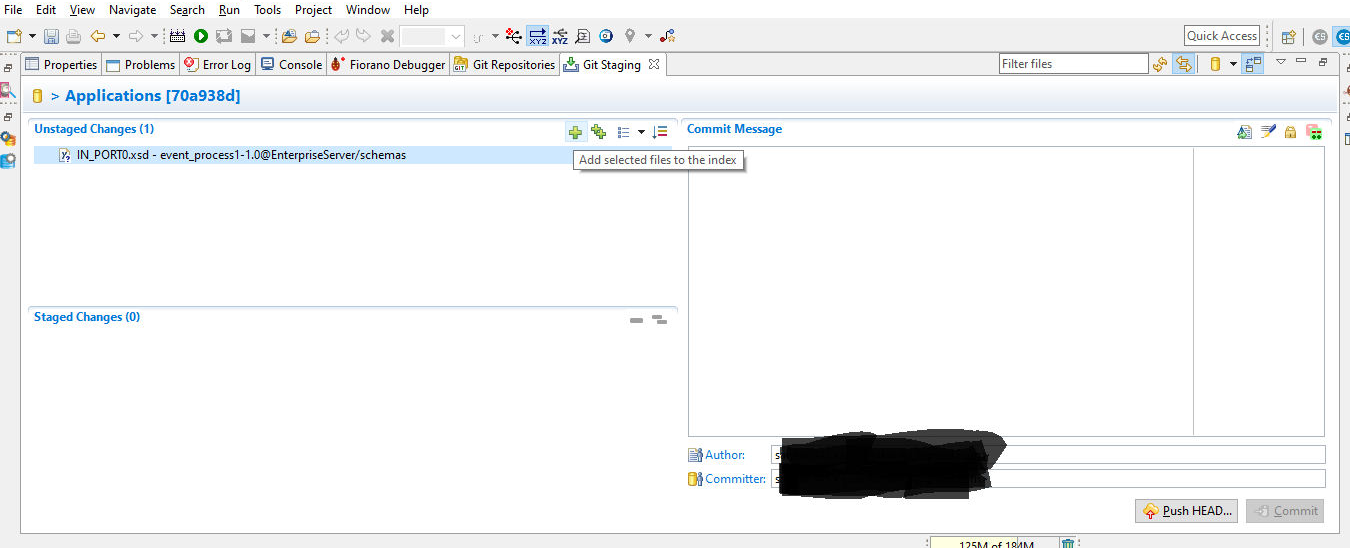
- A pop-up appears asking for git credentials. Provide git user credentials, but make sure to provide git token in place of password.
Anchor _GoBack _GoBack