...
After logging on to the Fiorano B2B Dashboard, Database and JMS need to be configured under Administration section to manage database and provide admin privileges.
| Anchor | ||||
|---|---|---|---|---|
|
The central database which stores all the details of trading parties, agreements, message configurations, etc., is configured in Database settings on the landing page.
| Note |
|---|
Click the Login Name present at the upper-right part of the screen and click Settings to change settings at any point of time.
|

| Warning |
|---|
Before starting with DB configuration in the landing page - Database tab, ensure that |
...
the corresponding driver jars in the Server Configuration file are added as mentioned in |
...
...
section. |
| Tip |
|---|
The Database Connection can be tested after configuration. |
| Info |
|---|
Databases supported by Fiorano B2B are:
|
...
|
To configure the database, perform the following actions:
- In the 'B2B database configuration details' page, under Database Configuration section ,
In the
Navigation Panel present in the left side of the Dashboard, click Administration tab, and select Database.

Figure 1: Database tab
Database settings tab, choose the preferred database from Database drop-down and provide the database credentials in the rest of the fields. After providing
alldetails, click the Test button to test the connection.

Info A notification indicating the successful connection appears on the upper-right part of the Database Settings page. In case of any error, check the error message in the notification area and troubleshoot accordingly.
Configuration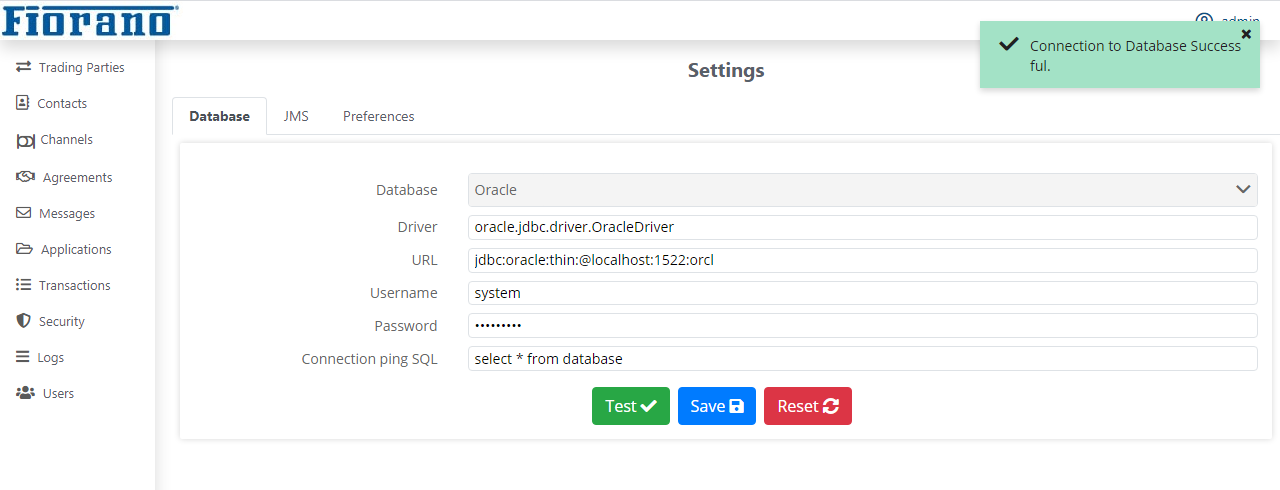
Figure 2: DatabaseSettings configuration
- Click OK in the Testing DB configuration dialog box and save the Save the database by clicking Save; notification appears confirming that the database connection details are saved.

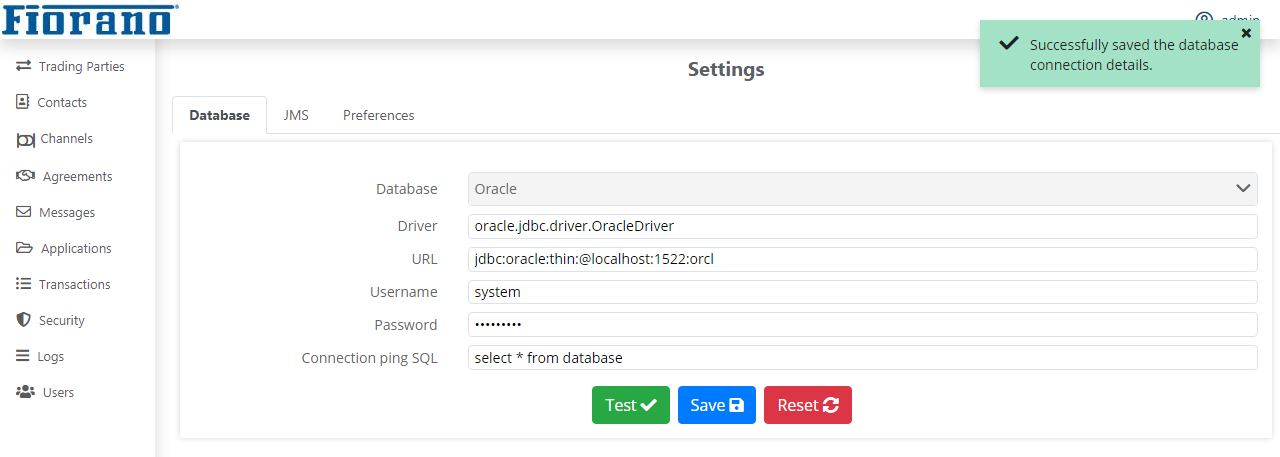
Figure 3: Confirmation message showing successful connection
Click OK in the Save DB configuration dialog box.

Figure 4: Confirmation message saying DB configuration is saved successfully
By this, DB configuration is complete.
...
The values under each field will be auto-populated in the JNDI Configuration section under JMS Configuration Details pageSettings page. However, test the connection and save it by following the same steps as in Configuring Database section section above.
| Note |
|---|
If the peer server is running in on a different machine, then you need to provide the valid FPS URL in the Server URL field. |
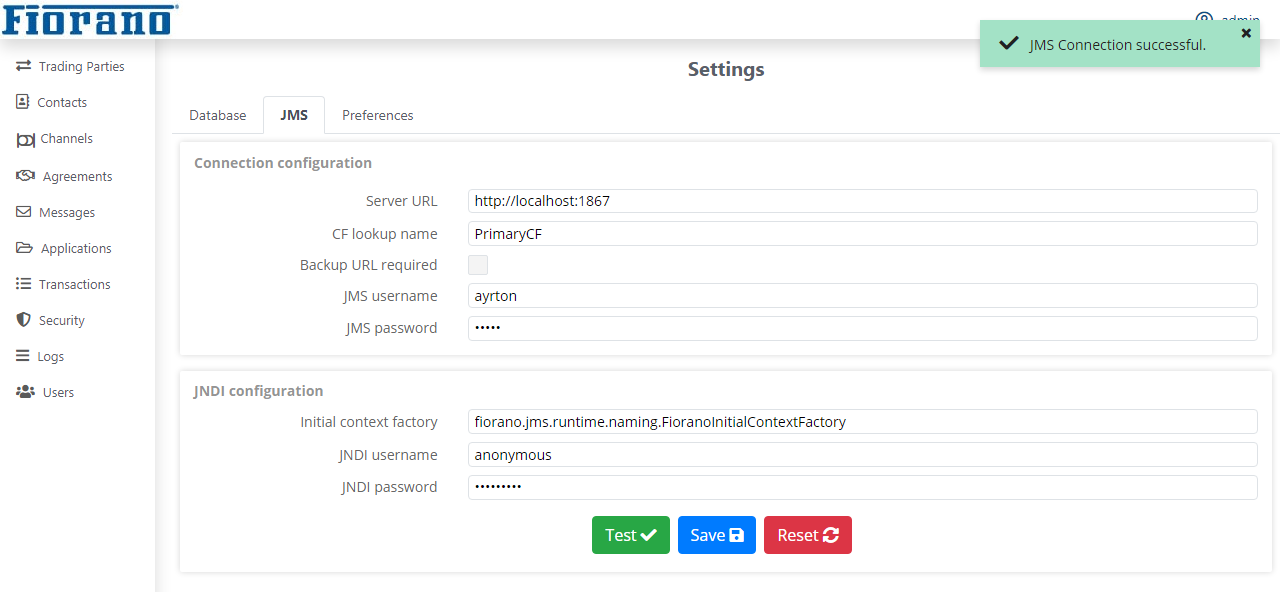
Figure 4: Testing JMS Configuration
| Warning |
|---|
Make sure that you save the JMS Configuration though the values are auto populated; you may encounter some issues if it is not saved. |

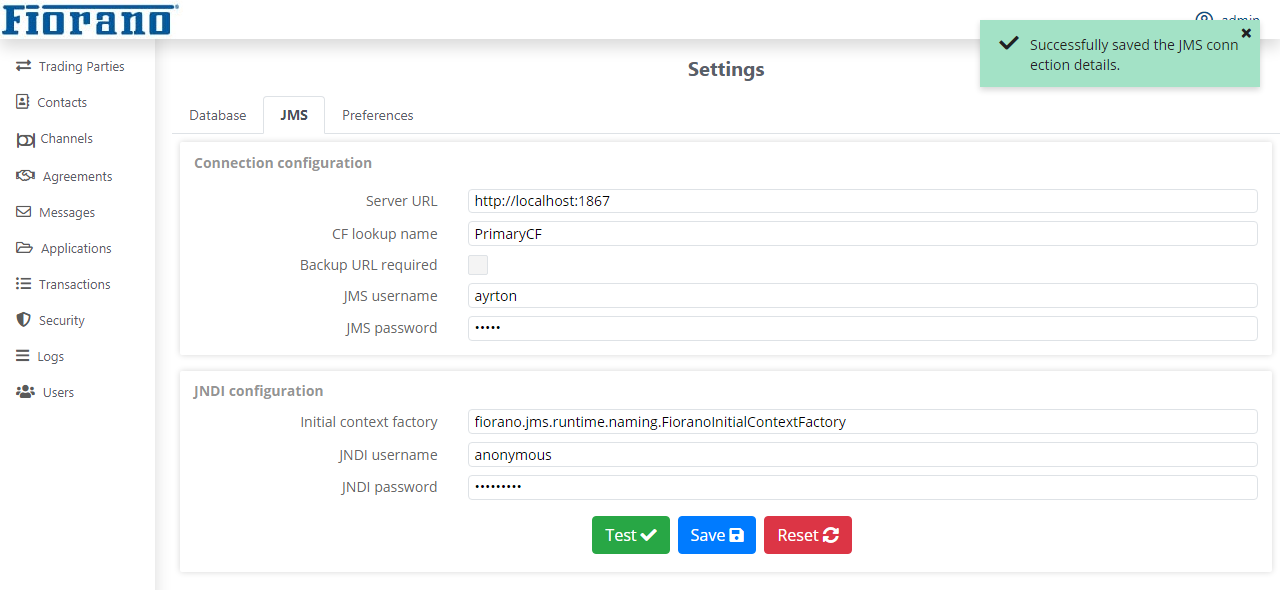
Figure 5: JMS Configuration screensaved
By this, the B2B database configuration and JMS configuration are complete and you are ready to work with Fiorano B2B.
| Info |
|---|
JMS configuration can be tested by clicking Test button as done in Database Configuration. |