The Bridge node in the Fiorano Admin Studio enables you to manage all the bridges that connect the FioranoMQ Server to another MQ server or any other messaging Server. The admin tool enables adding links, adding channels to a link and monitoring the status of every bridge running within the cluster. This module is visible only after the bridge is configured in the Server.
25.9.1 Adding the Bridge to the FioranoMQ Profile
- In Studio open ProfileManager and open the FioranoMQ profile. Right-click Fiorano and select New Domain as shown below.

- Name the Domain as Bridge, for User convenience.
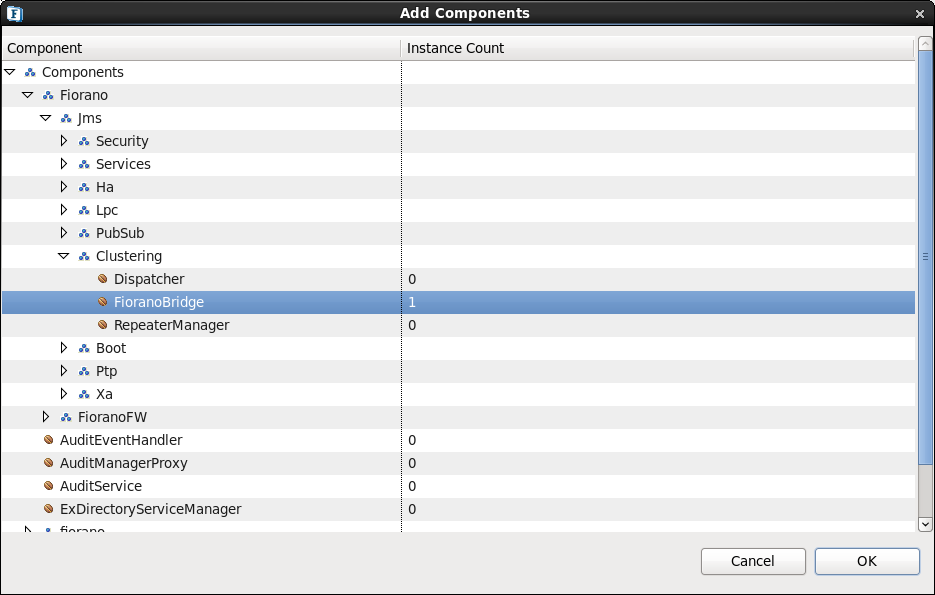
- Right-click on Bridge (new domain that was added in the previous step) and click on Add Components. Go to Fiorano?Jms?Clustering and select FioranoBridge. Click ok. The FioranoConnectorManager is added to the Bridge.
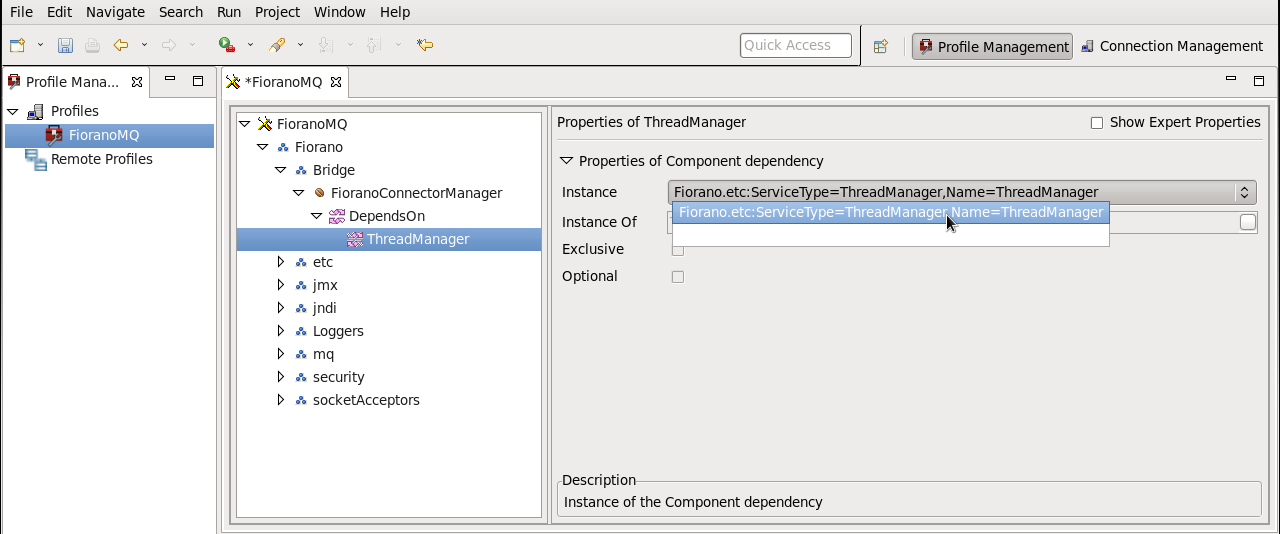
- Navigate to *FioranoConnectorManager?DependsOn?ThreadManager. By clicking on the *ThreadManager, the user can see properties on the right-hand side of studio. By default, instance property will be null. Select the only instance present there. Name the FioranoConnectorManager in properties.
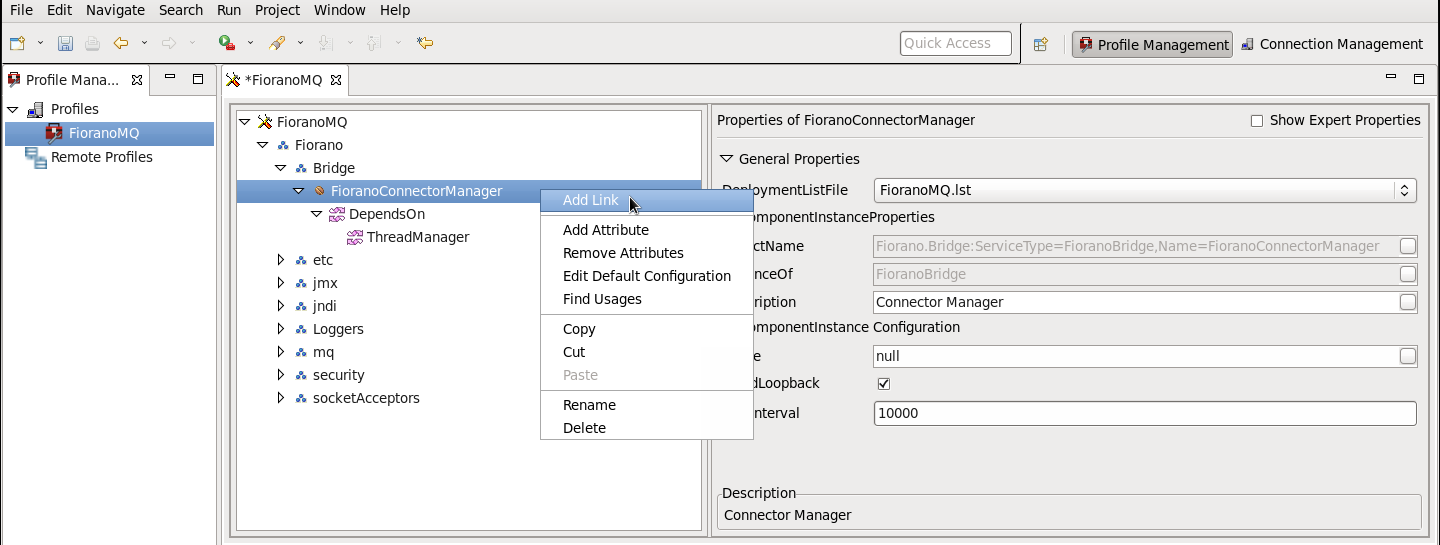
- Right-click on FioranoConnectorManager and addLink as shown below. Name the link in properties.
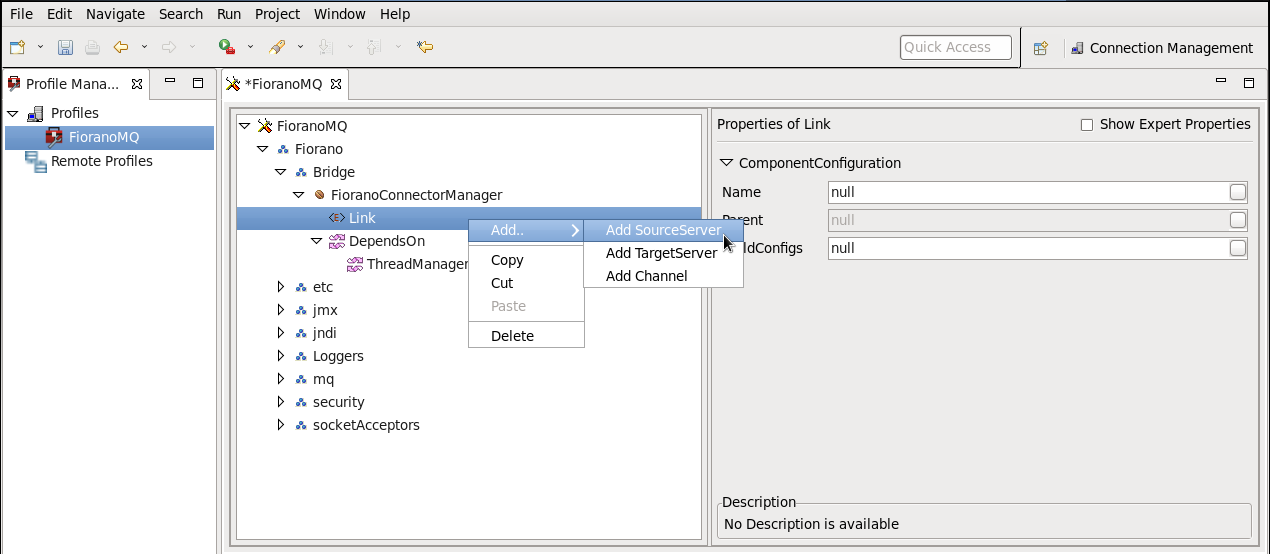
- Right-click Link and add source Server, target Server and channel. Add connectionInfo to the source Server and to the target Server. Add source queue and target queue to the channel. Add queueInfo to source queue and target queue. All components added need to be configured. Configuration techniques are available in Chapter: 12 Bridge.
25.9.2 Adding a Link
The administrator can create new links dynamically in a Bridge. This enables the application to send and receive messages on queues created after the bridge has started. A link can contain one or more channels. Information such as the link name, the source and target Servers between which the link needs to be created, the protocol to be used by the connection and login information need to be provided when a new link is added to the Bridge. To add a new link, follow the steps below:
- Select the Bridge node from the Server Explorer pane.
- Right-click and select the Add Link option from the pop-up menu.
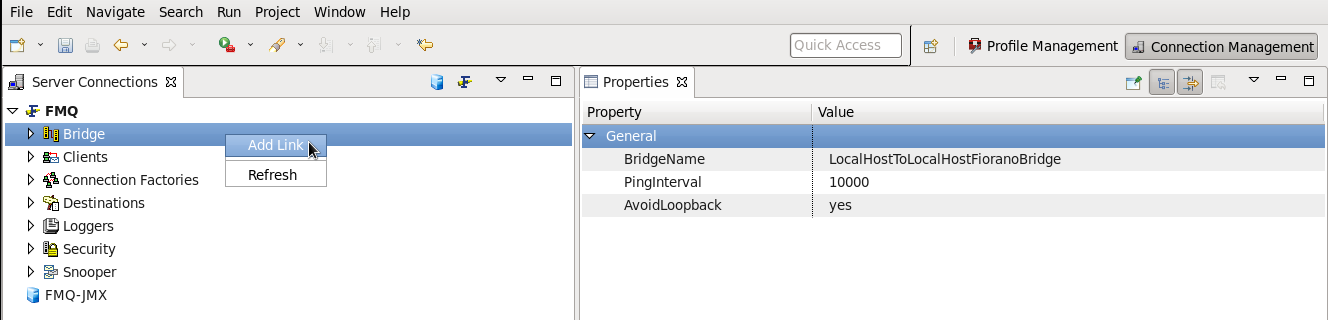
- The New Link Properties dialog box is displayed.
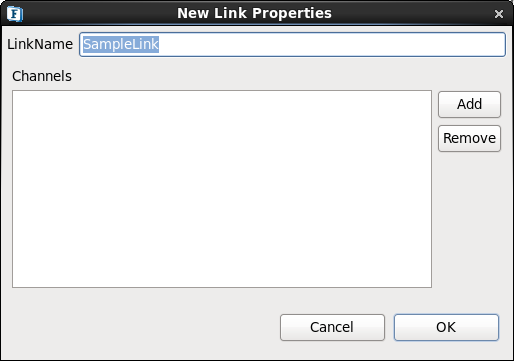
- Specify the link properties and click OK; the new link gets added as a node and displays in the Server Explorer pane.
25.9.3 Removing a Link
The administrator can remove the selected link from the repeater by following the steps below:
- Select the link to be removed from the Server Explorer pane.
- Right-click and select Delete from the pop-up menu.
- The Confirm Object Deletion dialog box is displayed. Click the Yes button. The selected link is deleted and is no longer visible in the cluster.
25.9.4 Starting a Link
To start a link:
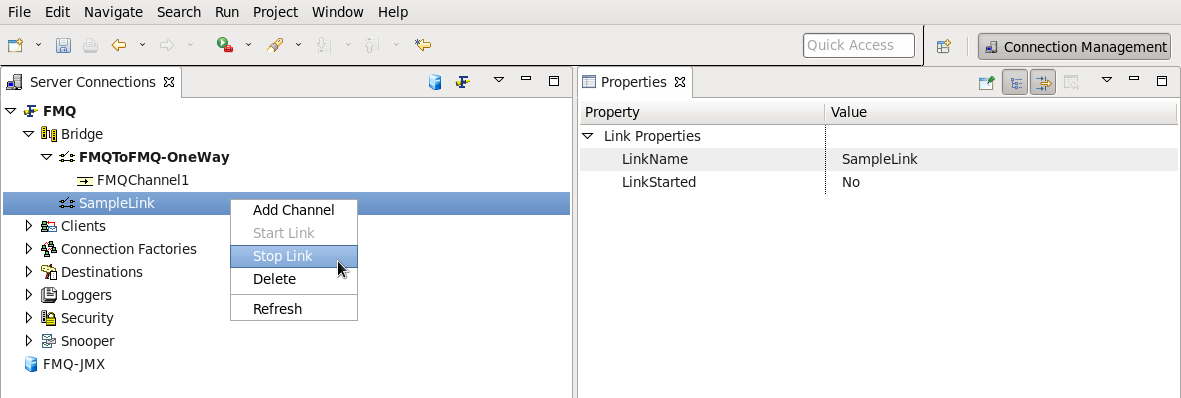
- Select the link from the Bridge in the Server Explorer pane.
- Right-click and select the Start Link option from the pop-up menu.
25.9.5 Stopping a Link
To stop a link:
- Select the Link from the Bridge in the Server Explorer pane.
- Right-click the link and select the Stop Link option from the pop-up menu.
25.9.6 Adding a Channel to a Link
The administrator can add channels to a link dynamically. To add a channel to a link the administrator must provide information such as source and target queues. A link can have multiple Channels mapped to different Queues.
- Expand the Link sub-node from the Bridge node in the Server Explorer pane. The various channels configured within the bridge are displayed.
- Right-click any of the Channels and select the Add Channel option from the pop-up menu.
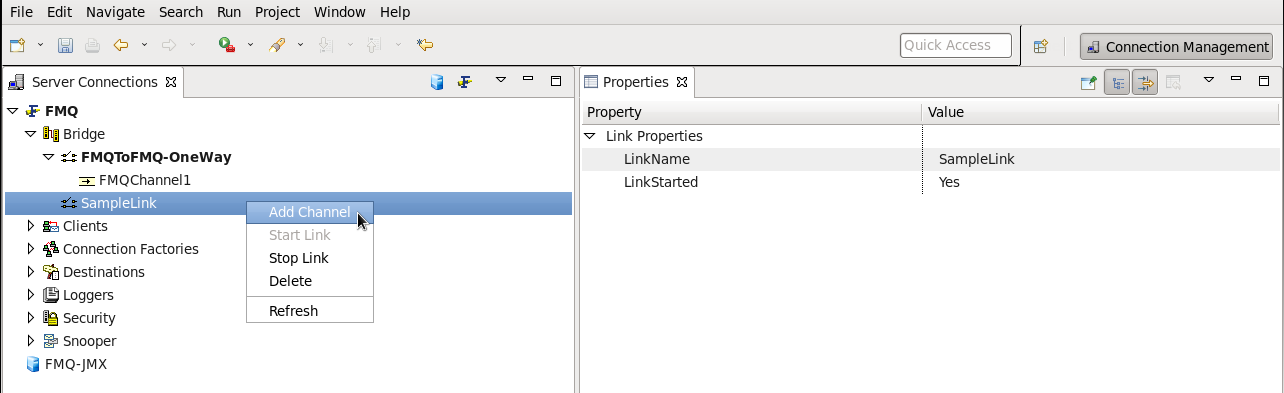
- The New Channel Properties dialog box is displayed.

- Specify the properties and Click the OK button. The new channel is added as a node and shown in the Server Explorer pane.
25.9.7 Removing a Channel from a Link
The administrator can remove a channel from a link on a Bridge by following the steps below:
- Select the channel to be removed from the Server Explorer pane.
- Right-click and select Delete from the pop-up menu.
- The Confirm Object Deletion dialog box is displayed. Click the Yes button. The selected channel is deleted and is no longer visible in the cluster.