FioranoMQ comes with a preconfigured XA-enabled FioranoMQ profile named FioranoMQ_XA. XA can be enabled in the default profile by following the steps given below:
- Launch Fiorano Studio and open FioranoMQ (default profile) using the ProfileManager
- Navigate to FioranoMQ > Fiorano > mq. Right-click and select Add Domain.
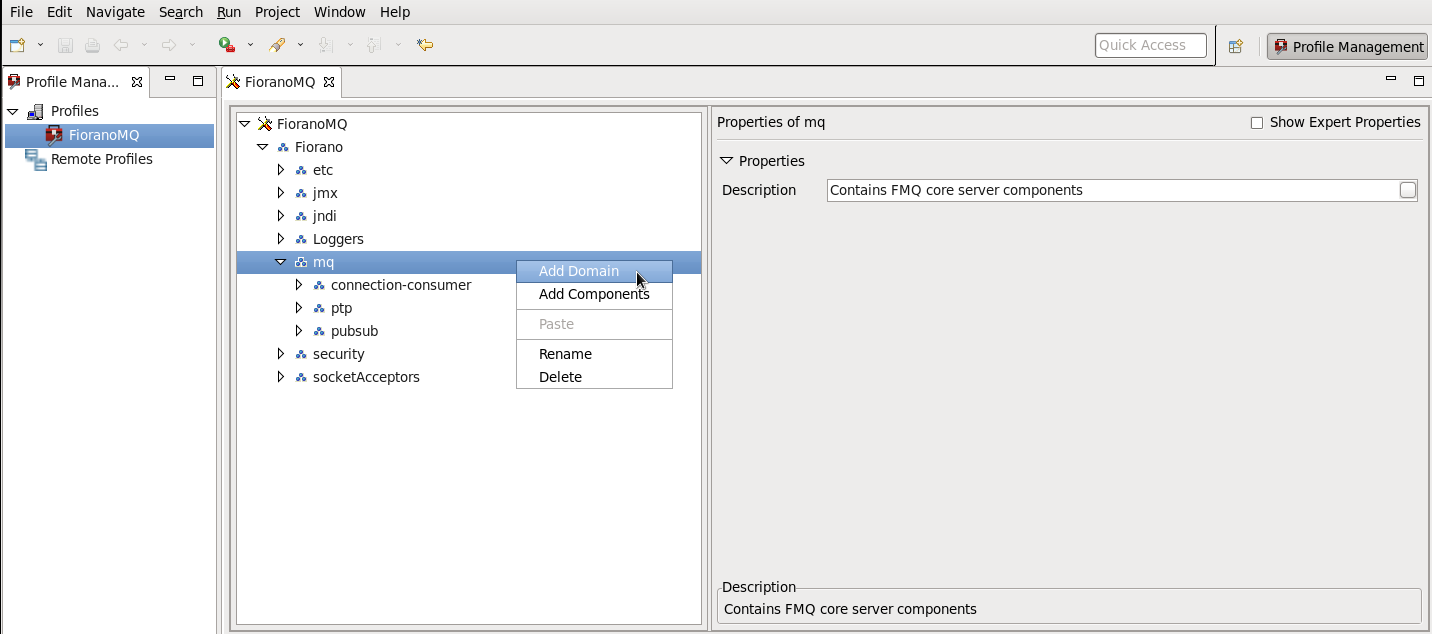
- Enter the domain name in the Input pane displayed and click on the OK button. This domain is named XA in the example.
- Right-click the new domain and select Add Components; an Add Components dialog box pops up.
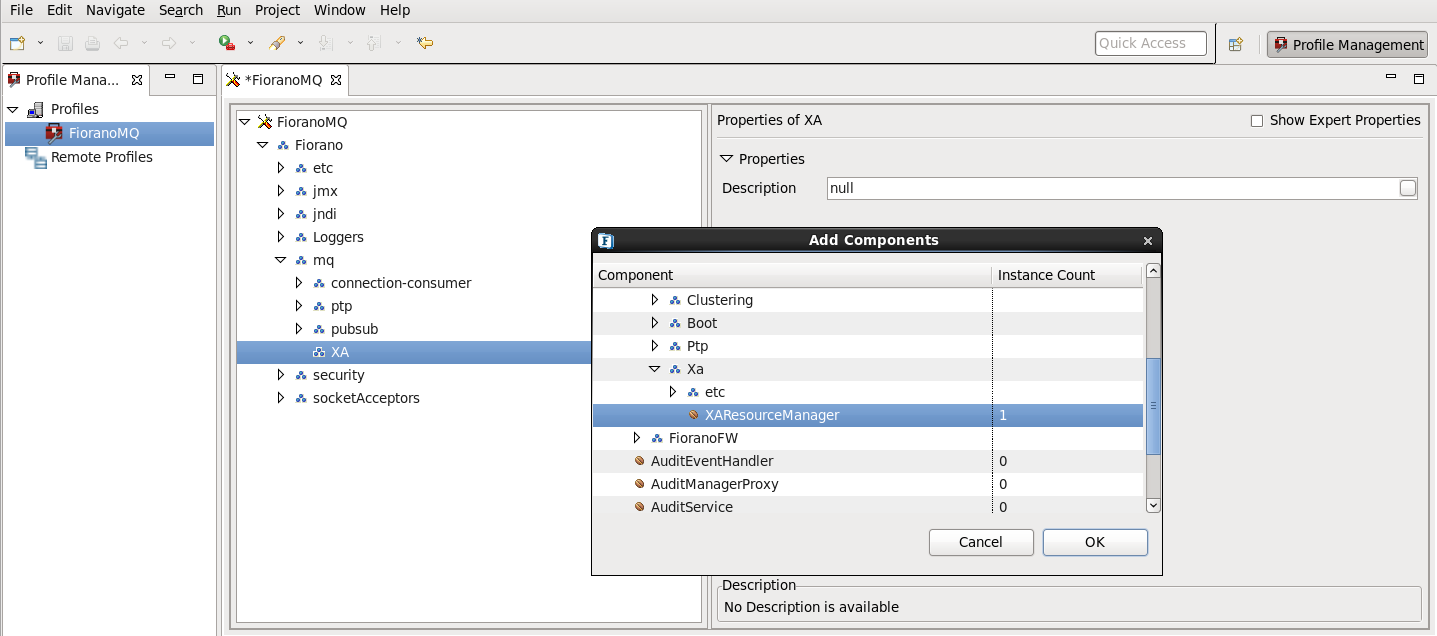
- Navigate to Fiorano > Jms > XA > etc and check the XAResourceManager component and click OK.
- Resolve all the unresolved dependencies (which are marked with a red icon). Select the unresolved dependencies. In the property pane, choose the right value for this service instance.
- Navigate to Fiorano > Fiorano > mq > XA > FileDBManager > FileDBManager and in the Properties of FileDBManager, enter the path name XA.

- XA requires RDBMS based storage. To enable this, go to FioranoMQ > Fiorano > etc >RdbmsDBManager and in the Properties of FileDBManager
enable the EnableRdbms property.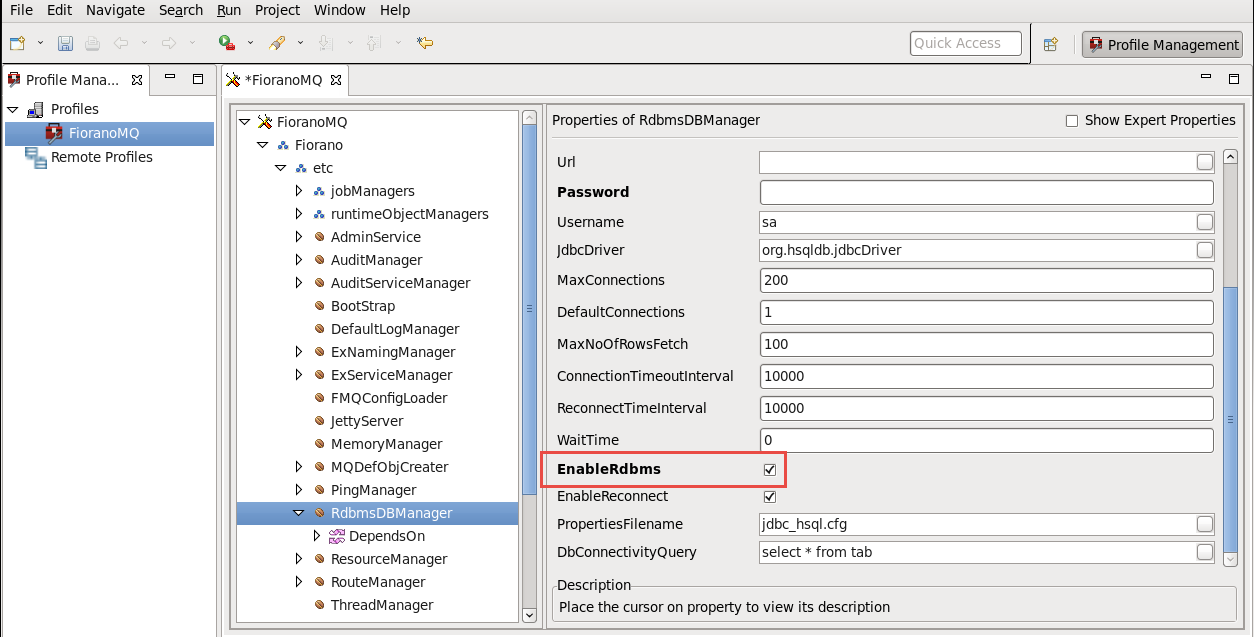
- Add the XAResourceManager component to the dependency list of Fiorano > etc > ExServiceManager. This can be done by right-clicking the Dependson node under the ExServiceManager. In the Add Component as Dependency dialog box, select XAResourceManager and click OK.
- Right-click the profile and select Save.
Overview
Content Tools
ThemeBuilder