Objective
To demonstrate the ability of a Fiorano REST application to interact with an end user by exposing a REST service which accepts HTTP GET requests at a URL and responds with a Hello World message.
Prerequisites
- Start the Fiorano Enterprise Server (FES) and the Fiorano Peer Server (FPS)
- Login to the eStudio application
- Understand basic menus and perspectives (panels) in the eStudio application
Scenario
Build a REST service to accept HTTP GET requests at: http://localhost:1880/restgateway/services/HelloWorld/sayHello and respond with the message "HelloWorld".
How it Works
The REST service gets deployed in the jetty server running inside the peer server. Whenever a rest client sends a request to the service, the request is available on the output port and the response can be routed back by connecting a route to the input port.
Components used
- RESTStub component.
Setting up the Example
Configuring RESTStub component
To configure the RESTstub component, perform the actions below in theeStudio application:
- Open the Server Explorer window (Window > Show View > Fiorano > Server Explorer), right-click Event Process Repository and select Add Event Process and create a new Event Process with name 'RESTStub_Example'.
- In the Service Palette, under the Web category, drag the RESTStub component to the Fiorano Orchestrator.
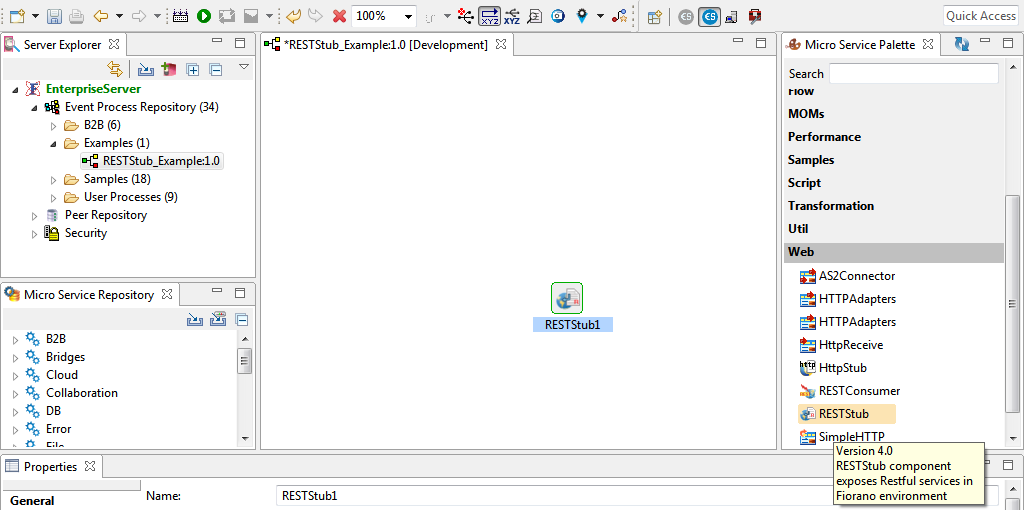
Figure 1: Adding RESTStub component to Orchestrator
- Double-click the component to open the Configuration Property Sheet (CPS).
The first screen in the CPS, wizard (1 of 3), is used to define the service using a user interface for WADL.
In the first screen, perform the actions below and click Next:
- Provide the Service Name as 'HelloWorld' with which the event process functionality is exposed as a RESTful service.
Go to resource under the Resources node. Under the Resource Configuration tab, replace the default value of Path 'resourcePath' with 'sayHello' to give a logical meaning to the scenario.
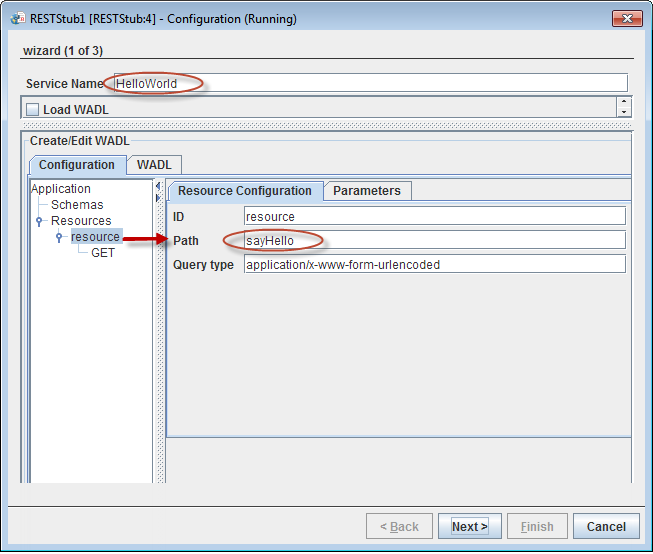
Figure 2: Service Name and resource configuration
- In the second screen, wizard (2 of 3), where SSL Configuration, HTTP Authentication Configuration and Additional Configuration can be done, click Next as no change are required for this example.
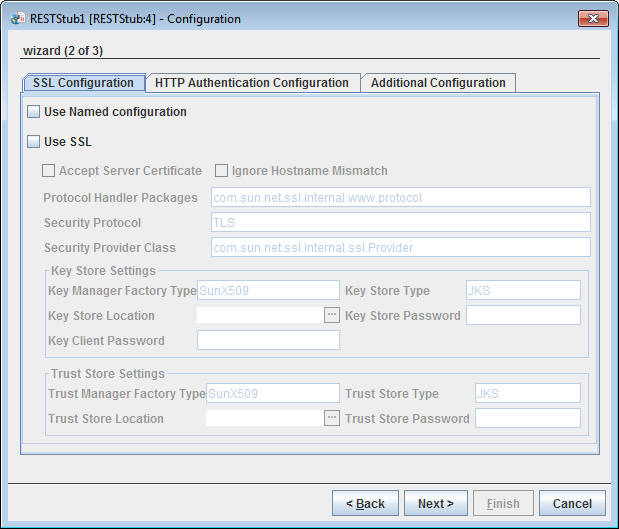
Figure 3: Clicking the Next button to move to the final screen
Click Finish in the third screen, wizard (3 of 3) , to close the CPS and to save the configuration. The input and output ports get generated.
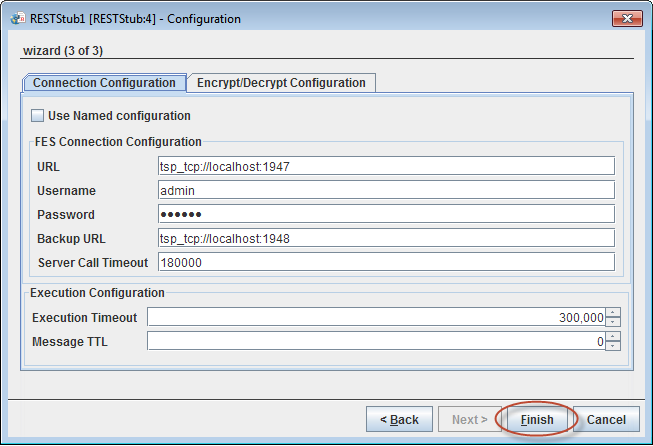
Figure 4: Clicking the Finish button to save configuration
- Drag the Output port to connect it to Input port. A route will be created with the default name 'route1'.
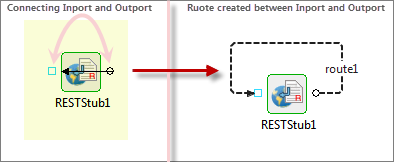
Figure 5: Connecting the input port to the output port
Configuring Transformation
To configure the transformation between the input and the output port, perform the actions below in Fiorano Orchestrator:
- Right-click route1, point to Configure Transformation and select the Mapper Project to open Fiorano Mapper editor.
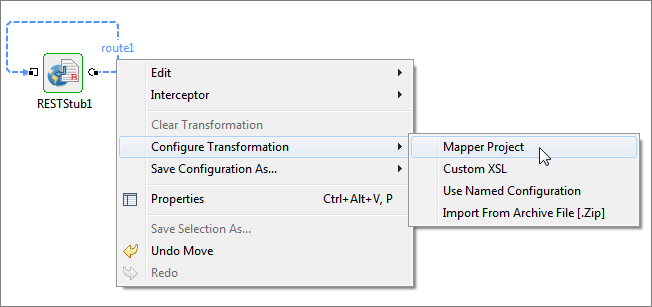
Figure 6: Opening Mapper Project window
- In the Output Structures panel in the Mapper Project, click ANY element to make it appear in the Funclet View.
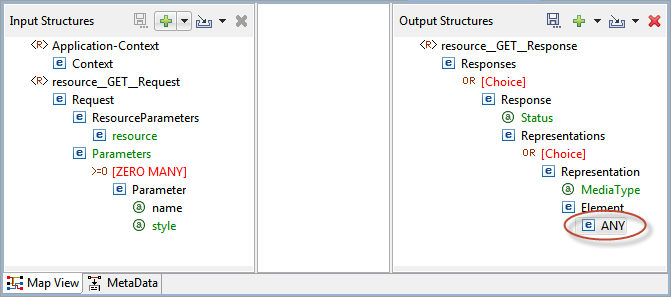
Figure 7: Clicking ANY element
- Click the Funclet View tab and select 'String Functions' from the Function Palette (Advanced Functions drop-down menu shown in Figure 3).
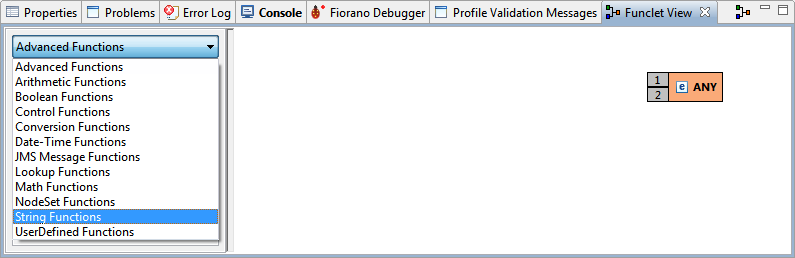
Figure 8: Selecting String Functions from the Function palette
- Drag and drop the Constant function to the Funclet easel. Connect the Source node of Constant and the Destination node of ANY by dragging from the grey box in the constant).
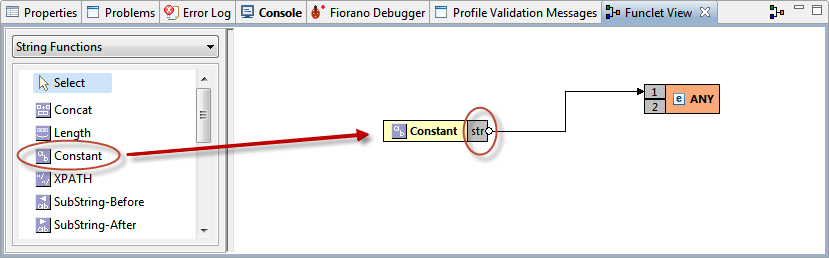
Figure 9: Connecting Constant function to ANY element
- Double-click the Constant present in the easel. In the String Constant dialog box, replace the default text 'Constant' with 'HelloWorld'. The name 'Constant' will be replaced with 'HelloWorld'.
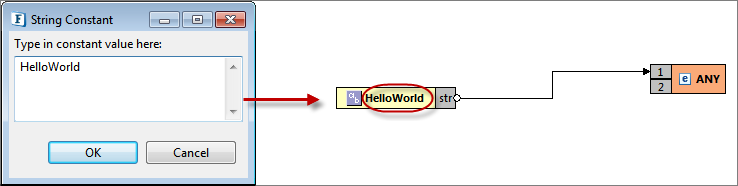
Figure 10: Changing the Constant name
- Click Save
 icon (or File > Save) to save the transformation configuration and close the Mapper Project editor.
Running the Example
To run the HElloWorld_example, perform the actions below in the Fiorano Orchestrator:
- Click Check Resource and Connectivity
 icon (or press ALT+SHIFT+C) to check resource and connectivity.
 - Click the Run Event Process
 icon (ALT+SHIFT+R) to run the event process.
- Right-click the RESTStub component and click View WADL option.
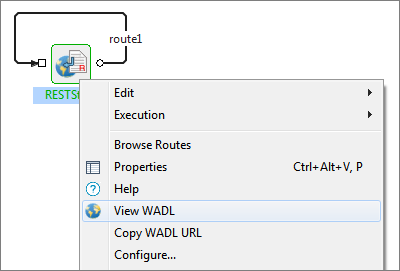
Figure 11: Navigating to view WADL
WADL appears in the browser.

Figure 12: WADL displayed in the browser
To access the service, type the following URL in a new tab and press ENTER to receive a response from the HelloWorld service:
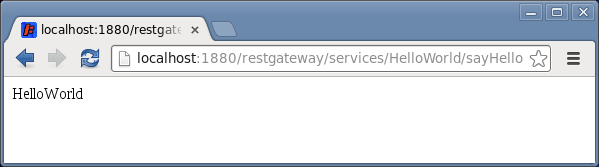
Figure 13: Response from HelloWorld service
Reference
- Download RESTStub_Example event process and import it to the Event Process Repository in the Server Explorer in eStudio to understand the configuration used in this example and to execute the working sample.
- Please note that the component options used in this example are minimum so as to get an overview of the application. To explore the other options present in the RESTStub component, refer the RESTStub documentation.