Exporting/Importing a Server
In Online Event Process Development perspective, a custom configured server can be exported to a preferred location for future use or for using in a different machine. The server data gets saved as a properties file and the server saved in this manner can be imported when required.
Exporting a Server
To save a custom configured server, export the server to the preferred location. Perform the following actions to accomplish the same:
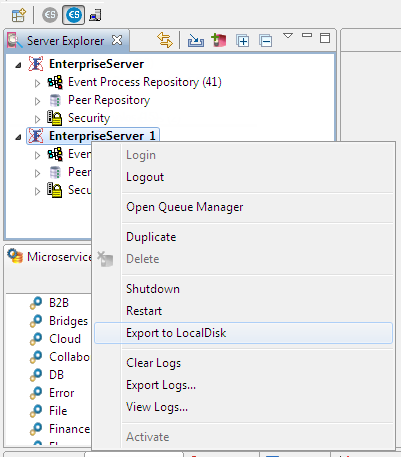
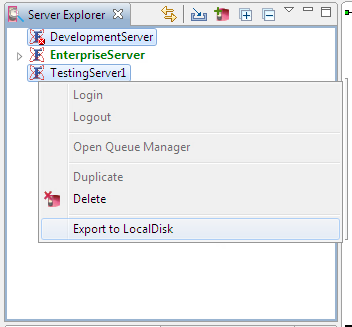
- Right-click the node of the server to be saved and select Export to LocalDisk option.
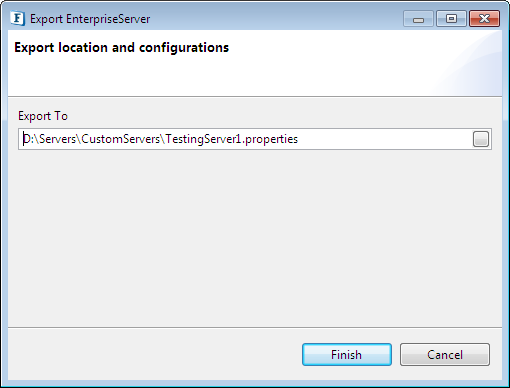
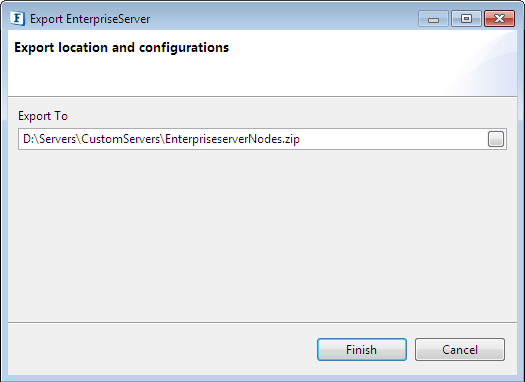
In the Export EnterpriseServer dialog box that pops-up, do any one of the following:
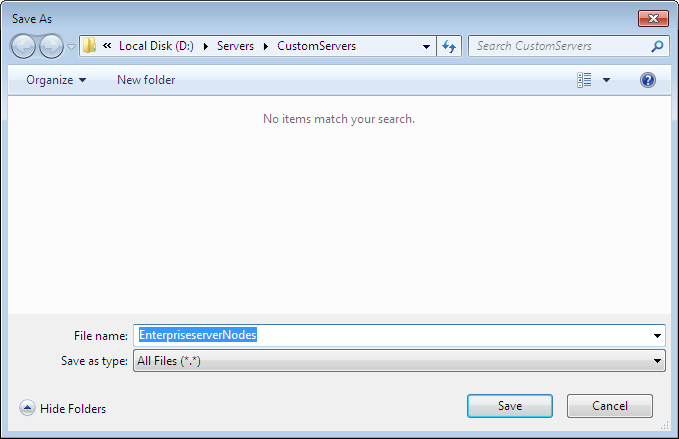
Type-in the path where the server needs to be saved.
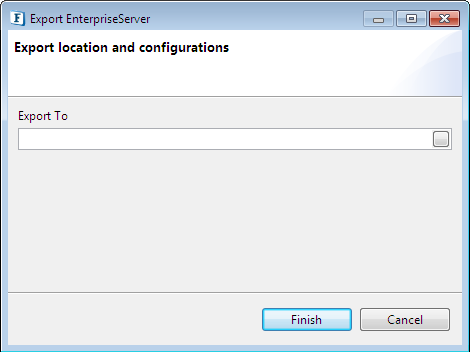
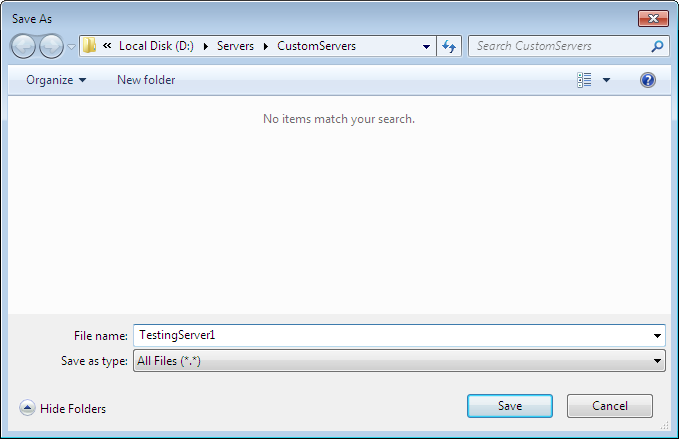
Click the button against the Export To text box to browse to the desired location in the system and click Save.
Click Finish to complete the process of exporting the server to the preferred location with the preferred name.
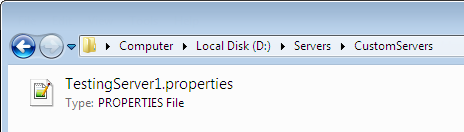
- The server properties get saved in a properties file.
Importing a server
To import a server which is saved as properties file from the location where it was saved, perform the following actions:
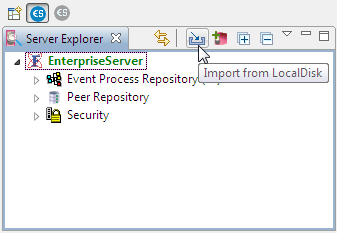
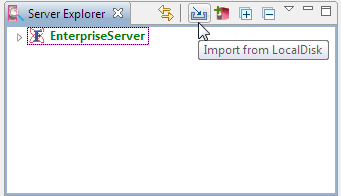
- Click the Import from LocalDisk icon in the Server Explorer panel.
- In the Import Event Processes dialog box, select the particular server that was exported and click Save.
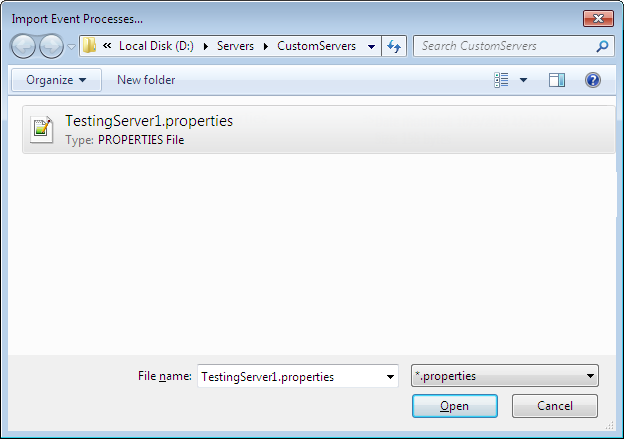
Click Finish to complete the Import.

- The imported server appears in the Server Explorer panel.
Exporting/Importing Multiple Servers
As a singe server can be exported as a properties file for future use, more than one server can be exported as well which gets saved as a Zip file.
Exporting Multiple Servers
To save servers as a Zip file, perform the following actions:
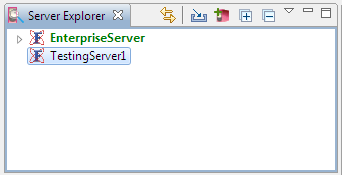
- Use CTRL/SHIFT to select multiple servers and select Export LocalDisk option from the right-click menu.
Type-in the path where the server needs to be saved, or click the button against Export to text box (as explained in Exporting a Server section), browse to the desired location in the system and click Save.
- Click Finish to save the selected servers consolidated in a Zip file.
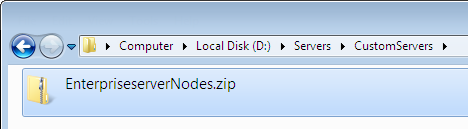
- The servers gets saved to the chosen location as a zip file.
Importing Multiple Servers
To import the multiple servers saved as Zip file, perform the following actions:
- Click the Import from LocalDisk icon in the Server Explorer panel.
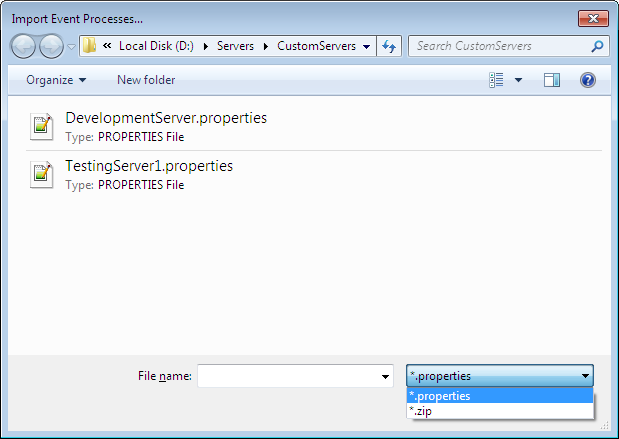
- In the Import Event Processes browser window, choose "*.zip" option from the drop-down as the servers are saved in a Zip file..
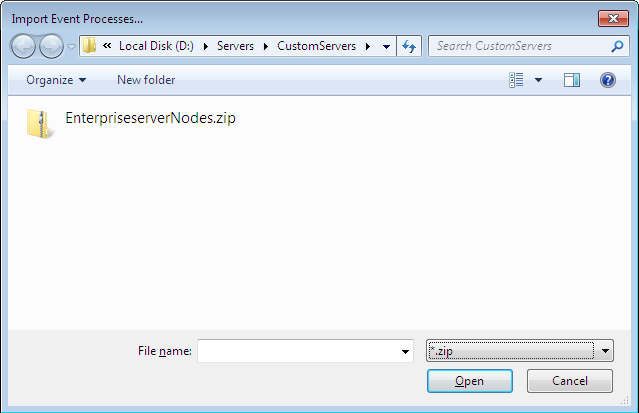
- Select the Zip file in which the servers are saved and click Open.
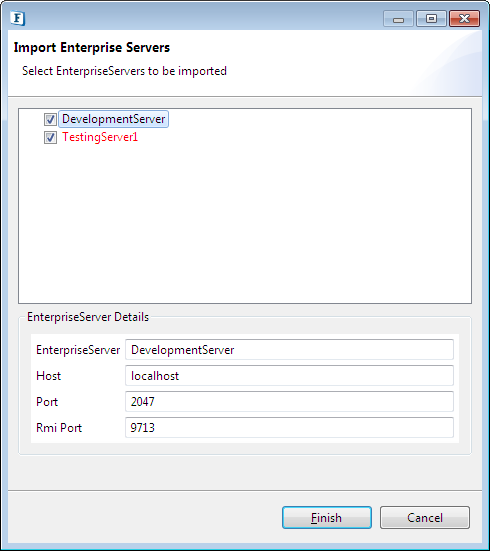
The servers that are saved as zip files gets displayed in the Import Enterprise Servers dialog box; select the ones to be imported and click Finish.
- The imported servers appear in the Server Explorer panel