If a User that is used to connect to the LDAP server has read-only permissions, then create 'admin' user and 'administrator' group manually. By default, Fiorano Server tries to create admin/administrator for internal use.
Editing Admin Password
From eStudio
To change the Admin password from eStudio, log on to the Enterprise Server and perform the following actions:
- Click the Users node under the Security section.

Figure 1: List of users under the Users node - From the list of users, right-click the ADMIN user, and click the Change Password option.
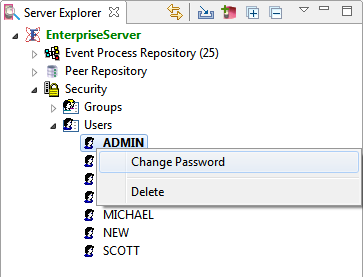
Figure 2: Option to change password In the Change Password dialog box, provide the new password and click OK.
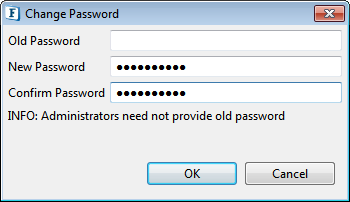
Figure 3: Changing the admin password
From Dashboard
To change the Admin password from the dashboard, log on to the Fiorano Web Console and perform the following actions:
- Click the Users node under the Security section.
- From the list of users, select the ADMIN user, and click the Change Password option.
In the Change Password dialog box, provide the new password and click OK.
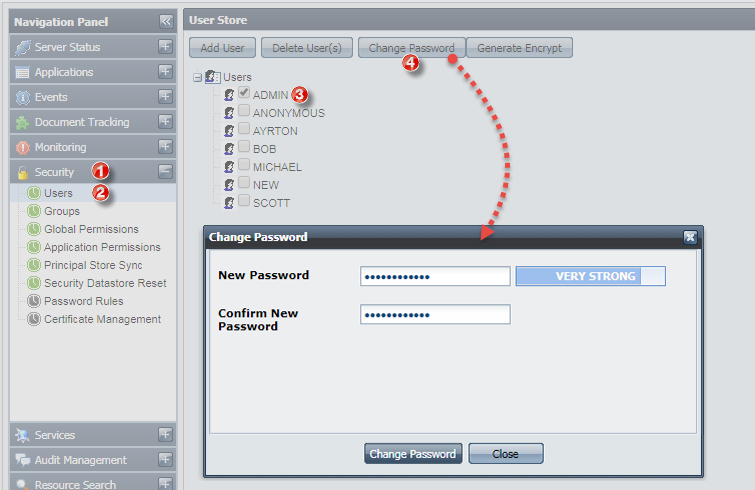
Figure 4: Changing the admin password in the Dashboard
Editing Server Profile configurations
Administrator user credentials are used for authenticating MQ and JMS server connections. So, if the Admin password is changed from the User Account as explained above, the same needs to be edited in the:
- FES and FPS Profiles (FES HA and FPS HA in case of HA profile).
- CPS (Configuration Property Sheet) of those microservices which use Admin user credentials.
Sections below illustrate the configuration steps.
FES and FPS profiles
Changes to the FES profile
- Load FES profile in eStudio Profile Management perspective.
- Stop the FES server.
- Navigate to Fiorano > Esb > Transport > FESTransportManager > MQProvider
- Change the password corresponding to admin user.
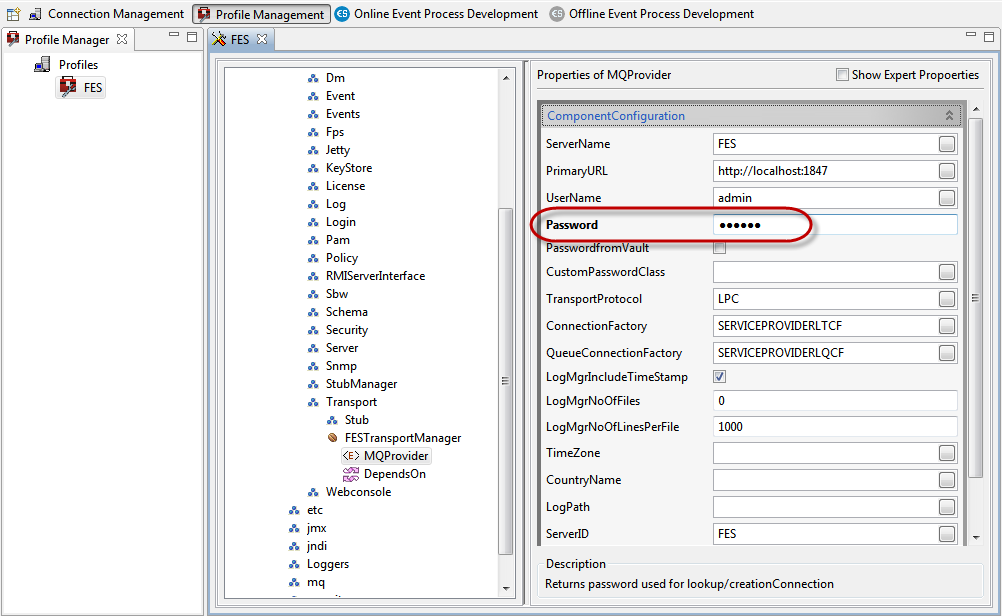
Figure 5: Providing the new password under the MQProvider properties - Navigate to Fiorano > jmx > engine > ClientJMXEngine.
- Change the password corresponding to the admin user.
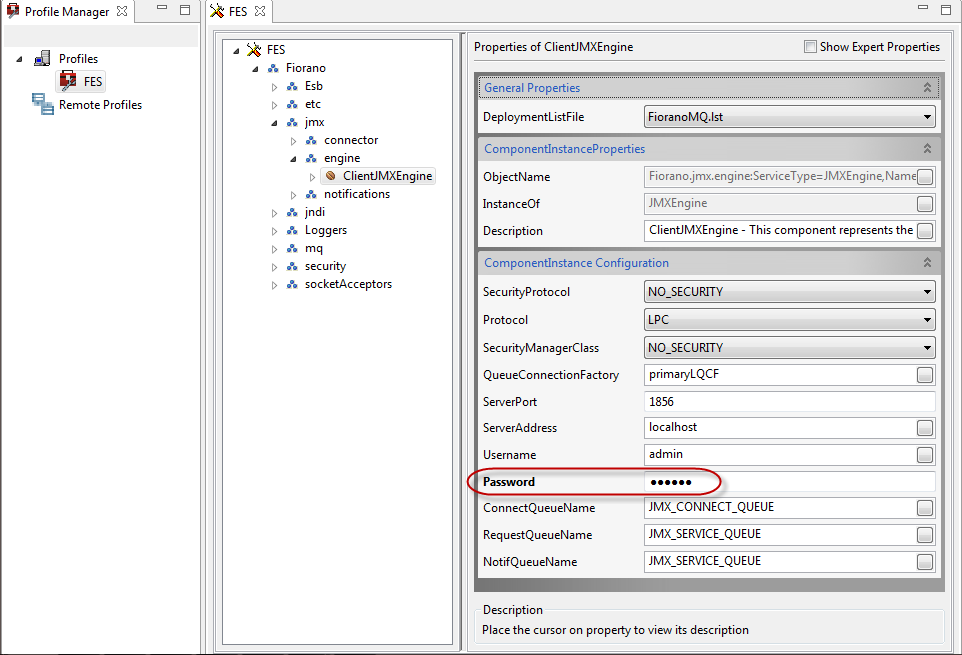
Figure 6: Providing the new password under the ClientJMXEngine properties - Save the profiles, start FES and login to Fiorano eStudio with the new password.
Changes to the FPS Profile
The path to the MQ Provider and JMX Client is the same as that of the FES profile above and thereby the steps are similar too; just that here it is done on the peer server profile.
- Load FPS profile in eStudio Profile Management perspective.
- Stop the FPS server.
- Navigate to Fiorano > Esb > Peer > Transport > FPSTransportManager > EnterpriseServer
- Change the username and password to use admin user credentials replacing the anonymous user credentials which are present by default.
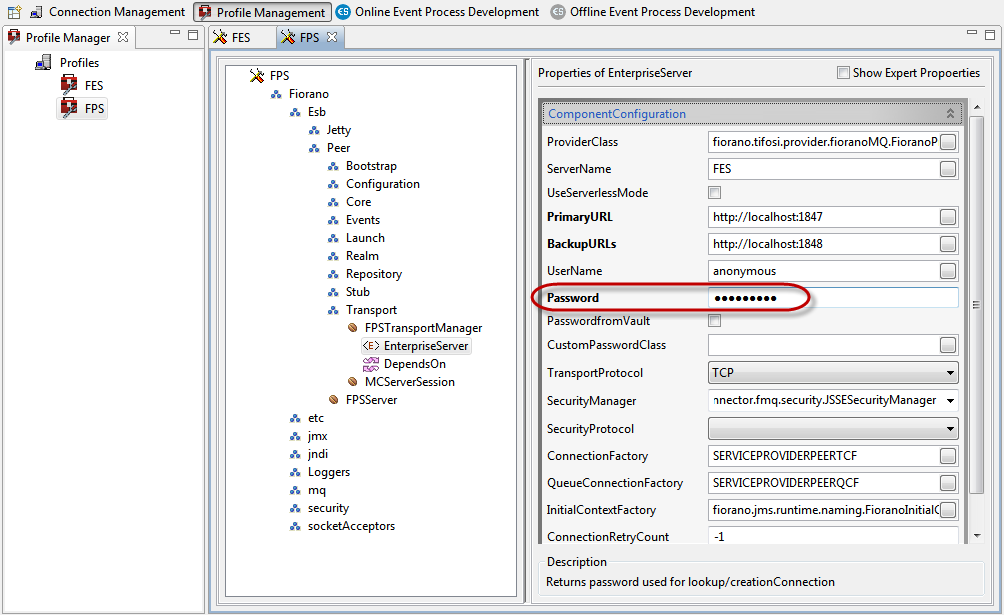
Figure 7: Providing the new password under the EnterprseServer properties
- Navigate to Fiorano > jmx > engine > ClientJMXEngine.
- Change the password corresponding to the admin user.
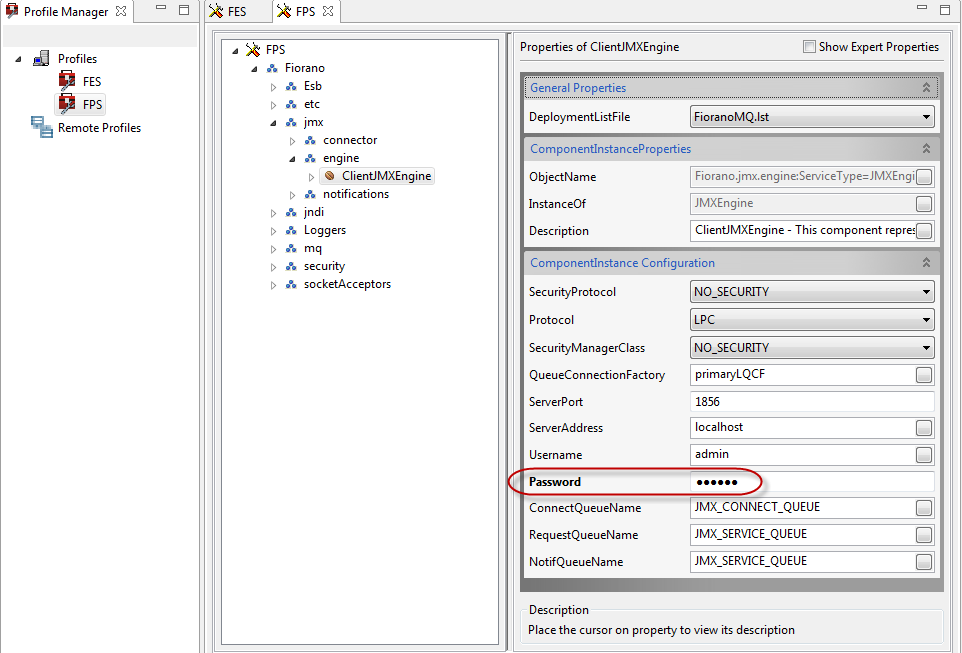
Figure: 8 Providing the new password under the ClientJMXEngine properties - Save the profile, start FPS and login to Fiorano eStudio with the new password.
FES HA and FPS HA profiles
The path to the MQ Provider and JMX Client is the same as that of the FES/FPS profile above and thereby the steps are similar too; just that here it is done on the HA profile of FES and FPS.
Changes to the FES HA profile
- Load FES HA profile in eStudio Profile Management perspective.
- Stop the FES server.
- Navigate to Fiorano > Esb > Transport > FESTransportManager > MQProvider
- Change the password corresponding to admin user.
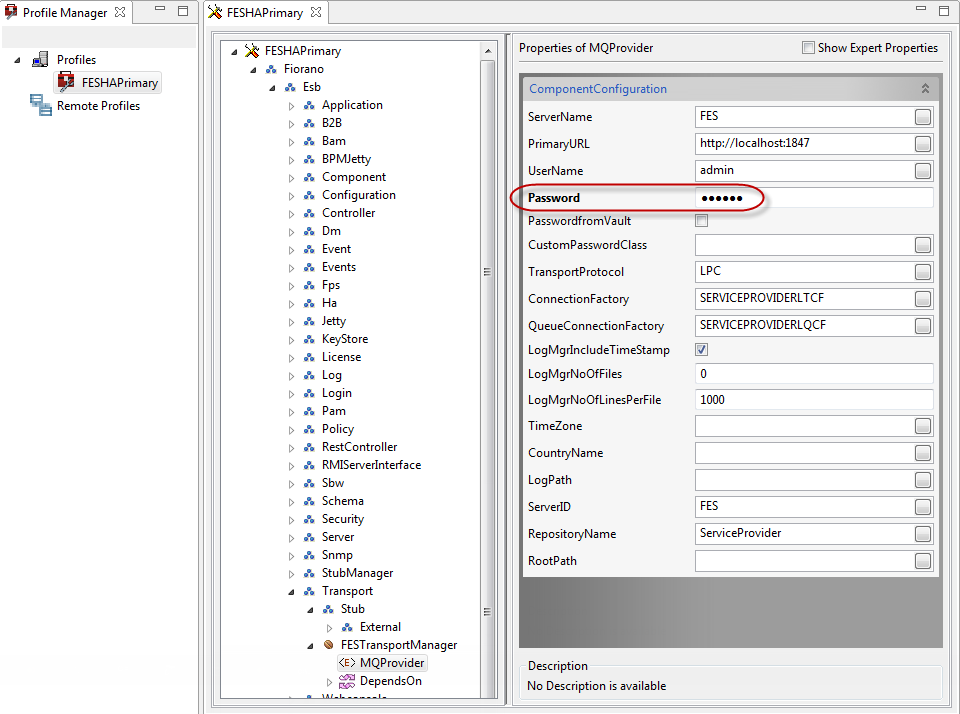
Figure 9: Providing the new password under the MQProvider properties - Navigate to Fiorano > jmx > engine > ClientJMXEngine.
- Change the password corresponding to the admin user.
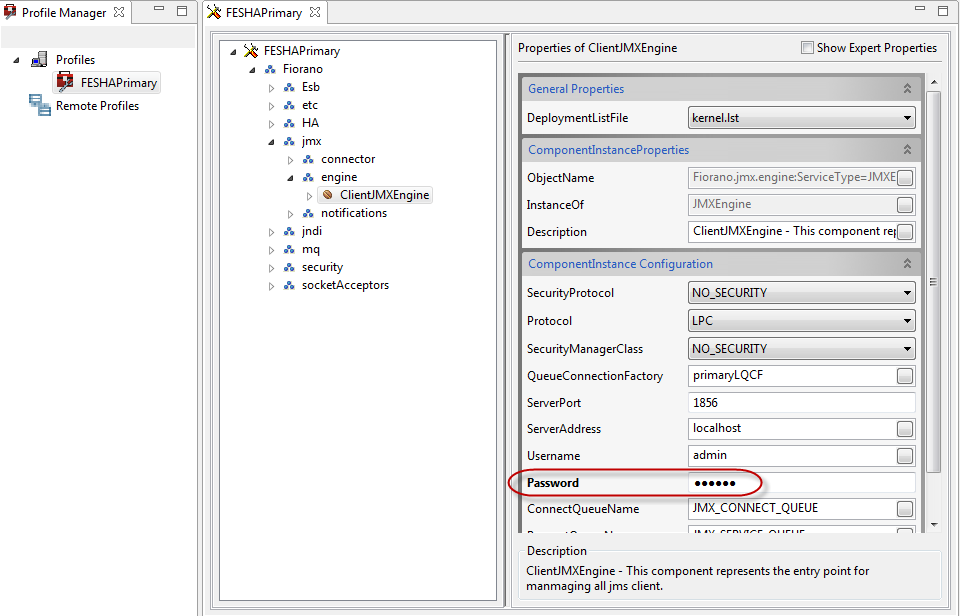
Figure 10: Providing the new password under the ClientJMXEngine properties - Save the profiles, start FES and login to Fiorano eStudio with the new password.
Changes to the FPS HA Profile
- Load FPSHA profile in eStudio Profile Management perspective.
- Stop the peer server.
- Navigate to Fiorano > Esb > Peer > Transport > FPSTransportManager > EnterpriseServer
- Change the username and password to use admin user credentials replacing the anonymous user credentials which are present by default.
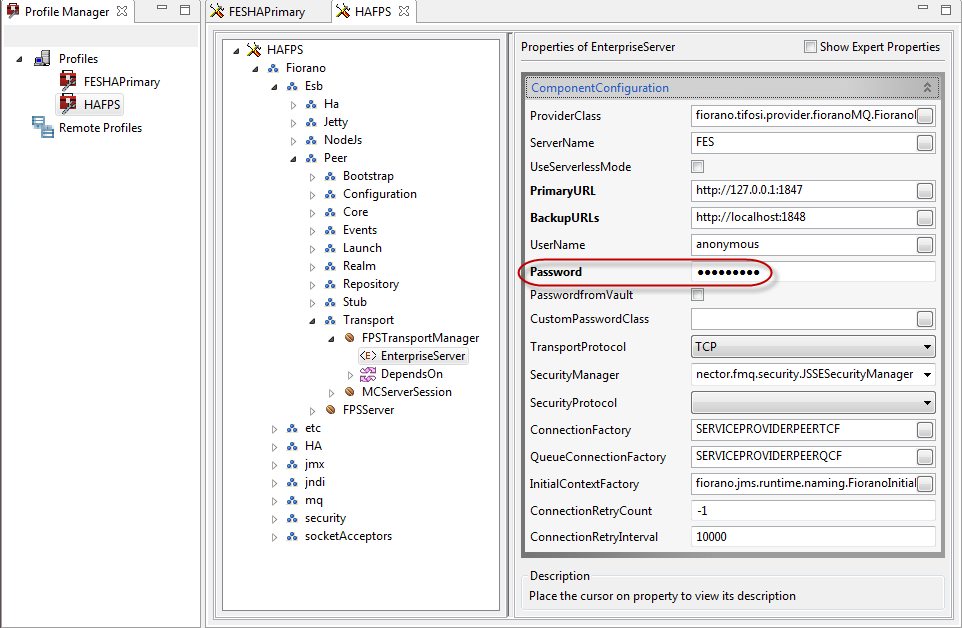
Figure 11: Providing the new password under the EnterprseServer properties
- Navigate to Fiorano > jmx > engine > ClientJMXEngine.
- Change the password corresponding to the admin user.

Figure:12 Providing the new password under the ClientJMXEngine properties - Save the profile, start FPS and login to Fiorano eStudio with the new password.
AGS and AMS profiles
Editing Component configuration
Few microservices use Anonymous user credentials to perform lookups and to create admin connections. These credentials must be changed to reflect the changes to admin/anonymous users if any.
Examples
Stub microservices
- Open the Stub CPS (Configuration Property Sheet) and go to FES Connection Configuration.
- Under the Component Configuration section in the FES Connection Configuration dialog box, change the username and password accordingly.
Save and Close and run the microservice.
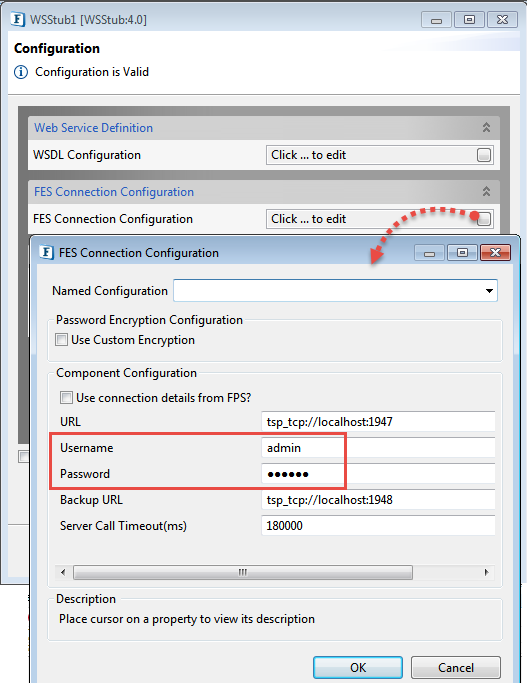
Figure 13: Connection Configuration properties pertaining to the WSStub microservice
Exception Listener
- Open the CPS and go to JNDI details section.
- Under the Component Configuration section in the JNDI details dialog box, change the JNDI username and password.
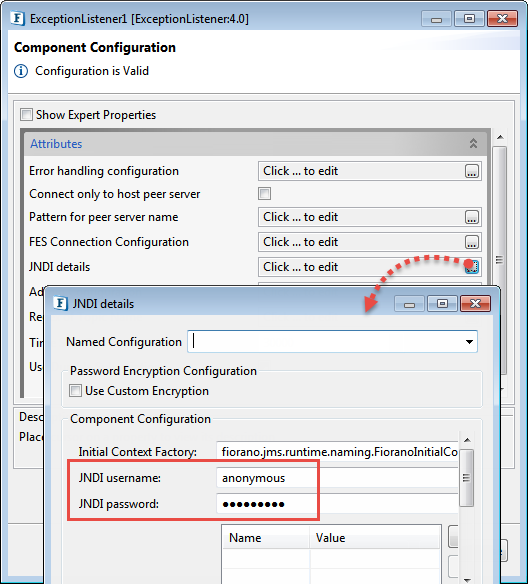
Figure 14: JNDI Configuration properties pertaining to the ExceptionListener microservice - Go to FES Connection Configuration.
- Under the Component Configuration section in the FES Connection Configuration dialog box, change the username and password accordingly.
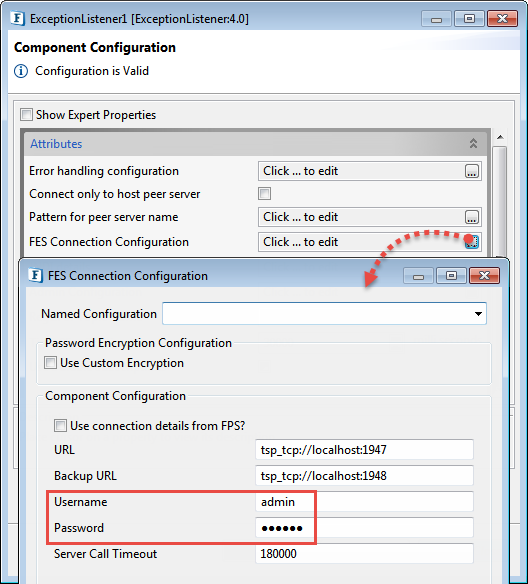
Figure 15: Connection Configuration properties pertaining to the ExceptionListener microservice
JMS Components
- Open the CPS and go to JNDI Configuration section.
- Under the Component Configuration section in the JNDI Configuration dialog box, change the JNDI username and password.
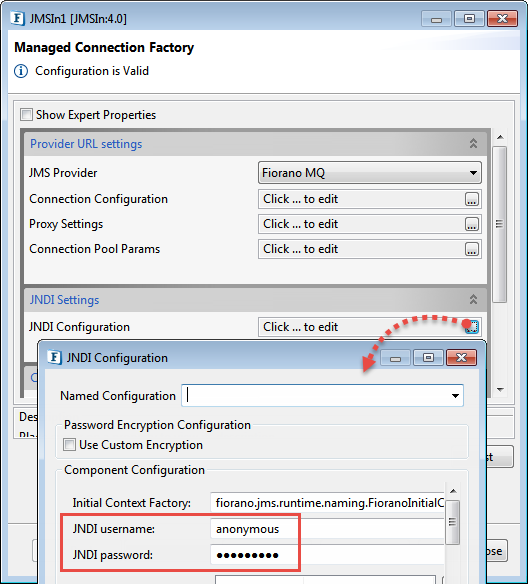
Figure 16: JNDI Configuration properties pertaining to the JMSIn microservice