Websocket Adapter allows two way (full duplex) communication and transfer of messages until the connection is terminated between web servers and clients. The microservice connects to the server configured in the component property sheet. Once a connection is created, messages coming to the INPUT_PORT will be sent to the connected server and the messages received from the server will be sent to the OUTPUT_PORT. After sending a message to the server, "Message sent successfully" message will be sent to the STATUS_PORT. The Message event takes place usually when the server sends some data. Messages sent by the server to the client can include plain text messages. After connection successful, whenever the server sends data, the message will be received by the output port.
Component Configuration
Configuration attributes in the Websocket Configuration Property Sheet (CPS) are explained below.
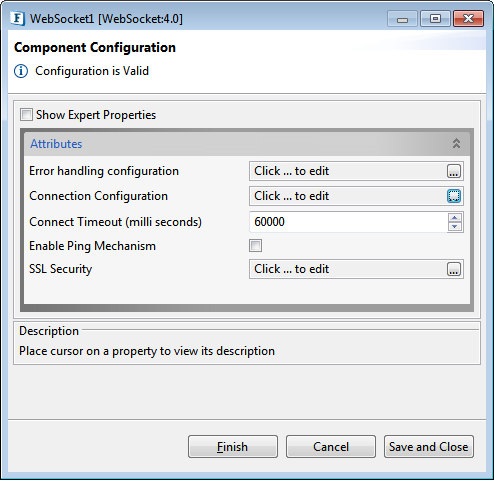
Figure 1: WebSocket CPS Component Configuration panel
Error Handling Configuration
The remedial actions to be taken when a particular error occurs can be configured using this attribute.
Click the ellipsis button against this property to configure Error Handling properties for different types of Errors. By default, the options Log to error logs, Stop service and Send to error port are enabled.
Refer to the Error Handling section in Common Configurations for detailed information.
Connection Configuration
Click the ellipsis button to configure the Connection configuration properties.
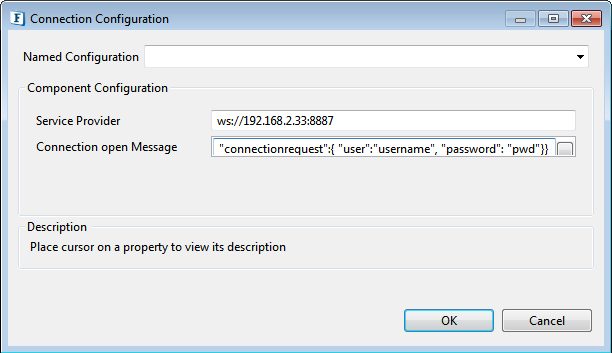
Figure 2: Connection Configuration properties
Once a connection has been established between the client and the server, the message configured in the Connection open Message property will be sent to the server. Errors are generated in the event of invalid URLs, or any non-availability of connection during the communication.
Service Provider
Web socket protocol has a schema similar to HTTP defined in its URL pattern. The default value is ws://localhost:8887.
The following image shows the Web Socket URL in tokens.
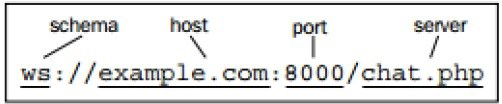
Figure 3: Web Socket URL elements
In case of a secured connection scheme, provide the schema as "wss" instead of "ws" and SSL configuration has to be enabled in the component as well.
Connection open Message
If a successful connection is made, the message provided here will be sent to the server. This can be used to send an initial request to the server for registration.
Click the button on the right side to configure the same.
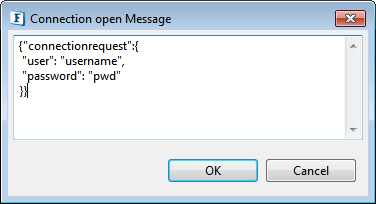
Figure 4: Sample message for Connection open Message
Connect Timeout
Connects this socket to the server with a mentioned timeout value (in milliseconds). A timeout of zero is interpreted as an infinite timeout. The connection will then block until established or an error occurs.
Enable Ping Mechanism
Enable this property to configure Ping Expiry Timeout.
Ping Expire Timeout
If the amount of time the client waits for the ping from the server exceeds the time specified here, then the message gets discarded.

Figure 5: Ping Mechanism enabled with the default timeout value
SSL Security
Please refer to the following sections to configure SSL Settings:
- Configuring SSL Settings
- SSL Security section in the Common Configurations page.
Expert Properties
Enable the Expert Properties view to configure these properties.
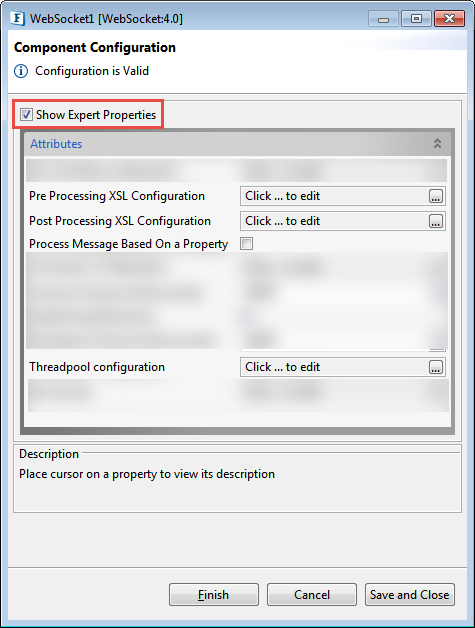
Figure 6: WebSocket CPS with the Expert Properties enabled and highlighted
Pre Processing XSL Configuration
Pre Processing XSL configuration can be used to transform request message before processing it. Click the ellipses button against the property to configure the properties.
Refer to the Pre/Post Processing XSL Configuration section under the Common Configurations page for details regarding Pre Processing XSL configuration and Post Processing XSL configuration (below).
Post Processing XSL Configuration
Post Processing XSL configuration can be used to transform the response message before sending it to the output port.
Process Message Based on Property
The property helps components to skip certain messages from processing.
Refer to the Process Message Based On a Property section under the Common Configurations page.
Threadpool Configuration
This property is used when there is a need to process messages in parallel within the component, still maintaining the sequence from the external perspective.
Refer to the Threadpool Configuration section under the Common Configurations page.
Functional Demonstration
Scenario 1 - Multiple clients connecting to the same server
Prerequisites: Start Non- SSL Server
The following sample flow has two websocket microservices, both act as clients connected to the same server using the URL "ws://localhost:8887". Upon successful connection, the message mentioned in the CPS will be sent to the server. After receiving requests from the client, the server will broadcast the message to all the connected clients which will be sent to the respective output ports as shown in the display window.
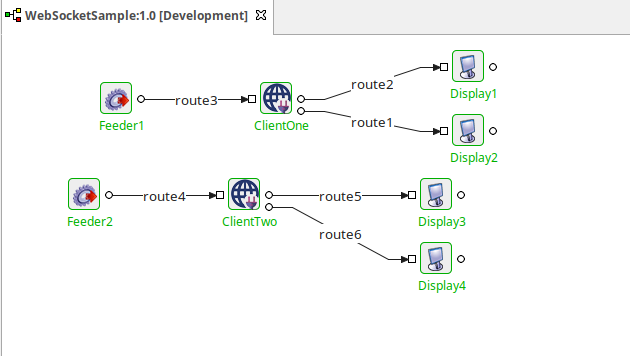
Figure 7: Event Process for multiple clients connecting to the same server
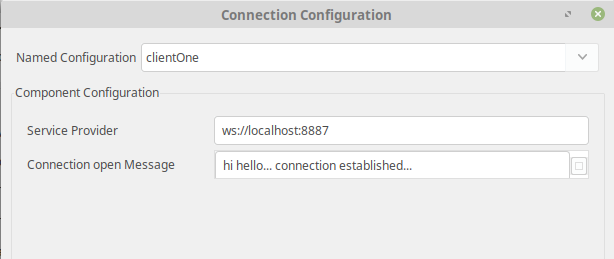
Figure 8: Connection open message for Client One in the CPS
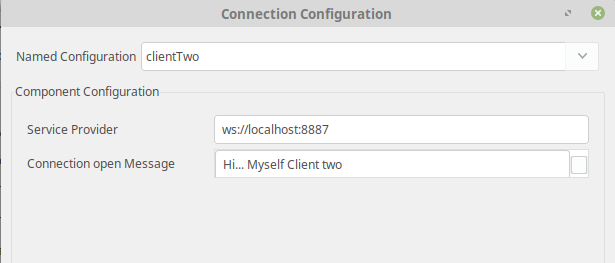
Figure 9: Connection open message for Client two in the CPS
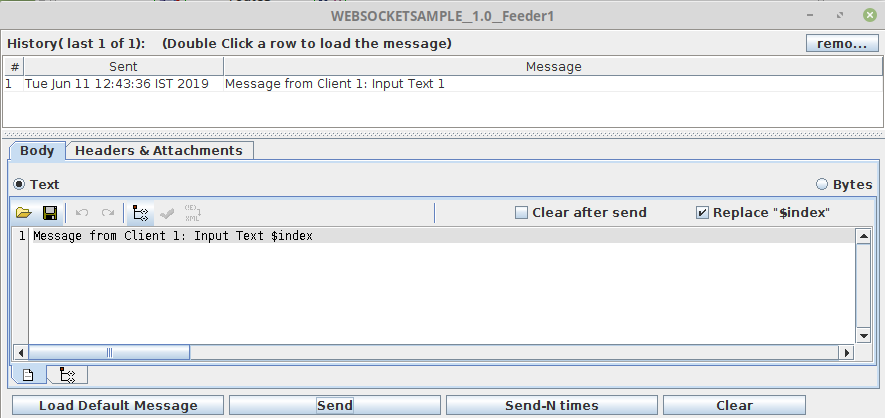
Figure 10: Sending message from Feeder1
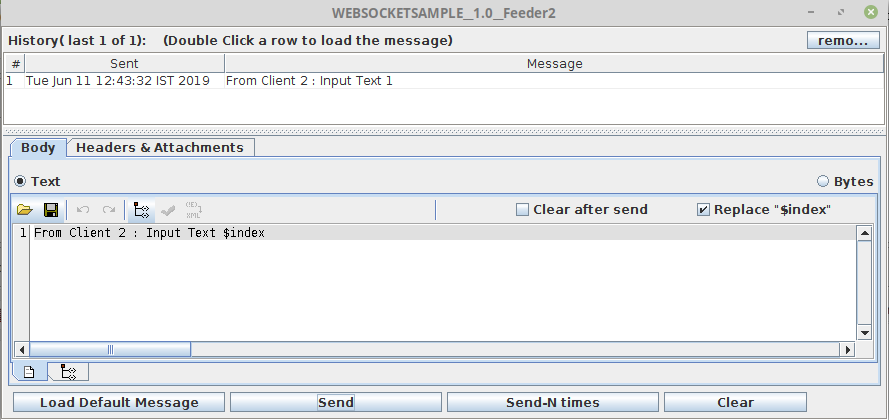
Figure 11: Sending message from Feeder2
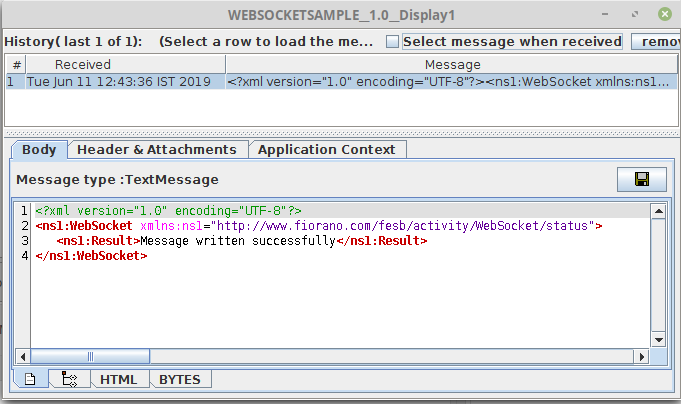
Figure 12: Acknowledgement message from Client1 displayed in Display1
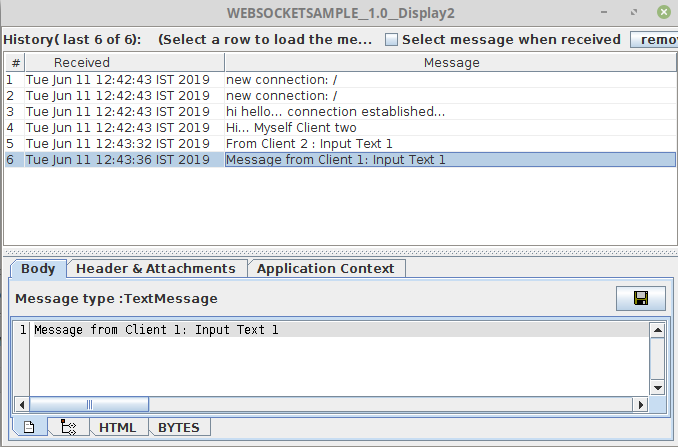
Figure 13: Messages from Client1 displayed in Display2
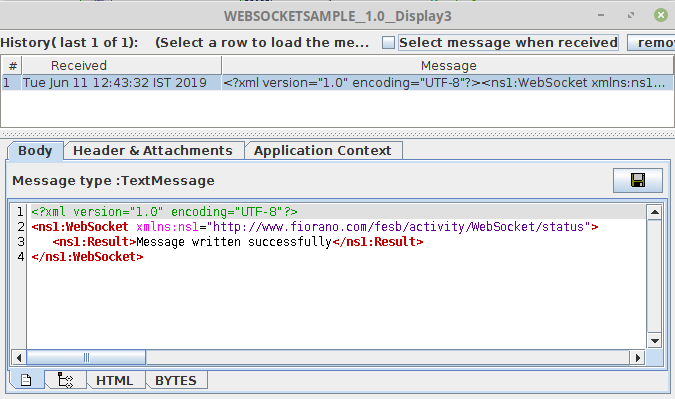
Figure 14: Acknowledgement message from Client2 displayed in Display3
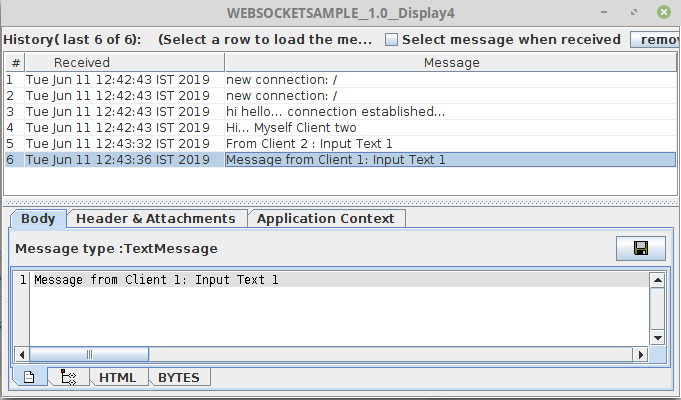
Figure 15: Messages from Client2 displayed in Display4
Scenario 2 - Enabling Ping mechanism
In this scenario, when Ping Mechanism is enabled, if the ping is not received between the client and the server until the time mentioned in the 'Ping Expire Timeout' property, the message sent by the client will get discarded after the timeout.

Figure 16: Enabling Ping Mechanism in the CPS
Enable Error port in the event process by clicking the  button in the eStudio and connect a Display microservice to the Error port display the error message. Error message can be found in the logs too.
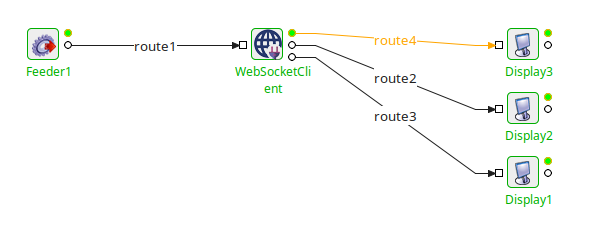
Figure 17: Event Process demonstrating Ping Mechanism
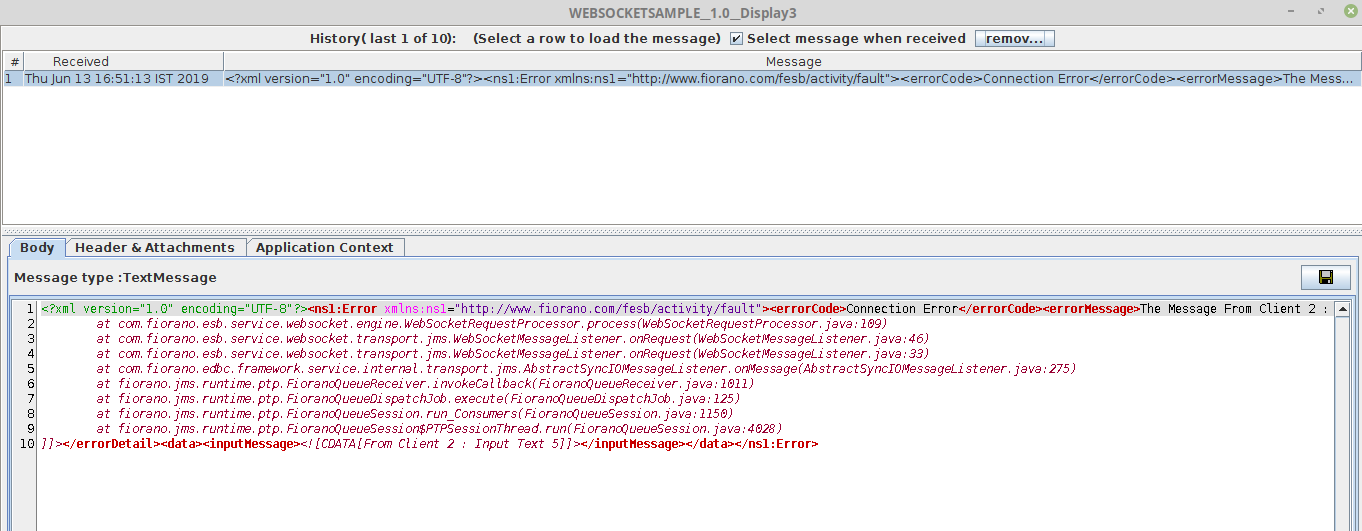
Figure 18: Message in the Display window
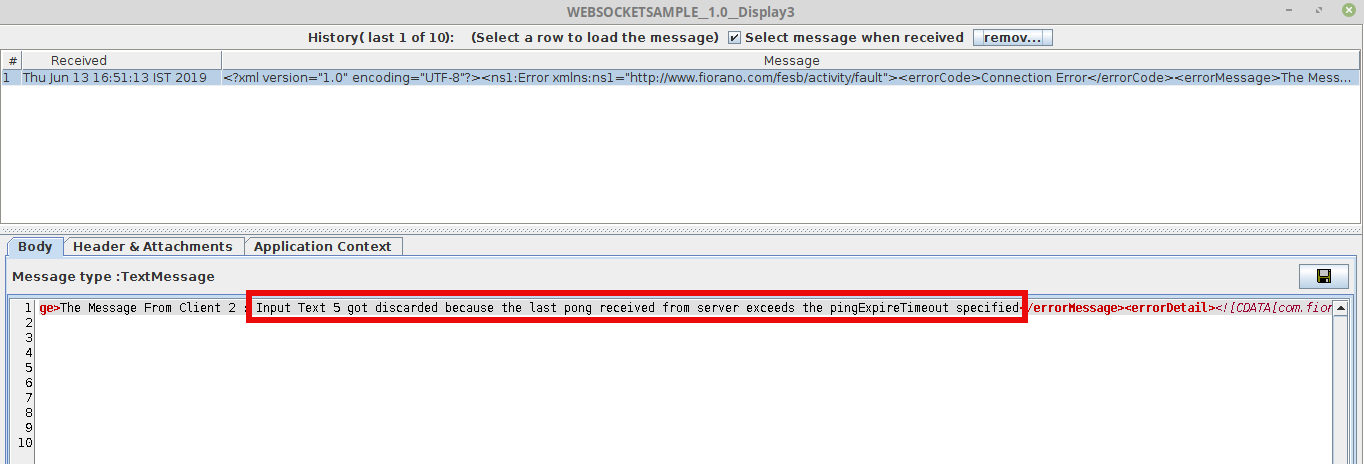
Figure 19: Error message highlighted in the Display window after scrolling to the right