The JMSRequestor component is used to send messages to a JMS Topic/Queue and wait till a message reply is received from the same. After sending the message to the Destination set in the CPS, JMSRequestor waits for the response message on the Response Destination. If Response Destination is not specified in the CPS, then a temporary destination is created on which the response message is expected. Users can also specify an Error Destination on which JMSRequestor receives the error message.
JMSRequestor is capable of handling following types of messages:
- Text messages
A TextMessage object's message body contains a java.lang.String object. - Map messages
A MapMessage object's message body contains a set of name-value pairs, where names are String objects, and values are Java primitives. The entries can be accessed sequentially or randomly by name. The order of the entries is undefined. Bytes Message
A BytesMessage object's message body contains a stream of uninterrupted bytes. This message type is for literally encoding a body to match an existing message format.
Points to note
- The only restriction on Map Messages is that this component does not support Objects in Map Messages.
- When adding the Initial Context Factory class for non Fiorano MQ server, the jar file(s) should be added as resource(s) to the JMSAdapters system library.
- JMSRequestor will not process further messages it receives on its input port till it receives the response for the current message.
- If IsDurableSubscriber property is changed to No or Destination Type is changed from Topic to Queue or ClientID/Subscriber ID is changed - the durable subscriptions created earlier should be unsubscribed to avoid persisting messages for the durable subscriber in runtimedata. For more information on unsubscribing, please refer to the DurableSubscribers view section in Chapter 32.3: Connecting to Web Management Tool of FioranoMQ Handbook.
Configuration and Testing
Managed Connection Factory
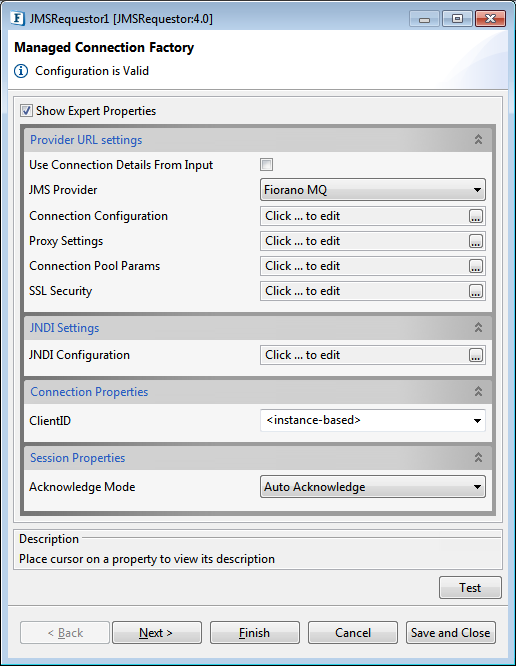
Figure 1: Managed Connection Factory panel
Please refer the respective sections in JMSIn4.0 page as properties in the Managed Connection Factory panel are the same for both the components.
Interaction Configurations
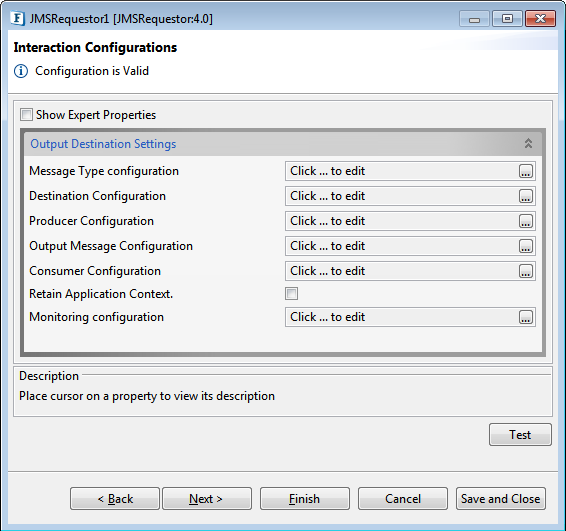
Figure 2: Interaction Configurations panel
Output Destination Settings
Message Type Configuration
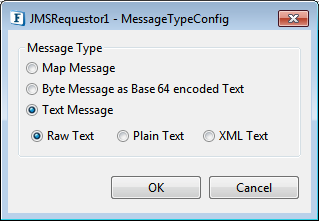
Figure 3: Message Type Configuration panel
Please refer the section in JMSIn4.0 page.
Destination Configuration
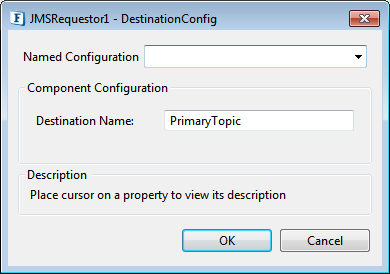
Figure 4: Destination Configuration panel
Destination Name
Name of the Topic/Queue to be subscribed to.
Producer Configuration
Please refer the section in JMSIn4.0 page.
Output Message Configuration
Please refer Mesaage Type Configuration section in this page.
Consumer Configuration
Please refer the section in JMSOut4.0 page.
Retain Application Context
Specifies whether the application context has to be retained
Monitoring Configuration
Please refer Monitoring Configuration section in Common Configurations page.
Expert Properties
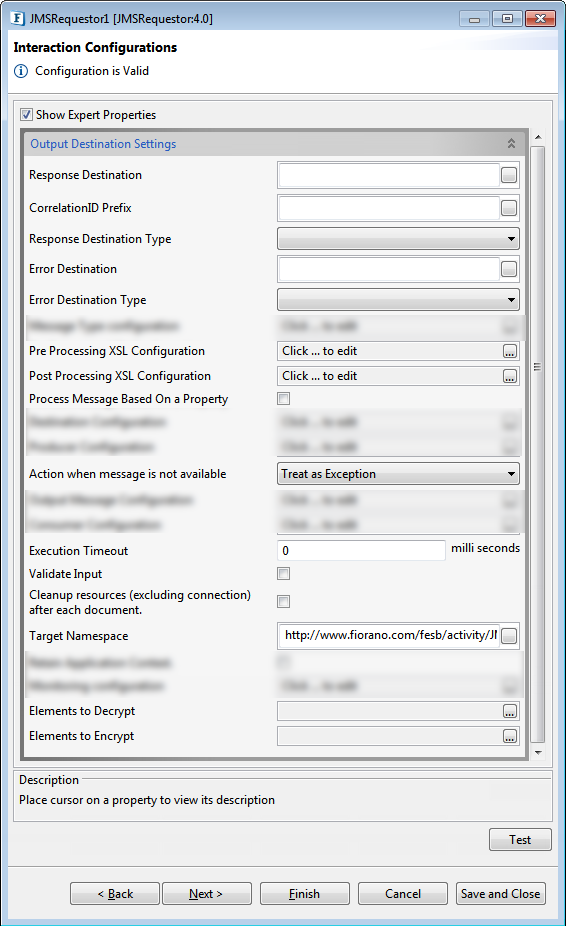
Figure 4: Destination Configuration panel with the Expert Properties view highlighted
Response Destination
Destination on which response is expected. This is an optional configuration; if this is not specified, a temporary destination will be created.
CorrelationId Prefix
Prefix used for setting Correlation ID.
Response Destination Type
Specifies the response destination; choose from the below options:
- Topic
- Queue
Error Destination
Destination on which error is expected. This is an optional configuration; if this is not specified, errors are expected on Response Destination.
Error Destination Type
Specifies the destination type for the Error Destination option chosen; choose from the below options:
- Topic
- Queue
Action when message is not available?
Please refer the section in JMSOut4.0 page.
Execution Timeout
Maximum time in milliseconds the component should wait for a message. The default value is "0" which specifies infinite wait time, that is, waits until a message is received.
Scheduler Configuration
Please refer Scheduler Configurations section in Common Configurations page.
Error Handling
Please refer Error Handling section in Common Configurations page.
Functional Demonstration
Scenario 1
Sending a request from JMSRequestor4.0 to the JMSReplier in plain text format; if successful, the plain text message gets processed as output from JMSReplier back to JMSRequestor.
Configure both the components as described in the Configuration and Testing section above and use Feeder and Display components to send sample input and check the response respectively.

Figure 5: Event Process demonstrating JMSRequestor and JMSReplier functionalities
Sample Input
Below is the sample generated using the Feeder.
Output
After running the Event Process, output will be displayed in the Display component if the message is successfully sent.
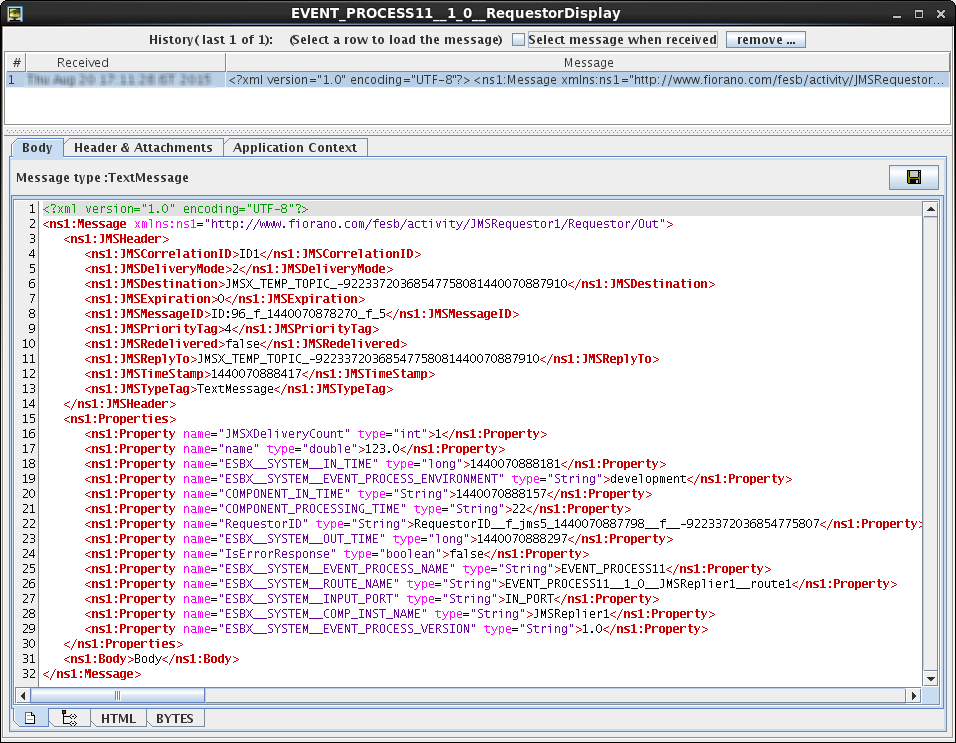
Figure 6: Output as seen in the Display component window
Scenario 2
Sending a request from JMSRequestor4.0 to the JMSReplier in 'Byte Message as Base 64 encoded Text' format; if successful, the byte message gets processed as output from JMSReplier back to JMSRequestor.
Configure both the components as described in the Configuration and Testing section above and use Feeder and Display components to send sample input and check the response respectively.
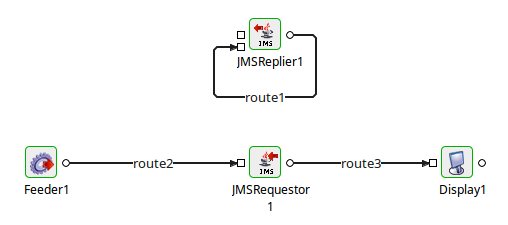
Figure 7: Event Process demonstrating JMSRequestor and JMSReplier functionalities
Sample Input
Below is the sample generated using the Feeder.
Output
After running the Event Process, output will be displayed in the Display component if the message is successfully sent.
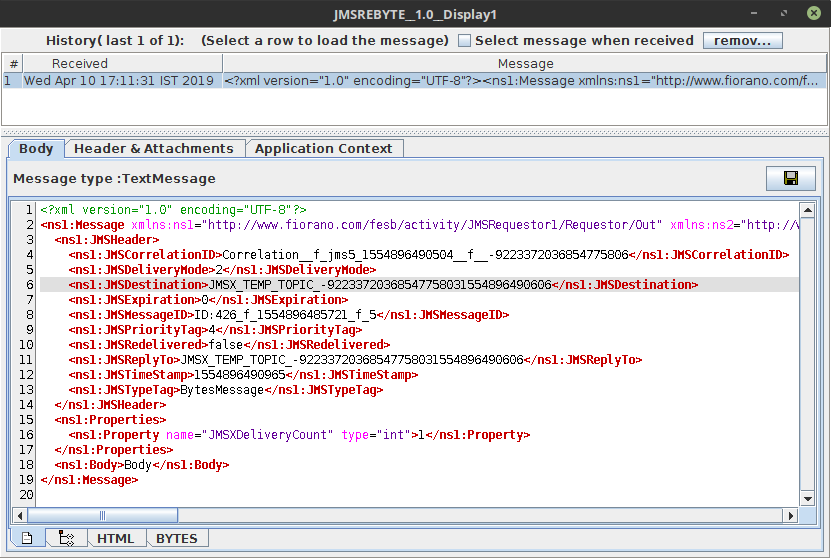
Figure 8: Output as seen in the Display component window