The Connection Management tool is used to manage both Admin and JMX connections to a Server. To open the Connection Management dialog box, click Window > Open Perspective > Other and select Connection Management.
The dialog box displayed consists of three views – the Server Connections view, the Properties view and the Explorer view, as shown in Figure 1.
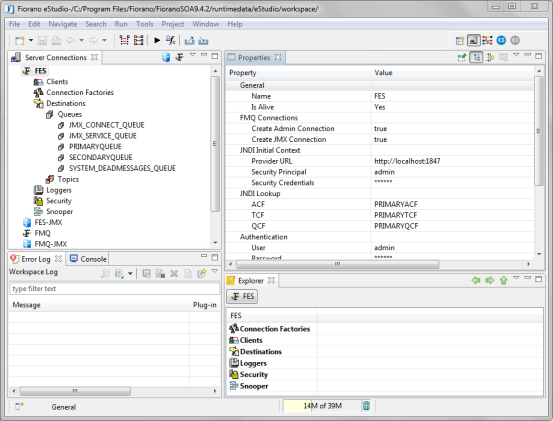
Figure 1: Connection management perspective
- Server Connections: Displays the connection nodes through which connections (Admin/JMX) are made to the Server.
Each Server Node displays the Shutdown and Restart options by right-clicking over the menu.
- Actions on the View Toolbar:
- New Fiorano JMX Connection: This option is used to create a new JMX connection Login node.
- New Fiorano Server Connection: This option is used to create a new Admin Connection Login Node.
- Explorer: The Explorer provides a collective view of multiple similar elements. The view provides a birds-eye view of all the children of a selected element and their properties. For example, if the user logs in to an Admin Connection to an Enterprise Server, clicking the Connection Factories node under FES node will show a list of all the connection factories and their properties in the Explorer view. (Refer figure below)
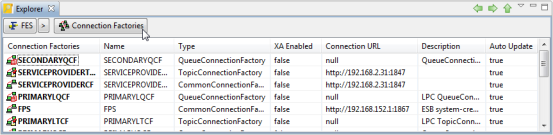
Figure 2: Explorer View
The view also has Up, Back and Forward actions to facilitate easy navigation through the nodes in the tree.
- Properties: All the properties for each administered object from the Server connections view is displayed in this view.
- Actions on the View Toolbar:
- Show Advanced Properties: This options is used to show/hide advanced properties if available for any selected node.
The ' ![]() ' icon is displayed beside the value of the property to indicate that there has been a change from in the value of the property from its default value.
' icon is displayed beside the value of the property to indicate that there has been a change from in the value of the property from its default value.
Admin Connection Management
Administrative Connection to a Fiorano Server (FMQ/FES /FPS) enables performing tasks such as tracking clients connected to the Server, managing destinations and connection factories, snooping messages on a queue or topic, viewing logs and so on.
- To login into a server, select the server node and in the properties view to specify the required connection properties, right-click on the node and select Login.
- After Login if both the Admin and the JMX connections are successful, then six child nodes are displayed under the Server node.
- If only the Admin connection is successful five nodes, excluding the logger node, will be displayed under the Server node.
- If the JMX Connection is successful, only the Loggers node is displayed as a child of the Server node.
Given below is the description and usage of each node under the Server node (including FES/FPS/FMQ).
Clients
All the clients connected to the Server are displayed under this node.
Option Available:
- Refresh: This option refreshes client connections. Client connections made or lost after login are reflected in the tree diagram only when the Clients node is refreshed.
- Purge: This option is used to purge or clear messages on a Topic subscribed to by the client for messages, as shown in Figure 2. This action is useful for the durable subscriber when it is in an inactive state.
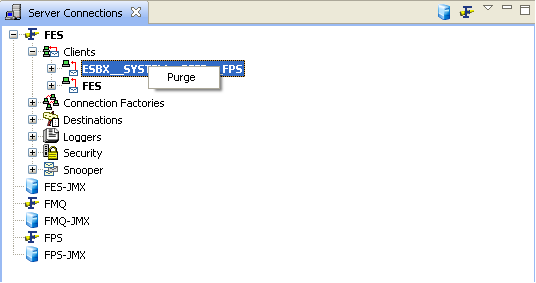
Figure 3: Purge Messages
Connection Factories
The default connection factories provided by the Server are initially displayed under this node. [Semantic check please]
New Connection Factories can be added by selecting the Add Connection factory option by right-clicking this node, as shown in Figure 3.
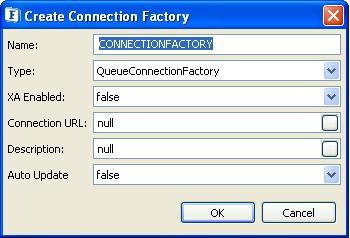
Figure 4: Create connection factory dialog
Right-click on the Connection Factory menu to delete the Connection Factory.
Destinations
The destinations created in the Server are displayed under this node under Queues or Topics categories.
New Queues/Topics can be added by selecting Add ? Queue /Topic and right-clicking the Destinations node or by selecting Add Queue/Add Topic on the Queues and Topics nodes, as shown in Figure 4.
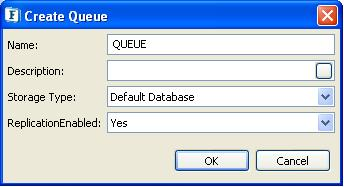
Figure 5: Create Queue dialog
Actions Associated with Queues andTopics
EditACL: This option is used to add Users to the Access Control List (ACL) where Permissions may be edited.
For adding a new ACL Entry, click Add in the EditACL dialog box, as shown in Figure 5.
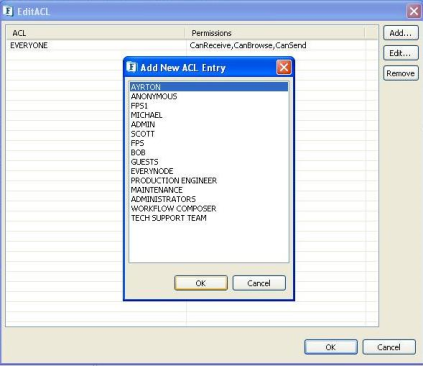
Figure 6: Edit ACL dialog
To edit a new ACL Entry, select the ACL to edit and click on Edit. The Edit Permissions dialog box displayed, as shown in Figure 6.
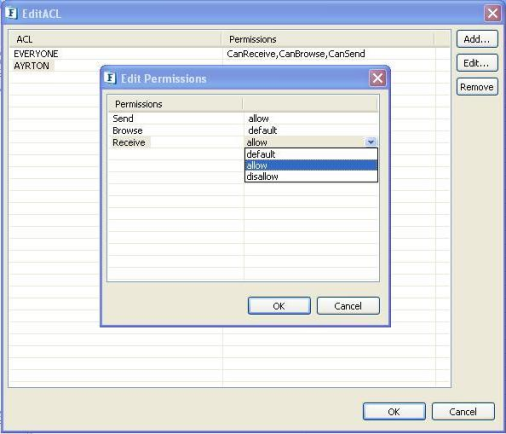
Figure 7: Editing permissions
Subscribe/Receive: This option is used to subscribe or receive messages on a destination. A dialog box is displayed, as shown in Figure 7, containing subscribed or received messages.
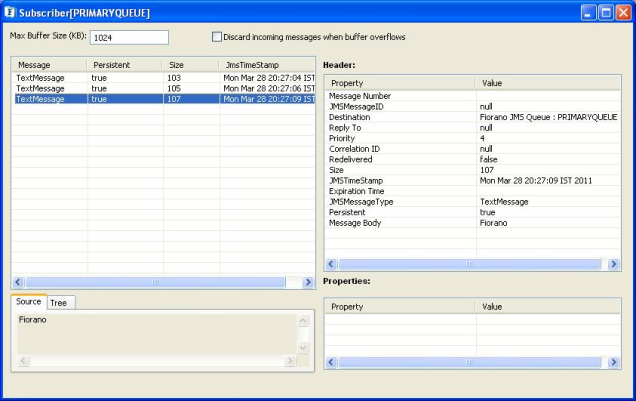
Figure 8: Subscribe messages dialog
Browse Messages: This option is used to view messages on a Queue.
Produce Text Message: This option is used to send/produce messages on a Queue or a Topic.
Delete: This option is used to delete a Queue or a Topic.
Loggers
Users that are logged in are allowed to view and manage Server logs. For example, the node Fiorano, which is a child node, contains all the Fmq and Esb related events to which an Appender or a Console Appender may be added. The same functions may be added to the Monitoring and the WebManagement nodes.
- To add an appender right-click on the logger and select Add ->File or Console Appender. A dialog box is displayed where New File Appender/Console Appender properties may be added .Enter the Values and click on OK to create the Appender.
- To View/Clear Logs of an Appender right-click and select View Logs /Clear Logs.
- To delete an Appender, right-click on the appender and select Delete.
Security
Groups and Users created for access control are added under this node.
- To add a new Group, right-click on Groups and select Add Group.
- To edit the members in a Group, right-click on a Group and select Members. A dialog box is displayed, as shown in Figure 8, where new Users or Groups may be added.

Figure 9: Add members dialog
- To add a new User, right-click on Users and select the Add Users option.
- To change the password of a User, right-click on User and select Change Password. A dialog box is displayed, as Shown in Figure 9, where the password can be changed.
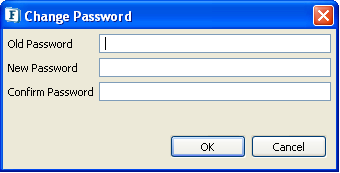
Figure 10: Change password dialog
Snooper
The Snooper function enables the replication of messages under a Queue/Topic to another Queue/Topic.
The Queue/Topic on which snooping is desired can be added by right-clicking on Snooper/Queues/Topics nodes and selecting Add/Remove Destinations option. A dialog box is displayed, as shown in Figure 10, where the destination list is displayed. Destinations may be added or removed from this list.
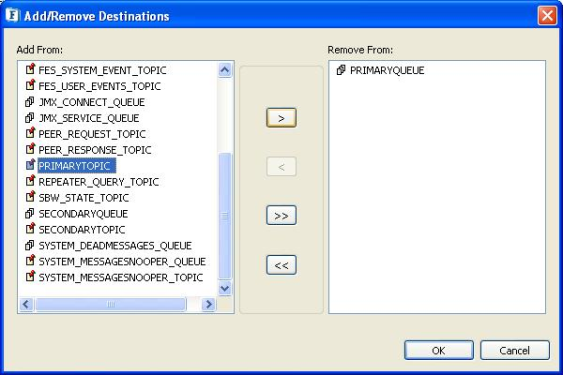
Figure 11: Add/Remove destinations
JMX Connection Management
The JMX Connection Management lets the User connect to a JMX complaint Server such as FMQ-JMX/FES-JMX/FPS-JMX and perform tasks such as browsing Server mbeans, monitoring data, and changing Server properties runtime.