Objective
To describe the capability of aggregator adapter to aggregate the incoming messages based on various constraints and preferences into a single message.
Prerequisites
- Start Fiorano Enterprise Server (FES) and Fiorano Peer Server (FPS)
- Login to eStudio application
- Understand the basic menus and perspectives (panels) in eStudio application
Configure the DB component to perform a Select query with a WHERE clause and return all the records which match the WHERE clause in a particular database table (refer scenario below) that has many records.
Scenario
Configure DB component to select the table with columns: STUDENT_ID, STUDENT_NAME and PLACE, and configure query to fetch all the records based on STUDENT_ID. Send multiple requests with same and different STUDENT_IDs using Feeder. Configure Aggregator component to aggregate 3 entries complying with 2 conditions as below:
- The message does not contain a duplicate value in the element 'STUDENT_ID'.
- All 3 entries in each output message need to have the same value for the element 'PLACE'.
In such a scenario, the 3 entries appeared once in a message do not appear again in the subsequent messages.
How it Works
Aggregator component collects and aggregates messages received on its IN_PORT based on a specified Completeness Condition. The collected messages are then forwarded as an aggregated bundle of messages to a component connected to its OUT_PORT.
Components used
Setting up the Example
Composing the Event Process
Before configuring the components, perform the following actions in eStudio:
- Add a new Event Process with name 'Aggregator_Example'.
- Drag the DB component from DB category in the Micro Service Palette to the Fiorano Orchestrator.
- Similarly, add Aggregator component present in Flow category, and Feeder and Display components present in Util category.
- Connect the components in the following manner:
- Output port of Feeder component to the input port of DB component
- Output port of DB component to the input port of Aggregator component.
- Output port of Aggregator component to the input port of Display component.
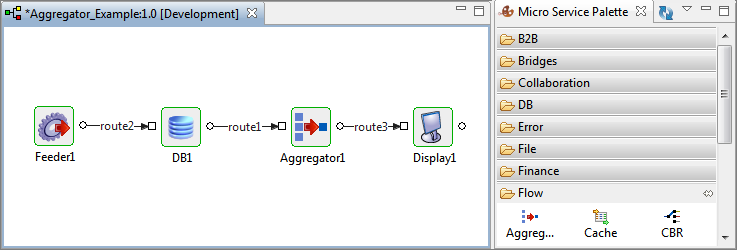
Figure 1: Composing the Aggregator_Example event process
Configuring DB component
Configure DB component as mentioned in the "Prerequisite" section so that query can be invoked using the Feeder component sent to Aggregator.
Configuring Aggregator component
To configure Aggregator component, perform the following actions in Aggregator_Example event process:
- Double-click the Aggregator component to open the Configuration Property Sheet (CPS).
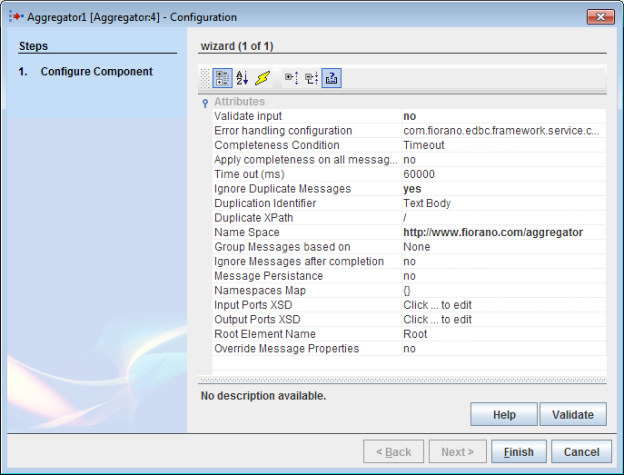
Figure 2: Aggregator CPS - Under Attributes section in the Configuration dialog box, click the Completeness Condition attribute and select the value "Wait For 'N' Messages".
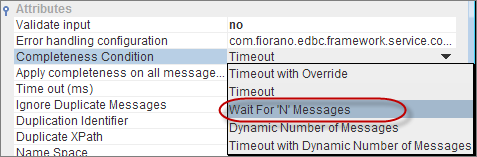
Figure 3: Setting Completeness Condition - In the new attribute—Completeness Message Count that appears, provide the value '3'.This makes the Aggregator wait for 3 messages and then aggregates into a single output message after the receipt of 3 messages.

Figure 4: Setting Completeness Message Count - Select the Input Ports XSD attribute and click the Ellipsis
 button.
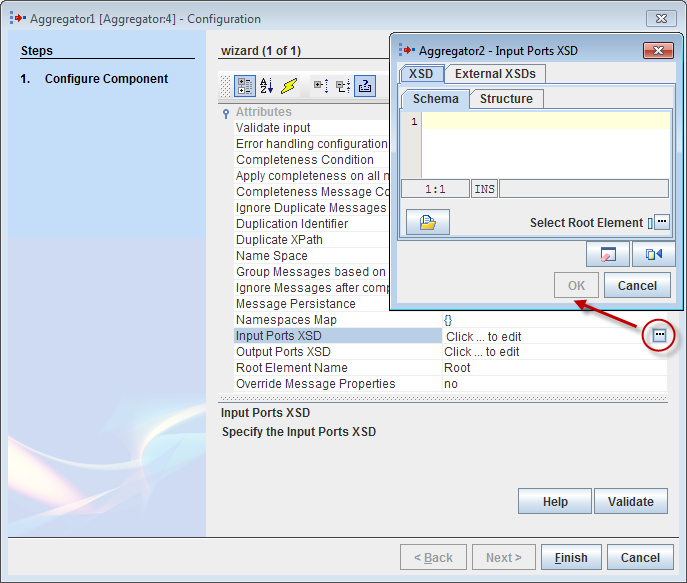
Figure 5: Selecting Input Ports XSD Schema - In the Input Ports XSD dialog box, click the Fetch From Connected Source
 button present in the bottom-right part of the screen. Inthe Connected Ports dialog box, select OUT_PORT and click OK to fetch the XSD from DB output port.
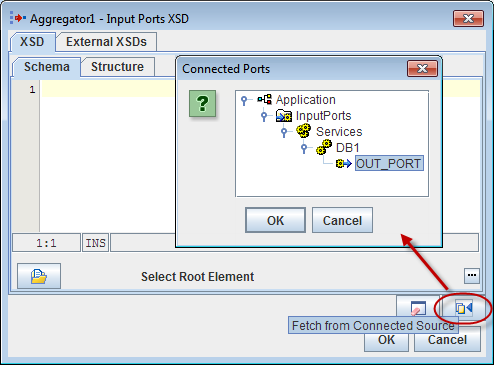
Figure 6: Connecting to DB component output port XSD Schema appears in the editor and the root appears under Select Root Element next to the Ellipsis
button.
Figure 7: Input Port XSD editor with the DB Schema populated- Retain the IgnoreDuplicateMessages attribute value as 'yes' to ignore the messages that has the same content in the Duplication identifier.
- Retain Duplication Identifier attribute value as 'Text Body' so that the message having the same content in Text Body as that of a previous message will not be taken into account for aggregation.
- Select Duplicate XPath and click the Ellipsis button. In the XPath Editor dialog box, perform the following actions and click OK:
- Delete the default element present in the right side panel to restrict the duplicate check to a particular element than the entire content.
- Drag the element 'STUDENT_ID' present in the left panel to the right panel.
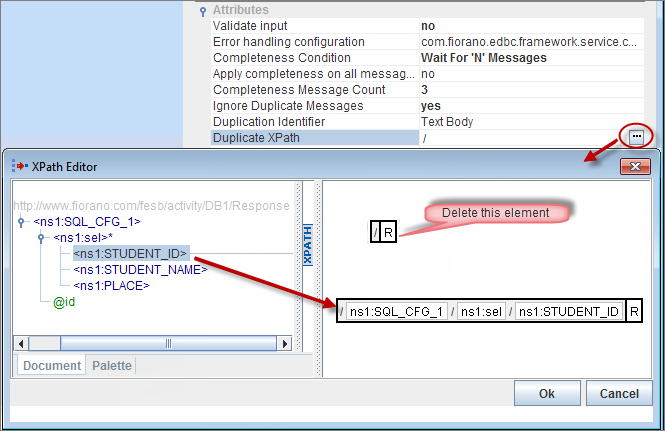
Figure 8: Selecting STUDENT_ID under Select query as Duplicate XPath
- Click OK to close the XPath Editor and click Finish in the Configuration CPS to save the configuration.
Configuring Feeder component
To configure the Feeder component, perform the following actions:
- Double-click Feeder component to open the Feeder CPS.
- In the Message Type Configuration page, retain Output Message Format option as 'XML' and click the Connected Port Schemas button.
- In the Connected ports dialog box, select IN_PORT to enable connection between output port of Feeder_Split and input port of XMLSplitter_Split component. Click OK and then click Next.
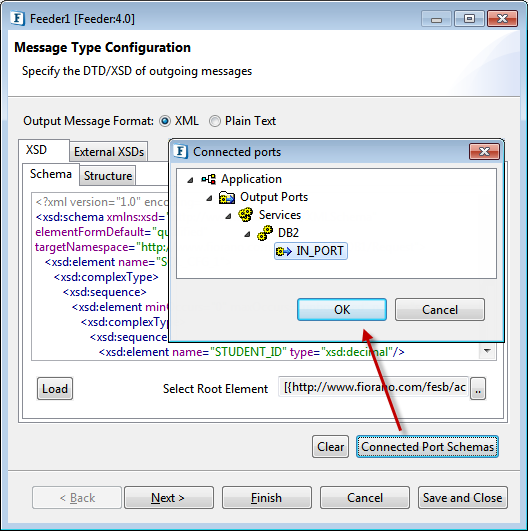
Figure 9: Connecting to DB Input port
- In the Message Details Configuration page, click the Generate Sample button to load sample input.
- Under No.of Repeatable elements to be generated section in the XSD Sample Generation Dialog window, replace max value '3' with '1' so that only one output is generated, and click OK.
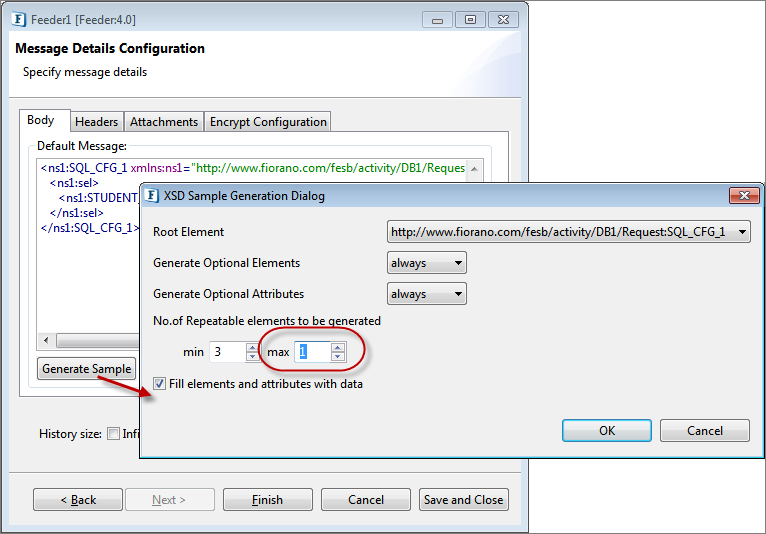
Figure 10: Reducing the number of elements generated to '1'
- Click Finish to save Feeder configuration.
Running the Example
To run the example, perform the following actions in the Orchestrator:
- Click Check Resource and Connectivity
 icon (or press ALT+SHIFT+C) to check resource and connectivity.
 - Click Run Event Process
 icon (ALT+SHIFT+R) to run the event process. Two windows for Feeder and Display components get opened.
 - In the Feeder window, type STUDENT_ID number and click Send. Perform this activity multiple times with different IDs, for example, 1 to 10.
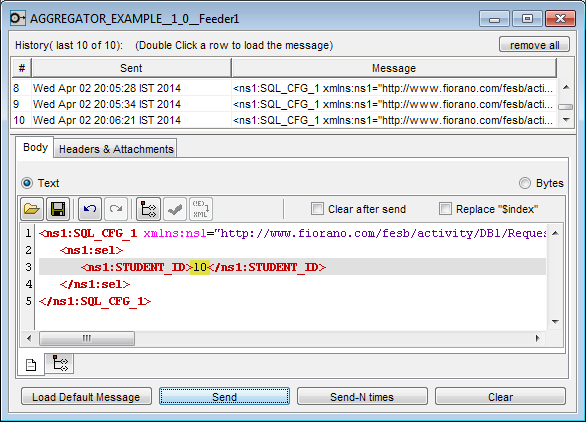
Figure 11: Sending multiple messages in Feeder
- In the Display window, select the first message received. It shows the filtered message with 3 entries that match the criteria, that is, data that contains same PLACE and different STUDENT_IDs.
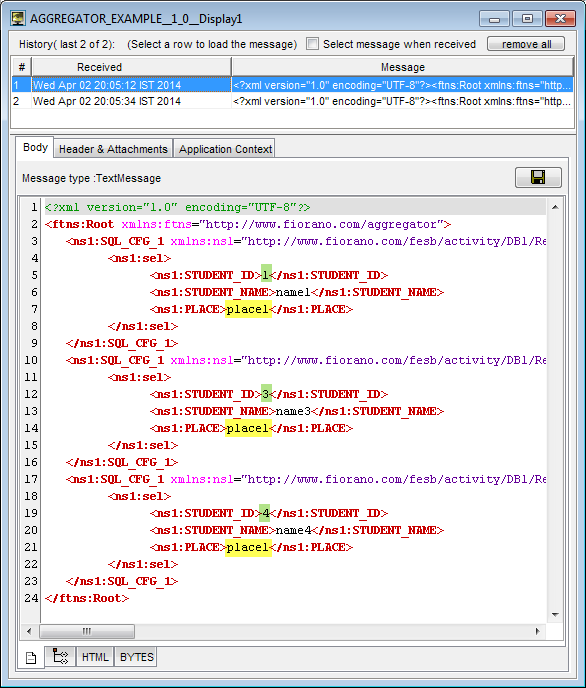
Figure 12: Content of first message in Display window
- In the Display window, select the second message received. It shows the filtered message with 3 entries that match the criteria, where it won't repeat the data that was previously filtered (compare the first and second message in Display window).
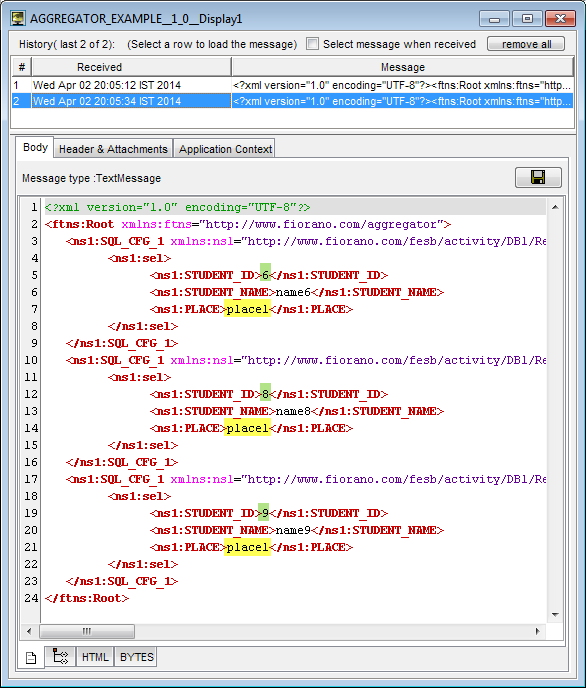
Figure 13: Content of second message in Display window
Reference
Please note that the options used in this example are minimum, which helps you to get an overview of the application. To explore the other options present in the Aggregator component, refer: Aggregator. Likewise, for DB, Feeder and Display, refer sections: DB, Feeder and Display respectively.