Sender selector ascertains conditional flow of data through a route. By specifying one or more component (as per requirement) on Sender selector of the selected route, it ensures that only those messages coming from the specified components are allowed to pass through the route.
Defining a Sender selector
To provide a Sender property, select the route and go to Selectors property tab. Now click the button against Sender property and select the component(s) from the list to define that the route allows only those messages which comes from the particular component.
Example
Below is an example with a scenario and the corresponding steps explained.
Scenario
Create an Event Process containing two instances of a Chat service and an instance of a Display connected through routes.
In the event process, connect the routes from output ports to input ports in the following manner:
- Chat1 to Display1 - Route1
- Chat2 to Display1 - Route2
- Display1 to Chat1 - Route3
- Display1 to Chat2 - Route4
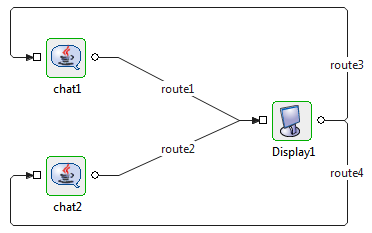
Figure 1: Event Process set as per scenario
As per the above connections, when the Event Process is launched, if a message is sent from Chat1 component, it is received by Display component and the message is sent back to both Chat1 and Chat2 components from the Display output port.
Now, define conditional data flow from the Display component instance by assuming that Display1 has to send only those messages on Route3 which are sent from Chat1. Similar conditions should also apply to route4 so that it should allow only those messages that is sent from chat2 to Display1.
Steps
To define conditional data flow through route1, perform the following steps:
- Select Route3; when the properties of this route gets displayed in the Properties tab, go to the Selectors tab.
- In Selectors tab, click the button against Sender property.
In the Senders Dialog pop-up window, select chat1 and click OK
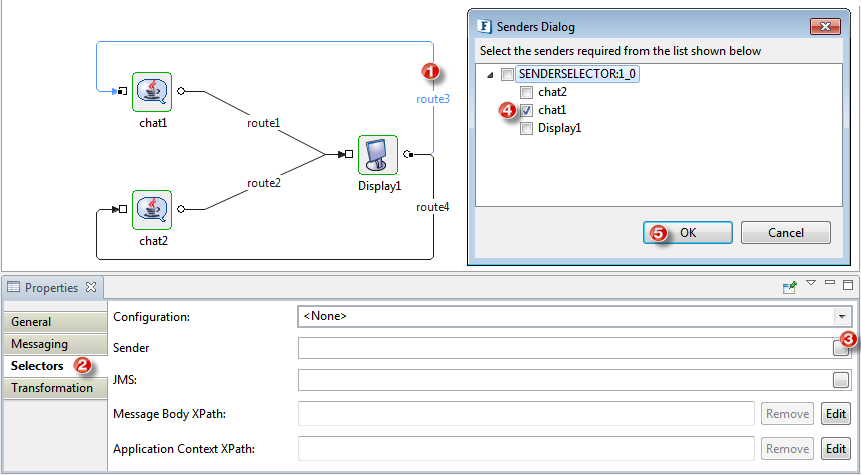
Figure 2: Configuring Sender selector on route1
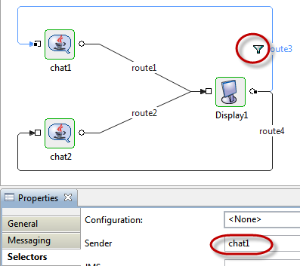
This ensures that only the data sent by Chat1 will travel through route3. Similarly, set the Sender Selector value as 'Chat2' for Route4.
After the changes, if the event process is launched, messages sent by Chat1 are in turn received only by Chat1 and messages sent by Chat2 are received only by Chat2.