There are times when a target Event Port needs information that was produced by a service instance that occurred earlier in the workflow. Consider an event process representing a ten-step business process. In these ten steps, each step is implemented using a service instance. By using application context, a service instance representing the tenth step in the process can use the information generated by the service instance in the second step.
Application context is set as a JMS Message Property on the message and is available throughout the function, which can be used anywhere in the event process using an Xslt component or using Route Transformation.
Defining Application Context
To define Application Context for an application, perform the following steps:
- In the Event Process project, click in the Orchestration Editor and open the Properties view.
- Click the Application Context tab in the Properties view and enable the Application Context option.
- Select DTD or XSD option to choose the schema type.
- Click the Edit Schema button, provide the schema content in the editor that pops up and click OK.
- Click the
 button corresponding to the Root property and select root element from the list of available roots from the Root drop-down list.
Now the application context schema is defined for the Event Process.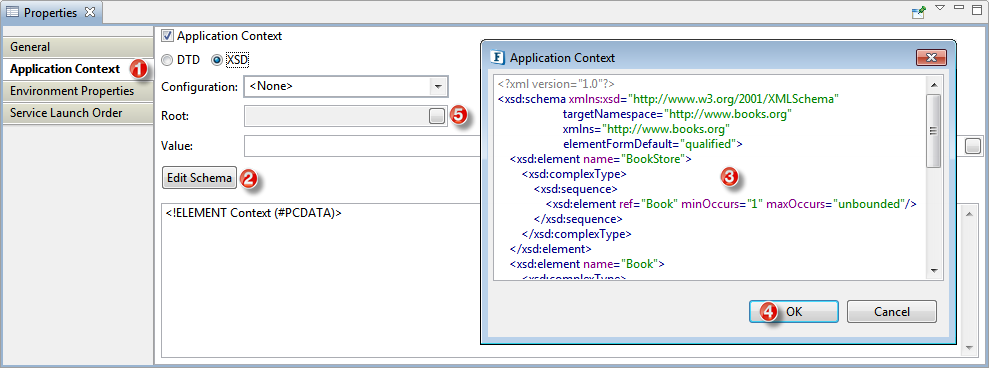
Figure 1: Application Context option Provide a name in the Value property to store as default value for this Application Context defined.
Setting Route Transformation to map Application Context
After creating Application Context, to configure it to the desired output port from where the value needs to be propagated, you need to set Route Transformation from the output port.
To configure Route Transformation, perform the following actions:
- Right-click the desired output port, go to Configure Application Context option and select Mapper Project option to open the Mapper editor.
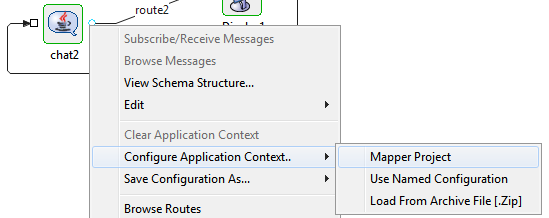
Figure 2: Opening Mapper editor The Mapper editor opens up where the mapping for the Application context can be defined. Connect the routes as required (from OUT_PORT element to Application-Context element) and save the mappings. The port figure will be shown in bold font to give a visual representation.
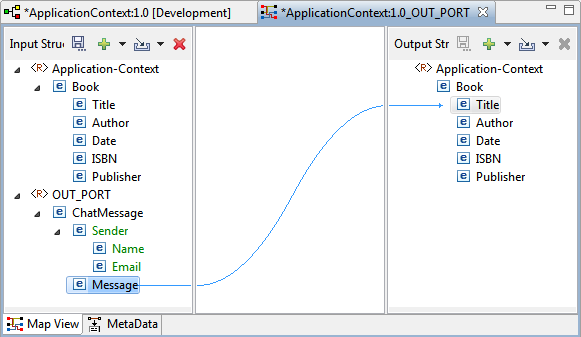 Figure 3: Mapper editor
Once the Application Context is configured at one of the output ports as above, the value is propagated in the message flow.