...
- Add the FileWriter component from File category in the Micro Service Palette to the Fiorano Orchestrator.
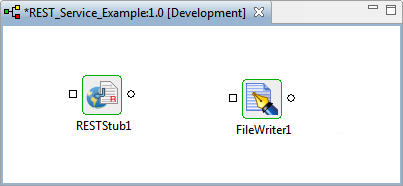
Figure 8: Adding FileWriter component in REST_Service_Example event process
- Double-click the FileWriter component to open Configuration Property Sheet (CPS).
- In the Interaction Configuration dialog box, click the Attributes tab to configure the attributes.
- Select the Is input Binary ?' checkbox checkbox to write the data as bytes and click the FileWriter Configuration Ellipsis
 button.
Figure 9: Selecting Binary Input
- In the FileWriterConfig dialog box, provide the following values and clock click OK:
- File Name: The name of the file to which the input data has to be written. If the file with this name does not exist, a new file is created
- Target Directory: Provide the location to save the file.
- Working Directory: Location to save the file during intermediate processing.
- Error Directory: Location to save the file in case the processing does not get successful.
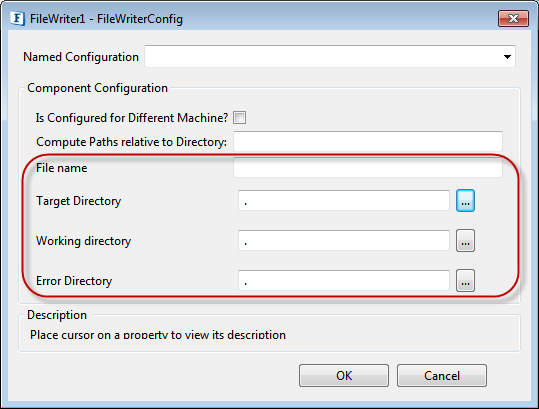
Figure 10: Providing File Name and storage locations
- Click Next, clear the Enable Scheduling option and click Finish to save the FileWriter configuration.
...
- Connect the FileWriter with RESTStub in the following manner:
- RESTStub output port to FileWriter input port.
- FileWriter output port to RESTStub input port.
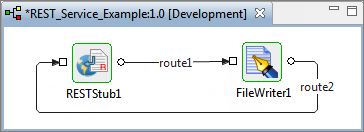
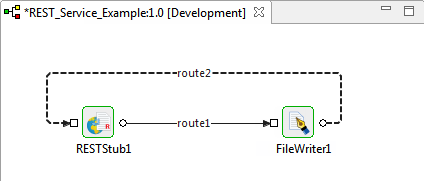
Figure 11: Connecting RESTStub with FileWriter
- Replace the names of 'route1' and 'route2' with 'UploadRequest' and 'UploadResponse' respectively to match the scenario. After clicking on the respective route, do any of the following to change the name:
- Press F2, change the name and click OK.
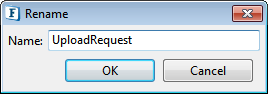
Figure 12: Renaming using Keyboard action 'F2'
- Go to Name property under General tab in Properties, change the name and press ENTER

Figure 13: Renaming using General Properties
- Press F2, change the name and click OK.
- The routes show up with the changed names

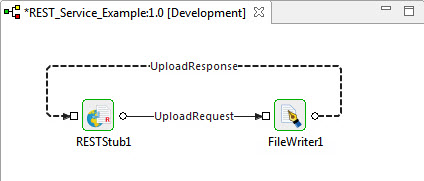
Figure 14: Connection with route names changed
...
- Right-click UploadResponse, point to Configure Transformation and select Mapper Project to open Fiorano Mapper editor.
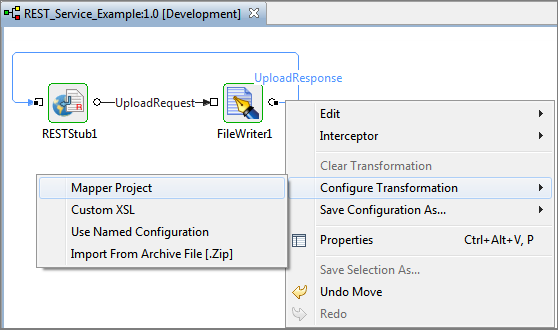
Figure 15: Navigating to Mapper Project for Route Transformation
- In the Output Structures panel, click Status under Response. 'Status' appears in Funclet View panel.
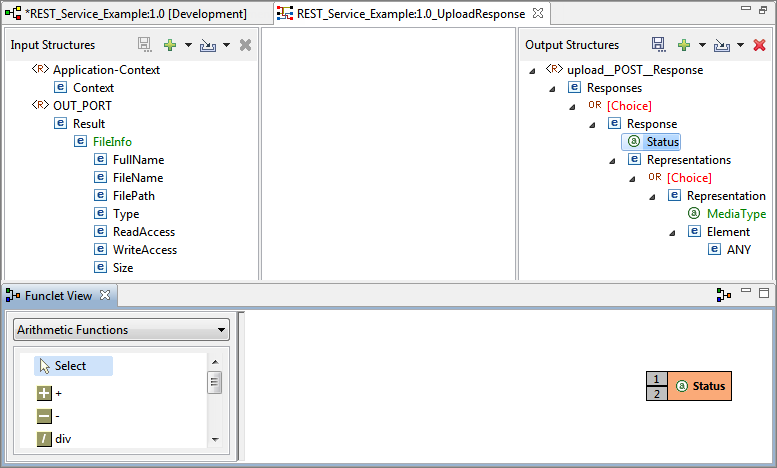
Figure 16: Working on Funclet View
- In the Funclet View panel, drag the function element Constant to the Funclet easel. Double-click it, edit the name as '200' and click OK.
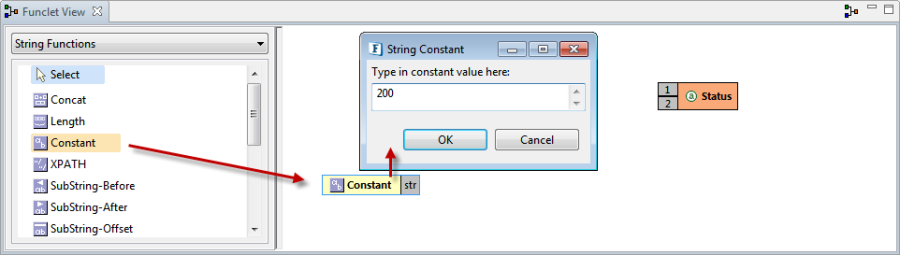
Figure 17: Adding Constant from String Functions
- Connect the source node of the constant '200' to the destination node of Status.
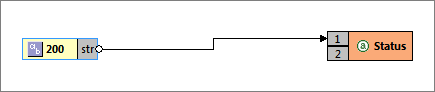
Figure 18: Connecting Constant with new name '200' to the Status element
- Similarly, connect source node of the constant 'application/jasonjson' to the destination node of MediaType (select from Representation under Output Structures panel).
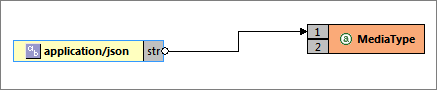
Figure 19: application/json constant connected to Media Type element - Add the following elements to the Funclet easel in the following manner:
- Click ANY present under Element in Output Structures panel
- Drag FullName present under FileInfo in Input Structures panel.
- Add two Constant functions from String Functions and change their name as below:
- { "FilePath" : "
- " }
- Add Concat from String Functions.
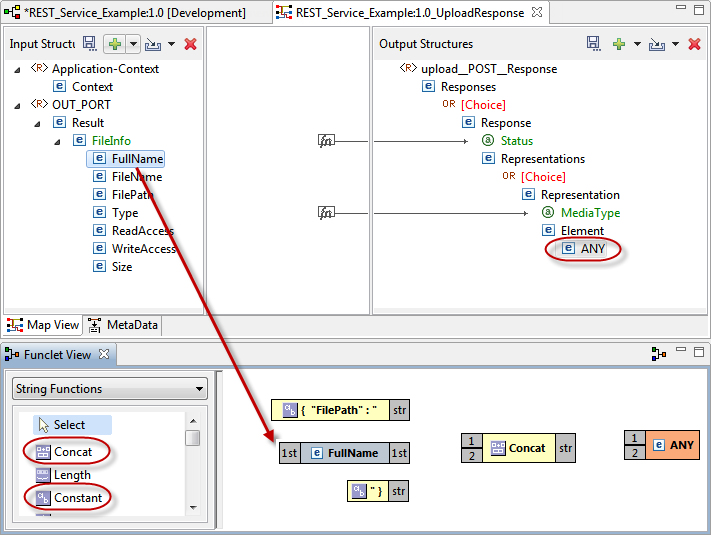
Figure 20: Adding Constant functions, FullName from FileInfo, Concat and ANY
- Connect the elements added in Step#6 in the following order:
- Source node of { "FilePath" : " to the destination node '1' of Concat.
- Source node of FullName to the destination node '2' of Concat. Destination node '3' appears after this conncetion.
- Source node of " } to the destination node '3' of Concat.
- Source node of Concat to the destination node of ANY.
{ "FilePath" : "<TARGET_FILE_PATH>" }: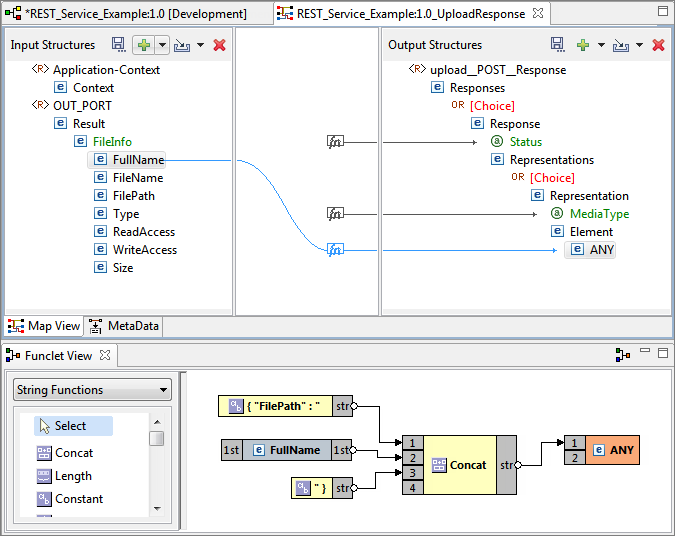
Figure 21: Functions and elements connected to generate Display output
- Click Save
 icon (or File ??Save) to save the transformation configuration and close the Mapper Project editor.
...
- Add the FileReader component from File category in the Micro Service Palette to the Fiorano Orchestrator.
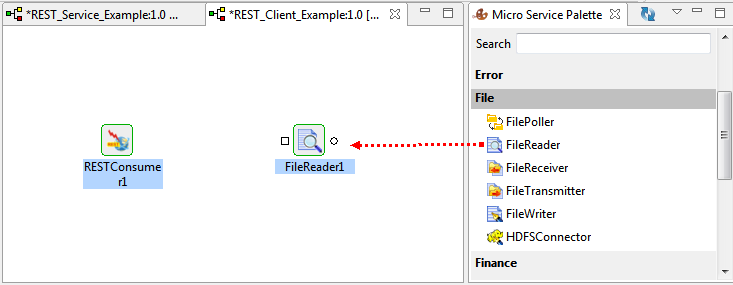
Figure 27: Adding FileReader component to REST_Client_Example event process
- Double-click the FileReader component to open Configuration Property Sheet (CPS).
- In the Interaction Configuration dialog box, select the 'Is input Binary ?' checkbox to write the data as bytes and click the FileReader Configuration Ellipsis button.
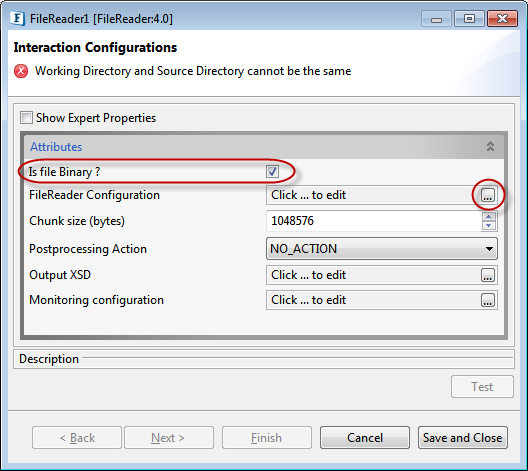
Figure 28: Selecting Binary File
- In the FileReaderConfig dialog box, provide the following values and click OK:
- File Name: The name of the file to be read. A pattern of file names can also be provided using wildcard character * (asterisk symbol).
Example: *.* includes all the files and *.jpg includes the files with .jpg extension. Source Directory: The directory which holds the file(s) to be read. All the files in this directory whose names match the pattern specified for the File name property will be processed.
Info Working Directory and Error Directory are optional. Select the Use Working Directory check box to use working directory.
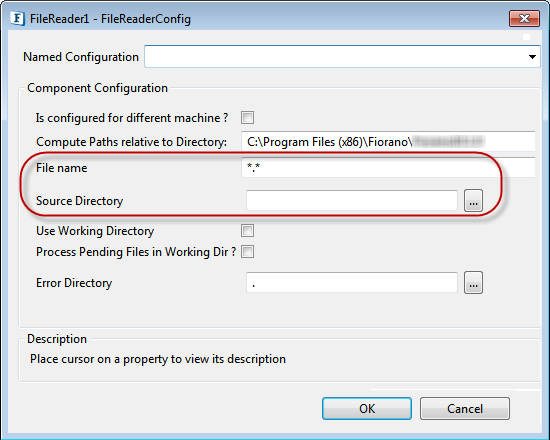
Figure 29: Providing File Name and storage location
- File Name: The name of the file to be read. A pattern of file names can also be provided using wildcard character * (asterisk symbol).
- Click Next and clear Enable Scheduling check box to allow Feeder component to provide input.
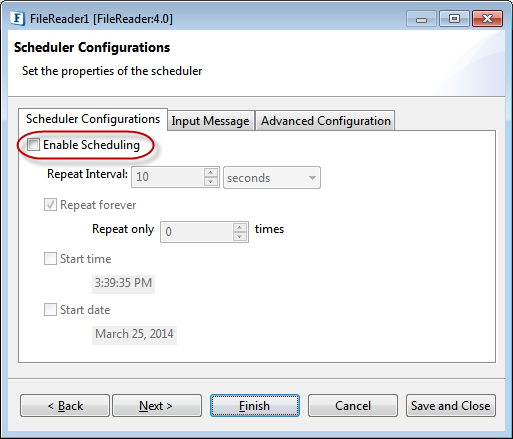
Figure 30: Disabling Scheduler Configurations
- Click Finish to save the FileReader configuration.
| Anchor | ||||
|---|---|---|---|---|
|
...
RESTConsumer
In the REST_Client_Example event process, perform the following actions:
...
| Note |
|---|
By default, REST component sends an XML response with an embedded JSON content. Perform the following actions if you want to extract only the JSON content, or else skip this section and move directly to Running the Example section. |
- Right-click ExtractJSON route, point to Configure Transformation and select Mapper Project to open Fiorano Mapper editor.
- In the Mapper Project, perform the following actions in Output Structures panel:
- Click the Add
 icon on the upper-right part of the page and select XML option.
 - In the Load Output XML Structure dialog box, add the following text in XML Content editor:<output>output</output>
- Click DTD
 icon to generate DTD element. The message appears in Generated DTD section. Click Finish.
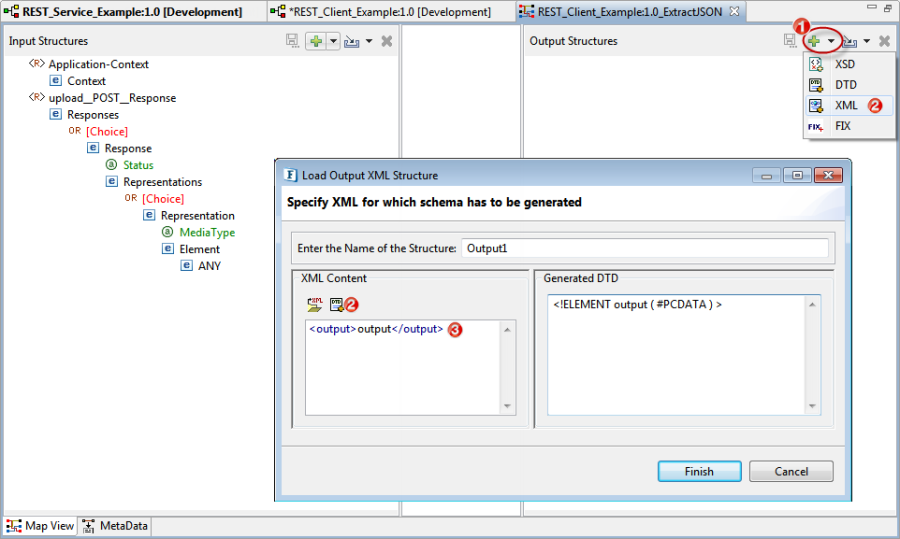
Figure 37: Configuring to generate JSON message
- Click the Add
- Connect ANY element present in Input Structures panel to output element that appears in Output Structures panel.
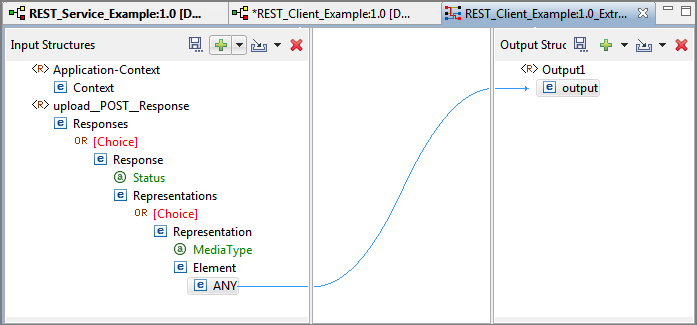
Figure 38: Connecting ANY element to output
- In the Menu, go to Tools and select XSLT Properties. In XSLT Properties dialog box, select 'text' from Output Method drop-down.
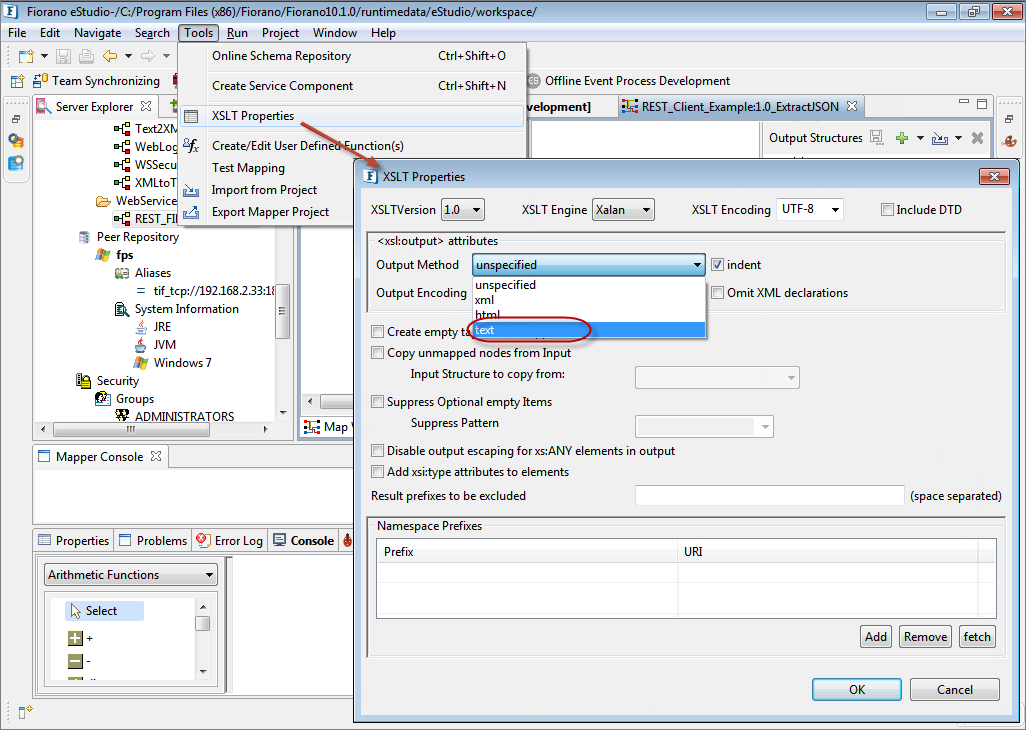
Figure 39: Configuring XSLT Properties - Click Save icon (or File >Save) to save the transformation configuration and close the Mapper Project editor
...
Overview
Content Tools
ThemeBuilder