...
- Add a new Event Process with name 'DB_Insert_Eg'.
- Drag the DB component from DB category in the Service Palette to the Fiorano Orchestrator.
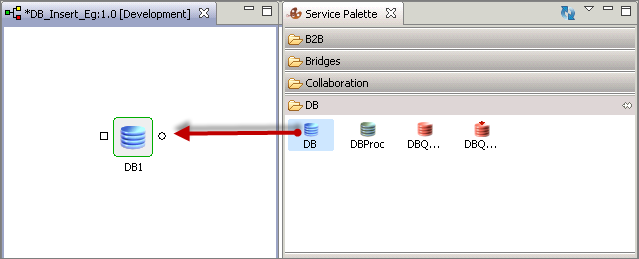
Figure 1: Adding DB component to Fiorano Orchestrator - Click the DB component and do any of the following to rename the component from 'DB1' to 'DB_Insert' to distinguish it from the DB component that gets configured for Select statement in 'Select Query Event Process Configuration' section:
- Press F2, change the name and click OK.
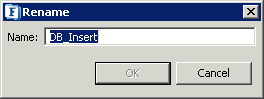
Figure 2: Renaming using Keyboard action 'F2'
- Press F2, change the name and click OK.
- Go to Name property under General tab in Properties, change the name and press ENTER.

Figure 3: Renaming using General Properties
...
- Double-click the DB_Insert in the Orchestrator to open Configuration Property Sheet (CPS).
- Click the Database Configuration ellipsis
 button to open DbConfigurations Panel.
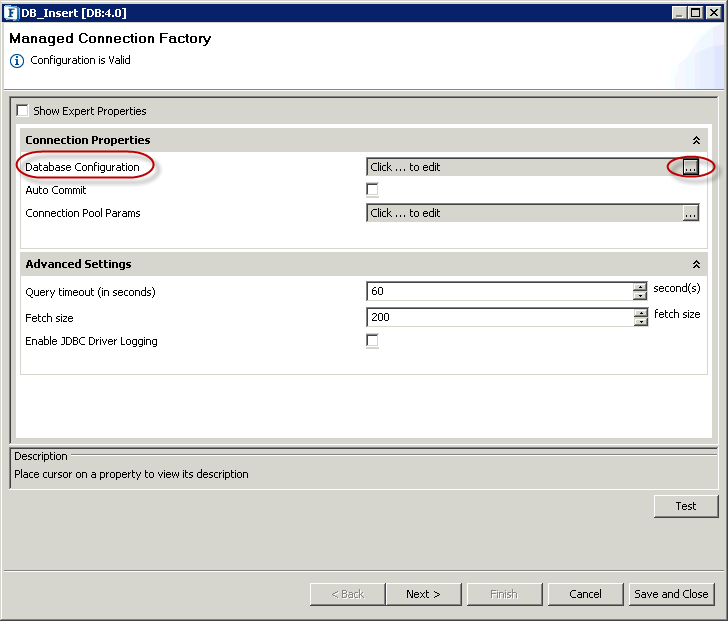
Figure 4: DB Component CPS
- Provide the following details in DbConfigurations Panel and click OK:
- Database: Oracle (Choose the database to be connected to. It is Oracle in this example)
- Driver: oracle.jdbc.driver.OracleDriver (Retain the default value)
- URL: jdbc:oracle:thin:@<SystemIP>:xe (in place of 'SystemIP', enter the machine IP in which the Oracle database is installed and 'xe' is the database name).
- User name: User name to connect to the database.
- Password: Password for the above user name.
- Named Configuration: OracleNamedConfig (Provide any value here to save the database configuration as Named Configuration to be used in future. 'OracleNamedConfig' is the name used in this example)
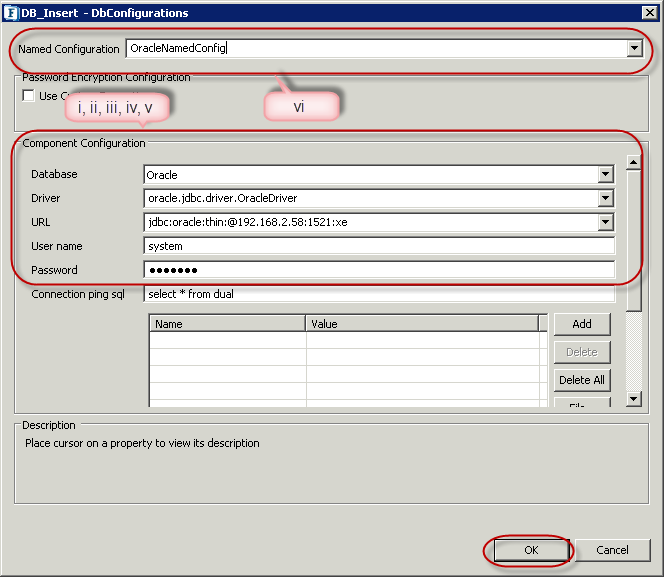
Figure 5: Database configuration in DbConfigurations Panel
- Click the Test button in Managed Connection Factory panel to check if the database has been configured correctly.
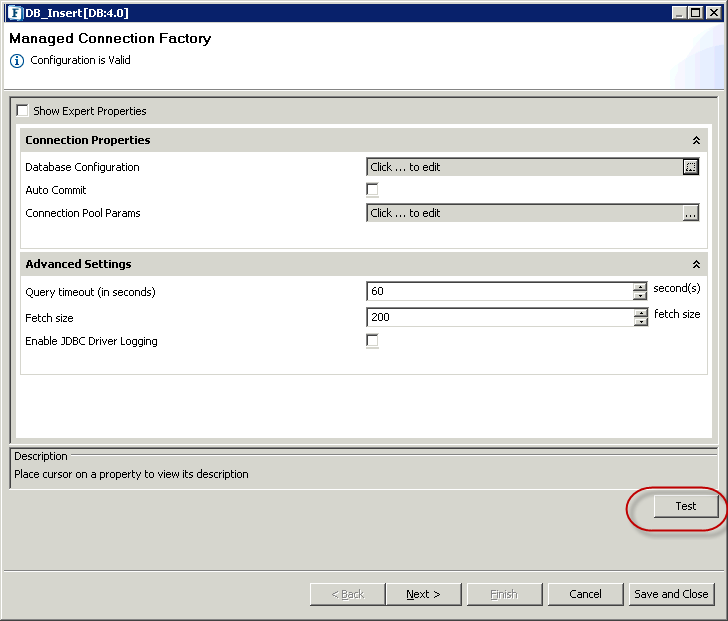
Figure 6: Testing Database configuration in Managed Connection Factory Panel
- If the configuration is valid, Test Connection Configuration pop-up displays confirmation message.
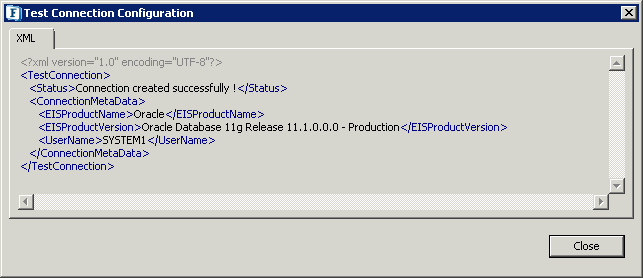
Figure7: Testing Database Configuration
- After the database has been configured properly, click the Next button in Managed Connection Factory panel to navigate to Interaction Configurations panel.
- Click SQL Configuration ellipsis button to configure Insert query in SQL Configuration Wizard panel.
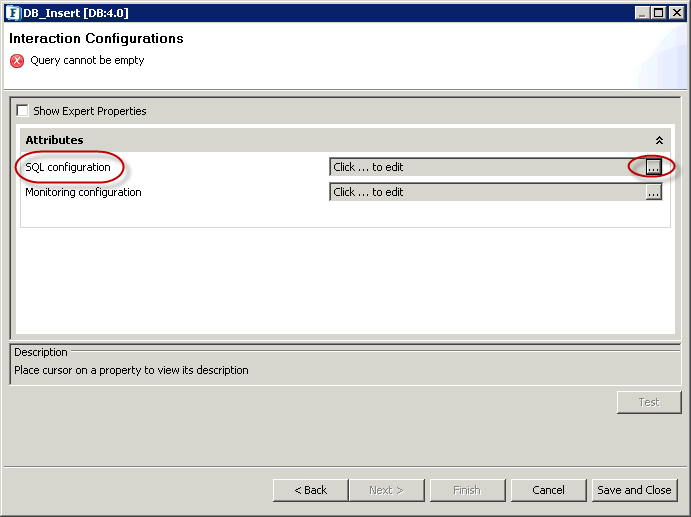
Figure 8: SQL Configuration in Interaction Configurations Panel
- Click the Add button and select Insert Statement option from the menu.
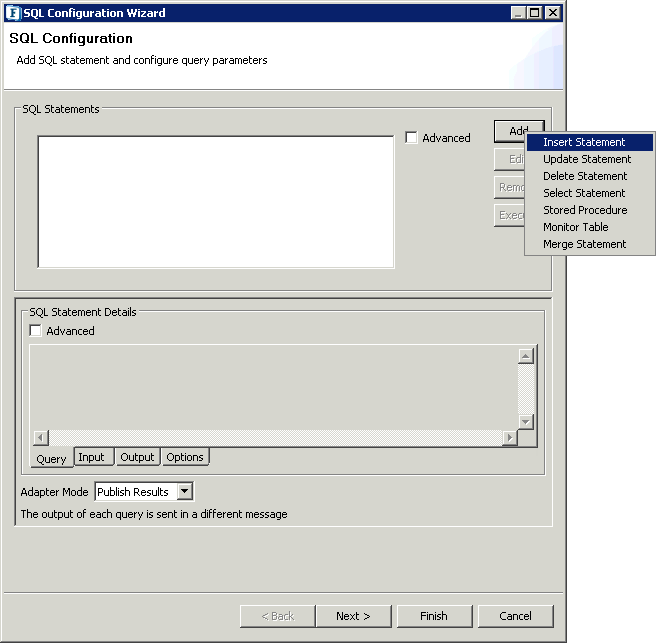
Figure 9: Selecting 'Insert Statement' in 'SQL Configuration Wizard' panel
- In the Insert Query Builder panel, enter a name (InsertQuery in this example) in Query Name text box and click Add.

Figure 10: Insert Query Builder
- Click the Fetch Schemas button to fetch all the schemas present in the database into the Schema dropdown. Select a schema and then click Refresh Tables button to fetch/refresh the table list for the selected schema. Select the table from the list for which InsertQuery has to be configured and click OK button.
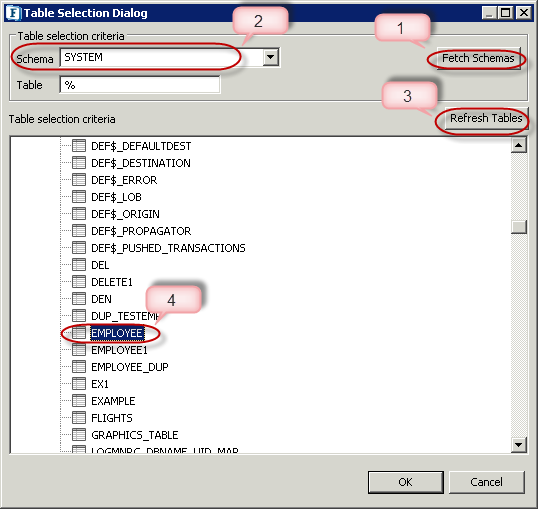
Figure 11: Selecting the table in Table Selection Dialog Panel
- As the columns of the table get fetched into Insert Query Builder panel, click OK.
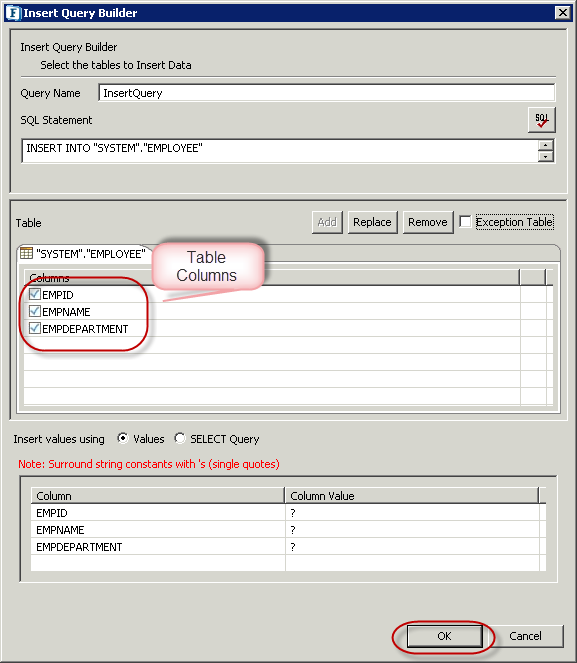
Figure 12: Table columns in Insert Query Builder
- Click Finish in SQL Configuration Wizard.
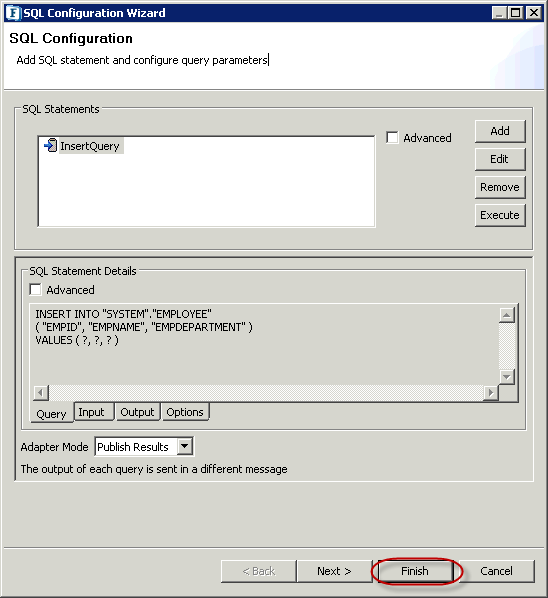
Figure 13: Finishing configuration in SQL Configuration Wizard
- Click Finish button to finish the DB_Insert component configuration.
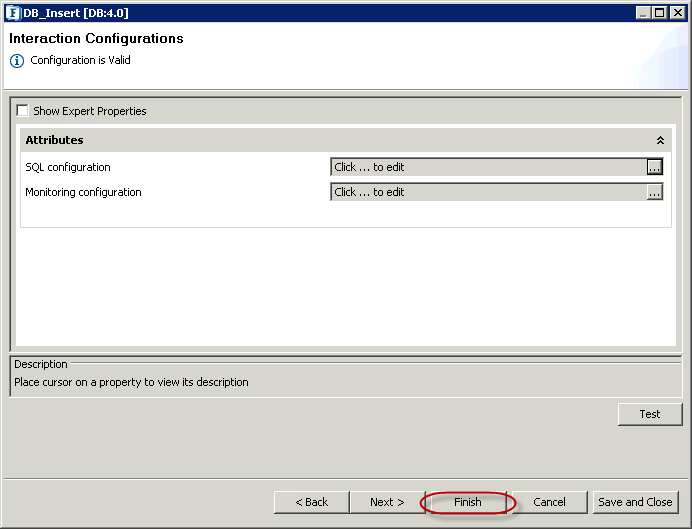
Figure 14: Clicking 'Finish' in Interactions Configurations Panel
...
- Add Feeder and Display components from the Util category in Service Palette into the DB_Insert_Eg' EP.
- Rename 'Feeder1' to 'Feeder_DBInsert' and 'Display1' to 'Display_DBInsert'. Change in name is to distinguish between the componentsthat are configured for 'Insert' and 'Select' queries.
- Connect Feeder_DBInsert and Display_DBInsert to input and output ports of DB_Insert respectively.

Figure 15: Adding Feeder and Display components to DB_Insert component
- Double-click Feeder_DBInsert and click Connected Port Schemas in Message Type Configuration panel.
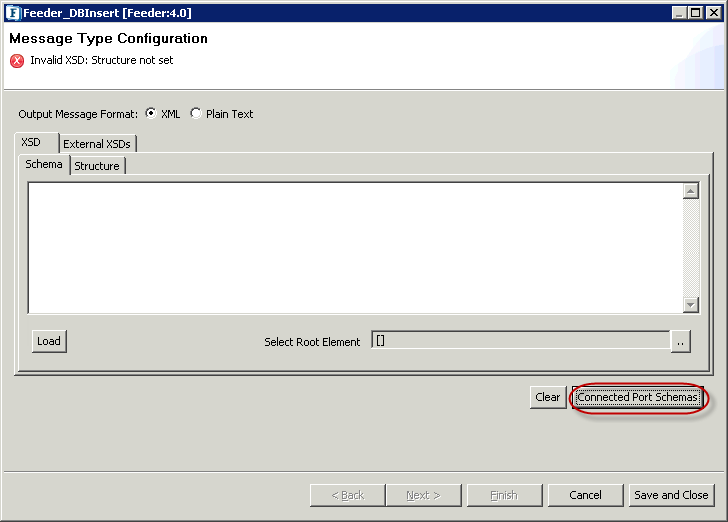
Figure 16: Configuring Feeder component
- Select IN_PORT to import DB_Insert schema into Feeder_DBInsert and click OK.
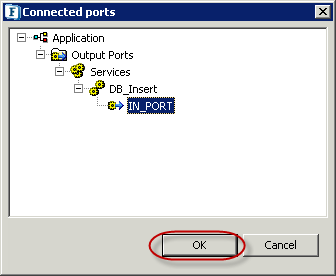
Figure 17: Selecting 'IN_PORT' of 'DB_Insert' component - Click the Select Root Element ellipsis
 button to open Root Element dialog box. Select the element (SQL_CFG_1 here) and click OK.
Figure 18: Selecting Root Element
- The Select Root Element text box gets populated and schema editor also gets populated with the DB schema. Click Next.
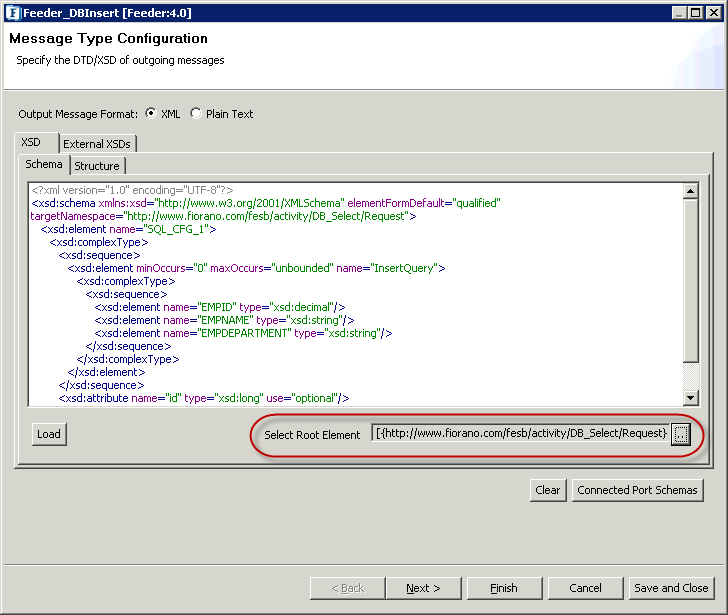
Figure 19: Schema editor with the DB_Insert Schema populated
- In Message Details Configuration panel, click Generate Sample to open XSD Sample Generation Dialog.
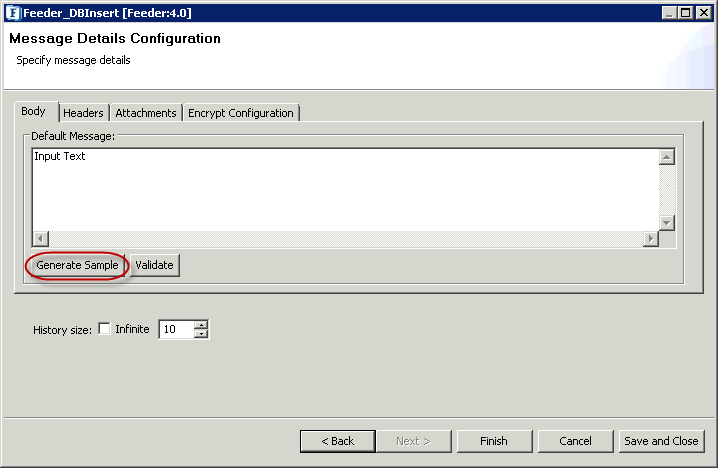
Figure 20: Clicking 'Generate Sample' in 'Message Details Configuration' panel
- Enter '1' in max text field under No. of Repeatable elements to be generated to reduce the number of samples generated to just one, and click OK.
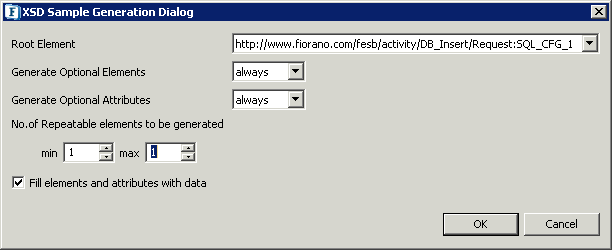
Figure 21: Setting No. of Repeatable elements to be generated
- Click the Finishto complete Feeder_DBInsert configuration.
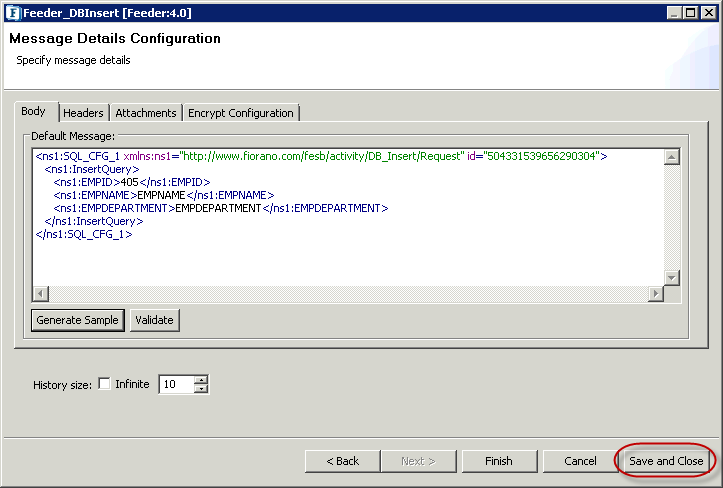
Figure 22: Clicking 'Save and Close' to complete Feeder_DBInsert configuration
...
Add a new Event Process with name 'DB_Select_Eg' and drag the DB component from DB category in the Service Palette to the Fiorano Orchestrator.
Figure 13: Adding DB component to Fiorano Orchestrator
...
- Double-click DB_Select to open the CPS. Click the Database Configuration ellipsis button to open DbConfigurations Panel.

Figure 24: DB Component CPS
- Select the named configuration 'OracleNamedConfig' (created during Insert Query Event Process Configuration) from the Named Configuration drop-down and click OK.
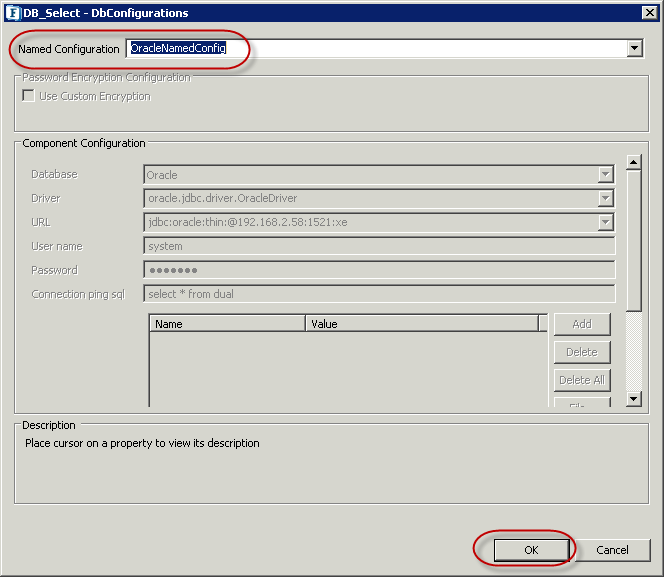
Figure 25: Selecting the Named Configuration
- Click Next in Managed Connection Factory panel to navigate to Interaction Configurations panel.
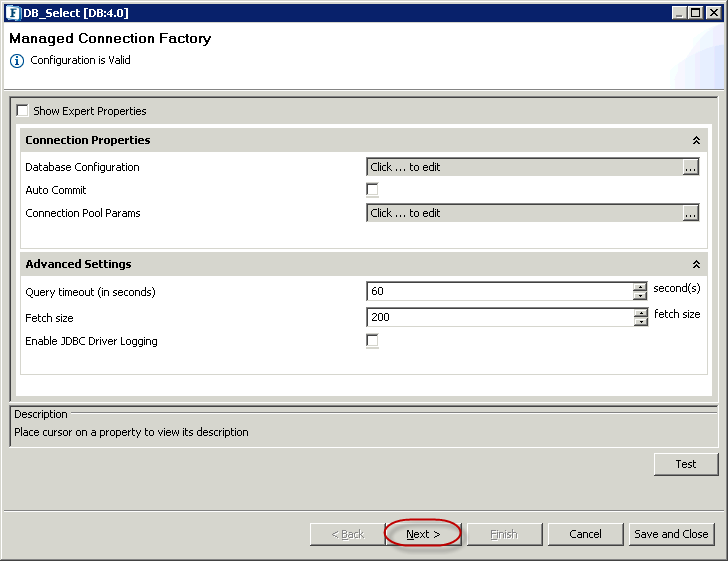
Figure 26: Moving to Interaction Configurations Panel
- Click SQL Configuration ellipsis button to configure Select query in SQL Configuration Wizard panel.
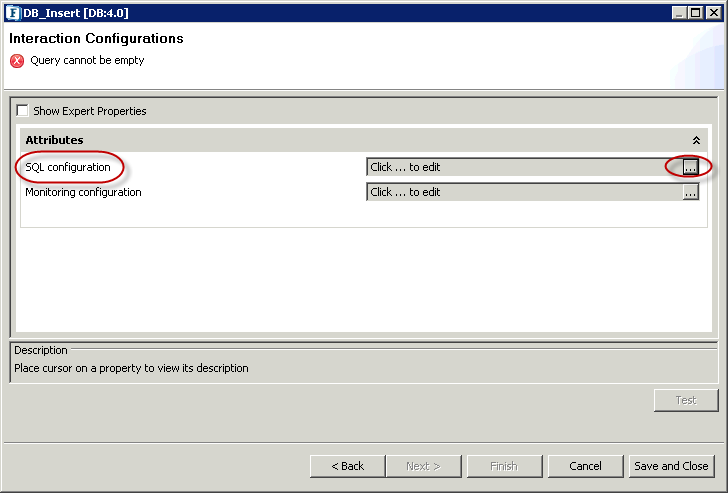
Figure 27: SQL Configuration in Interaction Configurations Panel
- Click the Add button and select Select Statement option from the menu.
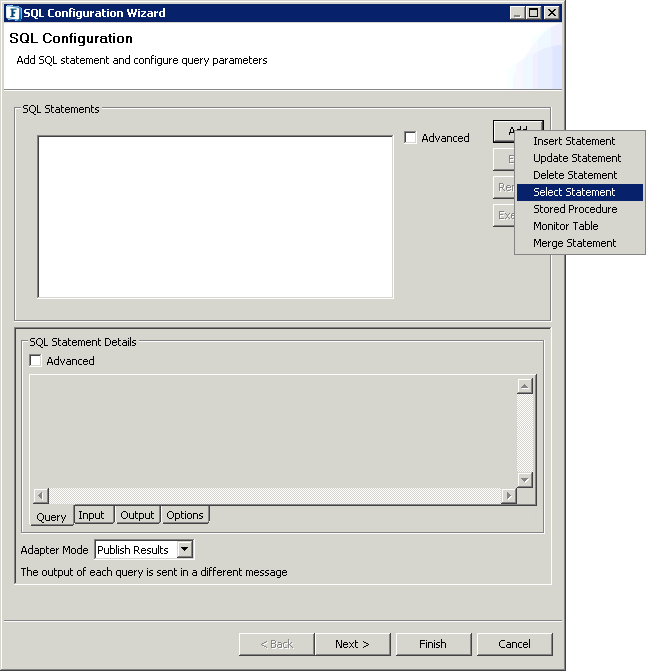
Figure 28: Selecting 'Select Statement' in SQL Configuration Panel
- In the Select Query Builder panel, enter a name in 'Query Name' text box (SelectQuery in this example) and click Add.
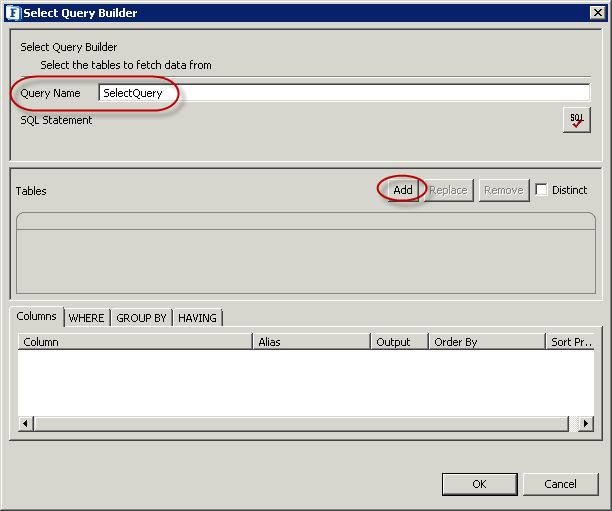
Figure 29: Select Query Builder
- In Table Selection Dialog, click the Fetch Schemas button to fetch all the schemas in the database into Schema drop-down. Select a schema and then click Refresh Tables button to fetch/refresh the table list for the selected schema. Select the table from the list for which SelectQuery has to be configured and click OK.
Figure 30: Selecting the table in Table Selection Dialog Panel
- The columns of the table get fetched into Insert Query Builder panel; click OK.
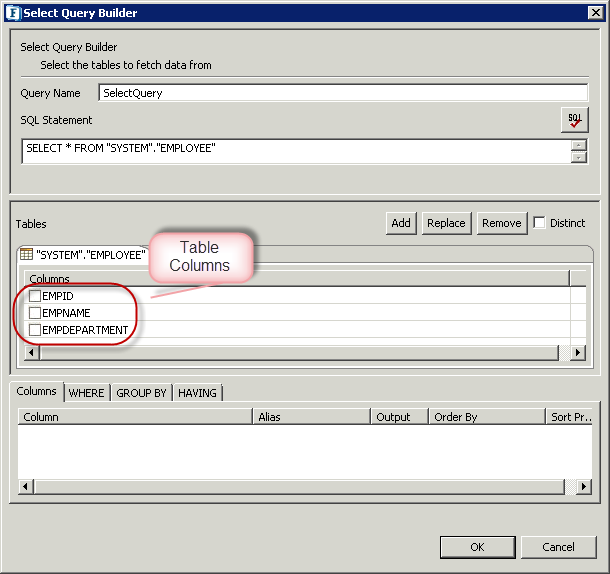
Figure 31: Table columns in Insert Query Builder
- Click Finish in the SQL Configuration Wizard.
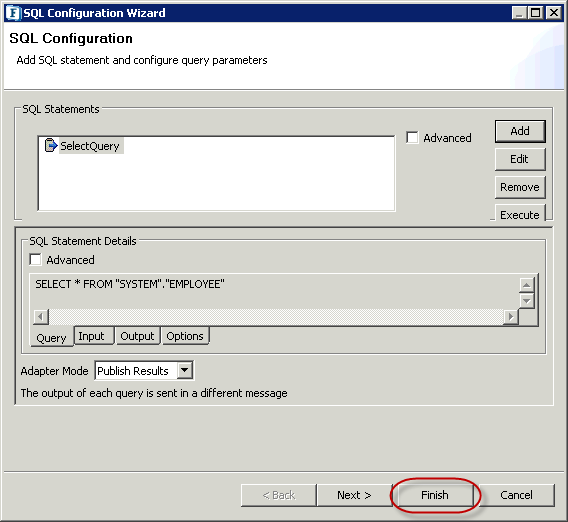
Figure 32: Finishing configuration in SQL Configuration Wizard
- Click Save and Close to finish configuring DB_Select component.
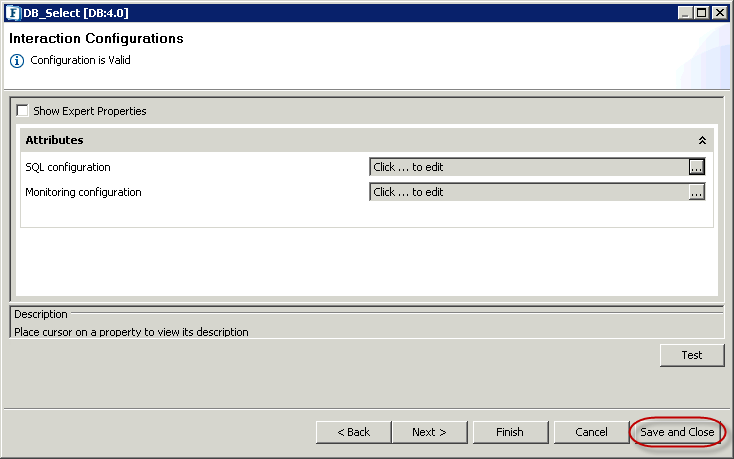
Figure 33: Clicking 'Save and Close' in Interactions Configurations Panel
...
- Add Feeder and Display components from the Util category in Service Palette into the DB_Select_Eg' EP.
- Rename 'Feeder1' to 'Feeder_DBSelect' and 'Display1' to 'Display_DBSelect'.
- Connect Feeder_DBSelect and Display_DBSelect to input and output ports of DB_Select respectively.
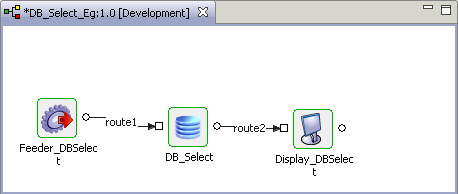
Figure 34: Adding Feeder and Display components to DB_Select component
- Double-click Feeder_DBSelect and click Connected Port Schemas in Message Type Configuration panel.
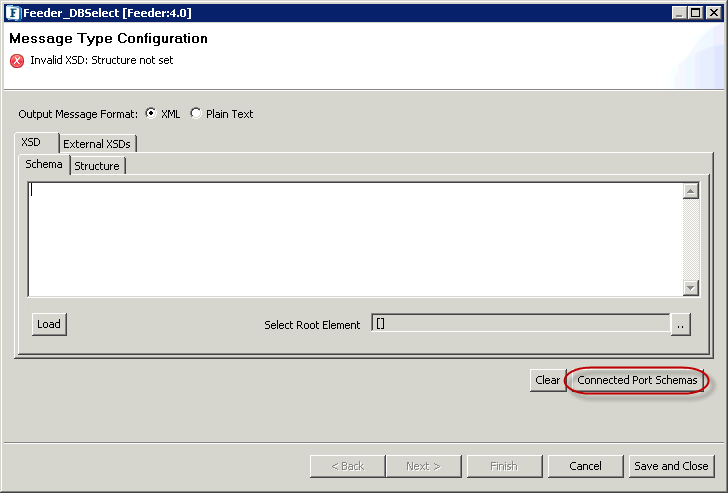
Figure 35: Configuring Feeder component
- Select IN_PORT to import DB_Select schema into Feeder_DBSelect and click OK.
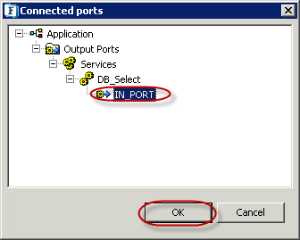

Figure 36: Selecting 'IN_PORT' of 'DB_Select' component - Click the Select Root Element ellipsis button to open Root Element dialog box. Select the element (SQL_CFG_1 here) and click OK.
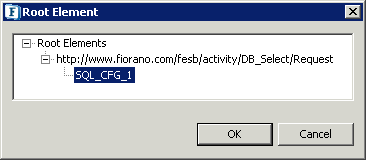
Figure 37: Selecting Root Element
- The Select Root Element text box gets populated and schema editor also gets populated with the DB schema. Click Next.
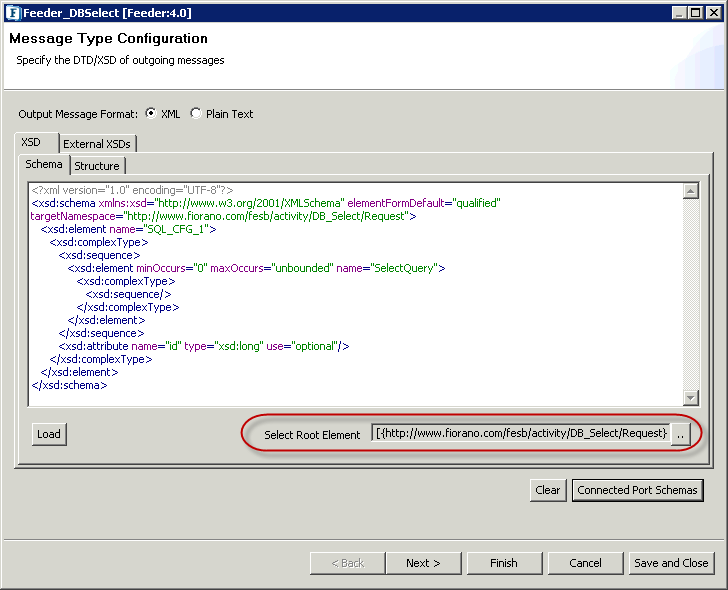
Figure 38: Schema editor with the DB_Select Schema populated
- In Message Details Configuration panel, click Generate Sample to open XSD Sample Generation Dialog.
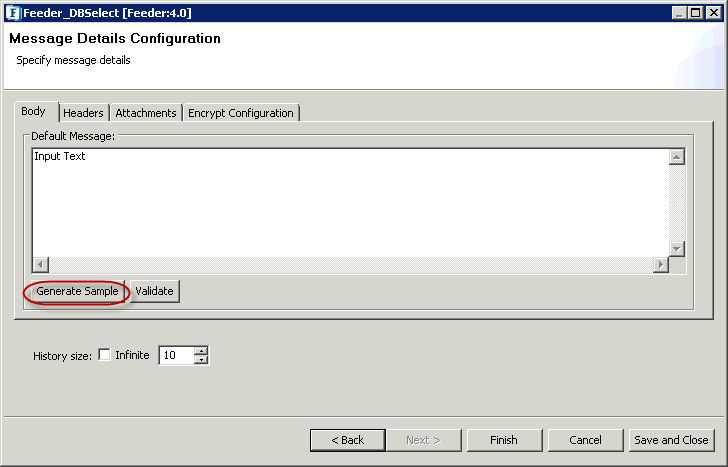
Figure 39: Clicking 'Generate Sample' in 'Message Details Configuration' panel
- Enter '1' in max text field under No. of Repeatable elements to be generated to reduce the number of samples generated to just one, and click OK.
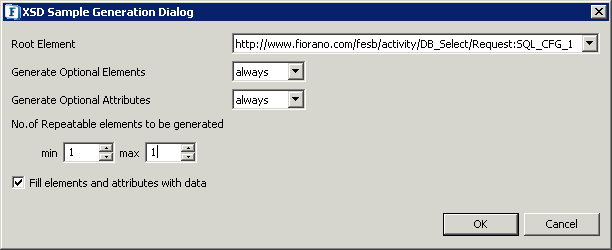
Figure 40: Setting No. of Repeatable elements to be generated
- Click the Save and Close button to complete Feeder_DBInsert configuration.
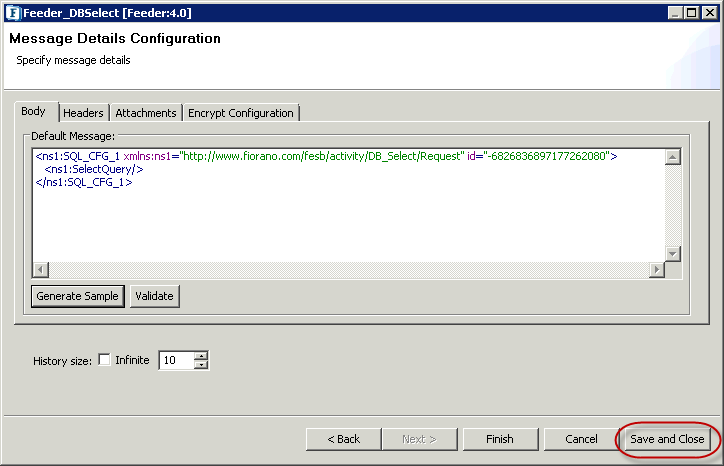
Figure 41: Clicking 'Save and Close' to complete Feeder_DBSelect configuration
...
Open DB_Insert_Eg Event Process and perform the following actions:
- Click Check Resource and ConnectivityConnectivity
 icon (or press ALT+SHIFT+C) to check resource and connectivity.
 - Click Run Event ProcessProcess
 icon (ALT+SHIFT+R) to run the event process. Feeder_DBInsert and Display_DBInsert windows get opened.
 - Provide the required column values (in this example, EMPID: 101, EMPNAME: MICHAEL and EMPDEPARTMENT: HR) in Feeder_DBInsert window and click Send.
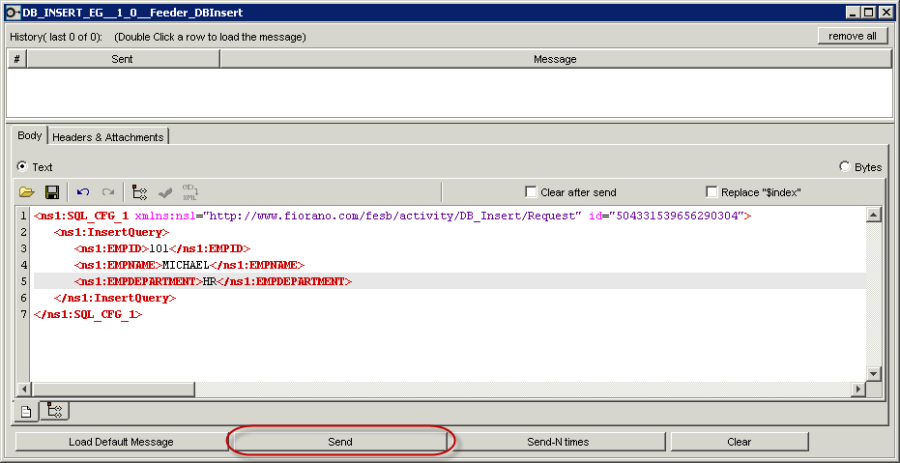
Figure 42: Sending input from Feeder
- If the Insert query is successful, a success message with 'UpdateCount' as '1' will be displayed in the Display_DBInsert window.
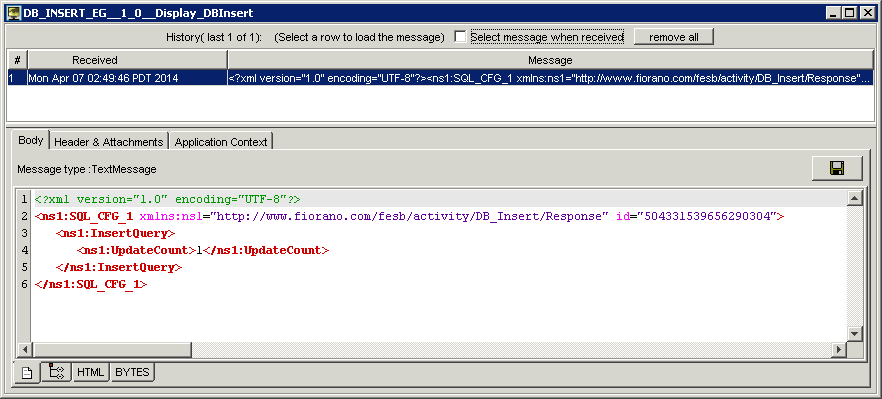
Figure 43: Insert Query Success message shown in Display component
...
Open DB_Select_Eg Event Process Orchestrator and perform the following actions:
- Click Check Resource and ConnectivityConnectivity icon (or press ALT+SHIFT+C) to check resource and connectivity.
- Click Run Event ProcessProcess icon (ALT+SHIFT+R) to run the event process. Feeder_DBSelect and Display_DBSelect windows get opened.
- Click Send in Feeder_DBSelect window to send input.
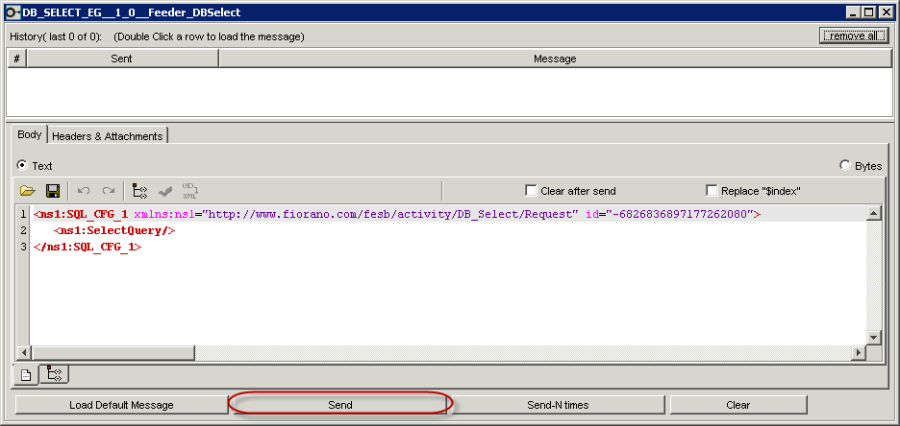
Figure 44: Sending input from Feeder
- The query results (data inserted in "Running Select Statement Event Process" section along with one record the records that was are already present in the table) will be displayed in Display_DBSelect window.
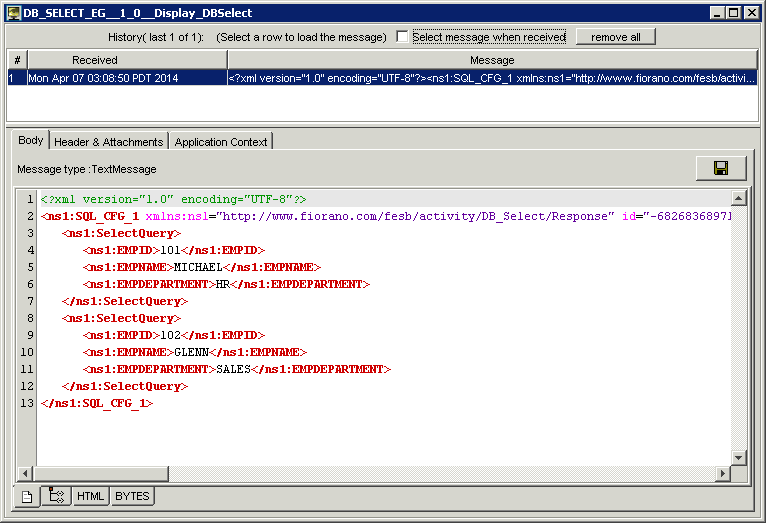
Figure 45: Select Query results in Display component
| Anchor | ||||
|---|---|---|---|---|
|
- Download DB_Insert_Eg and DB_Select_Eg Example event processes and import it to the Event Process Repository in the Server Explorer in eStudio to understand the configuration used in this example and to execute the working sample.
- Please note that the options used in this example are minimum, which helps you to get an overview of the application. To explore the other options present in the DB, Feeder and Display, refer sections: DB, Feeder and Display respectively.
Overview
Content Tools
ThemeBuilder