...
- Double-click the Aggregator component to open the Configuration Property Sheet (CPS).
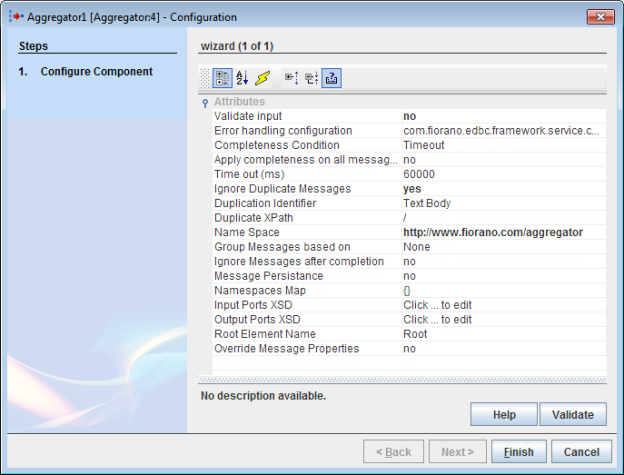
Figure 2: Aggregator CPS - Under Attributes section in the Configuration dialog box, click the Completeness Condition attribute and select the value "Wait For 'N' Messages".
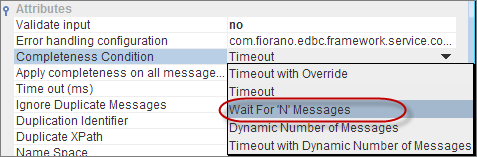
Figure 3: Setting Completeness Condition - In the new attribute—Completeness Message Count that appears, provide the value '3'.This makes the Aggregator wait for 3 messages and then aggregates into a single output message after the receipt of 3 messages.
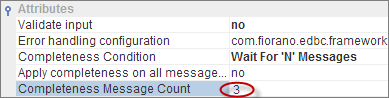
Figure 4: Setting Completeness Message Count - Select the Input Ports XSD attribute and click the Ellipsis
 button.
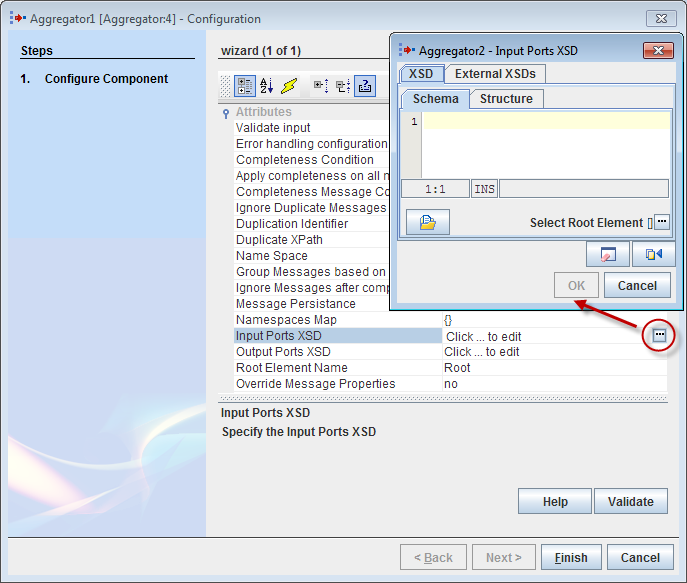
Figure 5: Selecting Input Ports XSD Schema - In the Input Ports XSD dialog box, click the Fetch From Connected Source
 button present in the bottom-right part of the screen. Inthe Connected Ports dialog box, select OUT_PORT and click OK to fetch the XSD from DB output port.
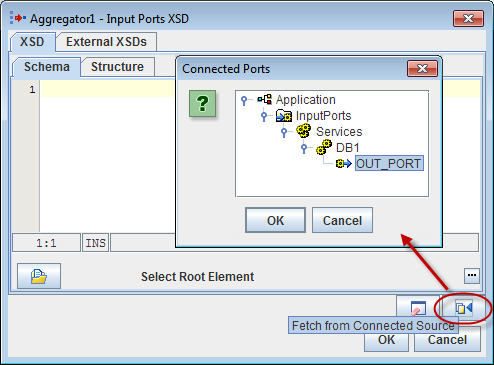
Figure 6: Connecting to DB component output port XSD Schema appears in the editor and the root appears under Select Root Element next to the Ellipsis
button.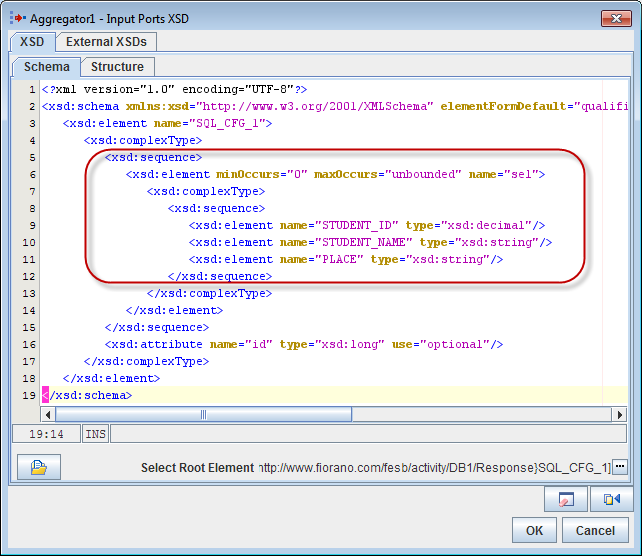
Figure 7: Input Port XSD editor with the DB Schema populatedInfo 'sel' in the above schema is the Select statement configured in DB component and the elements under it represent the columns
- Retain the IgnoreDuplicateMessages attribute value as 'yes' to ignore the messages that has the same content in the Duplication identifier.
- Retain Duplication Identifier attribute value as 'Text Body' so that the message having the same content in Text Body as that of a previous message will not be taken into account for aggregation.
- Select Duplicate XPath and click the Ellipsis button. In the XPath Editor dialog box, perform the following actions and click OK:
- Delete the default element present in the right side panel to restrict the duplicate check to a particular element than the entire content.
- Drag the element 'STUDENT_ID' present in the left panel to the right panel.
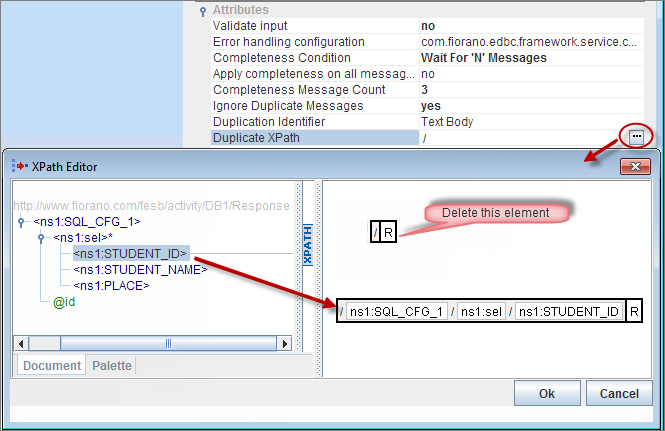
Figure 8: Selecting STUDENT_ID under Select query as Duplicate XPath
Similarly, click XPath Ellipsis button and drag the element 'PLACE' to the right panel after deleting the default element in the XPath Editor dialog box.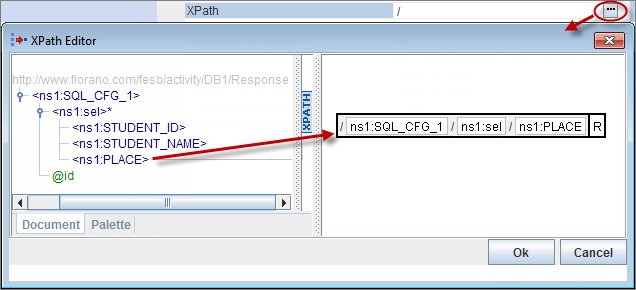
Figure 9: Selecting PLACE under Select query as Duplicate XPath
- Click OK to close the XPath Editor and click Finish in the Configuration CPS to save the configuration.
...
- Double-click Feeder component to open the Feeder CPS.
- In the Message Type Configuration page, retain Output Message Format option as 'XML' and click the Connected Port Schemas button.
- In the Connected ports dialog box, select IN_PORT to enable connection between output port of Feeder_Split and input port of XMLSplitter_Split component. Click OK and then click Next.
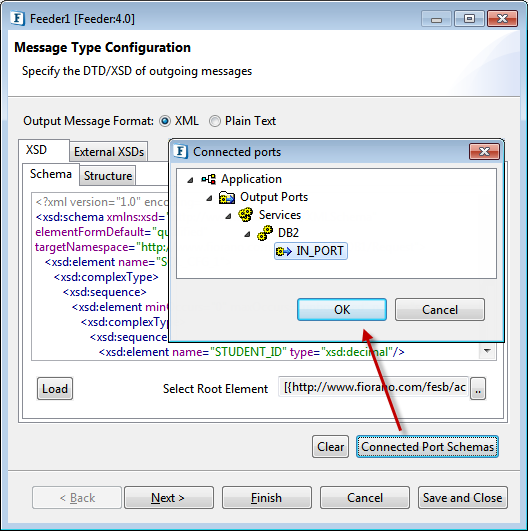
Figure 109: Connecting to DB Input port
- In the Message Details Configuration page, click the Generate Sample button to load sample input.
- Under No.of Repeatable elements to be generated section in the XSD Sample Generation Dialog window, replace max value '3' with '1' so that only one output is generated, and click OK.
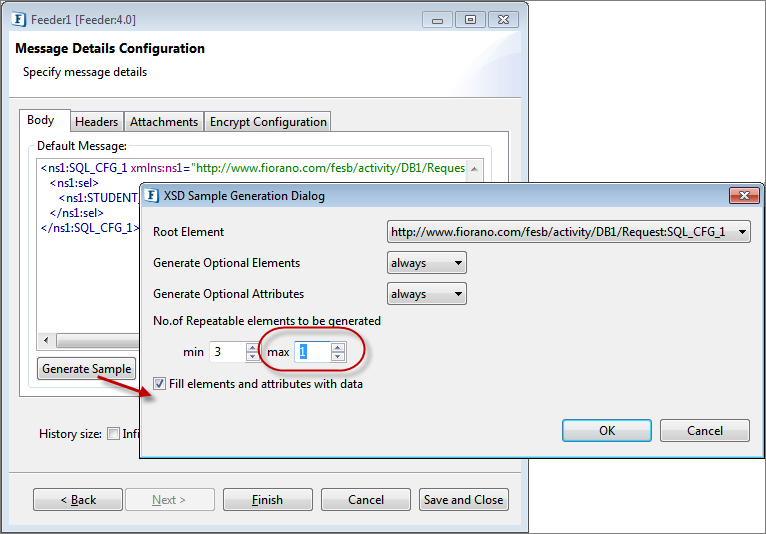
Figure 1110: Reducing the number of elements generated to '1'
- Click Finish to save Feeder configuration.
...
- Click Check Resource and Connectivity
 icon (or press ALT+SHIFT+C) to check resource and connectivity.
 - Click Run Event Process
 icon (ALT+SHIFT+R) to run the event process. Two windows for Feeder and Display components get opened.
 - In the Feeder window, type STUDENT_ID number and click Send. Perform this activity multiple times with different IDs, for example, 1 to 10.
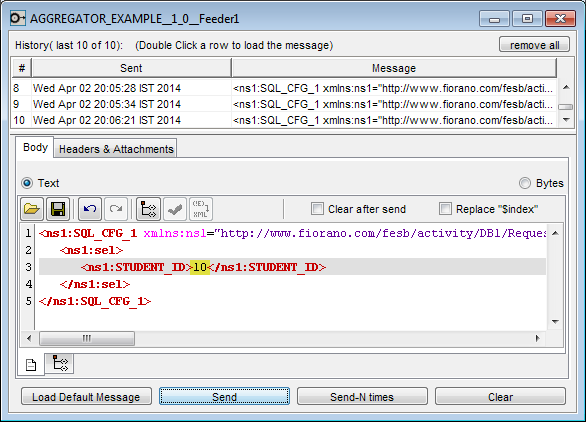
Figure 1211: Sending multiple messages in Feeder
- In the Display window, select the first message received. It shows the filtered message with 3 entries that match the criteria, that is, data that contains same PLACE and different STUDENT_IDs.
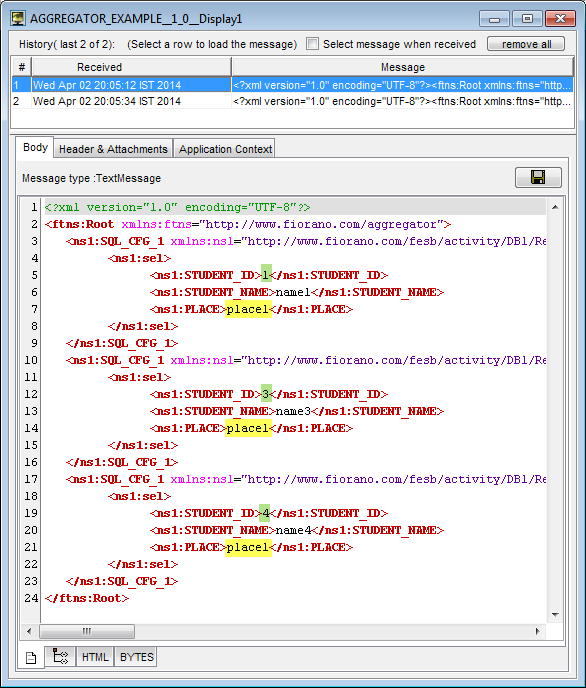
Figure 1312: Content of first message in Display window
- In the Display window, select the second message received. It shows the filtered message with 3 entries that match the criteria, where it won't repeat the data that was previously filtered (compare the first and second message in Display window).
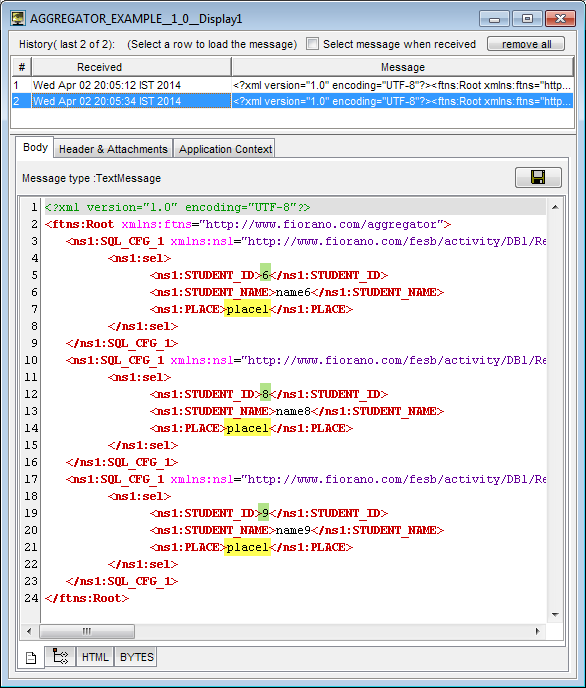
Figure 1413: Content of second message in Display window
...
Overview
Content Tools
ThemeBuilder