...
The figure below shows the first message sent for which processing is successfully completed.

Figure 2: Successful document processing
Every failed document gets added to the exception documents count under the same tab. Figure 3 The figure below shows the failed document adding to the exception count.
| Note |
|---|
The document may or may not be counted as complete depending on the configuration of the work flow. In the example above, whether the document fails or not, the work flow will be complete and the completed count will be incremented regardless of the exception. |

Figure 3. Failed document processing
There are two three ways in which this the document can be re-injected
...
As per the example specified in the section above, the second document failed to get processed. So, from the listing of the documents for Event_Process1, select the second document as shown in Figure 4the figure below.
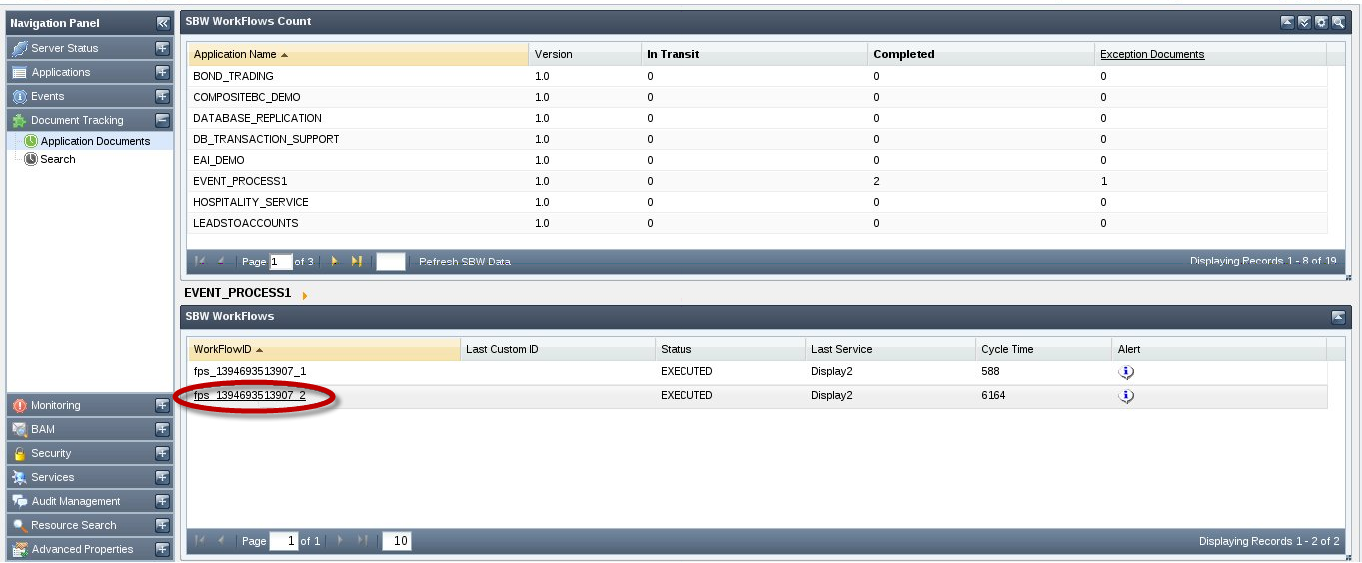
Figure 4: Selecting Failed document
...
| Note |
|---|
This is not the document to be re-injected, the document to be re-injected has to be the one tracked at a point before this. |
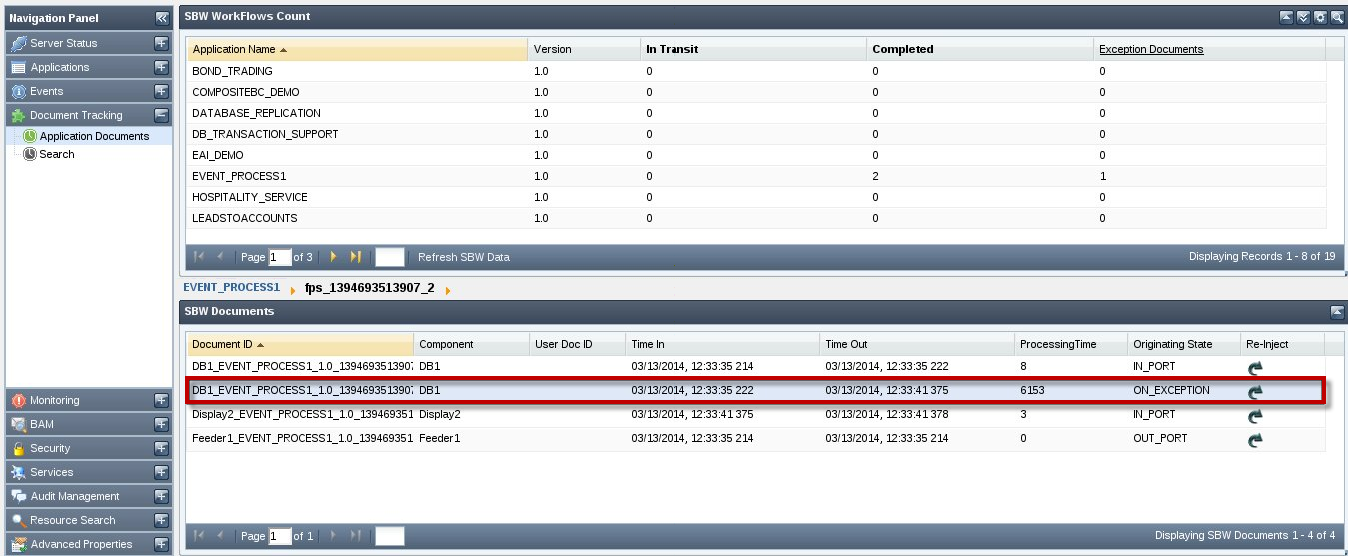
Figure 5: Exception document
...
- Select the re-inject icon of the document with DB as component and Originating State as IN_PORT and select This Document option. (Figure 6)
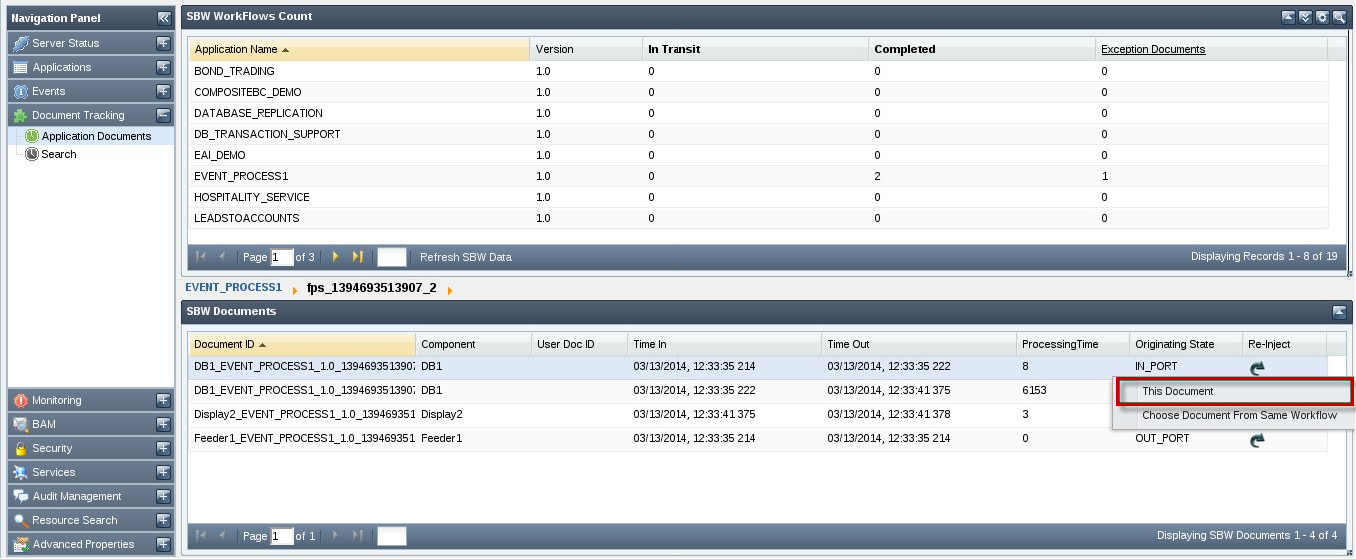
Figure 6: Re-injecting document directly - Click the Re-inject button on the pop-up after making the required changes to the document (if any)
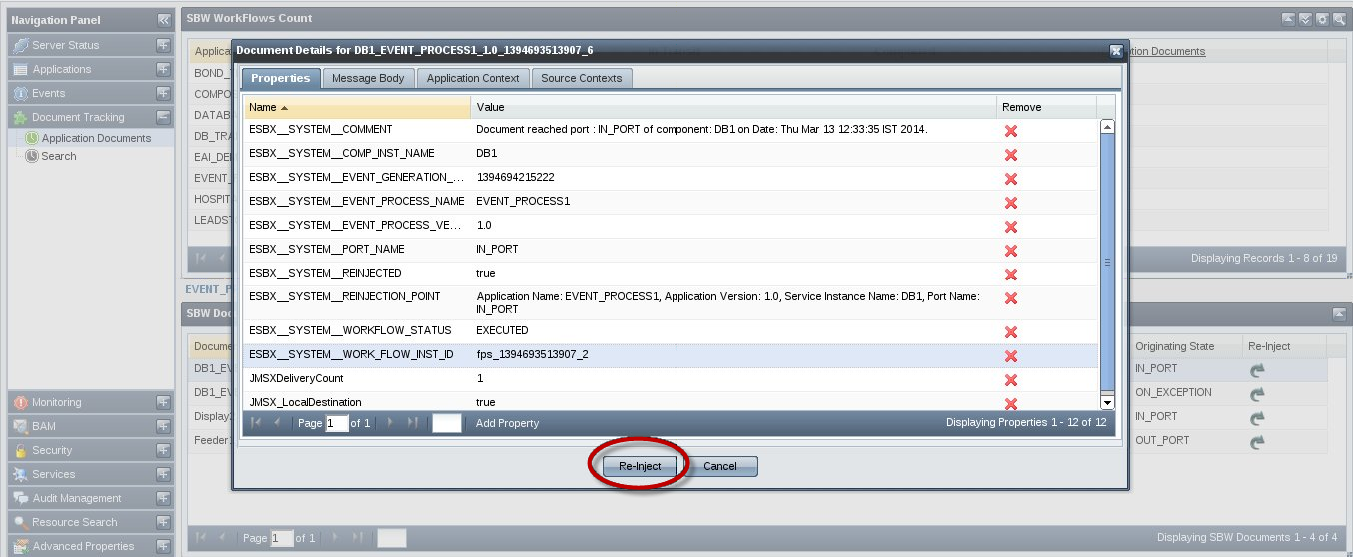
Figure 7. Document content display during re-inject - In the JMS Configuration screen, change the configurations as per the installation and click the Publish button; this will re-inject the document for reprocessing. In the example, the message will be resent to the DB Component to reprocess.
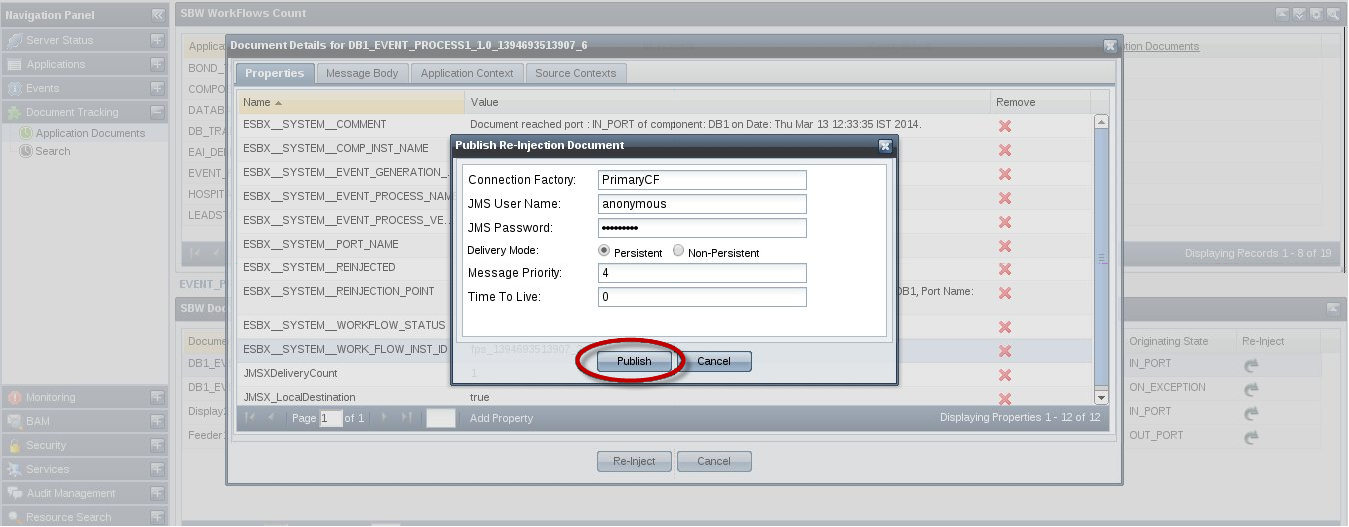
Figure 8. JMS Configuration screen
...
- Select the Chose Document from Same Workflow option after selecting Re-inject on the failed document.
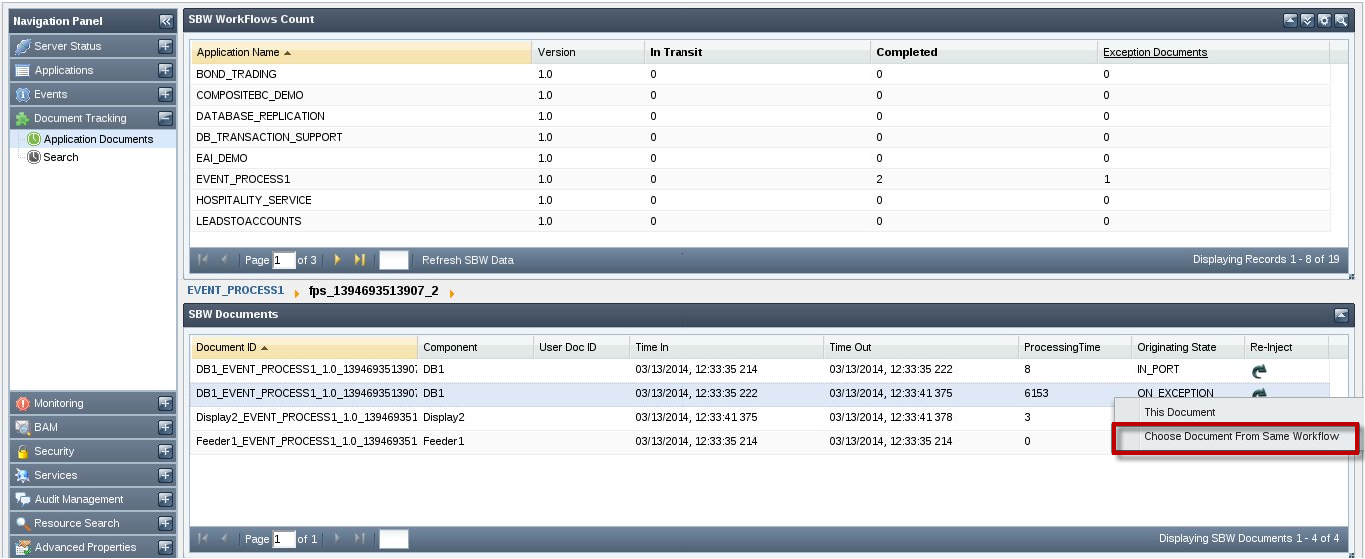
Figure 9. Choose Document from Same Workflow - A list of places at which the failed document was tracked appears.
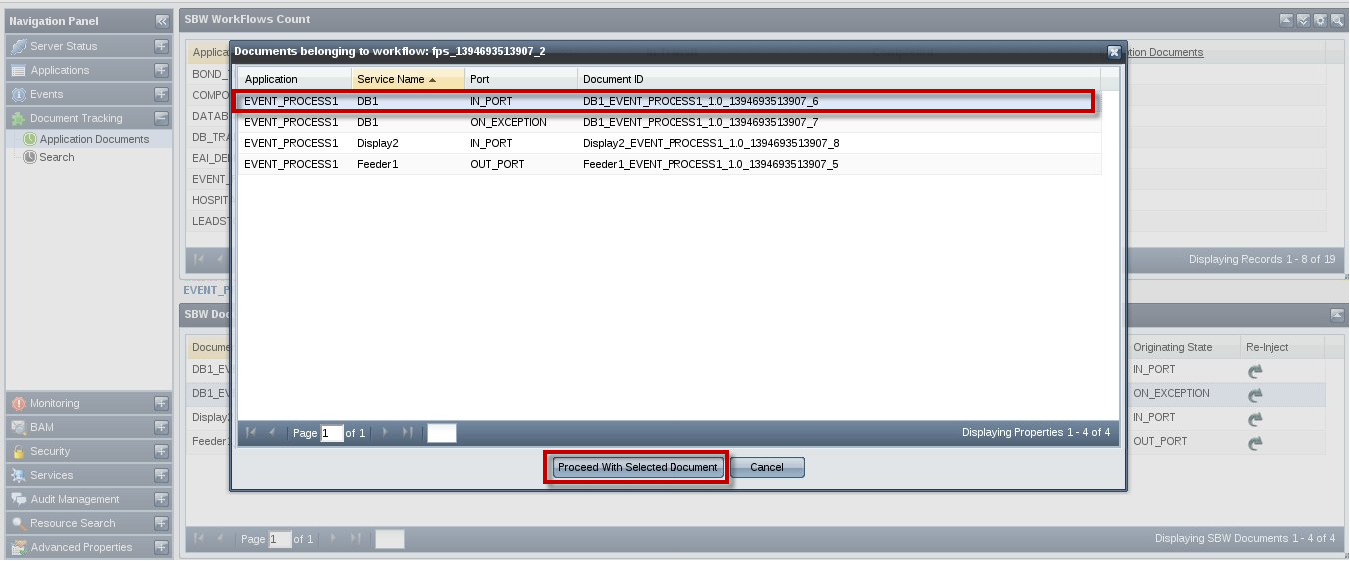
Figure 10: List of place at which the failed document was tracked - Now select the document to be re-injected and click the Proceed with Selected Document button
- This will open the document that was tracked at the IN_PORT in a pop-up. Follow the same Steps 2-3 as mentioned above after this.
Choose from Original Document
This option is to re-inject the original message that comes from exception ports, that is, it takes out the original message from the error message at the exception port and auto re-injects.
| Note |
|---|
Original Document option appears only in the Re-inject option for ON_EXCEPTION Originating State (See the below figure). |
The advantage of this option is that the exception port always gets the error messages and hence when the error comes at any point it re-injects the original document document that failed to process to the component again for reprocessing.
In the previous options, previous ports are to be tracked or else it is lost. In this case, since exception ports are tracked by default, re-injection is always possible and thereby have the document back in the system.
Perform the following actions to enable the same:
- Select the re-inject icon of the document with DB as component and Originating State as ON_EXCEPTION and select Original Document option.
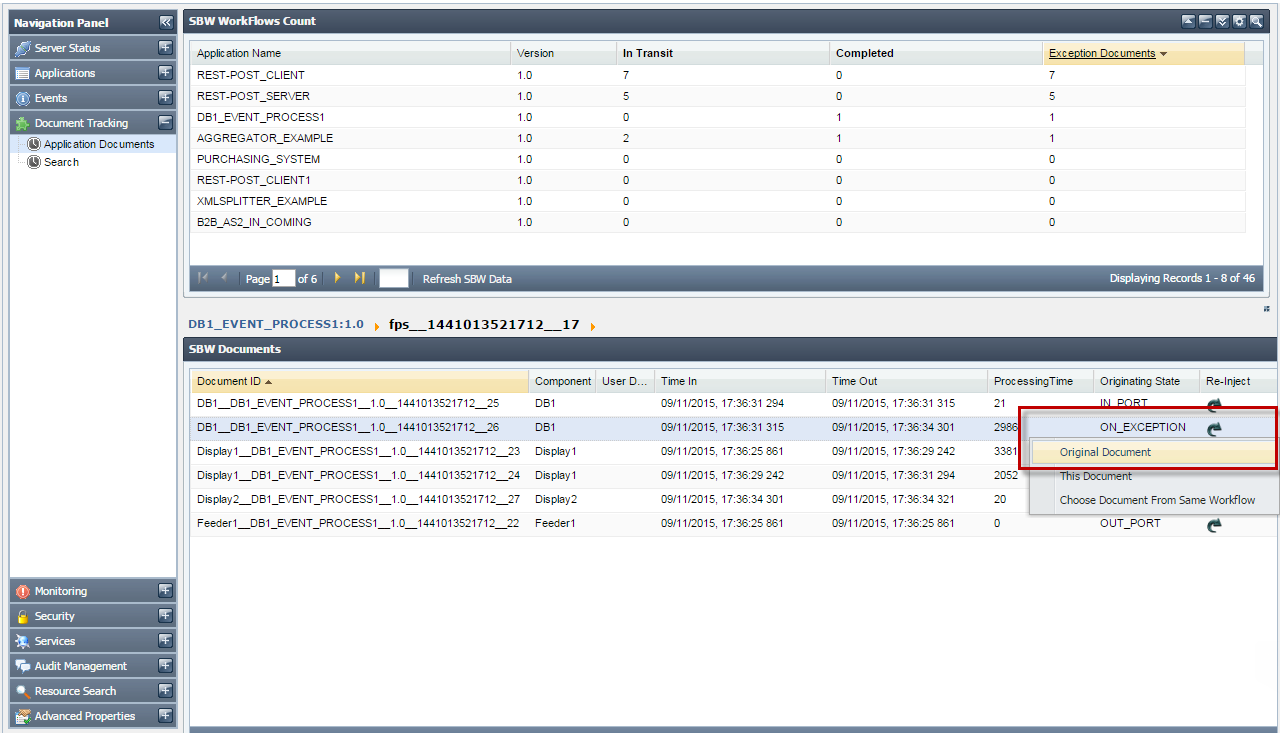
Figure 11: Re-injecting document directly - Click the Re-inject button on the pop-up after making the required changes to the document (if any).
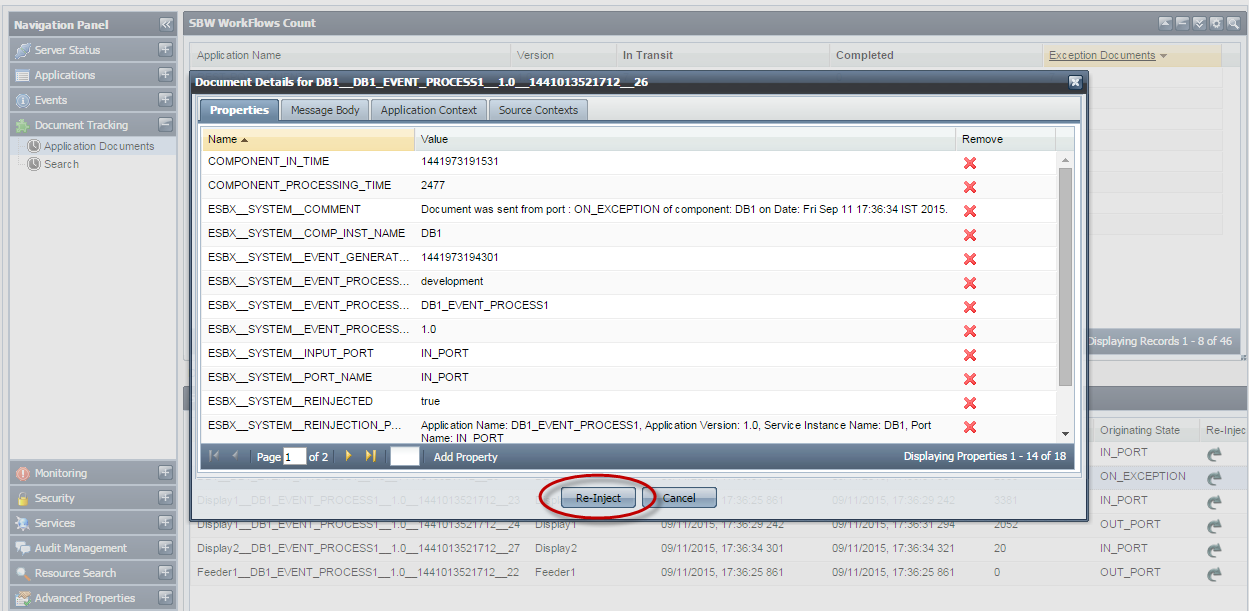
Figure 12: Document content display during re-inject - In the JMS Configuration screen, change the configurations as per the installation and click the Publish button; this will re-inject the document for reprocessing. In the example, the message will be resent to the DB Component to reprocess.

Figure 13: JMS Configuration screen
Re-injecting Document from the Search tab
Follow the steps below to re-inject the document from the Search tab.
- From the application documents listing, copy the Workflow ID of the failed document.
- Go to Dashboard > Document Tracking > Search and click the Filter SBW Documents button present at the upper-right part of the screen..
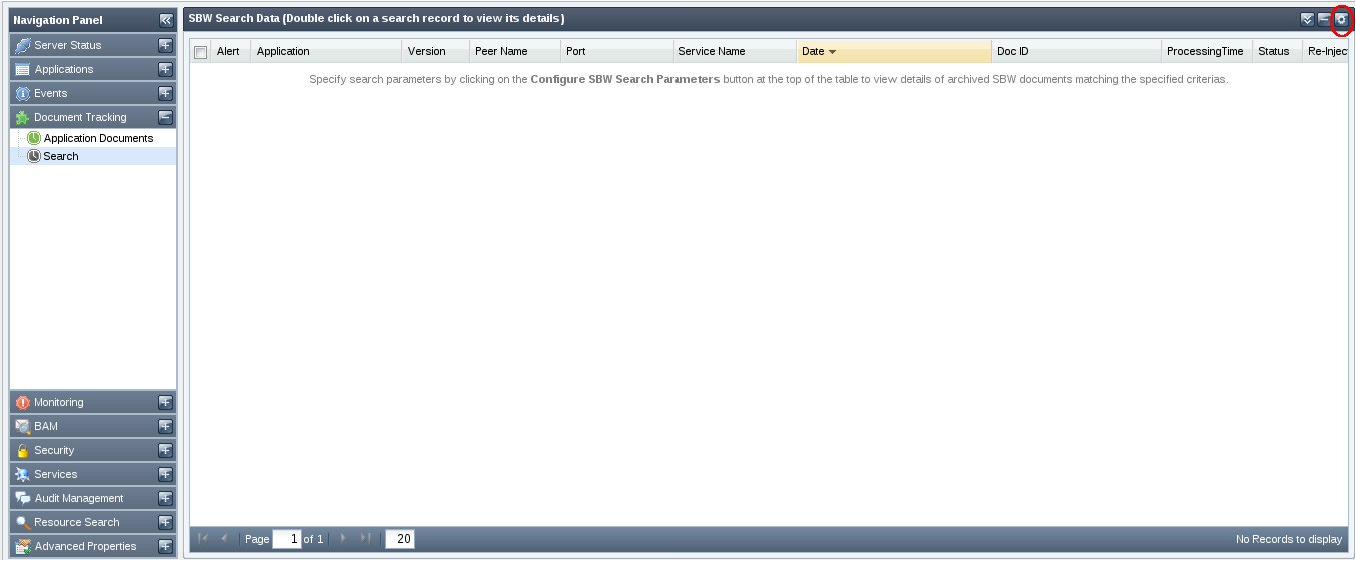
Figure 1114: Search Filter - This will pop up a search parameters window. Please fill in the Workflow ID copied above in the Workflow Instance ID field and click Search.
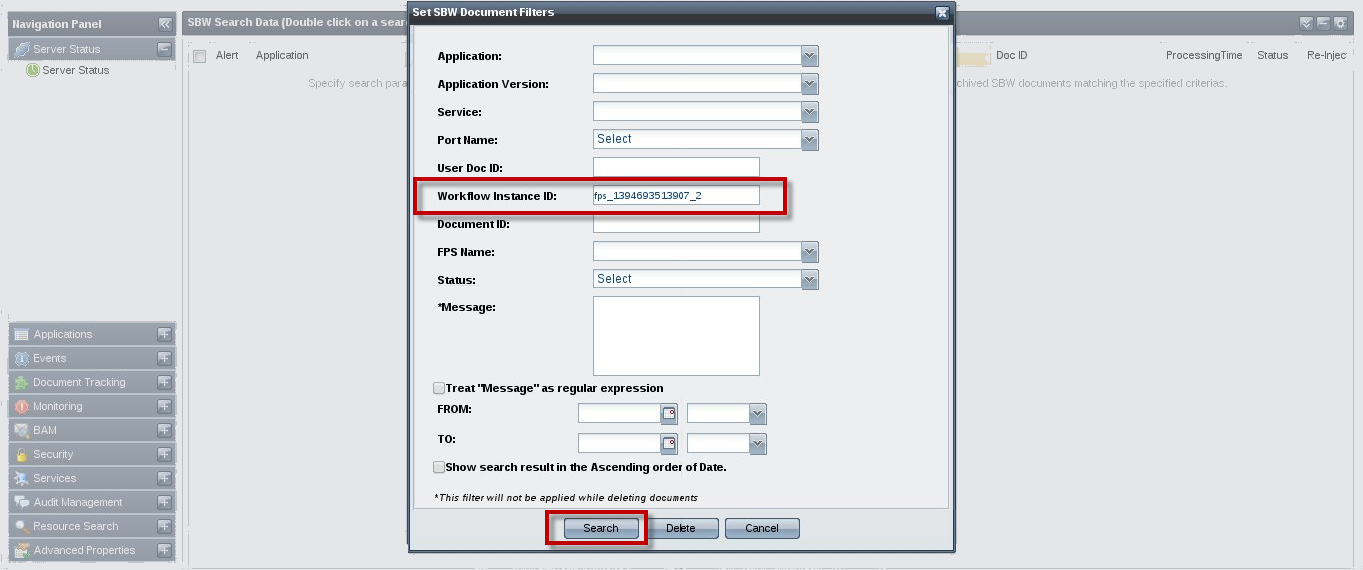
Figure 1215: Search with Workflow ID - This will list all the places at which the document was tracked.
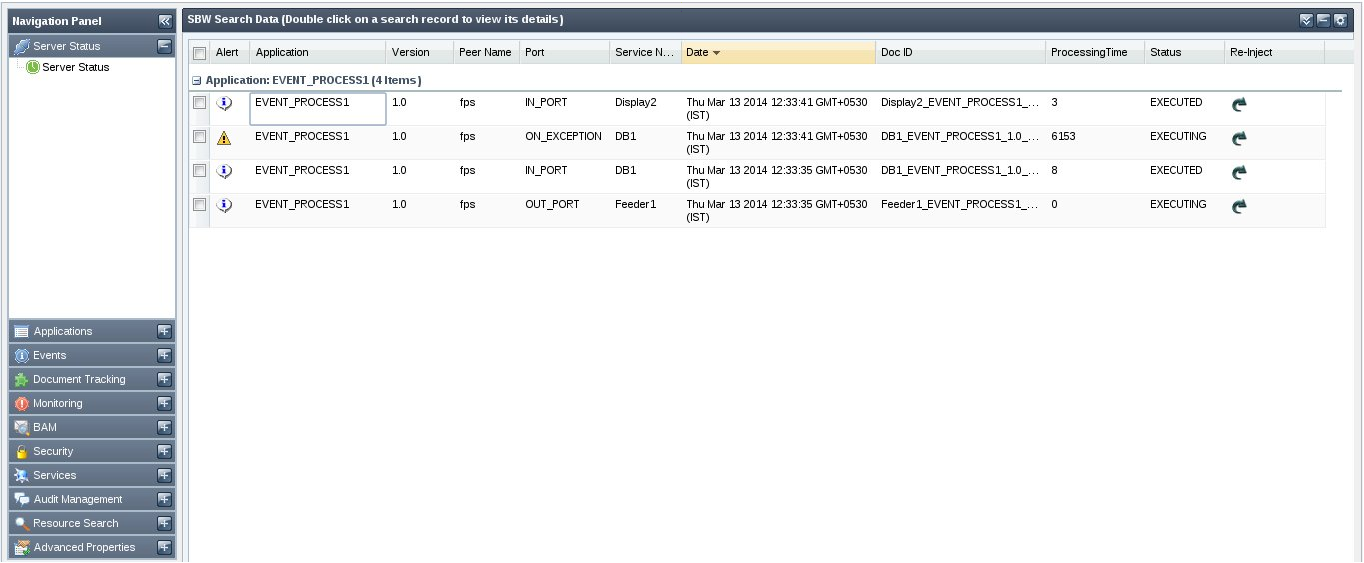
Figure 1316: Search Result - List of tracking points for the document - Now click the re-inject button of the document to be re-injected and follow steps similar to that in direct re-injection to re-inject the document at the correct point.