...
- Open Mapper perspective (Window > Open perspective > Other > Mapper), right-click Mapper Projects in the Mapper Project Explorer panel and click New option to open a new project.
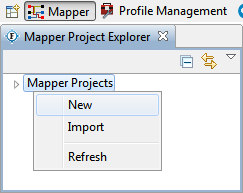
Figure 1: Creating a new Mapper project - In the New Mapper Project dialog box, provide a name and click Finish to create a project.
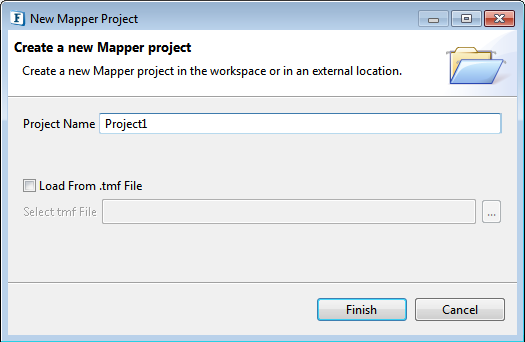
Figure 2: Providing a name to the new project On the Tools menu, click Create/Edit User defined Function(s) option; User Defined Functions dialog box appears.
Note Alternatively, click
 icon to open User Defined Functions dialog box.
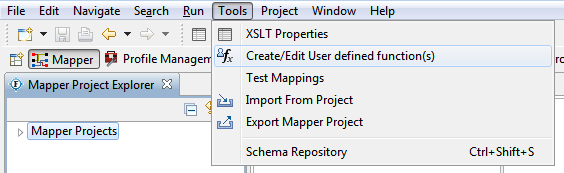
Figure 3: Opening User Defined Functions dialog box- User Defined Functions dialog box has has a list of all extensions that are defined.
To create a new extension
, typeType the name of the extension to be created in the Extension Name text
box provided in this dialog and
click the Edit button.
To edit one of the existing
extension, click on the extension and then pressextensions
Select the respective extension present under Defined Extensions and click the Edit button.
sequenceInfo The New Script Function Wizard appears as shown in Figure 5; the wizard has two panels in
sequence—Script Information panel and Function List panel as explained in the next section.
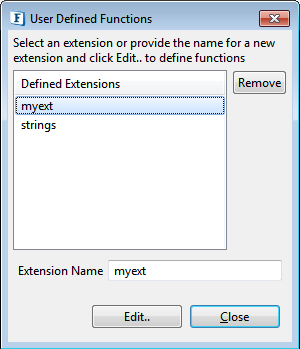
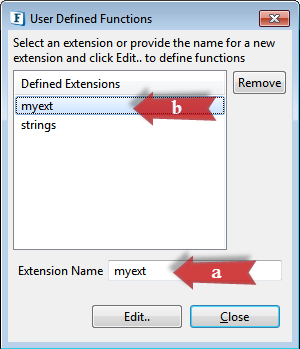
Figure 4: Extensions Dialog
Script Information and Function List
Extensions can be defined either in Javascript or Java language. The language of the extension being added can be specified from the Language combo dialog box present in the Script Information panel.
...
After choosing the language, provide Java Script (for javascript language) or the qualified name of the Java class
...
(for java language).
Function List panel (Click the Next button in the Script Information panel) shows the list of functions that were defined in the Script Information panel. Upon selecting the desired functions, these will be added to the Function palette under the User Defined Functions category. The Function List items will be different for the languages—javascript and java.
Below sections illustrate the specific steps for javascript and java language options.
Javascript
- In the Script Information panel, select 'javascript' from the Language drop-down.
Provide the script in the text editor which says 'Type in the script here'.
Code Block title Sample Javascript language js function compute(expr){ return eval(expr); } function nextMillenium(){ d = new Date() //today's date mill=new Date(3000, 00, 01, 00, 00, 00) //Next millennium start date diff = mill-d //difference in milliseconds mtg = new String(diff/86400000) //calculate days and convert to string point=mtg.indexOf(".") //find the decimal point days=mtg.substring(0,point) //get just the whole days return "There are only " + days + " days remaining to the start of the next millennium."; } function replace(input, pattern, flags, str){ return input.replace(new RegExp(pattern, flags), str); }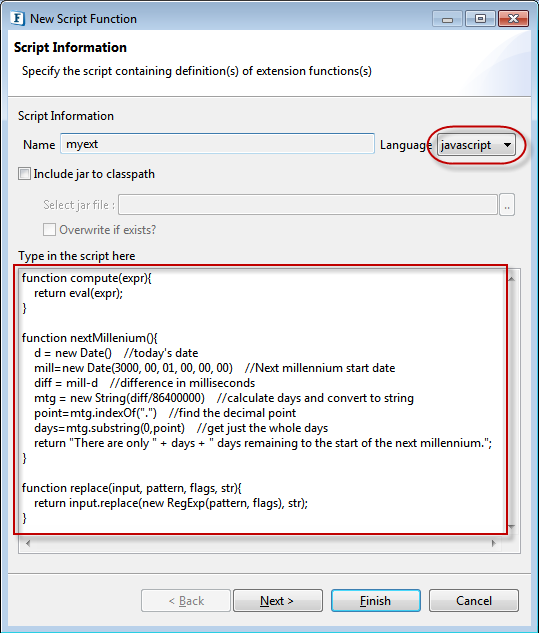
Figure 5: Java script provided in the Script Information Panel
Click Next; the script will be processed and the list of javascript functions will be populated
...
. Choose from the function list by selecting the checkbox; change the Type (String/Decimal/Real/Unknown) of function as required.
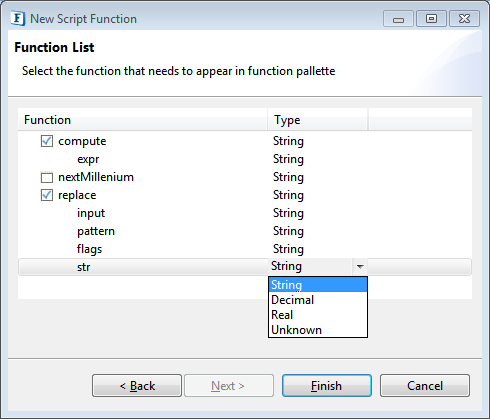
Figure 6: javascript Function List
Java
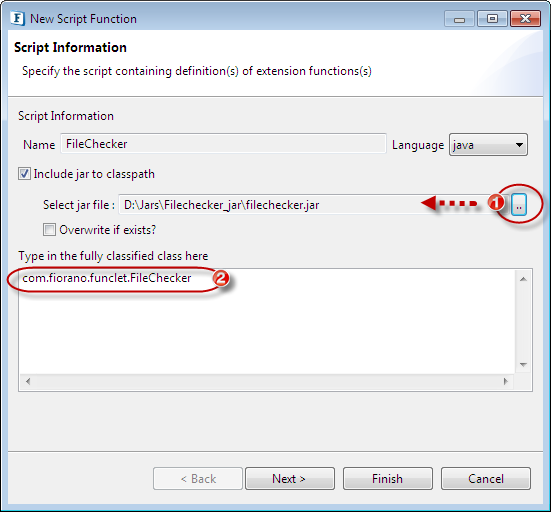
- In the Script Information panel, select 'java' from the Language drop-down.
Provide the fully qualified name of the Java class
...
Function List
The Function List panel shows the list of functions that were defined in the Script Information panel. The user can select the desired functions and the selected functions will be added to the Function palette under the User Defined Functions category.

Figure 6: Function List panel
in the text editor which says 'Type in the fully classified class here'.
Code Block title Java Class example com.fiorano.funclet.FileChecker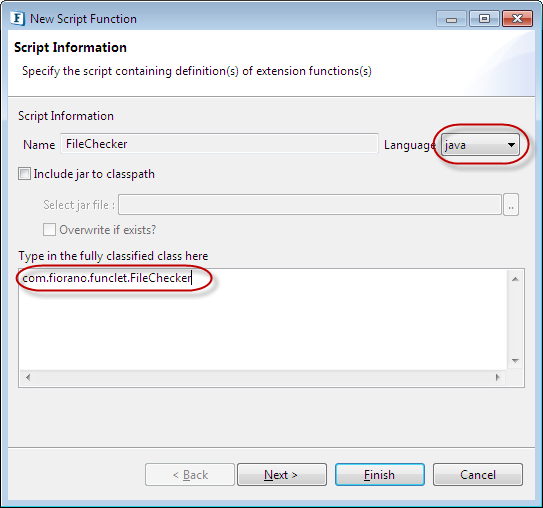
Figure 7: Java class provided in the Script Information Panel
Click Next; the list of java functions will be populated.
Note - Only the public static functions in the class are listed.
- The arguments to the functions should be either primitives or String.
- The return type of the functions should be either void, primitives or String.
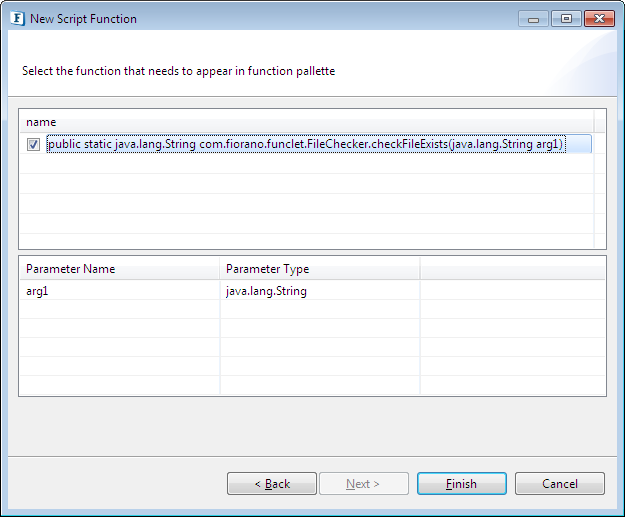
Figure 8: Java class parameters
In the panel, perform the following actions as required:
Choose from the java function list that appears under the name table by selecting the checkbox.
Select the function name to see the parameters appear.
Double-click the parameter name to change the name if necessary.
Adding Required Jars
For Testing in Mapper
...
From Script Information panel
...
- In the Script Information panel, select the Include jar to classpath option
...
- .
- Click the browse
 button against the Select jar file property
...
- to add the required jar file from the location where it is saved.
...
Figure
...
9: Adding Jar to mapper classpath from Script Information panel
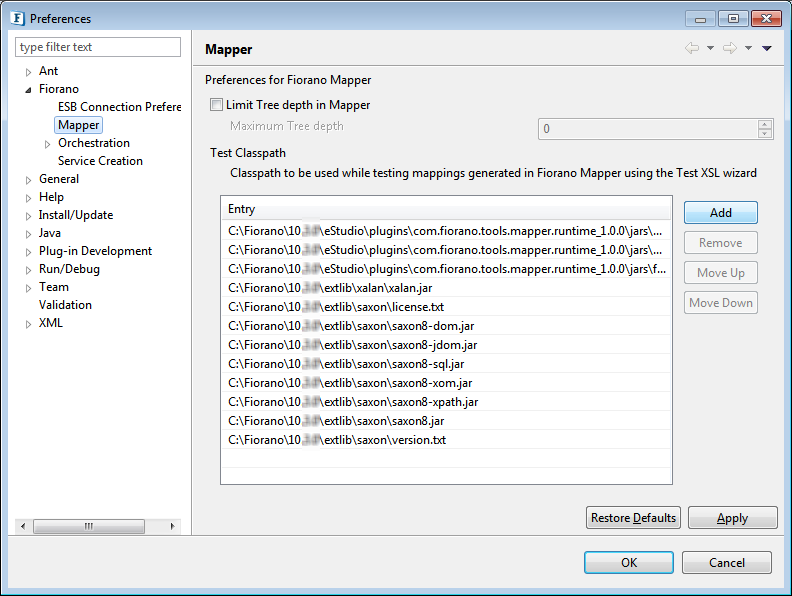
From Preferences
...
- Navigate through Window > Preferences
...
- In the Preferences window, expand Fiorano and select Mapper.
- Click the Add button to add the jar to the Test Classpath table in the Mapper preferences panel.
Figure
...
10: Adding Jar to mapper classpath from Mapper Preferences panel
For Runtime
Xslt Component
To use the added funclet(s) in an XSLT component, add the jar to the component resources. To add jar files, follow the steps mentioned in the Add Resources to a Service section.
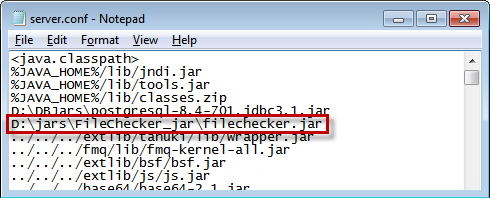
Route Transformation
To use the added funclet(s) in Route Transformation, add the jar to the Class Path of servers. To add the jar, provide the path in the Server Configuration file by following the below steps:
- Open configuration file of the peer server hosting the route's source component and make the changes mentioned in the steps below.
- server.conf file from the location FioranoHome/esb/server/bin (if you are using server.bat to deploy the server)
- fps.conf file from the location FioranoHome/esb/server/bin (if you are using fps.bat to deploy the server)
- Provide the path (absolute path) where the jar file is saved.
Example: D:\jars\FileChecker_jar\filechecker.jar (filechecker.jar being the jar file) Save the file and close it.
- Restart the peer server for the changes to take effect.
Figure
...
11: Adding Jar to classpath in case of server.conf configuration file