...
To demonstrate the ability of a Fiorano REST application to interact with an end-user by exposing a secured REST service which that accepts HTTP DELETE requests at a URL and responds with a count of records deleted from the database successfully.
...
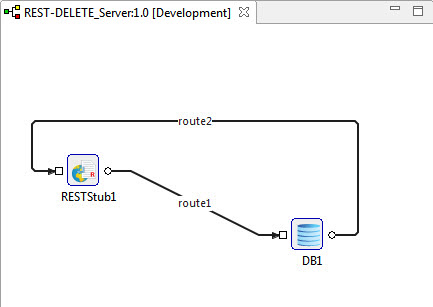
- Configure the RESTStub component to receive HTTP DELETE requests from RESTConsumer and process it as a query configured in a DB component. Bind the DB schema to the RESTStub and transform the routes between the RESTStub and the DB.
Configure the RESTConsumer component to send HTTP DELETE requests triggered using a Feeder component which that adapts to the RESTConsumer schema.
...
- In the REST-DELETE_Server event process, drag the RESTStub component from the Web category in the Microservice palette to the Fiorano Orchestrator.
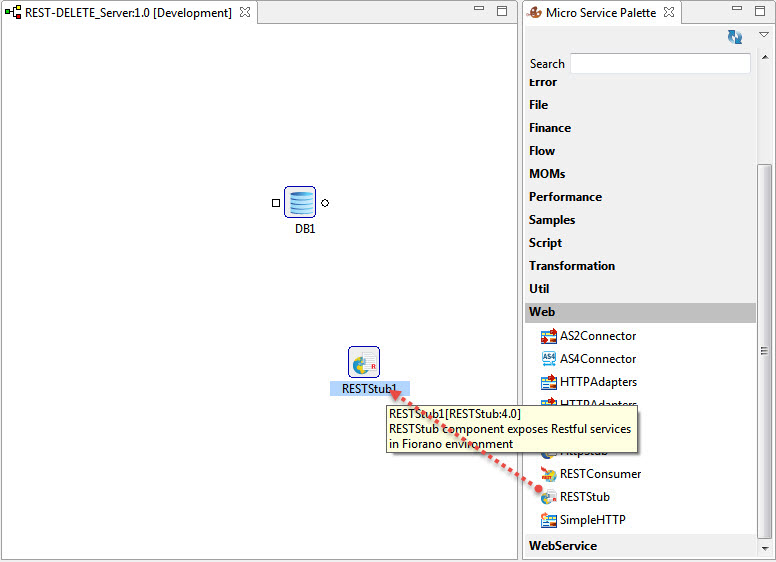
Double-click the component to open the Configuration Property Sheet (CPS).
Note Notice that the RESTStub component does not have any ports attached to it; ports appear only after configuration.
- The first screen in the CPS, wizard (1 of 3), is used to define the service using a user interface for WADL. WADL can be created manually by defining different aspects of the service or can load an existing WADL and edit the configurations.
Provide Service Name as 'Sample' with which the event process functionality is exposed as RESTful service. - Under the Create/Edit WADL section, perform the actions below:
Bind the DB input port and output port schemas to the RESTStub
Click Schemas under the Configuration tab.
Note Port Schemas appear only if the DB component is configured correctly.
In the Schemas Configuration section, click the Add
 button and click Load from Port Schemas option
In the Select Port dialog box that is displayed, select 'IN_PORT'.
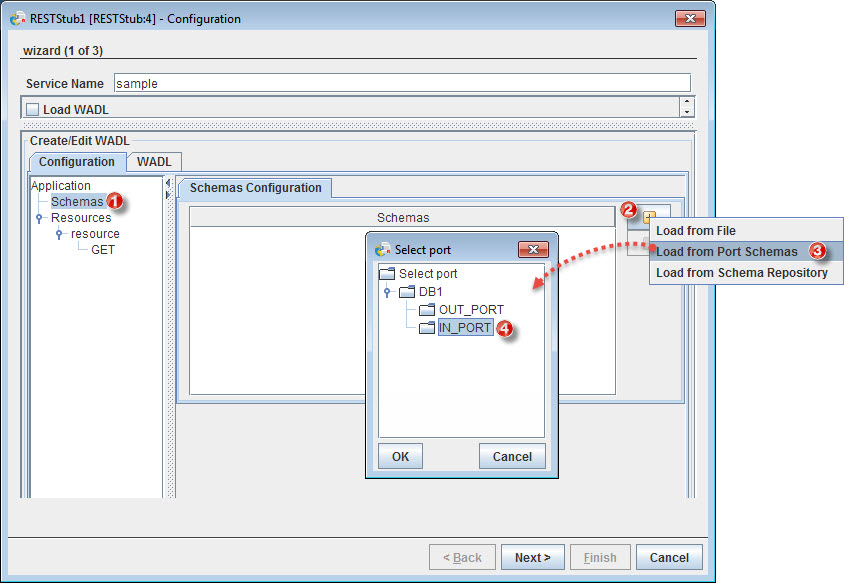
Similarly, select the OUT_PORT too and click OK. Both schemas get added under the Schemas section.
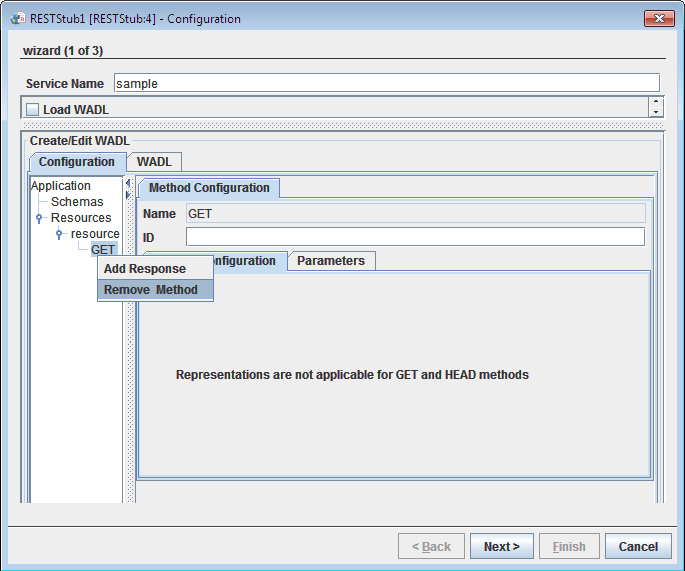
Add DELETE method
Right-click the GET node and select the Remove Method option to remove the default method.
- Right-click resource under the Rresources node, go to Add Method and select DELETE option to add the DELETE method.
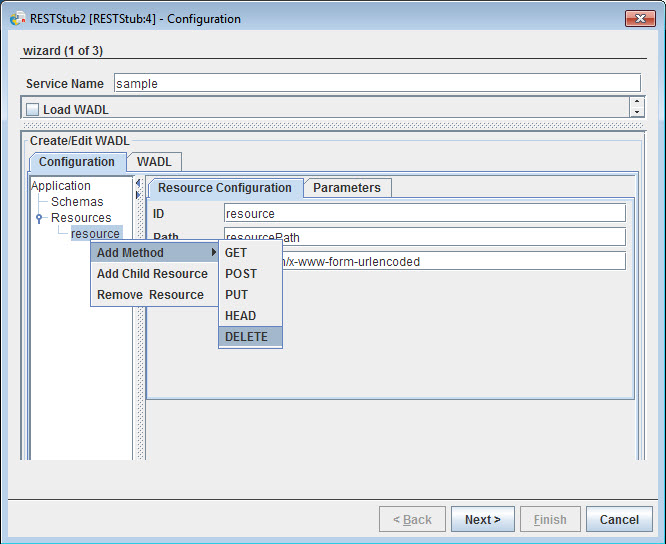
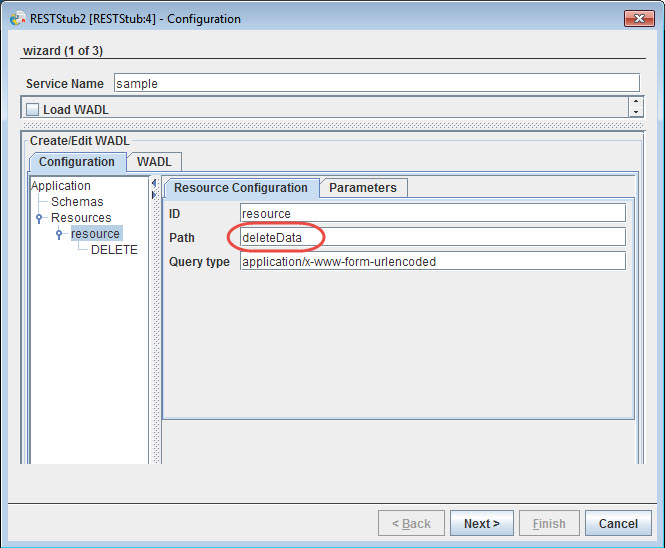
Rename resource path to give logical meaning to the scenario
Click the resource node.
Under the Resource Configuration tab, replace the default value of Path 'resourcePath' with 'deleteData'.
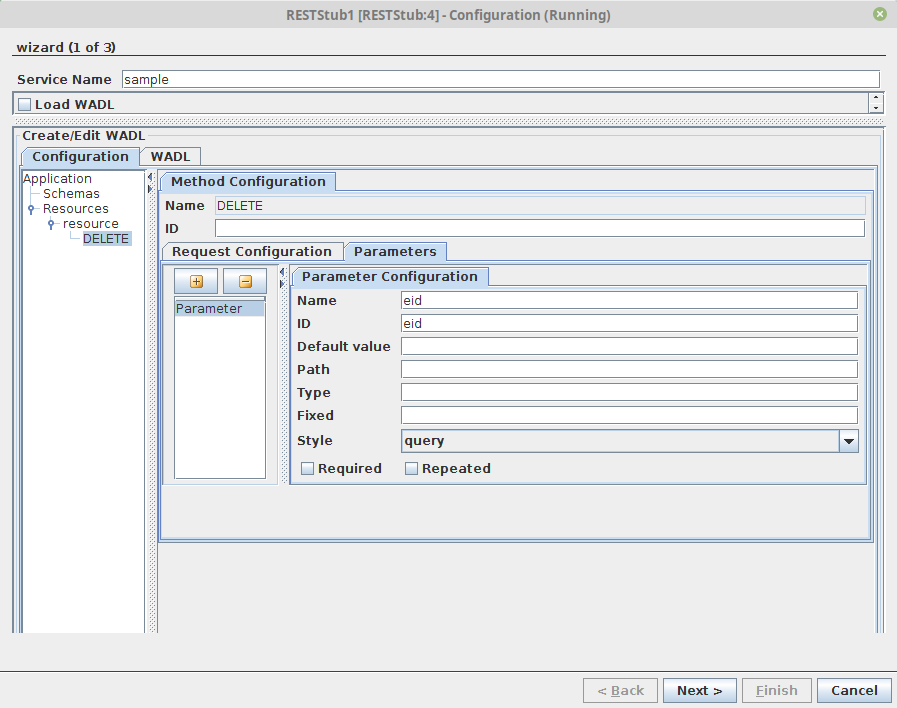
Add the request SQL element to the DELETE node
Click the DELETE node.
- Click the Parameters tab under Method Configuration.
- In the Name field, enter “eid” and also enter “eid” in the ID field and select Style as "query".
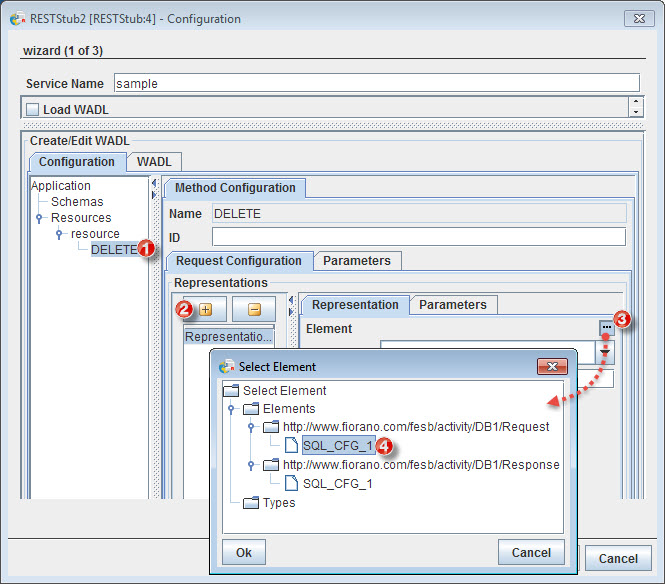
Click the Add
 button under the Request Configuration tab.
Click the ellipsis
 button under the Representation tab.
In the Select Element window displayed, select "SQL_CFG_1" under Request element and click OK.
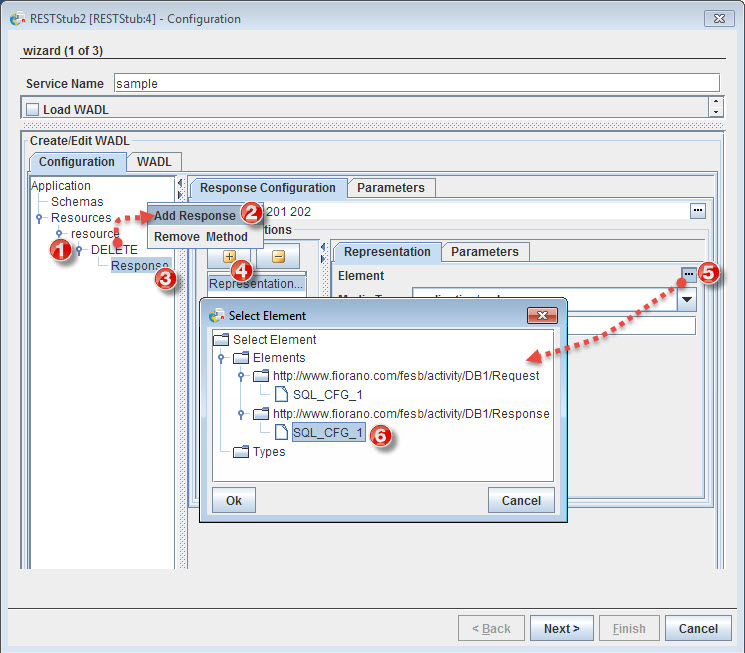
Add the response SQL element to DELETE node
Right-click the DELETE node and click the Add Response option. The Response node is displayed.
- Click the Response node
Click the Add
button under the Response Configuration tab.Click the ellipsis
button under the Representation tab.In the Select Element window, select "SQL_CFG_1" under the Response element and click OK.
...
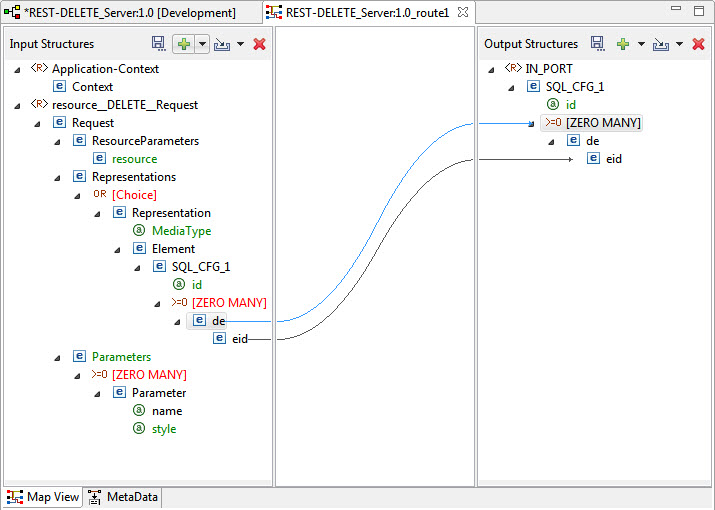
- Right-click route1, point to Configure Transformation and select the Mapper Project option to open the Fiorano Mapper editor.

- In the Mapper Project, connect values in and map “eid” from Input Structures and to Output Structures as below:
- de to ZERO MANY
- Click the Save
 icon (or File > Save) to save the transformation configuration and close the Mapper Project editor.
 - Similarly, for route2, go to the Mapper Project window and connect "UpdateCount".
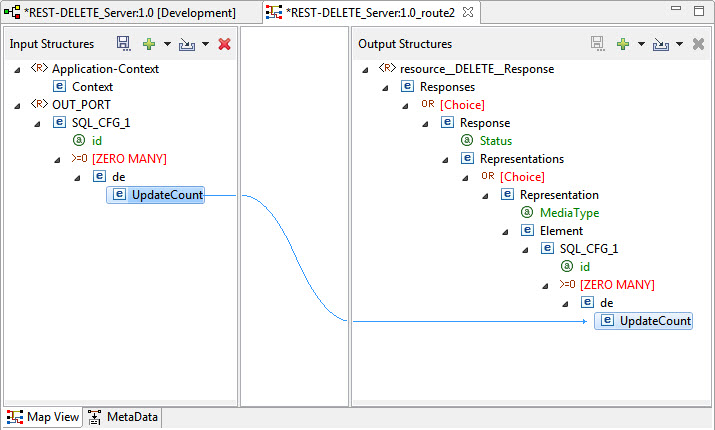
Save the mapping configuration as explained in step 3.
Info Now the dotted lines in the route are transformed to bold lines implying that the route transformation has been done.
eid

...
- Click the Check Resource and Connectivity
 icon (or press ALT+SHIFT+C) to check the resource and connectivity.
 - Click the Run Event Process
 icon (ALT+SHIFT+R) to run the event process. The Feeder and Display windows get opened.
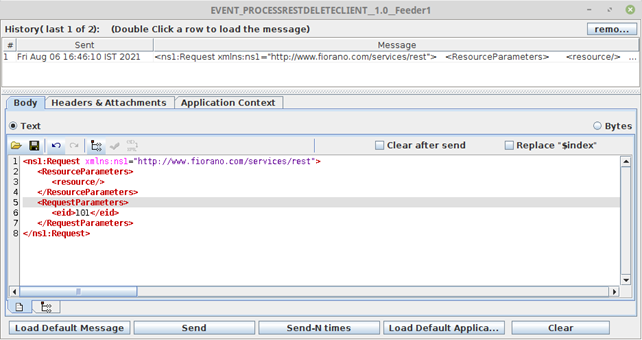
 Provide the required column values (in this example, eid: 101) in the Feeder window and click Send.
Expand title Expand for sample input Code Block <ns1:Request xmlns:ns1="http://www.fiorano.com/services/rest"> <ResourceParameters> <resource/> </ResourceParameters> <Representations><RequestParameters> <Representation MediaType="application/xml"> <Element> <ns2:SQL_CFG_1 xmlns:ns2="http://www.fiorano.com/fesb/activity/DB1/Request" id="-4827304138918607872"> <ns2:de> <ns2:eid>101</ns2:<eid>101</eid> </ns2:de> </ns2:SQL_CFG_1> </Element> </Representation> </Representations> </RequestParameters> </ns1:Request>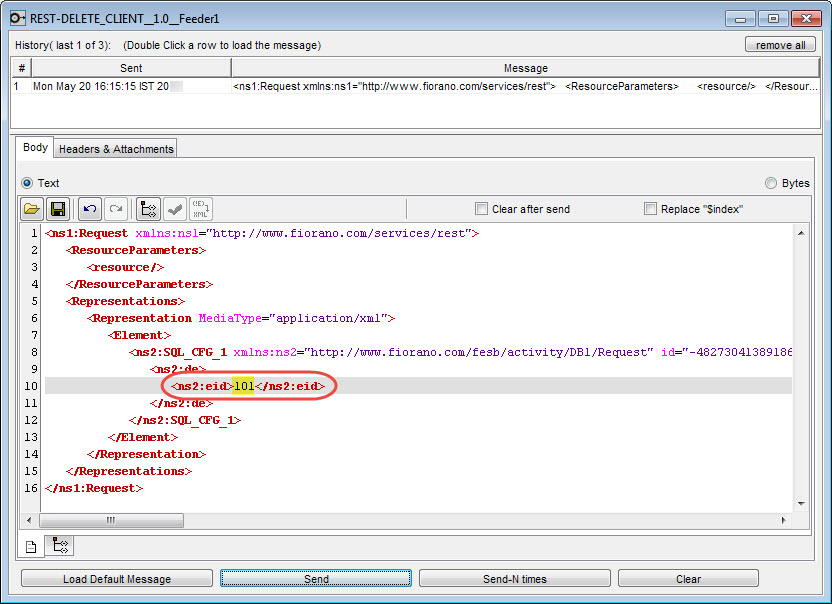
Info This changes the name inserted using RESTPOST.
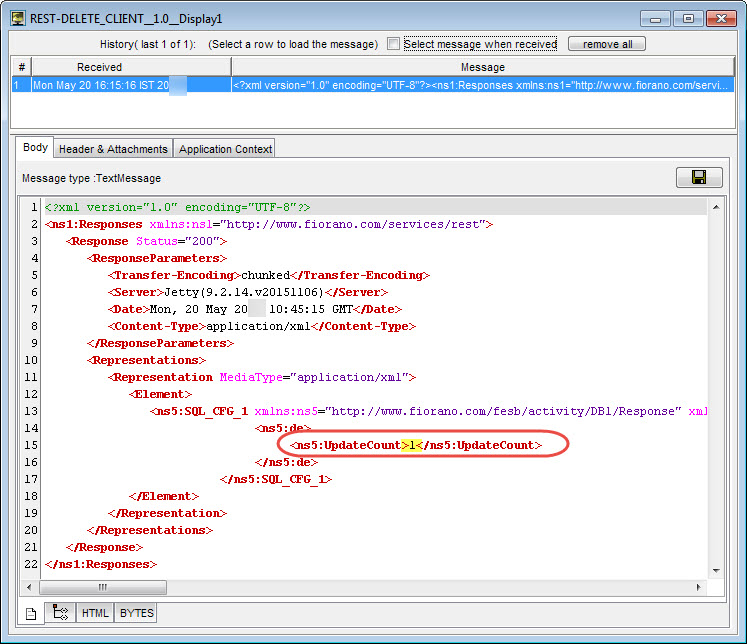
If the DELETE query is successful, 'UpdateCount' shows "1" in the Display window.

Note In order to verify, GET method can be used in DB before and after the deletion of data.
Code Block title GET method to retrieve existing data in the DB table SELECT "public"."emp"."ename", "public"."emp"."eid" FROM "public"."emp"
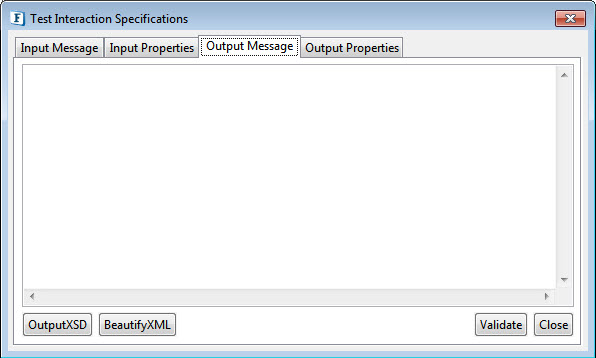
Click Execute in the DB Test Interation Specifications Panel; it shows as an empty screen as the lone data in the DB is removed.
...