...
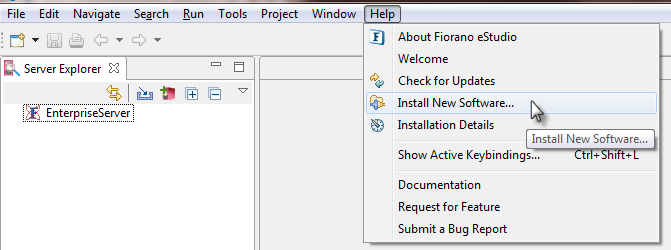
- In eStudio, go to the Help menu and click the Install New Software option to open the Install New Software wizard.
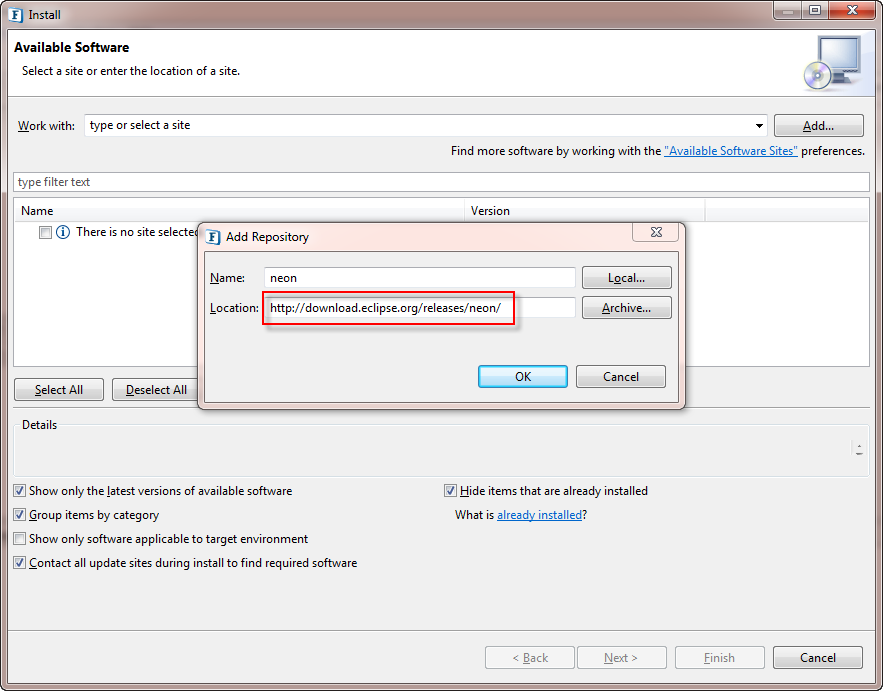
- Click the Add button and provide the URL "http://download.eclipse.org/releases/neon/" in the Add Repository dialog box and click OK.
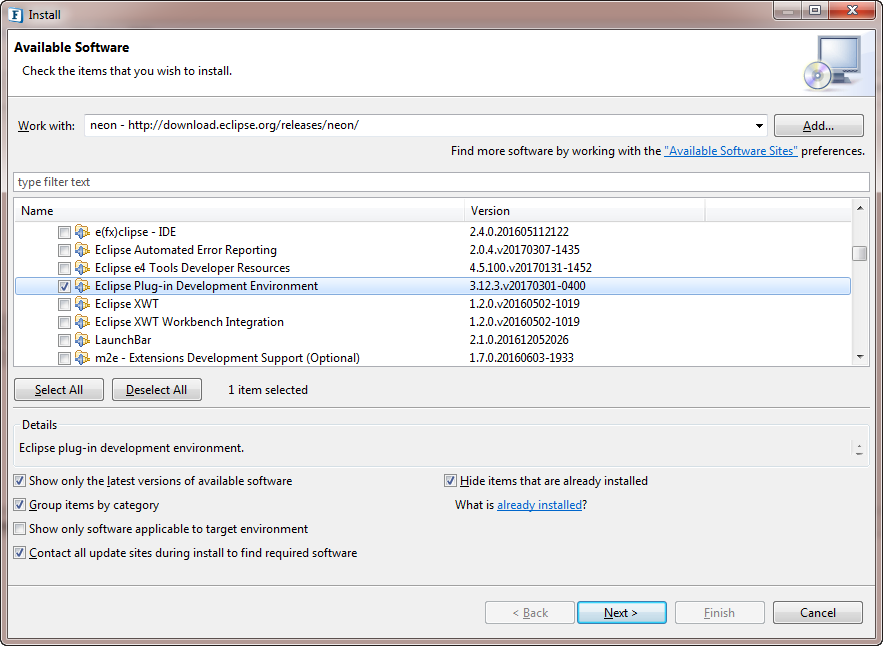
- Select the 'Eclipse Plug-in Development Environment' option under the 'General Purpose Tools' name and click Next twice.
- Accept the License Agreement and click Finish.
- When the installation is done, restart eStudio as it prompts to do so.
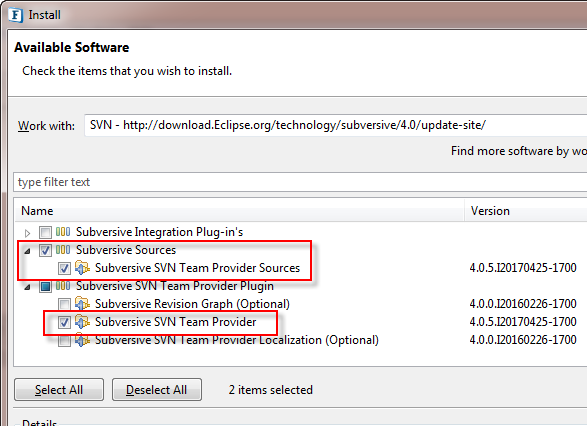
- Open the Install New Software wizard and add "http://download.Eclipse.org/technology/subversive/4.0/update-site/". Select the values from the list as shown in figure below.
- Click Next twice, agree to the License Agreement, click Finish, and restart eStudio upon prompting.
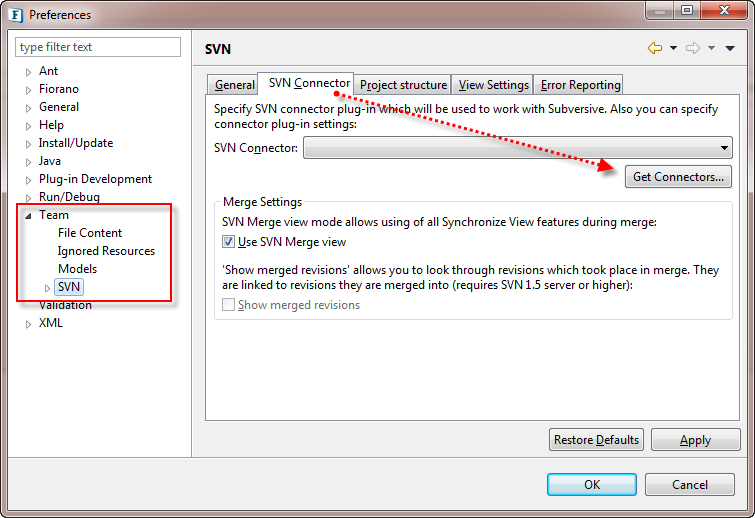
- After restarting eStudio, navigate to Window > Preferences. In the window shown, navigate to Team > SVN. Go to the SVN Connector tab and click the Get Connector button.
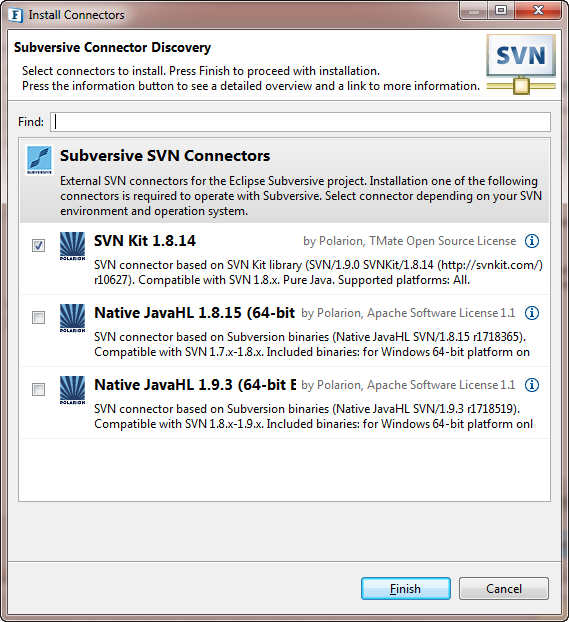
- From the list of compatible connectors displayed in the Subverse Connector Discovery panel, select the option with the prefix "SVN kit" and click Finish.
- Click Select All to select all plugins and click Next twice. Accept the License Agreement and click Finish.
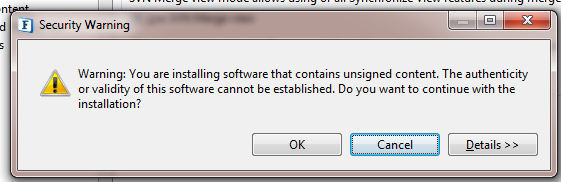
- During installation, a 'Security Warning' appears asking for confirmation to proceed, click OK to continue with the installation.
- Click OK in the Preferences panel to complete the installation. Restart eStudio as it prompts to do so.
...
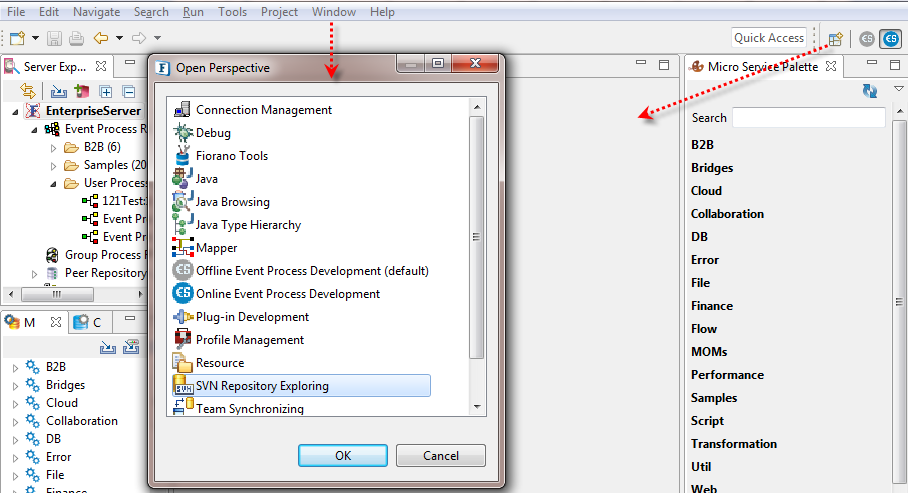
- Click the Open Perspective button on the upper-right part of eStudio (or Windows > Open Perspective). Select the SVN Repository Exploring option from the list and click OK.
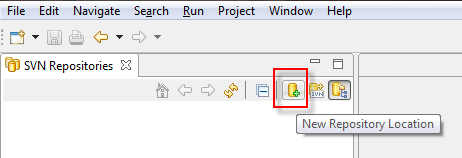
- Click the New Repository Location button, if you want to add a new SVN repository location other than the existing ones.
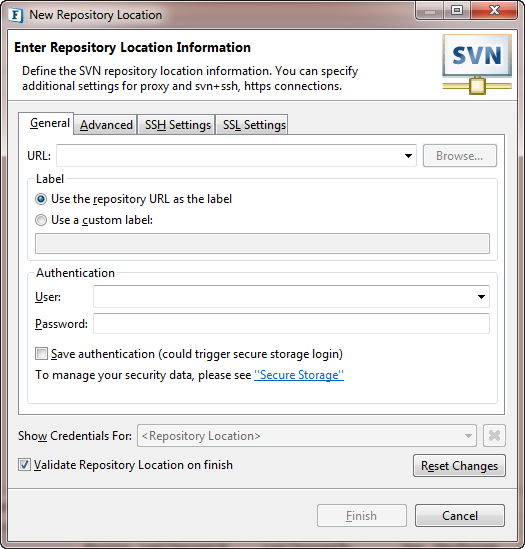
- Add details of SVN Repository and SVN credentials in the wizard and click Finish.
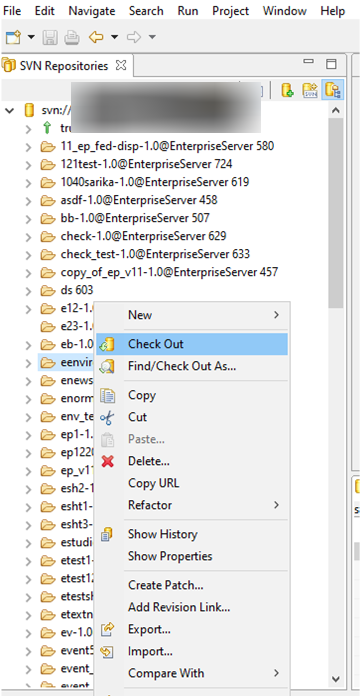
- Right-click the Event Process to be checkout and click on Check Out option.
- Navigate to Online Perspective and Refresh the Event Process Repository to see the checked out event process in the Server Explorer view.
| Anchor | ||||
|---|---|---|---|---|
|
| Anchor | ||||
|---|---|---|---|---|
|
Below-mentioned are a few useful options to work with the shared Event Process, which are available in its context menu (Team option in the right-click menu of the Event Process):
- Synchronize with Repository: When Event process has changes to be committed or checked out, use this Option to open Synchronize View either in the same perspective or in Team Synchronizing Perspective. The Synchronize view shows the changes to be committed or Checked Out.
- Update to HEAD: Used to update the event process to its current revision in the SVN repository. The changes that are made can be identified by a Dirty Flag that can be set using Label Decorations in Preferences refer section below.
- Update to Version: Used to update the event process to a particular revision from SVN repository.
- Show History: Shows the history of the Event Process commits.
- Revert: Used to Revert the changes made to Event Process. Note: The other options like Update to Revision, Revert and other options which change the contents of the Event process project will display 'out of sync' in the title of the EP. Just click on the Orchestration Editor of the Event process to sync.
| Anchor | ||||
|---|---|---|---|---|
|
| Anchor | ||||
|---|---|---|---|---|
|
As briefed earlier, this Option is used to update the event process to its current revision in the SVN repository. As shown in the below figure the Event Process2 has some local changes, which can be identified by the Dirty Flag.
After choosing the Update to HEAD option, the Event Process is shown as out of sync as shown in the below figure.
Click inside the Event process's Orchestration Editor so that the UI gets updated and the Event process gets in Sync with updated project; "Out of Sync" text disappears from the title.
| Anchor | ||||
|---|---|---|---|---|
|
| Anchor | ||||
|---|---|---|---|---|
|
The Label of the Event Process Project Name which is shared in SVN Repository can be customized to include/exclude various attributes such as Dirty flag, Revision Info, author, date, URL.
For example, to show the revision number (which helps in identifying revision from the Server Explorer itself) of an Event Process project next to its name in the Server Explorer View, perform the following actions:
- Go to Window menu and click Preferences.
- In the Preferences window, navigate to Team > SVN > Label Decorations.Under Text tab in the Label Decorations section, change the value of Project Format to the following and click Apply:
{dirty_flag}{name} [revision {revision}] - The Event Process in the Server Explorer panel appears in the format as applied.
- Some useful variables that can be used to display in Event Process name by amending Project Format values are:
- {author} for the author of the revision.
- {url_short} for the URL of the project in SVN repository (File_transfer-1.0@EnterpriseServer as it was appearing previously in the example).
- {date} for the modification date and time of the revision.