...
| Warning |
|---|
Use these properties with caution as these configurations are meant for expertsadvanced users. |
| Anchor | ||||
|---|---|---|---|---|
|
...
| Warning |
|---|
Use this property with caution as Expert Property configuration is meant for expertsadvanced users. |
XSL Configuration
Properties under XSL Configuration are described in the following sections.
...
| Warning |
|---|
Use this property with caution as Expert Property configuration is meant for expertsadvanced users. |
Enable this property If the component needs to process a message based on a condition which will be validated based on its properties. The conditions can be specified using the properties described below.
...
| Warning |
|---|
Use this property with caution as Expert Property configuration is meant for expertsadvanced users. |
| Anchor | ||||
|---|---|---|---|---|
|
...
| Warning |
|---|
Use this property with caution as Expert Property configuration is meant for expertsadvanced users. |
| Anchor | ||||
|---|---|---|---|---|
|
...
| Warning |
|---|
Use this property with caution as Expert Property configuration is meant for expertsadvanced users. |
| Anchor | ||||
|---|---|---|---|---|
|
...
| Warning |
|---|
Use this property with caution as Expert Property configuration is meant for expertsadvanced users. |
Enable Monitoring
Select the check box to enable monitoring for request execution time.
...
| Tip |
|---|
Refer the Monitoring Performance section to see how performance is monitored in the Dashboard. |
Threadpool Configuration
This property is used when there is a need to process messages in parallel within the component, still maintaining the sequence from the external perspective.
- This needs to be used only in such circumstances.
- If sequential processing is not required, please use sessions on the input port.
Click the Threadpool Configuration ellipses button to configure the Threadpool Configuration properties.

Figure 41: Threadpool Configuration properties
Enable Thread Pool
Enable this option to configure the properties that appear as below.
Pool Size
The number of requests to be processed in parallel within the component. Default value is '1'.
Batch Eviction Interval (in ms)
Time in milliseconds after which the threads are evicted in case of inactivity. New threads are created in place of evicted threads when new requests are received. Default value is '1000'.
| Anchor | ||||
|---|---|---|---|---|
|
A component can be scheduled to execute a specific request at configured intervals of time. When the component is configured to run in Scheduler mode, the component will not have input port (separate input need not be sent to the component in order to send message). However, messaging properties that are usually configured on the input port can be configured in Transport Configurations panel.
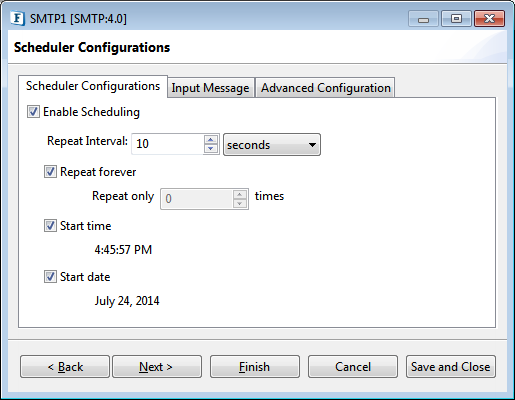
Figure 4142: Scheduler configurations panel
...
The polling start date. If the specified start date is earlier than the component start date, then it will be ignored and input messages are sent at next scheduled date.
Input Message
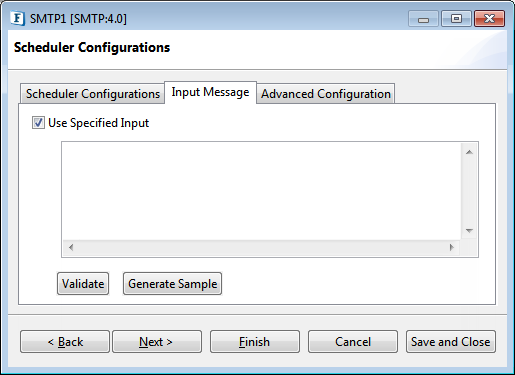
Figure 4243: Input Message tab in the Scheduler Configurations panel
...
Advanced scheduling information can be configured in the Scheduler Configuration panel.

Figure 4344: Advanced Scheduling configuration
...
Click the button against the property to specify the dates in the Editor. Dates moved to the Included Entries section are considered as the scheduled dates.
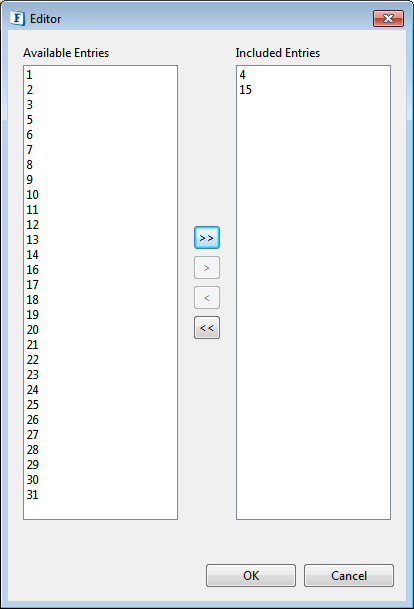
Figure 4445: Editor to provide Scheduled Dates In Month
Scheduled days in week (Schedule Type - WEEKLY)
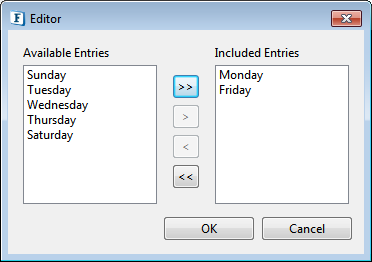
Figure 4546: Editor to provide Scheduled days in week
...
After selecting the Enable Scheduling check box in the Scheduler Configuration panel, click Next to configure Transport properties in Transport Configurations panel.
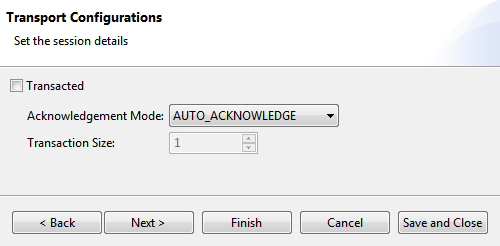
Figure 4647: Transport configurations panel
...
| Note |
|---|
Some of the panels or actions are not available for some components and hence are not visible in those components. |
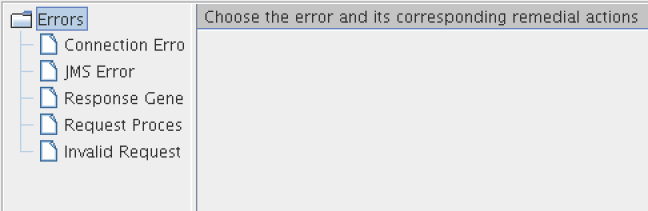
Figure 4748: Error handling
| Anchor | ||||
|---|---|---|---|---|
|
...
Example: Trying to connect to an external web site when the network connection is not active.
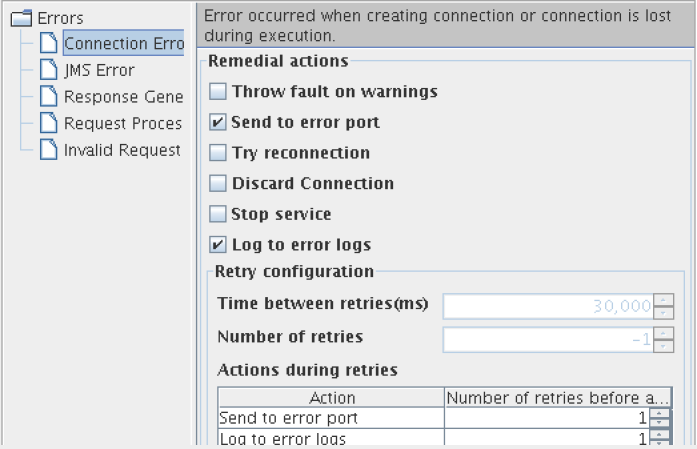
Figure 4849: Available actions for Connection Error category
...
Errors that occur in transport (JMS)
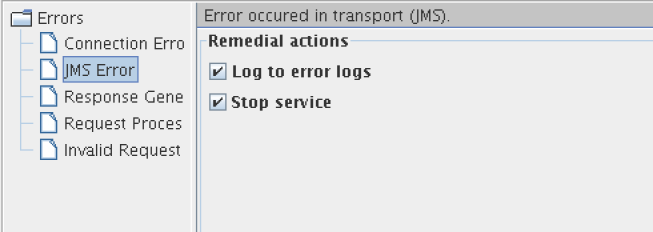
Figure 4950: Available actions for JMS Error category
...
Errors that occur while building a response for the processed request.
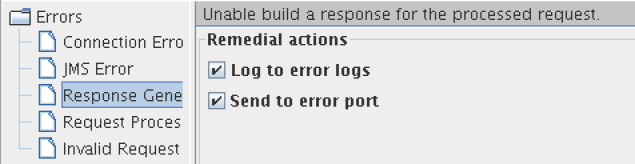
Figure 5051: Available actions for Response Generation Error category
...
Example: In case of FTPGet, a Request Processing Error occurs when the specified file (to be downloaded) in the input request is not present in FTP Server.
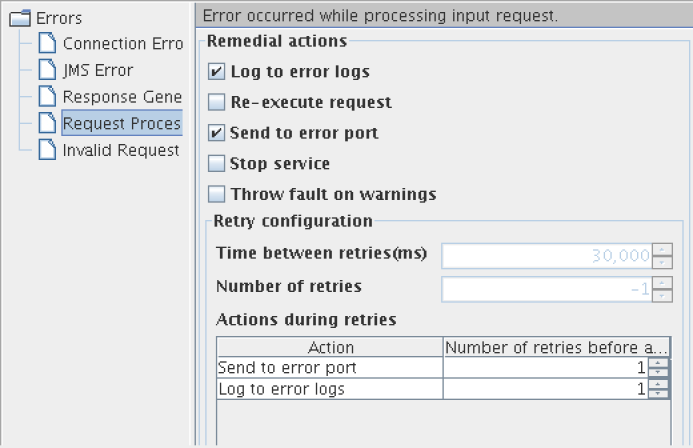
Figure 5152: Available actions for Request Processing Error category
...
Errors that occur when parsing the input request are categorized under Invalid Request Error. Remedial actions are different for EDBC and BC components.
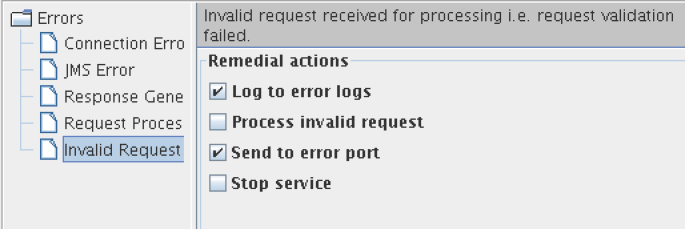
Figure 5253: Available actions for Invalid Request Error category
...
| Anchor | ||||
|---|---|---|---|---|
|
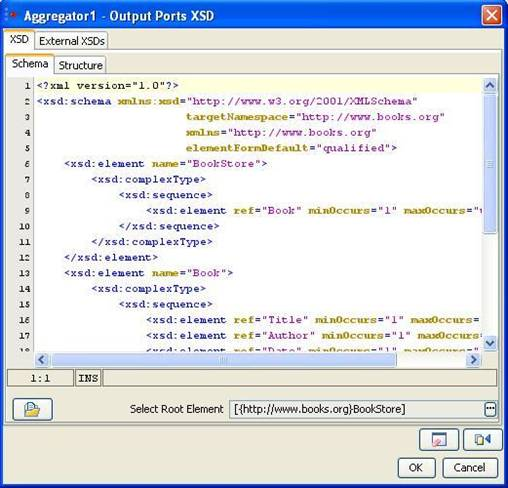
Figure 5354: Schema Editor
Schema Editor is used to configure schemas that are required for the functionality of a component.
In general,
...
Root element can be selected by clicking on Select Root Element button ![]() . A list containing all the elements present in the schema will be displayed as shown in Figure 49. A root element (multiple root elements, in some cases) should be selected from that list of elements. The selected root element(s) will be displayed in the schema editor next to Select Root Element text.
. A list containing all the elements present in the schema will be displayed as shown in Figure 49. A root element (multiple root elements, in some cases) should be selected from that list of elements. The selected root element(s) will be displayed in the schema editor next to Select Root Element text.
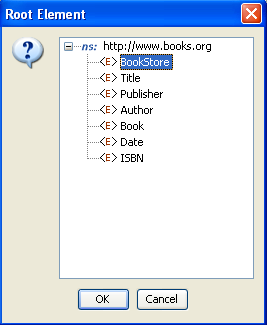
Figure 5455: Selection of root element
...
The structure tab displays a tree structure of the schema provided as shown below. The structure depends on root element.

Figure 5556: Structure of the schema when no Root Element is chosen
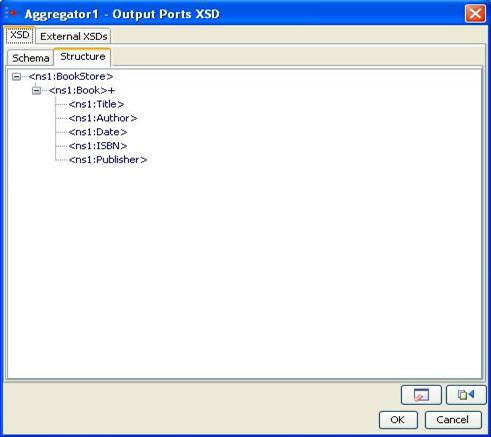
Figure 5657: Structure of the schema when Bookstore is chosen as Root Element
...
Click the Add button to add the external schema. Select an option from Manual or Load from File.
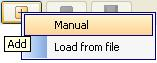
Figure 5758: Adding external schema
- Manual - The text editor on the right is editable only when Manual option is selected. The schema has to be provided manually in the text editor.
- Load from File - Opens a File Chooser to browse the required external schema.
...
To remove a schema, select the corresponding namespace and click Remove button ![]() .
.
To view a schema, select the corresponding namespace and the schema can be viewed in the text editor.
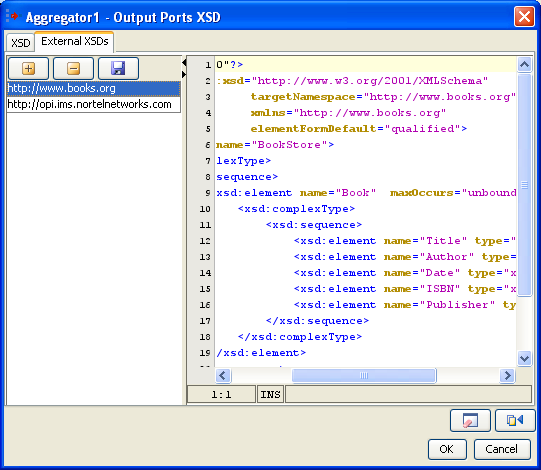
Figure 5859: Configuring external schema
...
On clicking Clear button, the schema, external schemas, root element and structure present in the schema editor will be cleared.
Fetch from Connected Source ![]()
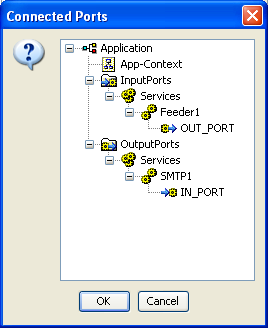
Figure 5960: List of connected ports from which schema should be fetched
...
- In Studio, navigate to Tools > Schema Repository. This opens a Schema Repository editor using which schemas can be added to schema repository.
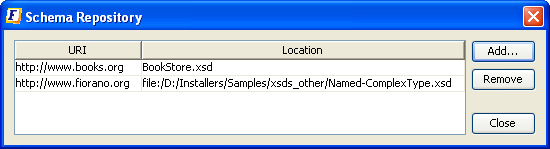
Figure 6061: Schema repository editor - Click the Add Button to add schemas to the repository, Customize Add... editor.
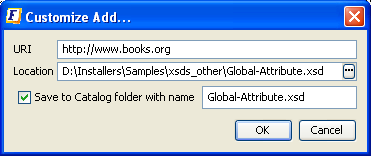
Figure 6162: Adding XSD to the schema repository - Click the ellipsis button
 to browse the required XSD.
 - Select an XSD and click OK
The values URI, Location, schema name will be automatically updated.- The URI value should not be an empty field. In case, if the schema has a target namespace, URI should be same as the target namespace of the XSD.
- The Location field displays the absolute path of the schema file.
- If the schema is to be copied and saved in the location <FIORANO_HOME>/xml-catalog/user, select the field Save to Catalog folder with name and specify a name with which the file has to be saved.
- If Save to Catalog folder with name is not selected, the file is not copied to the location <FIORANO_HOME>/xml-catalog/user and will be referred from its original location.
- Click OK to close Customize Add editor.
A new row specifying the URI and Location of the XSD will be added in the table.- To remove a schema from the schema repository, select a row from the table and click Remove.
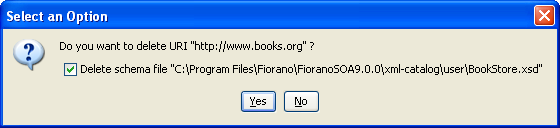
Figure 6263: Removing XSD from the schema repository - The option 'Delete schema file' specifies whether to delete the file from the system or just to remove the schema from xml-catalog. Select the check box to remove the file completely.
- In case, if the file is not copied to <FIORANO_HOME>/xml-catalog/user, the file will be deleted from its original location if this option is selected.
- To remove a schema from the schema repository, select a row from the table and click Remove.
| Anchor | ||||
|---|---|---|---|---|
|
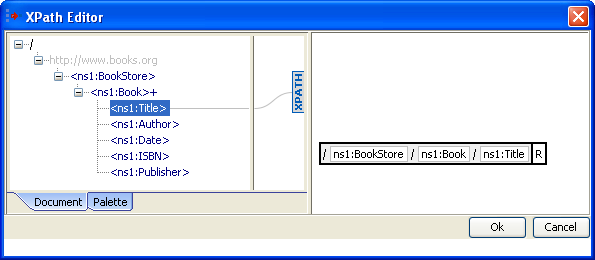
Figure 6364: XPath Editor
XPath Editor can be used for specifying path expressions to identify nodes in an XML document and for specifying conditions. The list of elements from schema provided are shown in the left panel of the editor. An XPath Editor with sample schema is shown below.
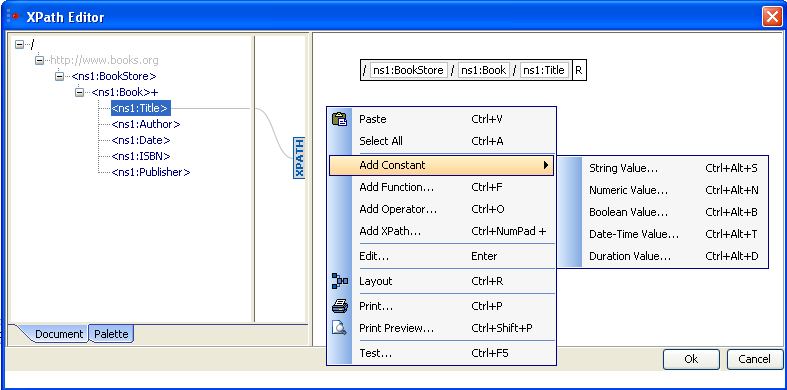
Figure 6465: Adding a constant in XPath Editor
...
A function can be added either by right clicking on the right hand side panel --> Add Function or by selecting from the list available in the palette tab which is present in the left panel as shown below.
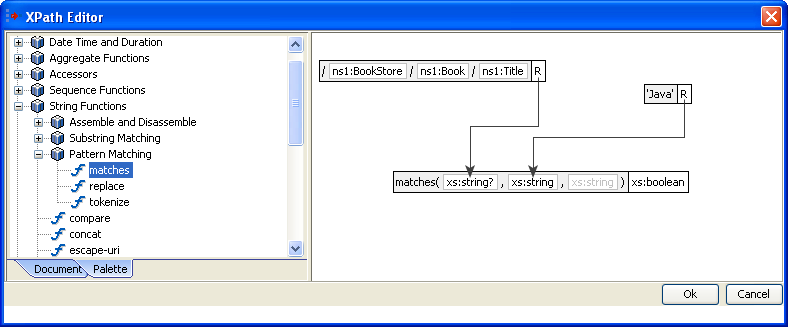
Figure 6566: XPath Editor – Palette containing different XPath functions
...
- Right-click the right panel. Select Add Constant > Boolean Value.
- Select the value as shown below.
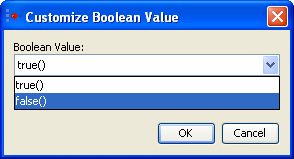
Figure 6667: Adding a boolean constant
Addition an Operator

Figure 6768: Adding an operator
- Right-click the right panel. Click the Add Operator
 button.
 - Select the operator as shown in the above figure.
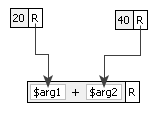
Figure 6869: Add ![]() operator
operator
The figure above illustrates a sample Xpath expression using a '+' operator. It contains two numeric constant values which are passed as arguments to the operator.
...
Named Configurations which are created earlier either from the Configuration Repository view or from the CPS itself can be re-used in other service instances.
To view all the named configurations of a particular service or resource type, use the drop-down in named configurations editor present in the CPS. A list of all configurations of similar type present in the repository is shown. Select a configuration name from the list to use that named configuration in a given service instance.
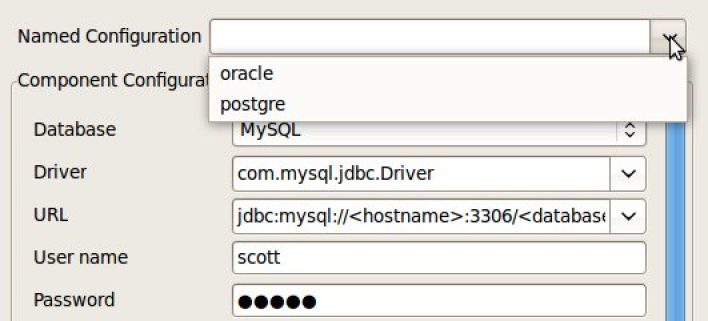
Figure 6970: Load Named Configuration
After selecting the named configuration from drop down, the UI will be disabled and will not be able to edit the configuration.
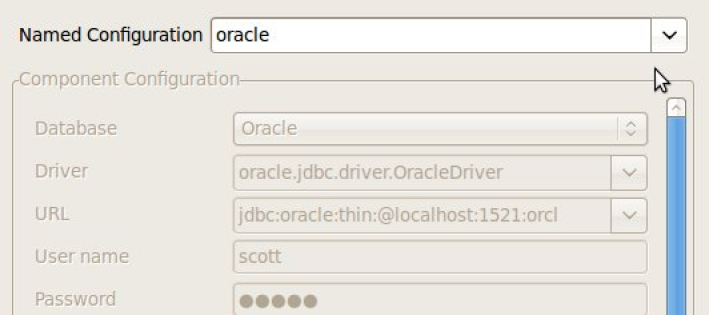
Figure 7071: UI disabled after loading Named Configuration
...
Click Save and Close button or Finish button in the CPS to save the named configuration to the repository.
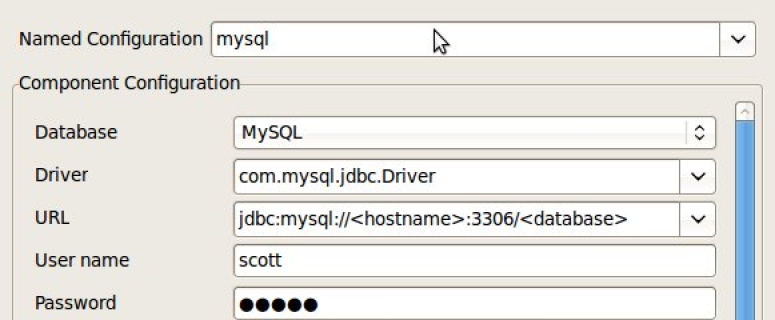
Figure 7172: Save Named Configuration
...
- In eStudio, navigate to Configuration Repository View and right-click the Resource button. Select Add Configuration to open the window for adding new Resource Configuration. Select the Resource type as MessageEncryptionConfiguration as shown in the figure below and click Next.
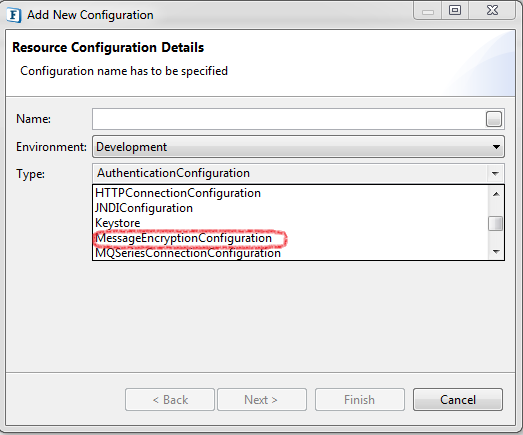
Figure 7273: Add Resource Configuration - Provide the encryption key password (any string) and XML Block Encryption Algorithm as below and click Finish. Supported XML Block Encryption Algorithms are AES128, AES256, TRIPLEDES.
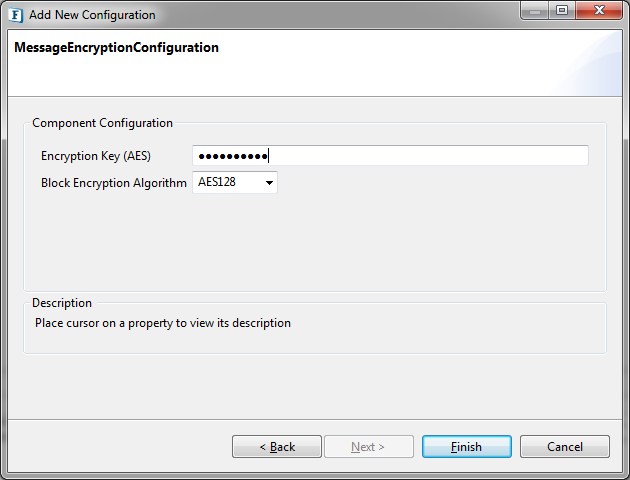
Figure 7374: Provide Encryption Key and Algorithm
...
In the component CPS, which have single input and output ports, the configuration will be as below.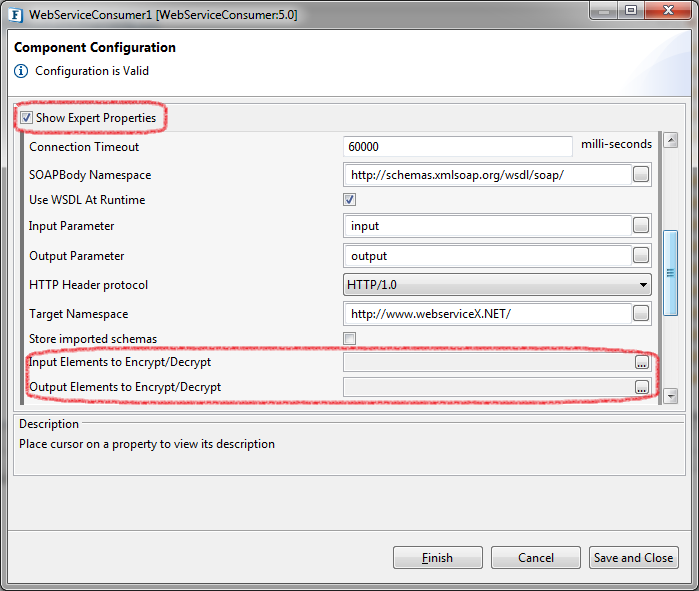
Figure 7475: Encrypt/Decrypt properties in CPS
Enable Show Expert Properties to see properties Input Elements to Encrypt/Decrypt and Output Elements to Encrypt/Decrypt. Both have similar configurations.
Open the Property Editor by clicking on ellipsis  button to select XML elements.
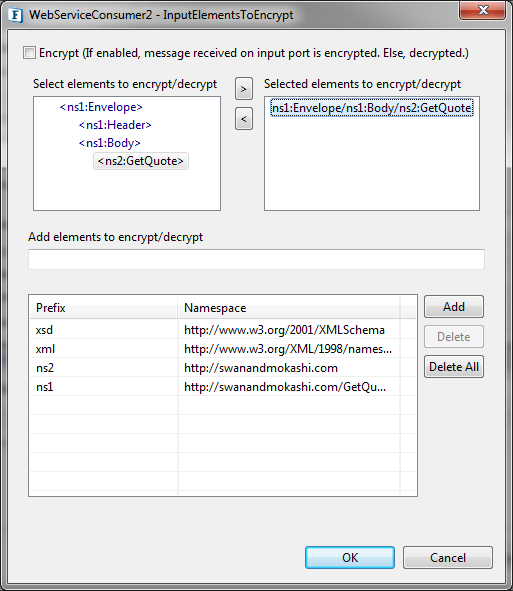
Figure 7576: Select elements to encrypt/decrypt
...
Navigate to Encrypt/Decrypt Configuration and click Refresh to populate the ports of the component.

Figure 7677: Components with multiple ports
Select the required port to populate schema structure. The rest of the configuration is the same as above.
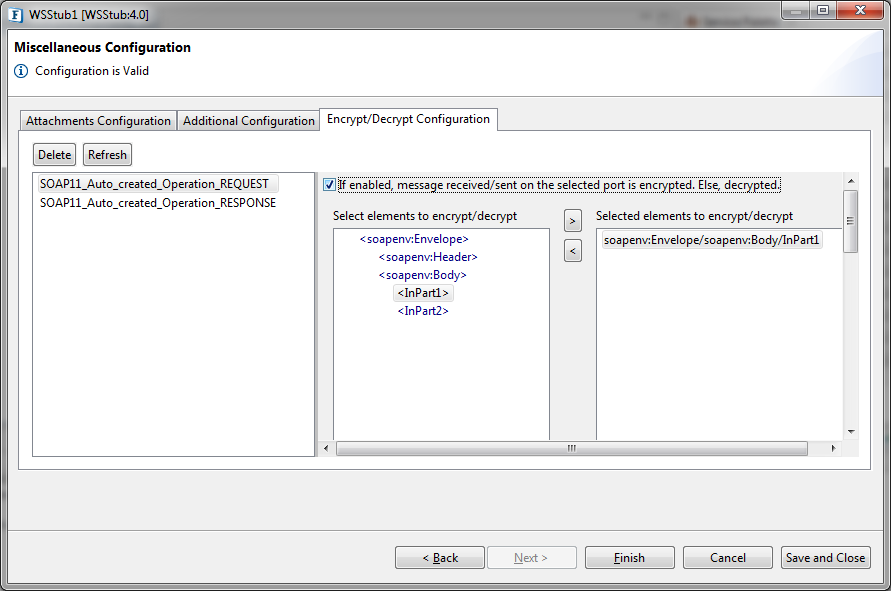
Figure 7778: Select elements for each port
...
- Create an Event Process with Feeder and Display.
- Configure Feeder with a schema. In the next page, select Encrypt Configuration tab and select XML elements to encrypt as described above.
- Adding MessageEncryptionConfiguration in Configuration Repository view is mandatory before launching the component.
- Launch the event process and send a message from Feeder to Display.
- A sample message received by Display where OutPart1 element is encrypted can be as below.
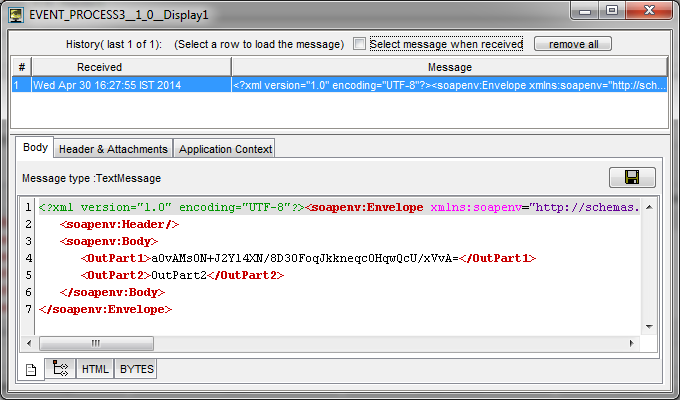
Figure 7879: Sample encrypted message
...
- In eStudio, open Configuration Repository panel and right-click Resource. Click Add Configuration to add new Resource Configuration. Select the Resource type as "Keystore" as shown below.
Gallery sort name include CommonConfig_KeyStoreConfig_3.png, CommonConfig_KeyStoreConfig_2.png, CommonConfig_KeyStoreConfig_1.png
Figure 7980: Adding Resource Configuration - Click Next to get the add AES Encryption Key. Enter any String of your choice (recommended minimum of 6 characters for better security) and click Finish to save the keystore which will be used as the key for encryption/decryption of data.
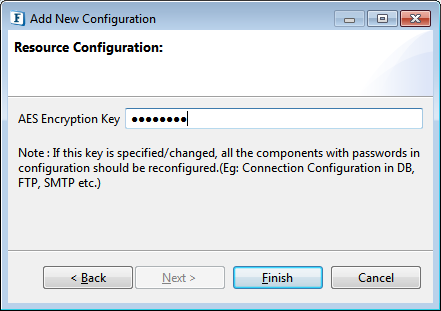
Figure 8081: Adding Encryption Key
| Anchor | ||||
|---|---|---|---|---|
|
Components in Fiorano Event Processes contain passwords of External Systems like Databases, FTP Servers as part of their configuration. Using this feature, users can use their own keys and algorithms to encrypt passwords.
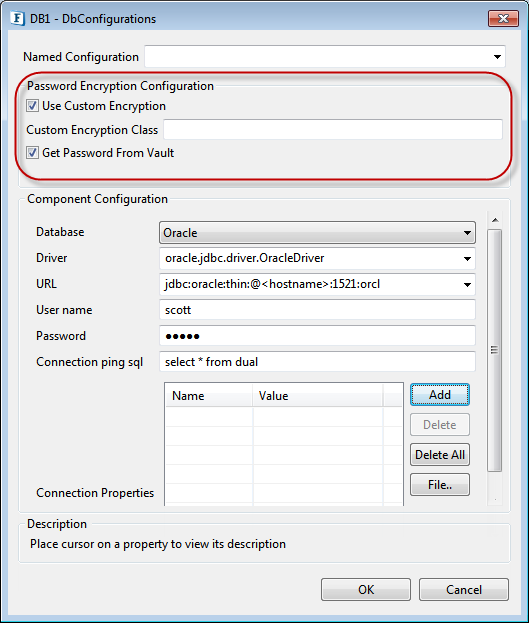
Figure 8182: DB Configuration dialog box
...
| Warning |
|---|
Configurations will not be saved in CPS unless the above exercise is performed. |
...
The property helps components to skip certain messages from processing. If this property is enabled, only those messages which have their name specified in the Message Property Name and value specified in Message Property Value will be processed, while the remaining messages will be sent to the output port without processing.

Figure 68: Process Message Based On a Property settings
Enable this property If the component needs to process a message based on a condition which will be validated based on its properties.
The condition can be specified using the configurations Message Property Name and Message Property Value.
Message Property Name
Property name of the message from where the value needs to pick to evaluate.
Message Property Value
Value of the message property.
...
This property will be useful when sequencing has to be maintained between hetrogenous messages.
Example :
Lets say an Event Process is configured to listen for mutilple types of HL7 messages using WSStub and forwards them using different protocols based on the HL7 message type
and insert it into database only forward action is successful.
Normally we define parllel flows for each HL7 message type, uses route selectors to identify the flow and sends the out of parllel flow to the DB component.
The template flow is shown in below image
<IMAGE>
Its difficult to maintain order at the DB component input port in above flow. If we need to mainantain the order we have to process all the message
sequentially as shown in below image and configure teh Process Message Based onProperty such that based on the HL7 message type, only required components will process, others simply forward the message to its output port
<IMAGE>