Below sections illustrate how to configure and use SVN version control in eStudio:
| Table of Contents |
|---|
...
| Panel | ||
|---|---|---|
| ||
|
Downloading and Integrating SVN into eStudio
To download and integrate SVN, perform the following actions:
- In eStudio application, go to the Help menu menu and click the Install New Software.

Figure 1: Navigating to Install SVN
In the Available Software dialog box, paste the URL: option to open the Install New Software wizard.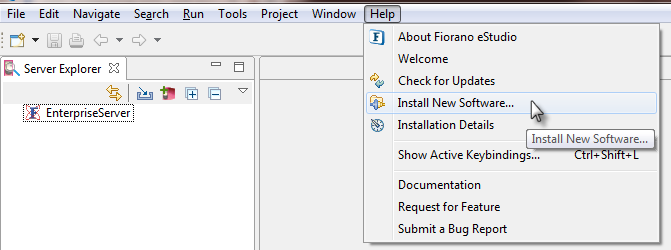
- Click the Add button and provide the URL "http://subclipsedownload.tigriseclipse.org/update_1.10.x in the Work With text field, and click the Add button.

Figure 2: Adding URL to update the software
In the Add Repository dialog box, provide a name in the Name text box and click OK. The URL provided in the previous step will be pre-populated in the Location text box.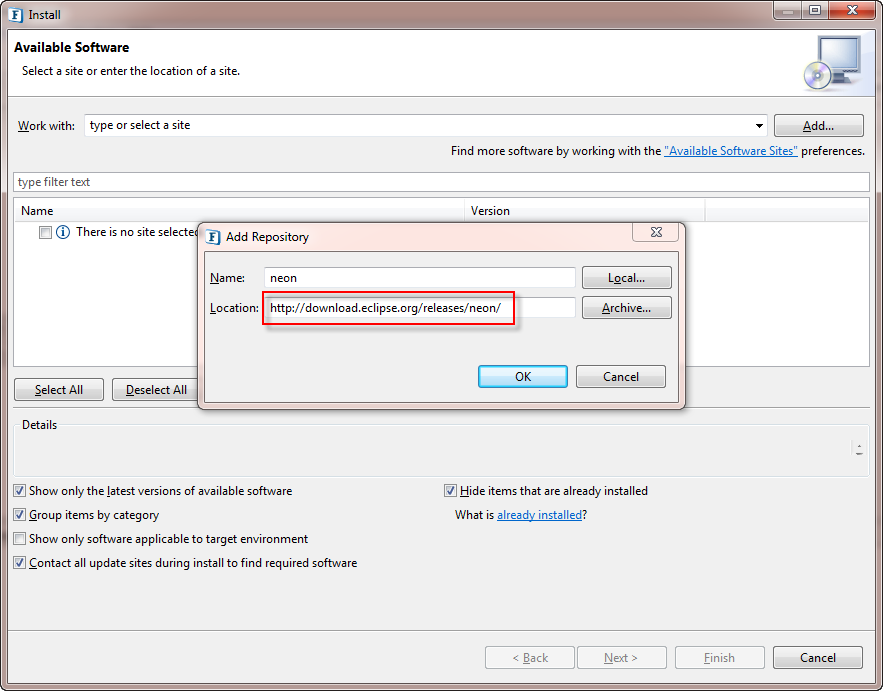
Figure 3: Providing a name for the Repository
Select all the subclipse-related libraries listed, except the Subclipse Integration for Mylyn 3.x option (expand Subclipse option to do this). Clear the option 'Contact all update sites during install to find required software' (this speeds up the installation process) and click Next.
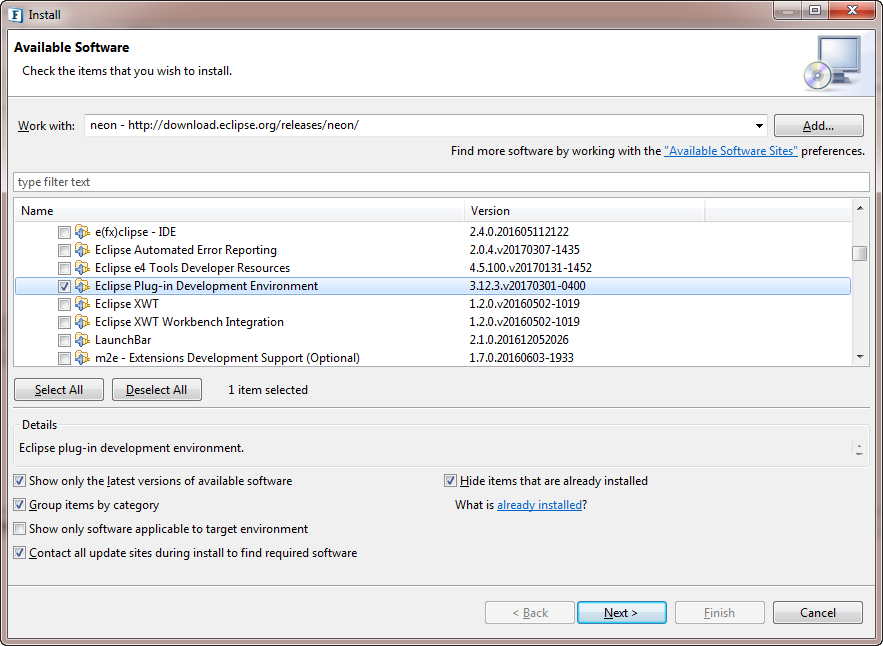
Figure 4: Choosing the required options from the library
In the Install Details page where the items selected in the previous step are displayed, click Next.
Figure 5: List of items chosen from the library
- In the Review Licenses screen, accept the terms and click Finish.

Figure 6: Accepting the terms of License Agreements to complete the installation
- Subclipse libraries will be installed subsequently (this may take a while). During installation, a Security Warning dialog box appears asking for a confirmation to proceed. Click releases/neon/" in the Add Repository dialog box and click OK.
- Select the 'Eclipse Plug-in Development Environment' option under the 'General Purpose Tools' name and click Next twice.
- Accept the License Agreement and click Finish.
- When the installation is done, restart eStudio as it prompts to do so.
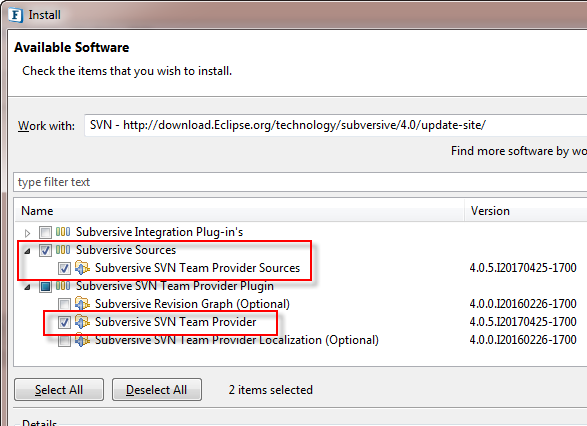
- Open the Install New Software wizard and add "http://download.Eclipse.org/technology/subversive/4.0/update-site/". Select the values from the list as shown in figure below.
- Click Next twice, agree to the License Agreement, click Finish, and restart eStudio upon prompting.
- After restarting eStudio, navigate to Window > Preferences. In the window shown, navigate to Team > SVN. Go to the SVN Connector tab and click the Get Connector button.
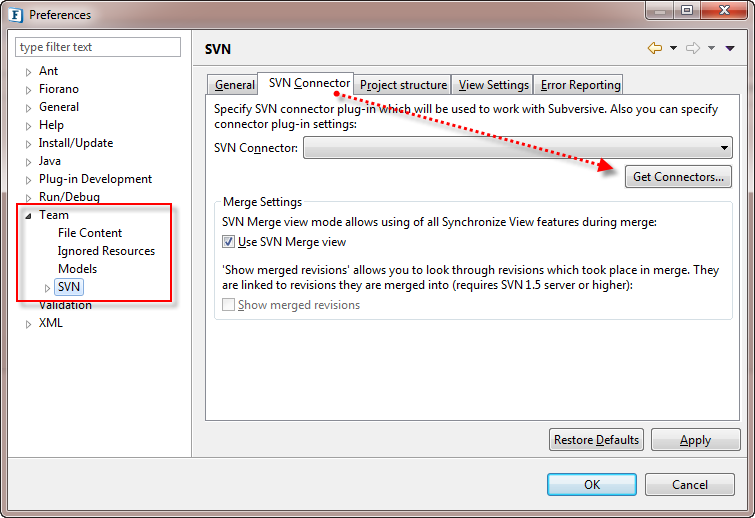
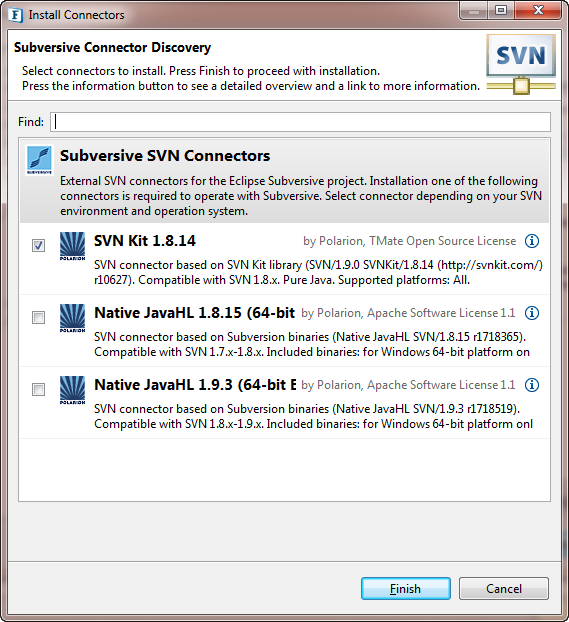
- From the list of compatible connectors displayed in the Subverse Connector Discovery panel, select the option with the prefix "SVN kit" and click Finish.
- Click Select All to select all plugins and click Next twice. Accept the License Agreement and click Finish.
- During installation, a 'Security Warning' appears asking for confirmation to proceed, click OK to continue with the installation.

Figure 7: Security Warning asking for a confirmation to proceed
As the installation approaches completion, Software Updates dialog box appears prompting to restart. Click Restart Now to restart eStudio; the version control plugins get integrated and will be ready to use.
Figure 8: Software Updates dialog box prompting to restart eStudio
...
An Event Process (EP) can be committed (share with the repository) to the SVN Version Control System from the Server Explorer view (the Event Process Repository). To open Server Explorer panel, navigate to the location Window > Show View > Fiorano > Server Explorer and click OK in the Show View dialog box.
To share an Event Process (Attributes are similar in Offline Event Process Projects as well) to SVN repository, perform the following actions:
In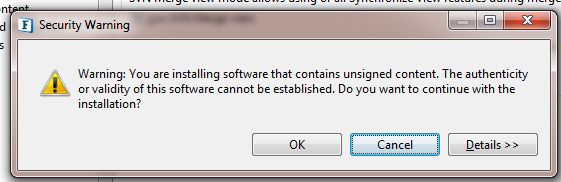
- Click OK in the Preferences panel to complete the installation. Restart eStudio as it prompts to do so.
Adding Event Process to SVN Repository
- In the Server Explorer view, open the Event Process which is desired to be shared in with the SVN repositoryRepository.
- Right-click the opened event process from the Server Explorer panel; panel, point to the Team option, and select the Share Project option option.

Figure 9: Navigating to open Share Project dialog box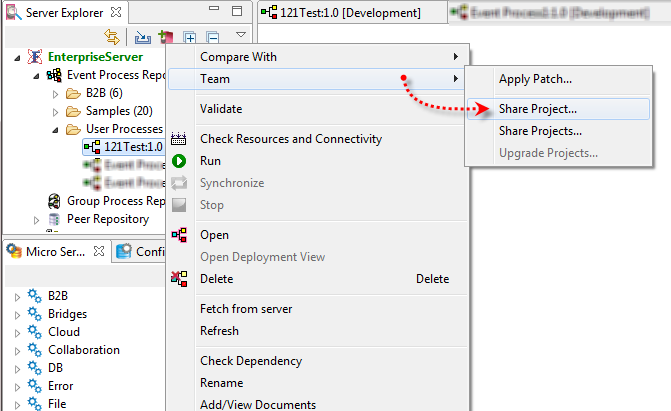
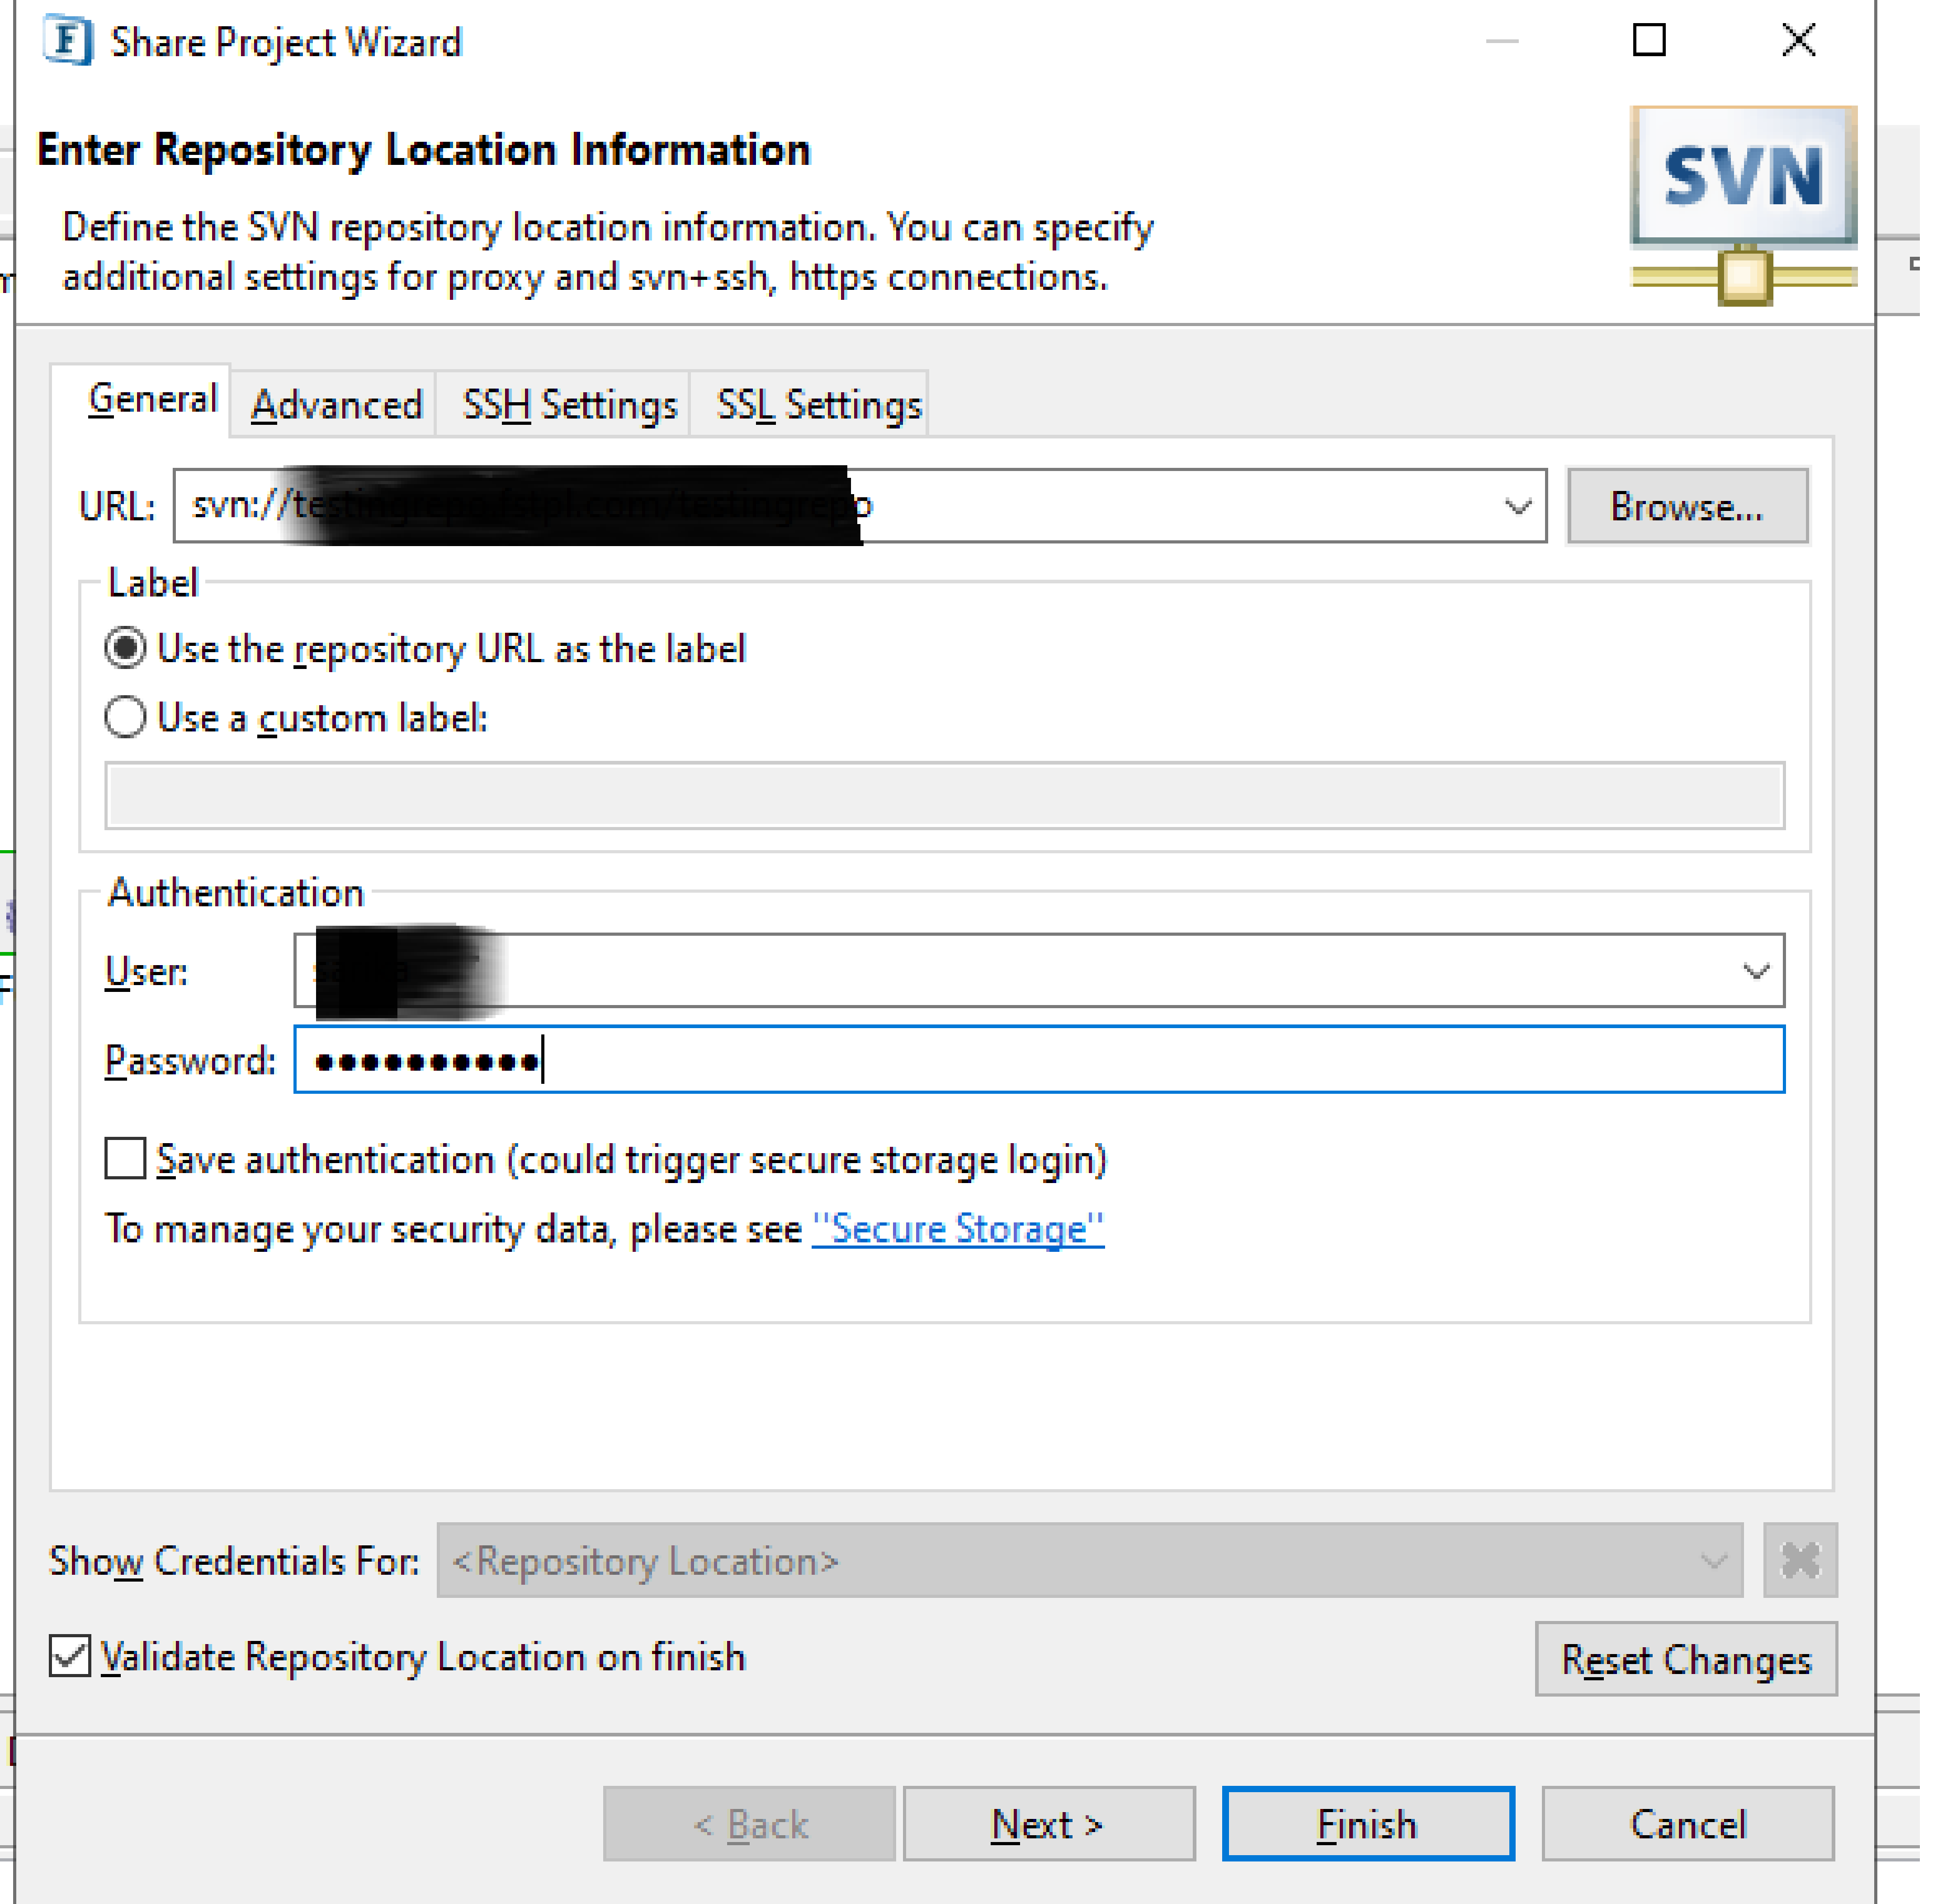
- Specify the SVN URL location where the project needs to be stored/shared and click Next.

Figure 10: Providing the SVN URL information
- If this is not the first time that you are sharing a project, Share Repository dialog box provides a choice to choose the existing location or change the location. The Create a new repository location option navigates to the previous step to provide URL and Use existing repository location option navigates to the next step to choose folder name on clicking Next.
To go ahead with the default Folder Name and default Location, select Use project name as folder name option in the Enter Folder Name panel.
Info By default, the Event Process name appears with the Enterprise Server name as suffix (like "@EnterpriseServer") for an Online Event Process.

Figure 12: Choosing the default name
To save it in the default location with a different folder name, select Use specified folder name option and type a different name.- Click the Select button and choose a different folder in the Repository Browser dialog box.
- Right-click inside the Repository Browser, select New remote folder, choose a location (SVN_IntegrationTesting) and provide a folder name. Click Finish to close the dialog box and go back to Enter Folder Name panel. After selecting the desired folder ('SVNIntegrationTesting' in this example), the path of the Event process appears in Enter Folder Name screen. Click Next to proceed. In the Ready to Share Project screen, provide appropriate comments which help future reference, and click Finish.
- If SVN credentials were not saved previously in the system (if you are using this for the first time), provide the credentials to browse the location. Select Save Password check box to bypass this dialog box while operating with SVN further.
Right-click the shared Event Process in the Server Explorer and click Refresh to notice the change in the file name and the icon with the dirty flag.
Info - The name inside the square brackets is the folder name that was used as default (taking the file name itself). If a new folder was chosen, that name appears here.
- Name, including the dirty flag, can be customized in Label Decorations, which is explained in the "SVN Label Decorations" section.

Figure 23: EP shared with SVN appearing with a dirt flag and changed name
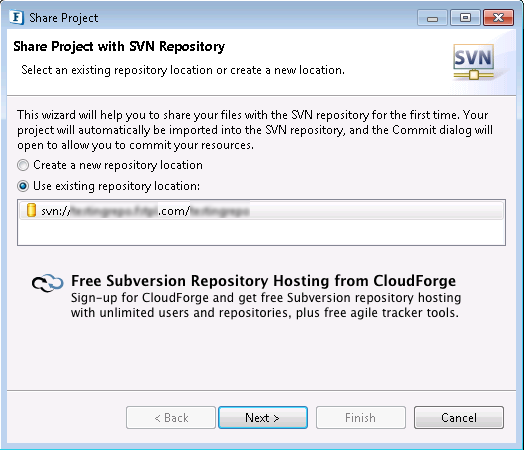
Figure 11: Option to choose a new repository or an existing one
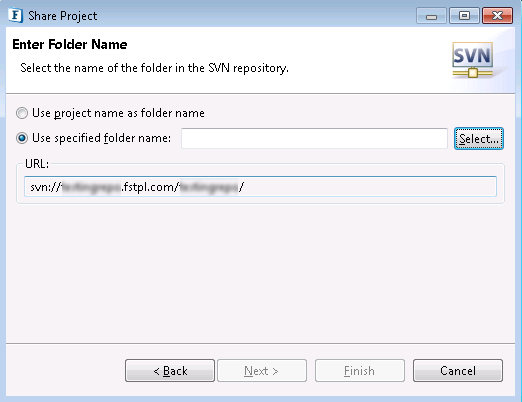
Figure 13: Option to provide a different folder name
Whereas, to choose a different location in the SVN repository,
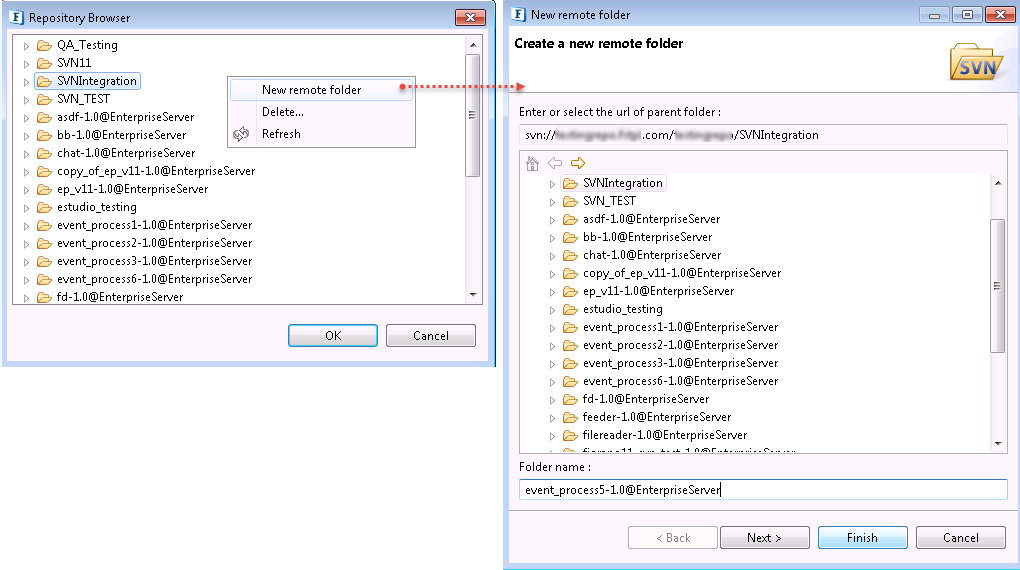
Figure 14: Option to choose a remote folder to share the project
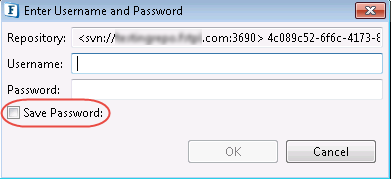
Figure 15: Saving credentials for further use
In the Ready to Share Project screen, provide appropriate comments which help in future reference, and click Finish.
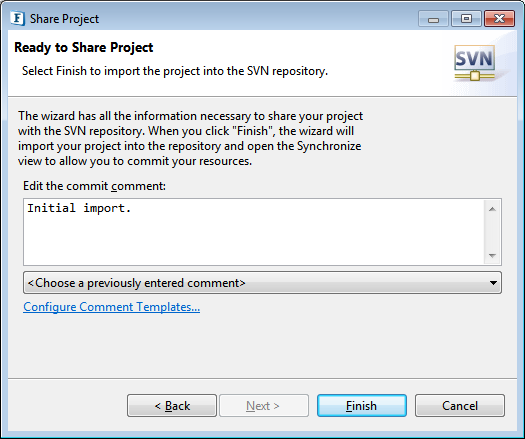
Figure 16: Option to provide comments regarding the project being imported
If the specified folder already exists, a warning appears as shown below. Click Yes to overwrite the existing project or click No to edit details by going back in the wizard and add a separate folder.
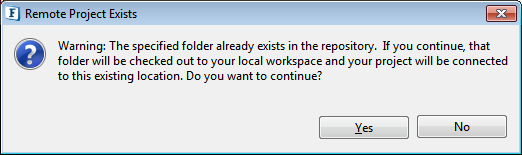
Figure 17: Alert that appears when the specified folder already exists
After sharing the project, Confirm Open Perspective dialog box appears to open the Team synchronizing perspective.
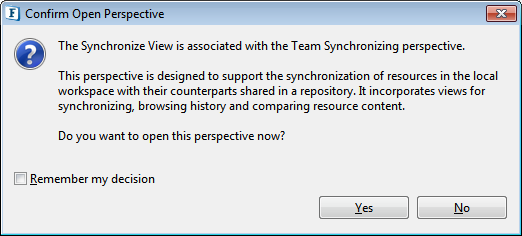
Figure 18: Option to choose the perspective for the project to commit
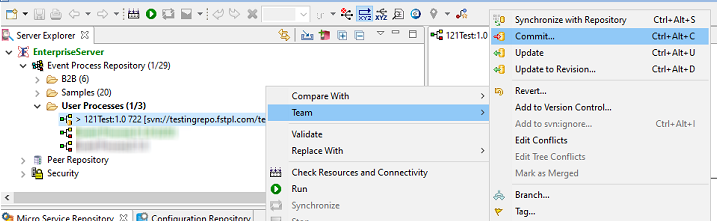
Click No for opening the Synchronize View in the same perspective. Right-click the Event Process in the Server Explorer panel, go to Team and click Commit.
| Info |
|---|
After completing the wizard, the Event Process gets shared in the repository and all the options to support SVN get active. Other Event Processes which are not shared in the repository will not display these options. |
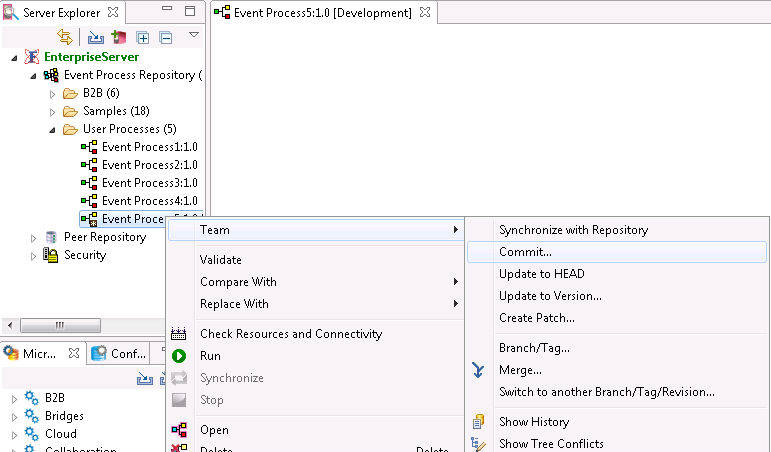
Figure 19: Choosing Commit from Server Explorer
Alternatively, to commit from Team Synchronizing perspective, click Yes option in the Confirm Open Perspective dialog box. Similar to the action in Service Explorer panel, right-click the Event Process from Synchronize panel, and click Commit.
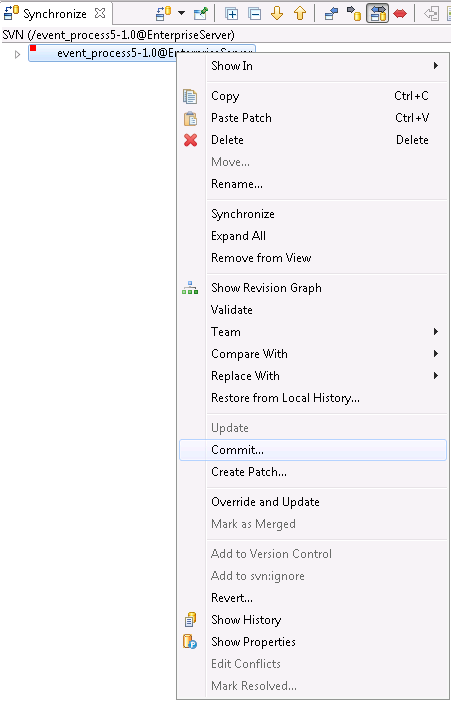
Figure 20: Choosing Commit from Team Synchronizing view
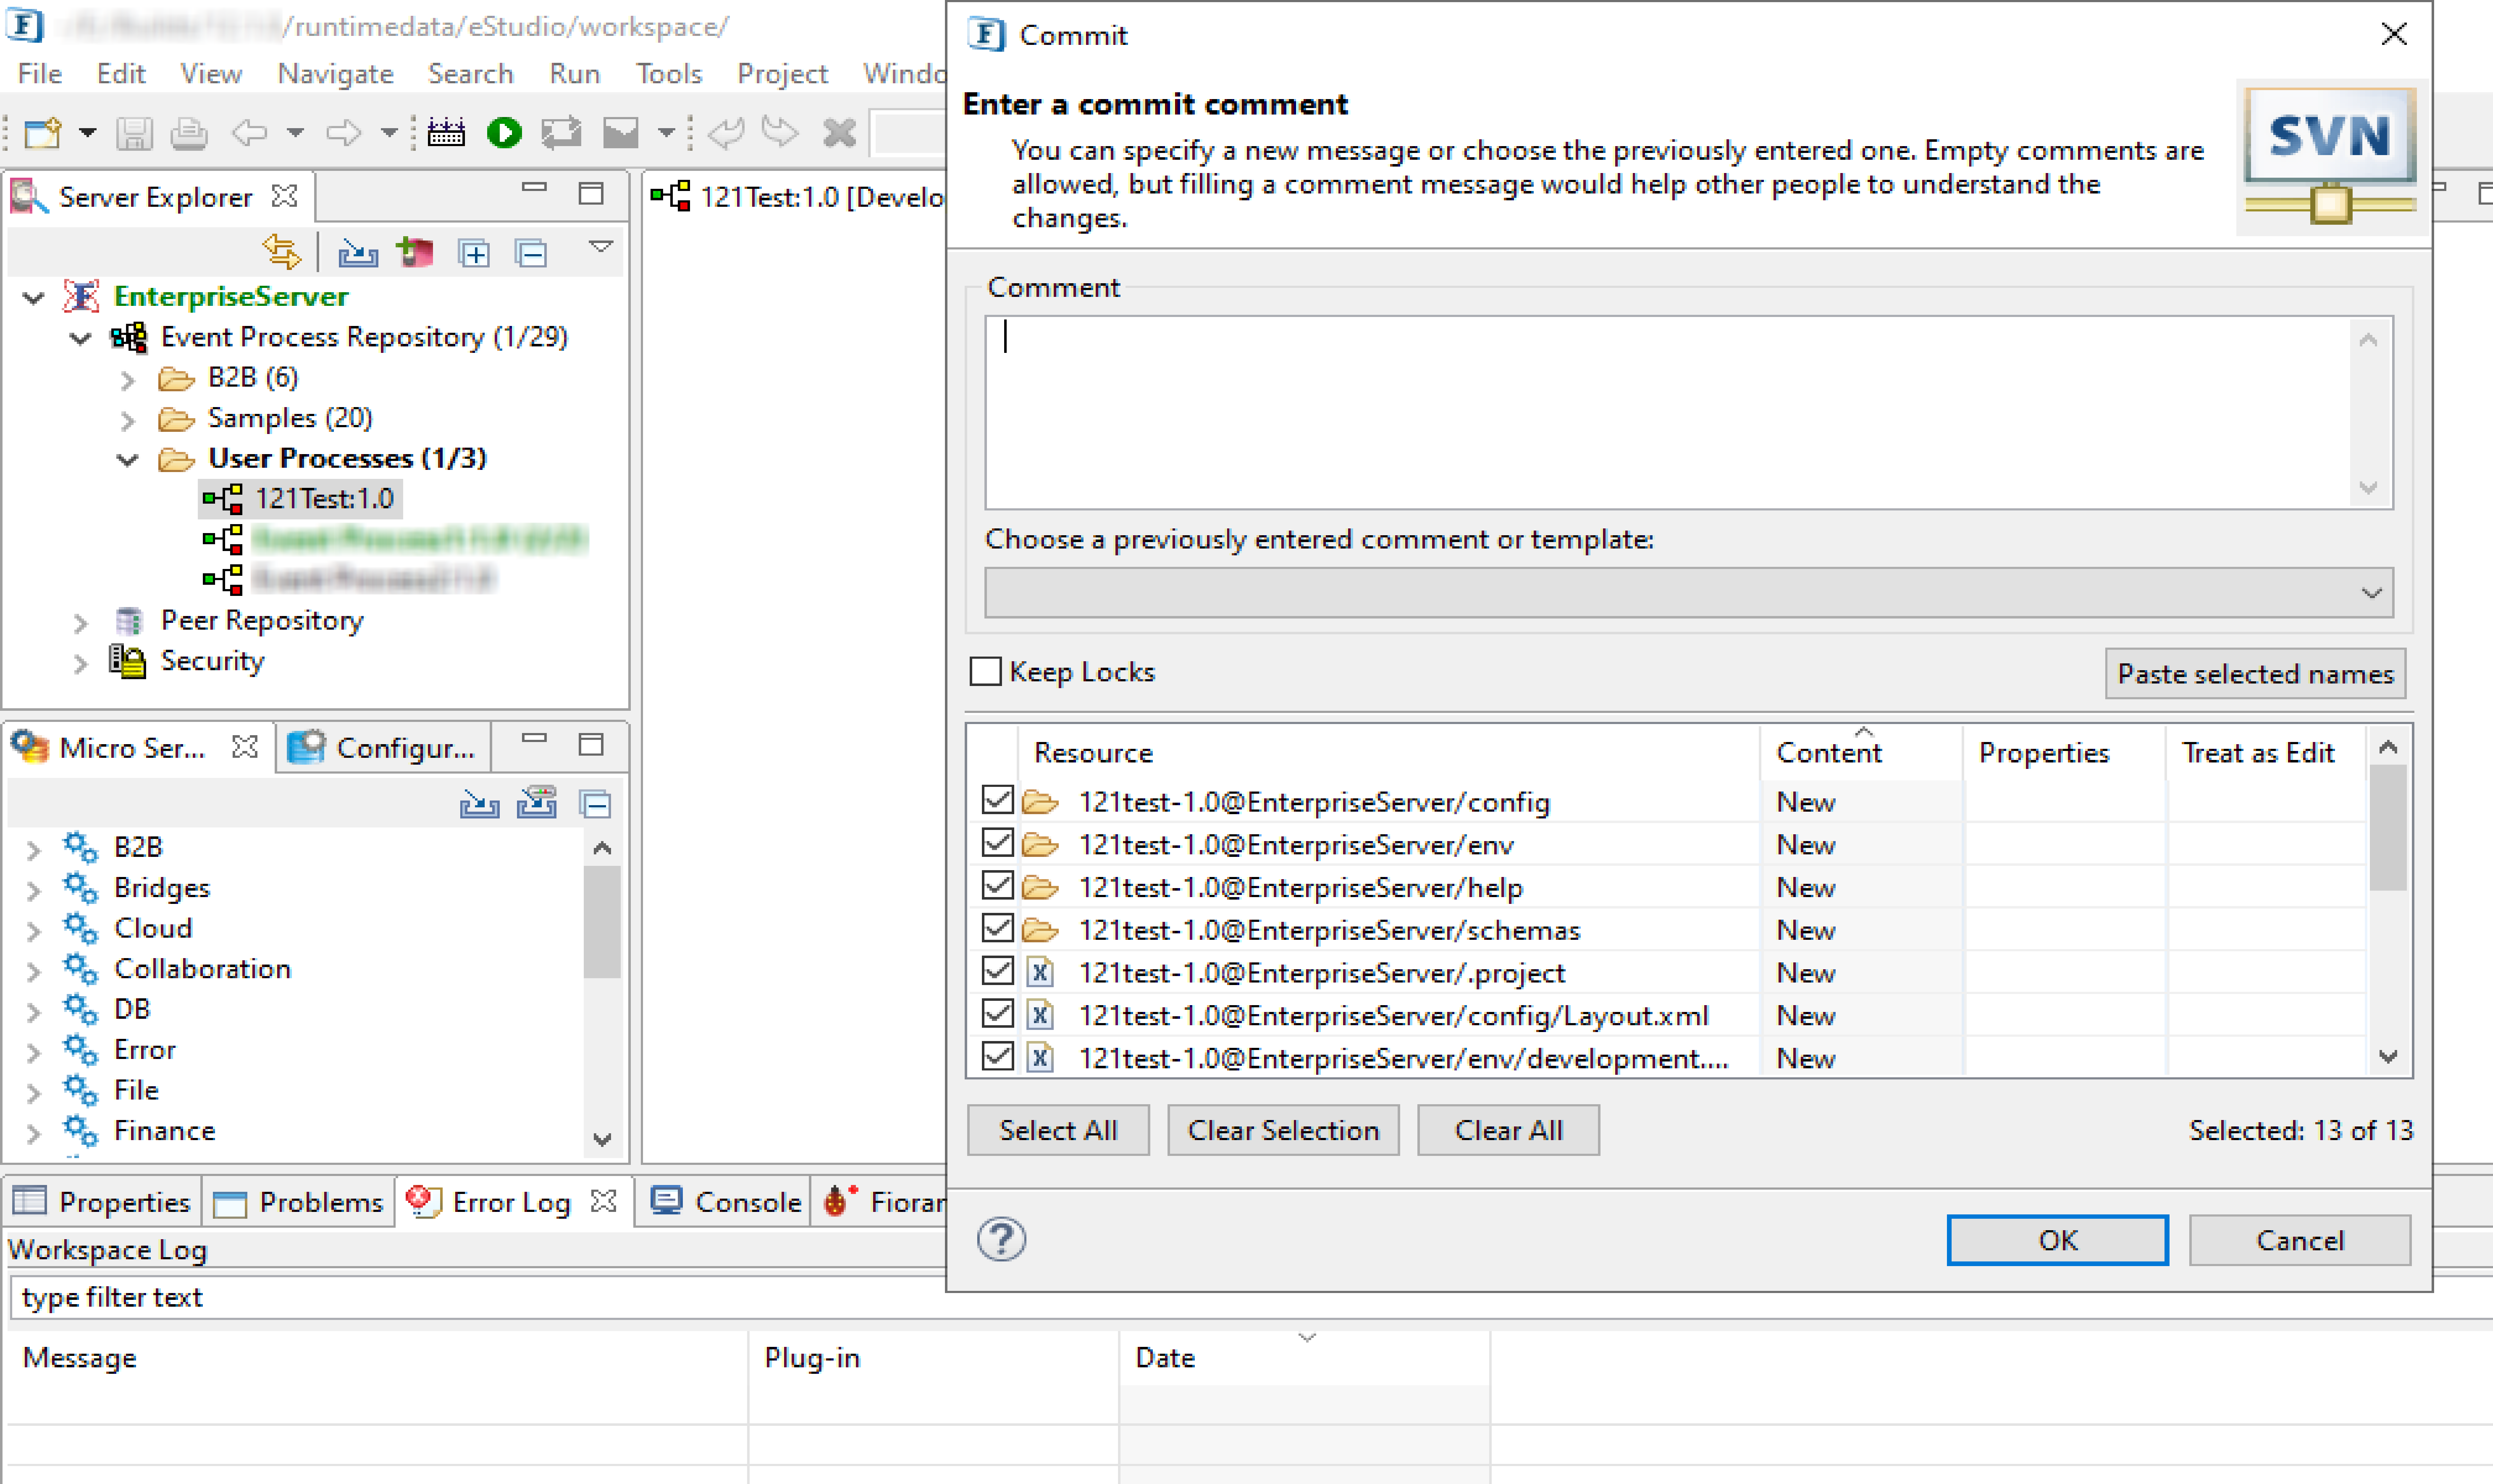
In Commit dialog box, provide some comments that signify the action and click OK to save the Event process in the SVN repository.
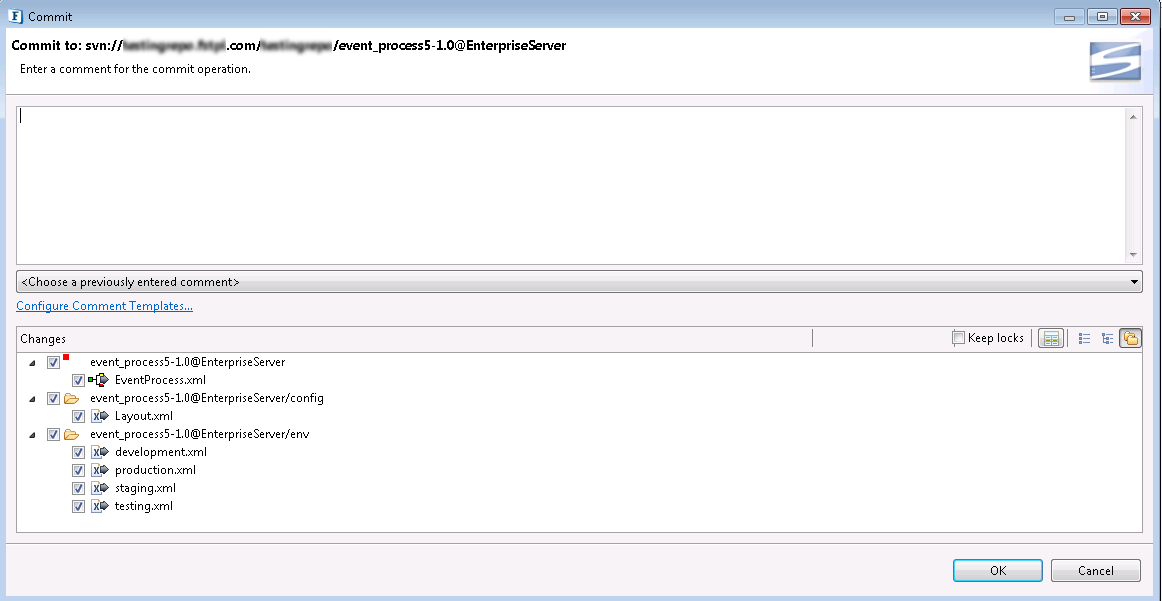
Figure 21: Option to provide comments regarding the commitThe Commit logs are available in the SVN Console. Go to Console panel and select the SVN Console from the Open Console
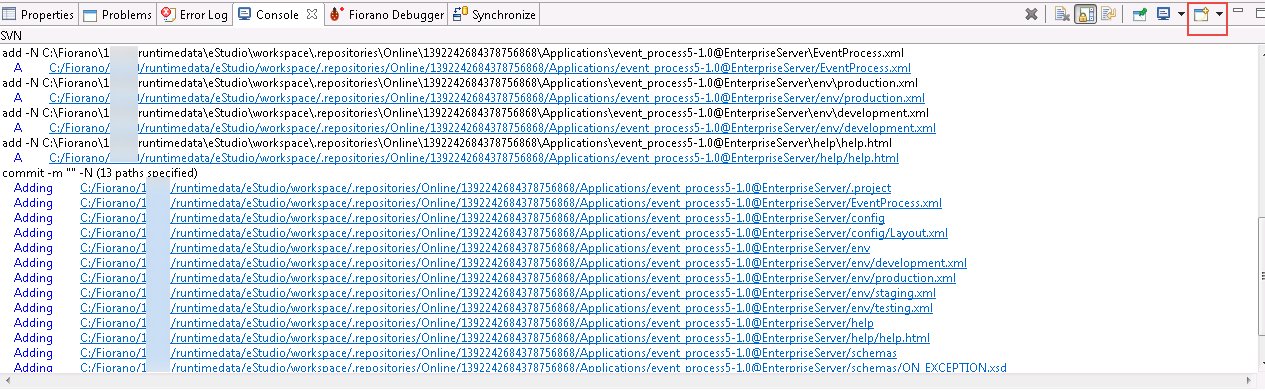
Figure 22: Commit logs in Console view
...
The Event Process that is shared with the SVN can be Checked Out to eStudio and used in the same server or even a different server.
To checkout Event Processes from the SVN repository, perform the following actions:
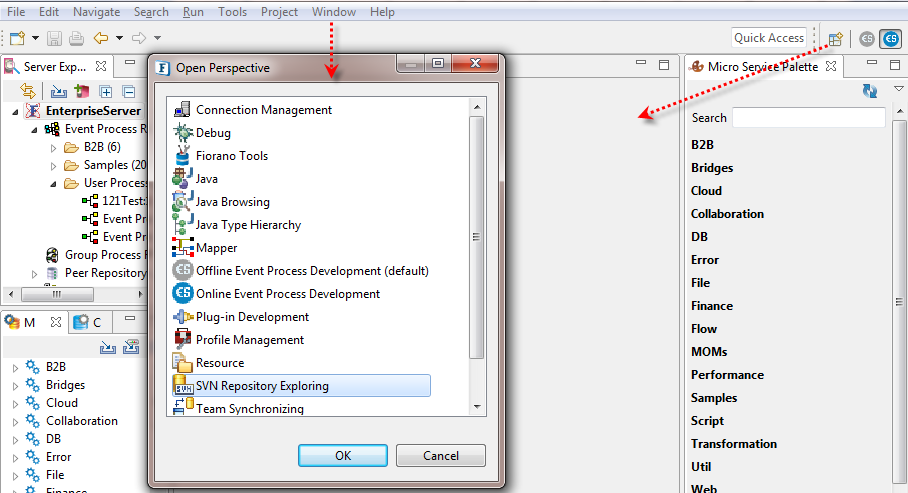
Go to SVN Repository Exploring perspective by selecting the Open Perspective![]() icon present in the upper-left part of the screen. In the Open Perspective pop-up, select SVN Repository Exploring from the list of perspectives and click Ok.
icon present in the upper-left part of the screen. In the Open Perspective pop-up, select SVN Repository Exploring from the list of perspectives and click Ok.
| Info |
|---|
SVN Repository Exploring perspective can be opened by navigating through Window > Open Perspective > Other also. |
...
| Info |
|---|
The suffix "@EnterpriseServer" in the event process project name refers that it is an online Event process project. "EnterpriseServer" is the name of the server from which it has been shared to SVN Repository, whereas Offline Event Process project has no suffixes as such. |
...
The first option gets highlighted in case a project file is not present but only a folder is being checked out. Click Next if the latest version of the project needs to be checked out.
| Note |
|---|
|

Figure 26: Changing server name to extract the project to that server
...
$FioranoHome/runtimedata/eStudio/workspace/.repositories/Online/<uniqueID>/Applications. Click Finish to check out the project.
...
Below-mentioned are a few useful options to work with the shared Event Process, which are available in its context menu (Team option in the right-click menu of the Event Process):
...
After choosing the Update to HEAD option, the Event Process is shown as out of sync as shown in the below figure.

Figure 34: EP Title showing 'Out of sync' indicating after updating to Head
Click inside the Event process's Orchestration Editor so that the UI gets updated and the Event process gets in Sync with updated project; "Out of Sync" text disappears from the title.

Figure 35: 'Out of sync' removed by clicking the Orchestrator
...
The Label of the Event Process Project Name which is shared in SVN Repository can be customized to include/exclude various attributes such as Dirty flag, Revision Info, author, date, URL.
For example, to show the revision number (which helps in identifying revision from the Server Explorer itself) of an Event Process project next to its name in the Server Explorer View, perform the following actions:
- Go to Window menu and click Preferences.
- Some useful variables that can be used to display in Event Process name by amending Project Format values are:
- {author} for the author of the revision.
- {url_short} for the URL of the project in SVN repository.
- {date} for the modification date and time of the revision.
- the corresponding SVN details and click Next and then Finish.
- Provide a description in the Commit dialog box that gets prompted, select all the files related to the event process to be added in the repository and click OK.
- Right-click the Event Process Repository node and click on 'Refresh'. Details of SVN Repository will be displayed within a square bracket beside the event process name.
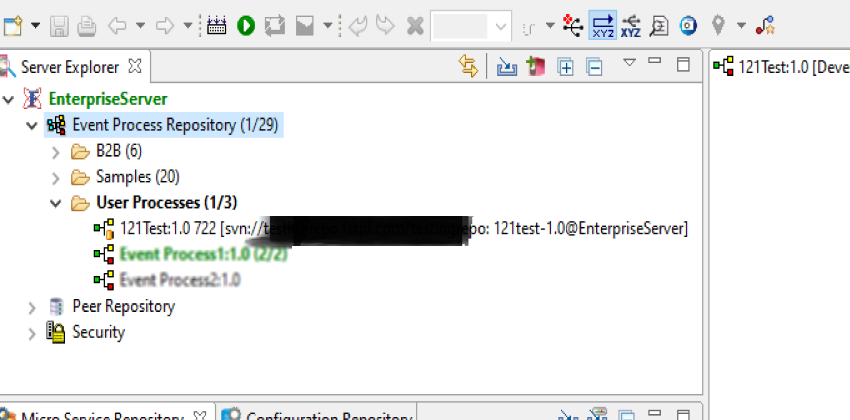
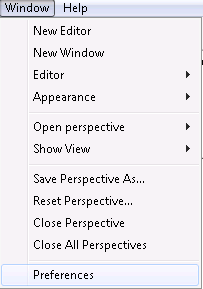
Figure 36: Navigating to Preferences
In the Preferences window, navigate to Team > SVN > Label Decorations.Under Text tab in the Label Decorations section, change the value of Project Format to the following and click Apply:
{dirty_flag}{name} [revision {revision}]
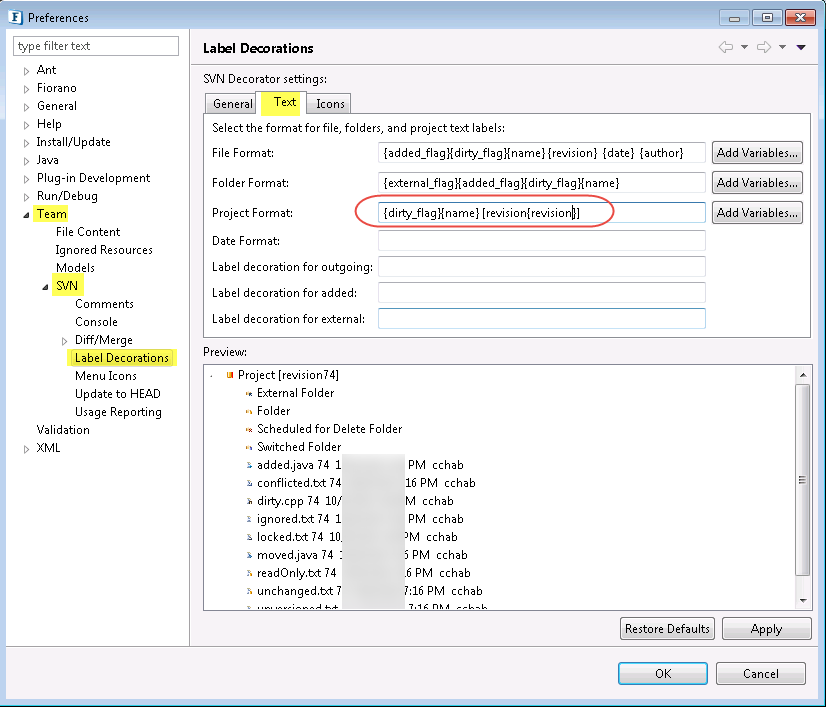
Figure 37: Changing Project Format values in Label Decorations section
The Event Process in the Server Explorer panel appears in the format as applied.
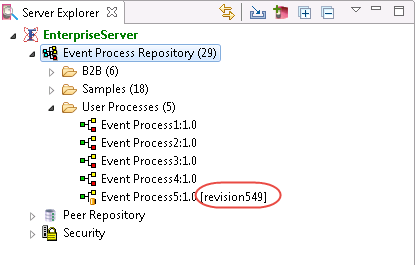
Figure 38: EP name with the label changed
Modifying Event Process in SVN Repository
- If we need to commit new changes to SVN Repository, Open Event process and right-click on the Event Process that is already shared with SVN Repository. Point to Team → Commit.
- Enter the commit message, select all the files related to the event process to be added in the repository and click OK.
Checking out Event Process from SVN Repository
- Click the Open Perspective button on the upper-right part of eStudio (or Windows > Open Perspective). Select the SVN Repository Exploring option from the list and click OK.
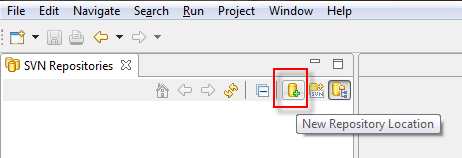
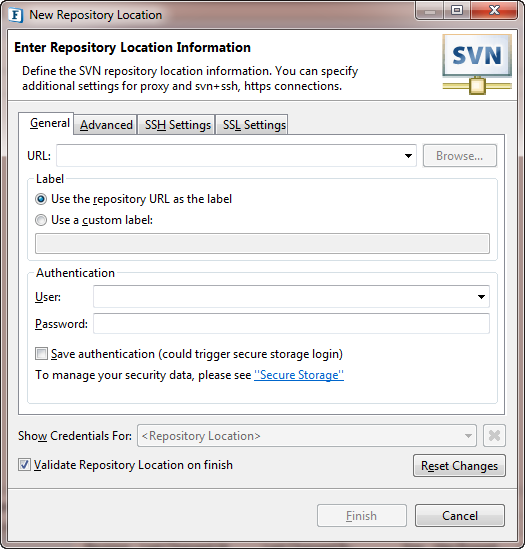
- Click the New Repository Location button, if you want to add a new SVN repository location other than the existing ones.
- Add details of SVN Repository and SVN credentials in the wizard and click Finish.
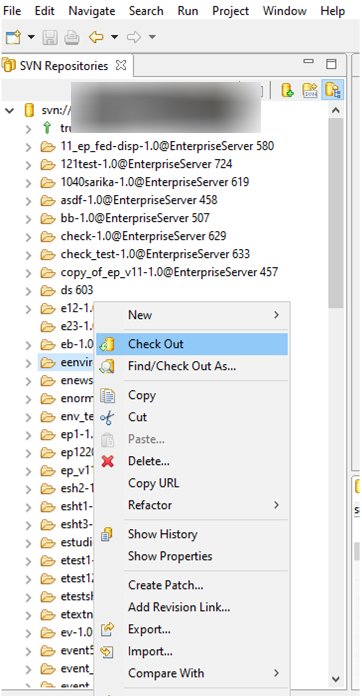
- Right-click the Event Process to be checkout and click on Check Out option.
- Navigate to Online Perspective and Refresh the Event Process Repository to see the checked out event process in the Server Explorer view.