...
- Add a new Event Process with name 'WSAttachments_Example'.
- Drag the WSStub component from WebService category in the Micro Service Palette to the WSAttachments _Example orchestrator.
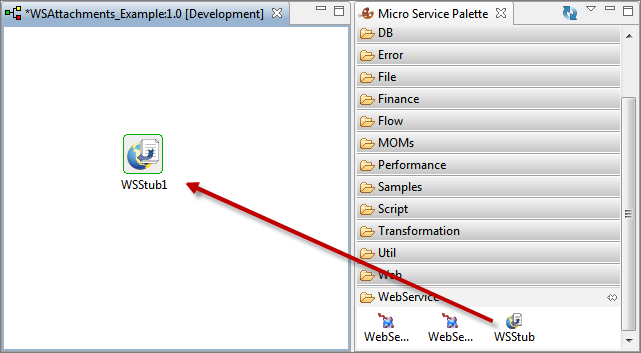
Figure 1: Adding WSStub component to Fiorano Orchestrator
- Double-click the WSStub component in the orchestrator to open Configuration Property Sheet (CPS).
- In the Configuration screen, click WSDL Configuration
 button.
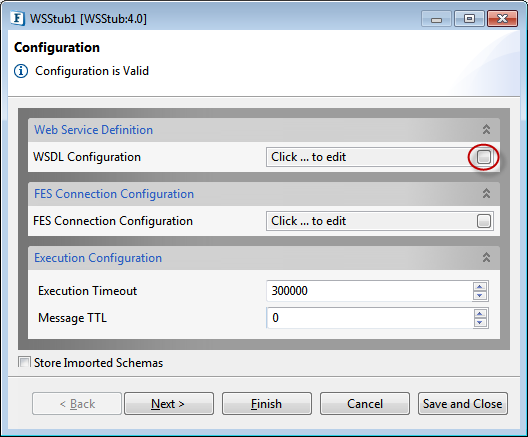
Figure 2: WSDL Configuration
- In the WSDL Configuration dialog box, select the Advanced checkbox in the left pane, and then select the 'Auto_created_OperationRequest' under Messages.
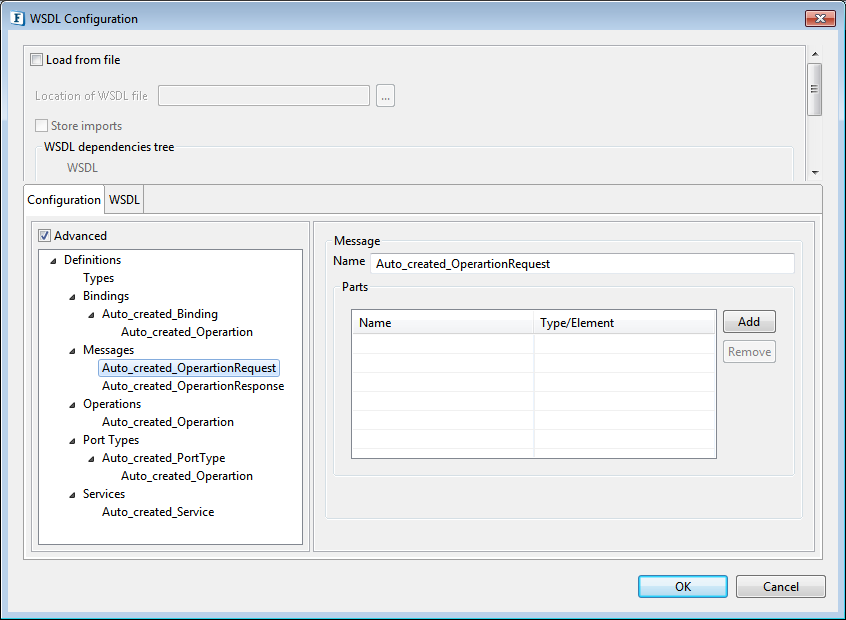
Figure 3: Selecting Auto_created_OperationRequest under Messages
- Under Message section in the right pane, perform the below actions and click OK to add elements that the application needs to send and invoke Web Service:
- Click Add button and rename 'PartName1' to 'Input' under Name.
Click the cell under Type/Element column, click the Ellipsis
 button and select string option in the Select Type/Element dialog box, and then click OK.
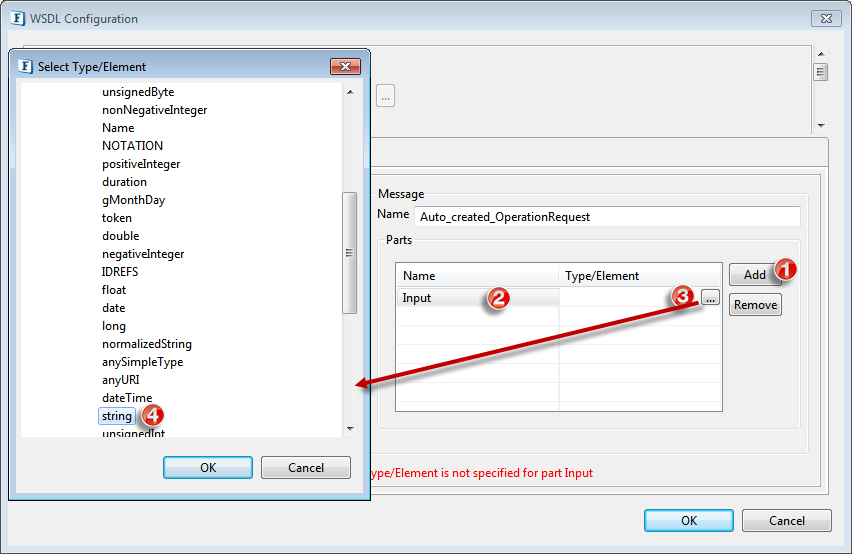
Figure 4: Adding Input attributes for Auto_created_OperationRequestInfo Similarly, to define the elements that the web service needs to send back as response to the program, configuration can be applied to send attachments by clicking Auto_created_OperationResponse under Messages section in the left pane, and add Name 'Output' and Type/Element 'string'.
Select Auto_created_Operation under the Bindings section in the left pane. Under Binding Operation section in the right pane, select the Input tab and click the Binding Details button to configure a request element as MIME and receive attachments.
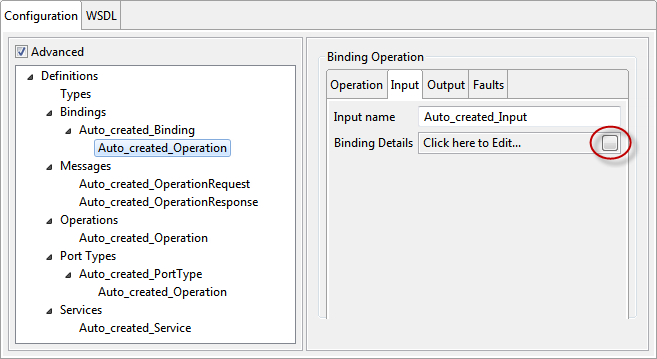
Figure 5: Navigating to Binding Details for Auto_created_Operation
- In the Binding Details dialog box, select MIME MultiPartRelated from the Binding type drop-down.
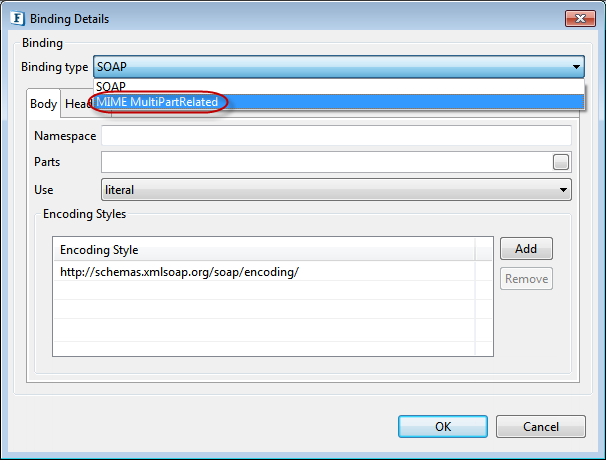
Figure 6: Selecting MIME MultiPartRelated as Binding type
- Click the Add button in the left pane to add the request elements configured in Input and select the MIMEPart that gets added just below the Add button.
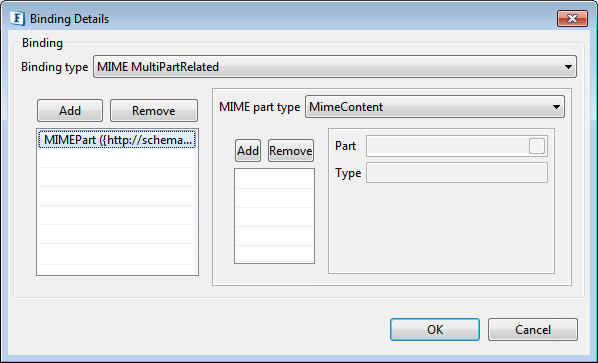
Figure 7: Selecting MIMEPart element
- Click the Add button in the right pane and select the MimeContent that gets added to bind it to one of the request elements/parts.
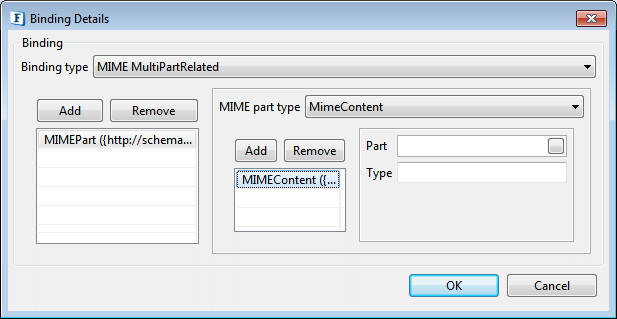
Figure 8: Selecting MIMEContent element
- Click the Part button and select Input that is populated in Select Part(s) dialog box, and then click OK to close the dialog box.
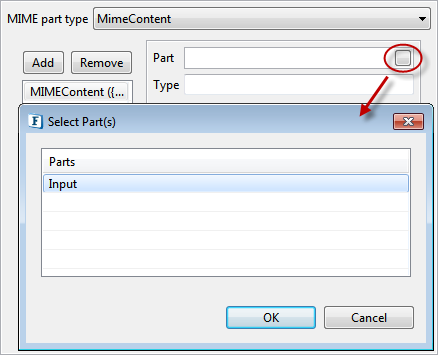
Figure 9: Selecting Part as 'Input'
- Click OK to close the Binding Details dialog box and save the binding details.
- In the WSDL Configuration window, click OK to save the WSDL Configuration changes made.
Press Next twice to go to the Miscellaneous Configuration page.
Note Default Configuration present in these sections works for this example. To understand the capability of these options, pls refer < link to Help Guide>to the WS Stub section.
Under the Attachments Configuration tab, select the Write Attachments to File checkbox to save the incoming attachments to a file.
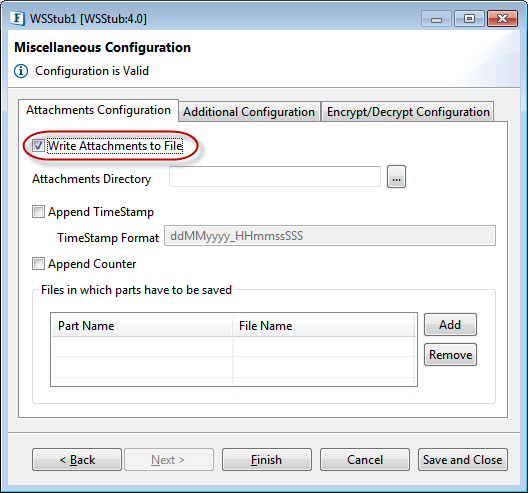
Figure 10: Enabling to Write Attachments to File
- Under 'Files in which parts have to be saved' section, click the Add button and add the following values:
- Rename Part Name from 'Name1' to 'SOAP11_Auto_created_Operation_Input' .
- In the FileName column, enter the file name to which attachment needs to be saved.
Info Enter a unique name that denotes a part. Unique name is appended with "_"(double underscore) to the Part Name. For example if the part Part1 in Operation Operation1 is a mime part, then the user should manually enter the key as SOAP11Operation1Part1 for SOAP1.1, SOAP12Operation2_Part2 for SOAP1.2.
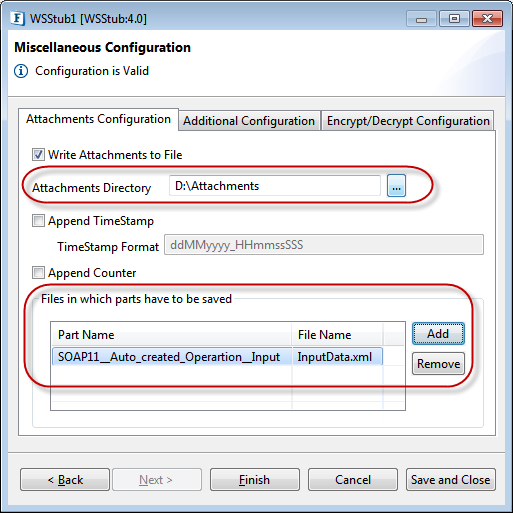
Figure 11: Setting Miscellaneous Configuration
- In the text field named Attachments Directory on top, enter the path of the directory in which we need to save the attachments.
- Click Finish to close the CPS and thereby save the WSStub configuration.
After the configuration, the WSSTub component will be set to host a web service that can receive attachments. - Three ports, that is, one output port and two input ports get generated as below:
- SOAP11_Auto_created_Operation_REQUEST: This output port passes request XML for operation Auto_ created_Operation.
- SOAP11_Auto_created_Operation_RESPONSE: This input port passes response XML for Auto_ created_Operation.
- SOAP11_Auto_created_Operation_FAILURE: This input port passes error response XML for Auto_ created_Operation.
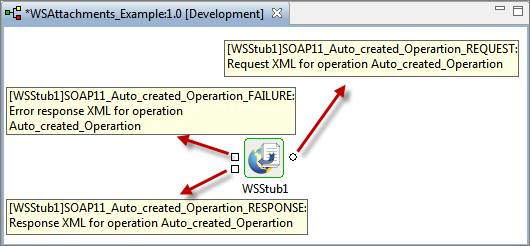
Figure 12: Input and Output ports generated after WSStub configuration
...
Please note that the component options used in this example are minimum, which helps you to get an overview of the application. To explore the other options present in the WSStub and WebServiceConsumer, Feeder and Display components, refer: WSStub, WebServiceConsumer 4WebServiceConsumer4.0, Feeder and Display sections.