...
| Expand | ||
|---|---|---|
| ||
|
Datadog component helps to send events and alerts to Datadog Agent which in turn sends it to the Datadog dashboard.
Component Configuration
The following properties can be configured in the Configuration panel as shown below.
...
Refer to the Error Handling section in the Common Configurations page for detailed information.
Event Name
<>Specify the name of the event which is sent to the datadog agent
Connection Configuration
Provide the server details in order to enable sending events and receiving a response. Click the Ellipsis button to configure connection details.
- Server IP: Specify the hostname or IP address of the Datadog server.
- Port Number: Specify the port number of the Datadog server
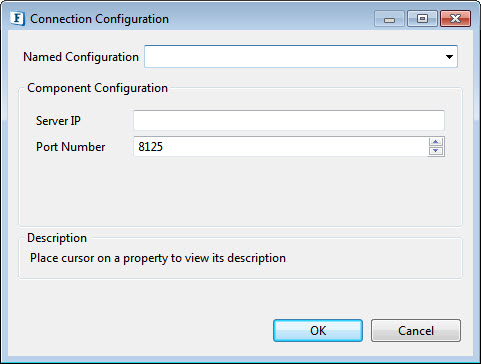
Figure 2: Connection Configuration properties
Event Priority
Specify the level of priority with which events need to be sent to the Datadog; choose from the following options in the drop-down:
...
Enable this property if the event has to be sent as an alert.
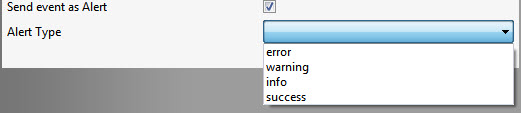
Figure 3: Properties to set an alert
Alert Type
choose from the Alert Types that appear in the Alert Type property drop-down options below:
...
| Warning |
|---|
Expert properties are meant for advanced users. Use with caution! |
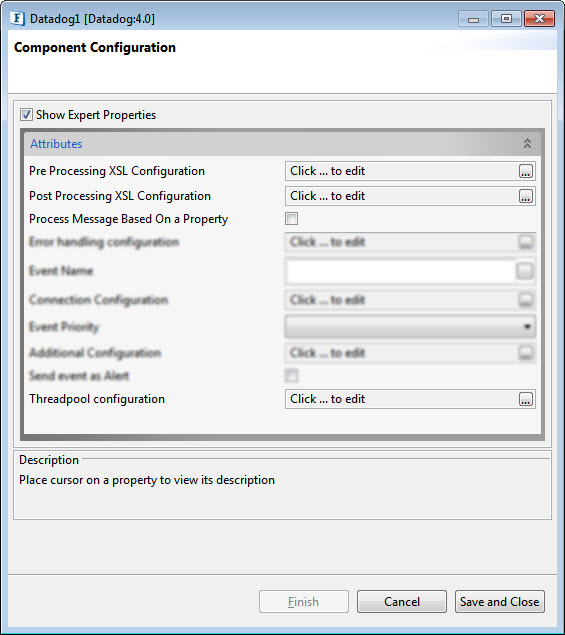
Figure 4: Datadog CPS with the Expert Properties enabled and highlighted
...
Functional Demonstration
Scenario 1
Configure the component with various operations to send events as described in the component description and connect Feeder and Display components to send input and receive output respectively.
Provide a name for the event in the CPS.

Figure 6: Providing an event name in the Datadog CPS
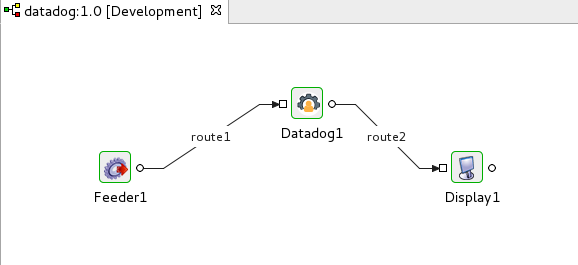
Figure 7: Event Process to demonstrate functions of Datadog
...
Input
<>
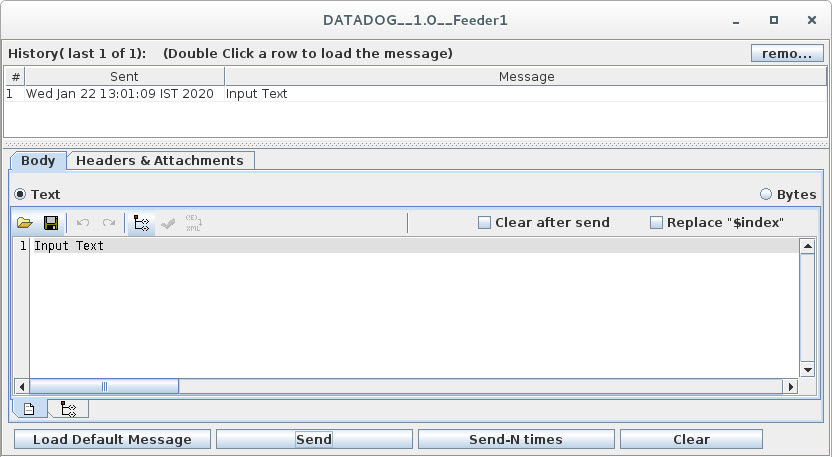
Figure 8: Feeder window sending input message for Datadog
Output
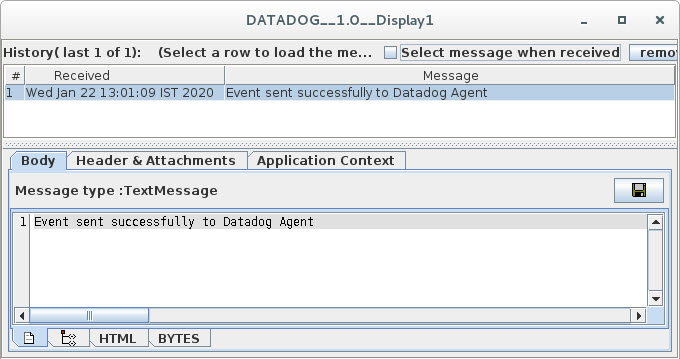
Figure 9: Display window receiving the confirmation message
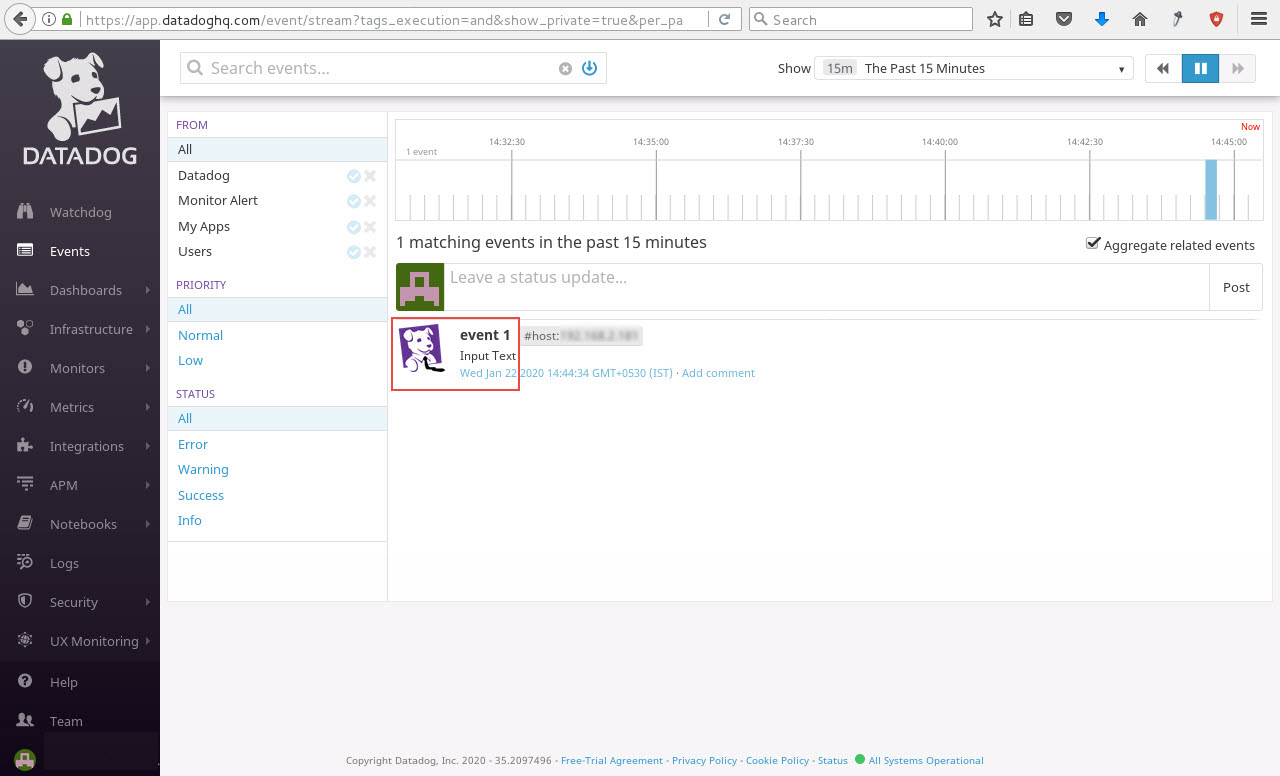
Figure 10: Datadog Dashboard receiving the event message